Follow Me On:
LAURIE KERN
  • Home
  • Blog
  • Portfolio
    • Metal Work >
      • Chasing & Repousse
      • Holloware
      • Jewelry
      • Other Wonderful Items
    • Fiber Arts >
      • Temari
      • Yubinuki
  • Resources
    • Library
    • Tools & Equipment
    • Links
  • About
    • Artist Statement
    • Curriculum Vitae
    • How it is Made
    • Contact

Making Scrap - Some Not On Purpose

8/1/2024

0 Comments

 
Now that the studio is clean and organized I am actually making things, to get my mojo back, since I have not done any sawing, soldering, stamping/pressing, or finishing for quite a while.

I am making sample impressions of all the dies I have for the hydraulic press as this gets me using the rolling mill for thinning metal or to use the pattern plates to texture on the metal. With the hydraulic press I am using the pancake dies to cut out the blanks for trays and to form the tray. I am also figuring out how to impress, in the metal, deep and shallow impressions to get all the detail.  Once that's done I do any sawing, filing or other cleanup at my bench with the flexshaft. If needed I use the belt sander to debur and clean up edges along with the JoolTool to figure out how to do the same and what wheels to use;  and then it's over to the JoolTool to do final polish. I am also using the belt sander and JoolTool to clean up and polish the impression dies that have uneven and marred surfaces

I, unintentionally, made a bit of scrap on some impression dies and trays. On a die, the metal was probably too thin, and I split the edge; on another tray I didn't get the impression back in the die and so I have a bit of a ghost image from the double pressing (gryphon) and then I positioned the tray crooked and it came out skewed;  on another tray it shifted in the silhouette die and the dish didn't have a rim on one side and on the flower tray the impression die was a bit domed and had machining marks which transferred to the tray so I ground the top surface flat and then polished it.  

BUT not all was lost. From the scrap tray I made myself a pair of earrings. I then made a good tray, several mini-dishes, another tray with a soldered-on impression, and several small wall vases; all of which are presents for friends when I attend my 50th High School reunion in a few weeks. I also cut out, from a thick impression that I was given, a bat and made a key ring for a friend. 

oh, and lastly I must say my soldering skills will take time to return; I have lots of clean up to do on the 3 wall vases.
0 Comments

The Box Project #5

11/30/2019

0 Comments

 
Picture
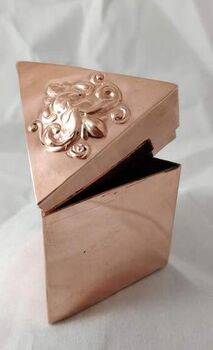
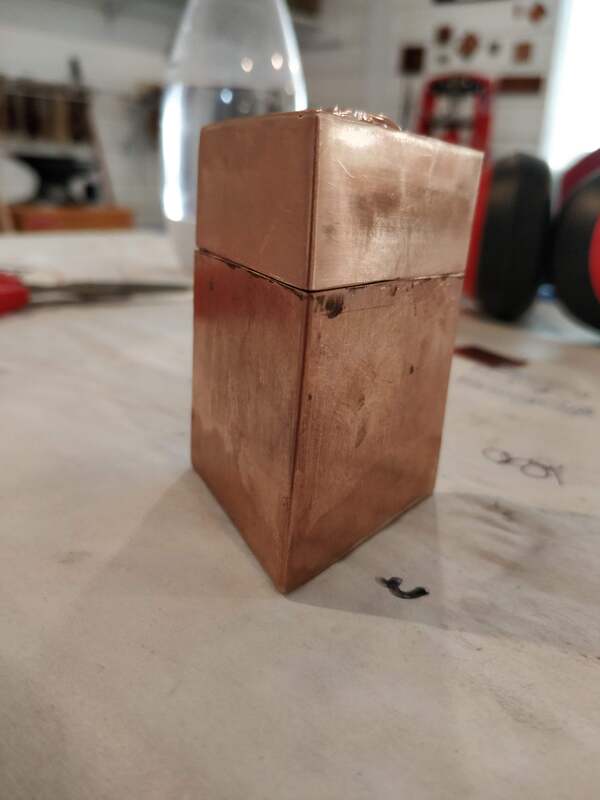
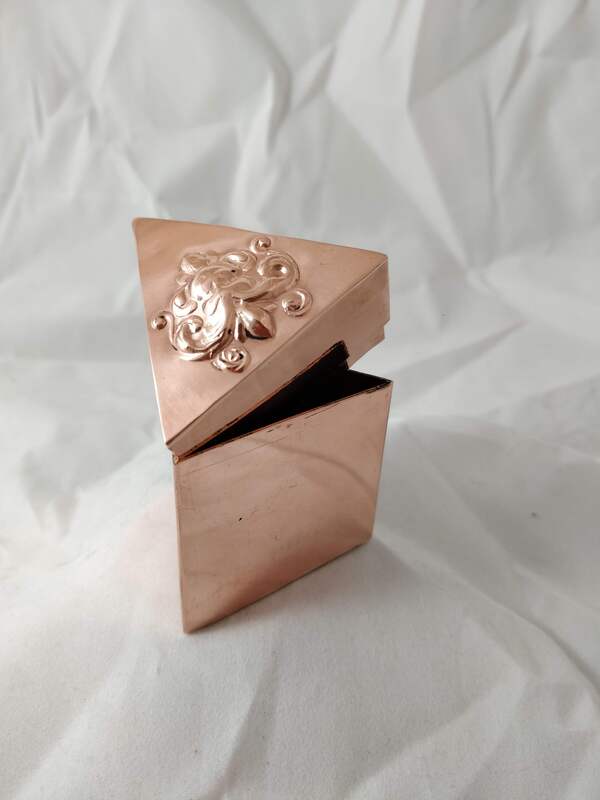
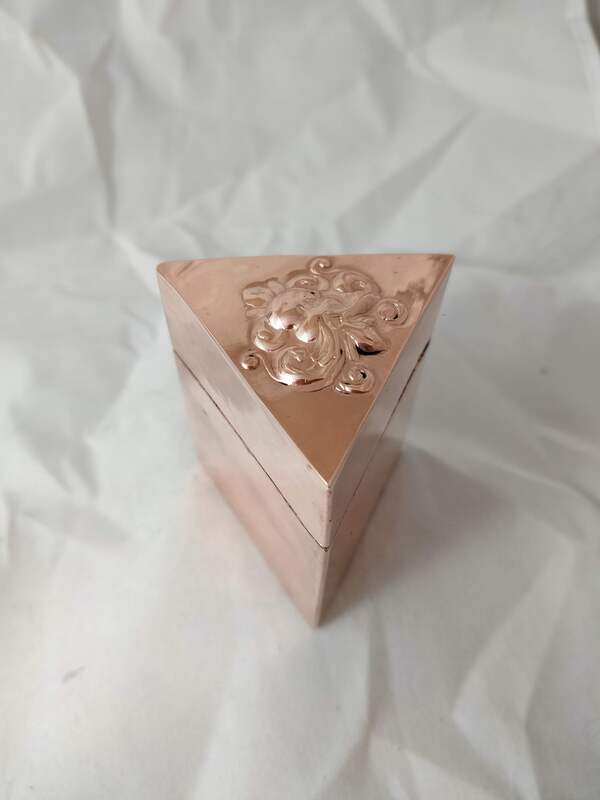
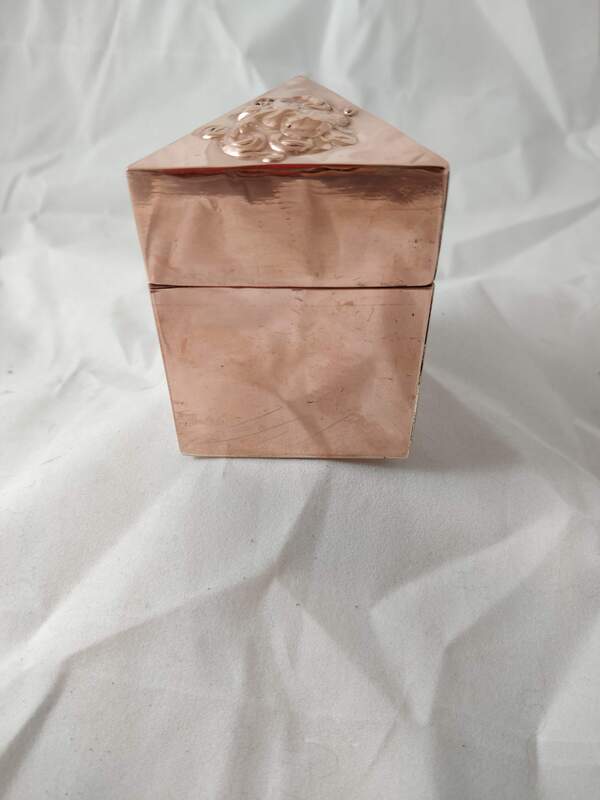
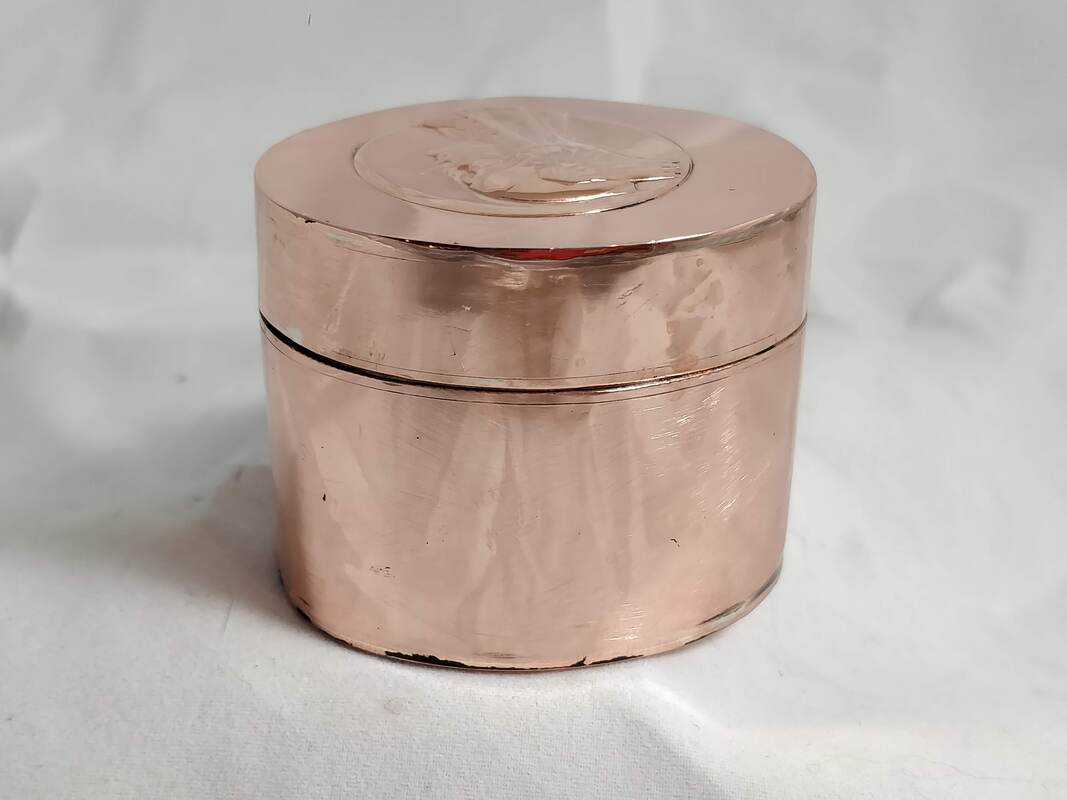
This being Thanksgiving weekend and I could have 4 days in the studio, I planned on my biggest box to date and the next step in this journey - 4 corners. 

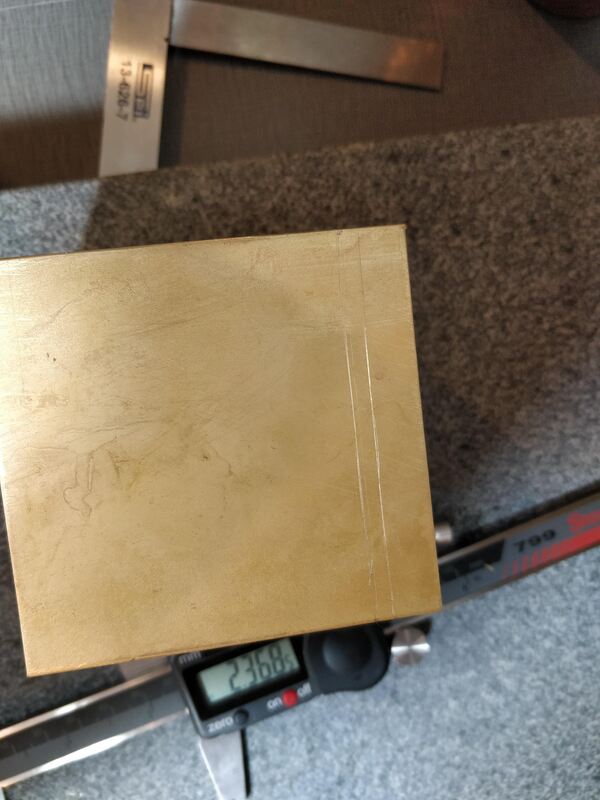
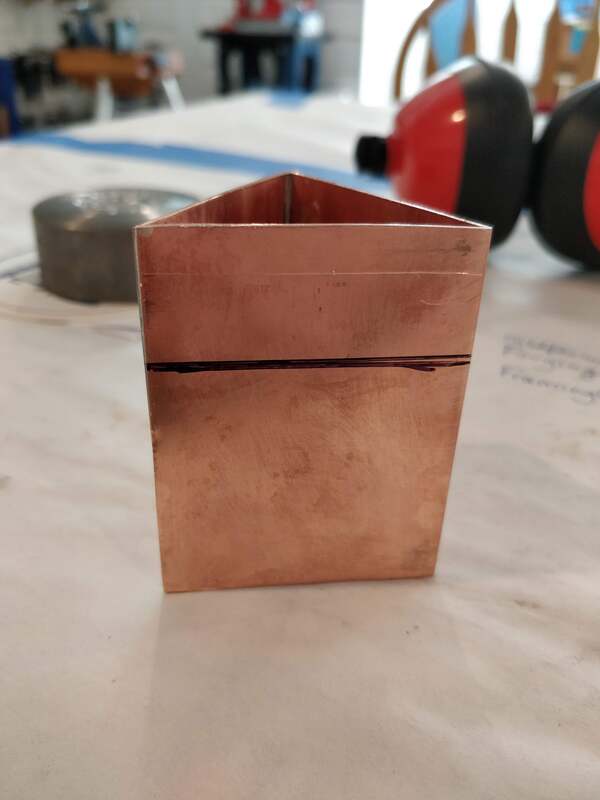
The box would be 3" wide by 3" long by about 3" tall. 

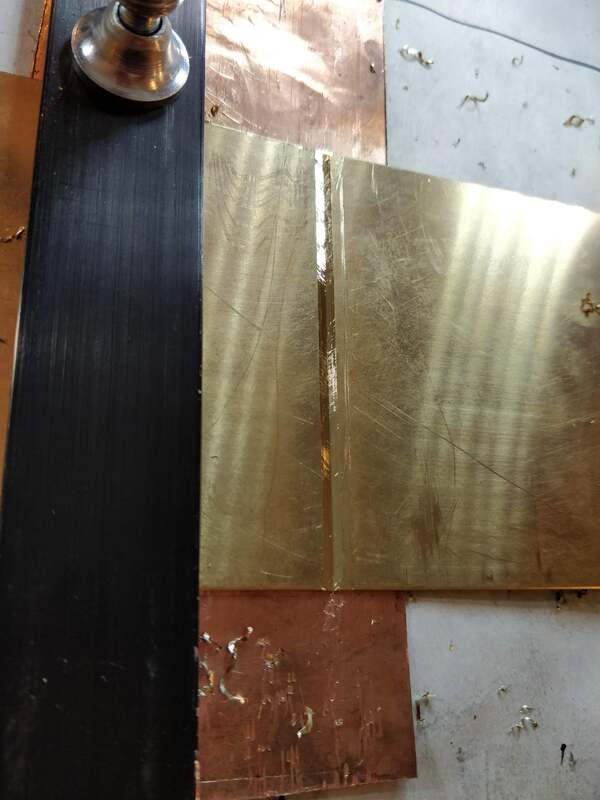
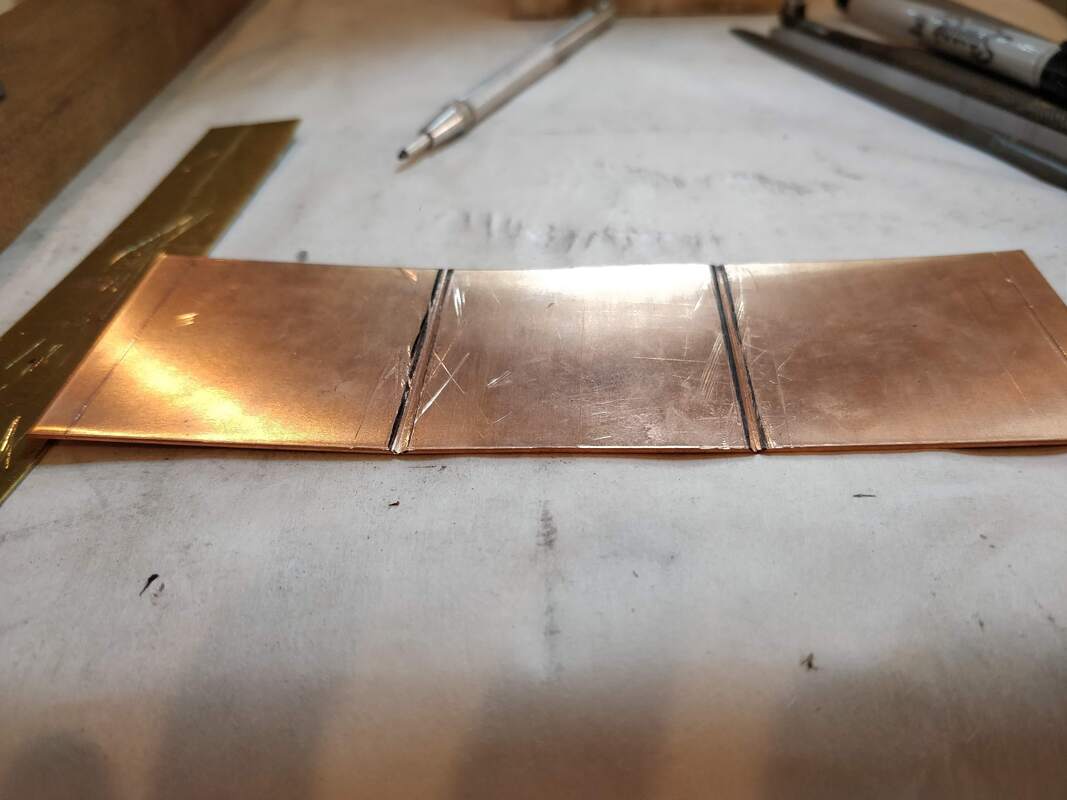
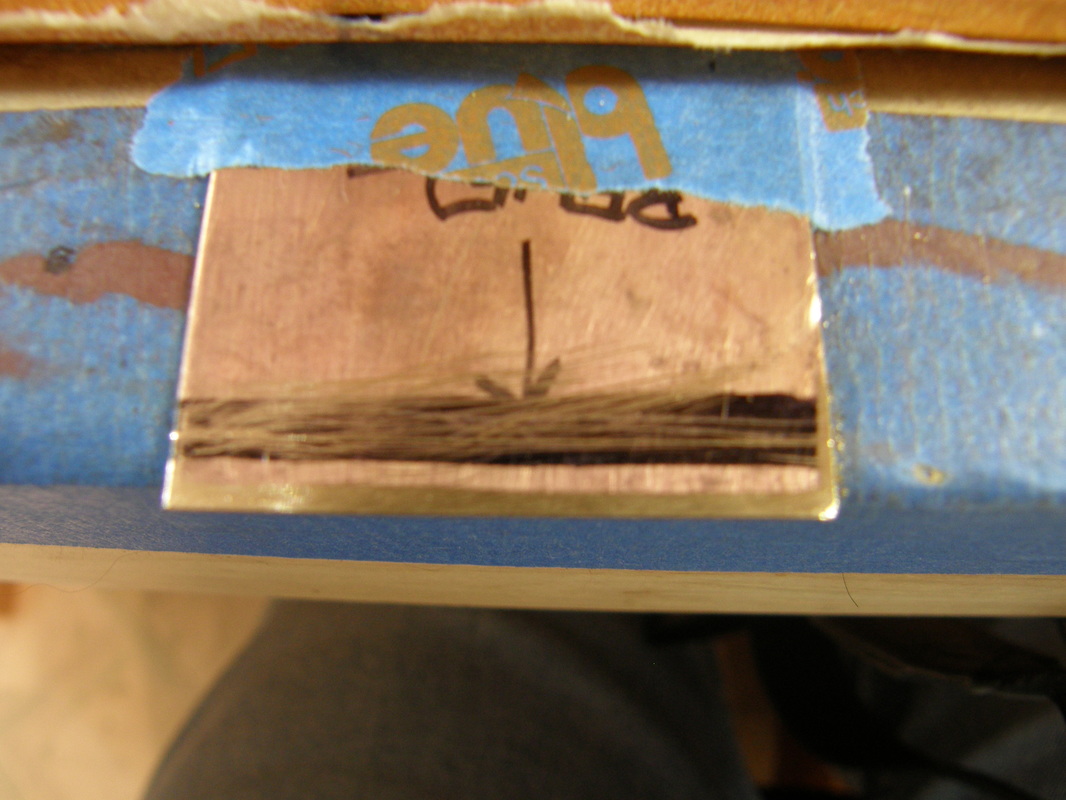
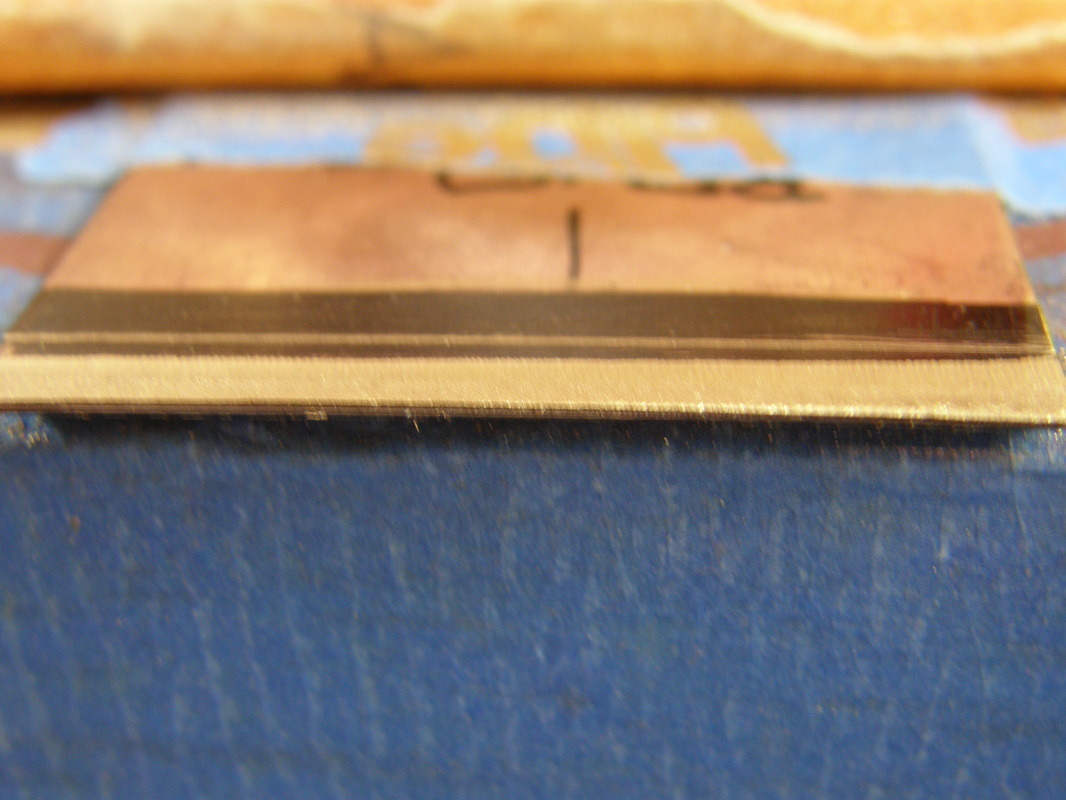
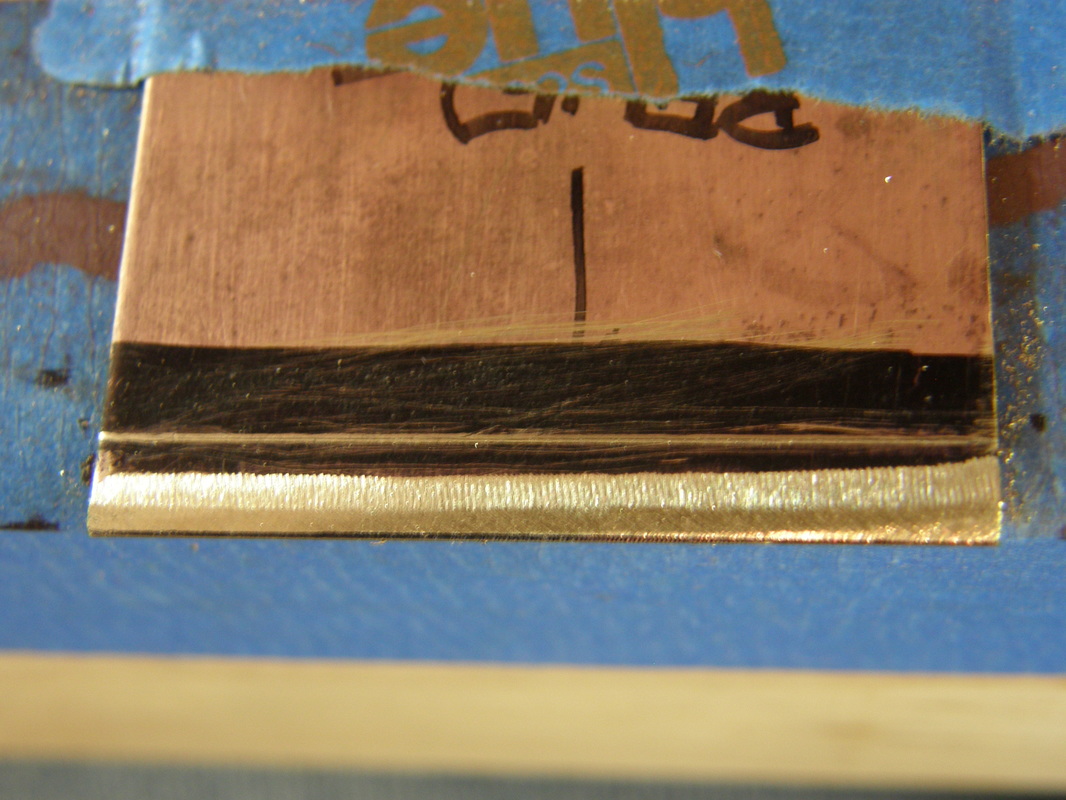
I set up my metal last weekend, a 12" by 6" of 20 gauge brass by drawing the scoring lines and clamping it to the table with my guide.   And then I went to the day job for three days....

Thursday, I woke up at 6:00 am with the shop cat (Boots) announcing her presence at the bedroom door (the shop elf was fast asleep) so I got up and went to have my cuppa coffee. I went in to the studio and turned on the lights and the heater as it was about 65 and a wee bit nippy.  Then it was to the kitchen to brew my cuppa and feet the cat. While having my cuppa, I read a sci-fi book I started on Monday was getting rather disappointed with how the author was ending it. By now it was 9:00 am and it was time to go to the studio which was a comfortable temp.

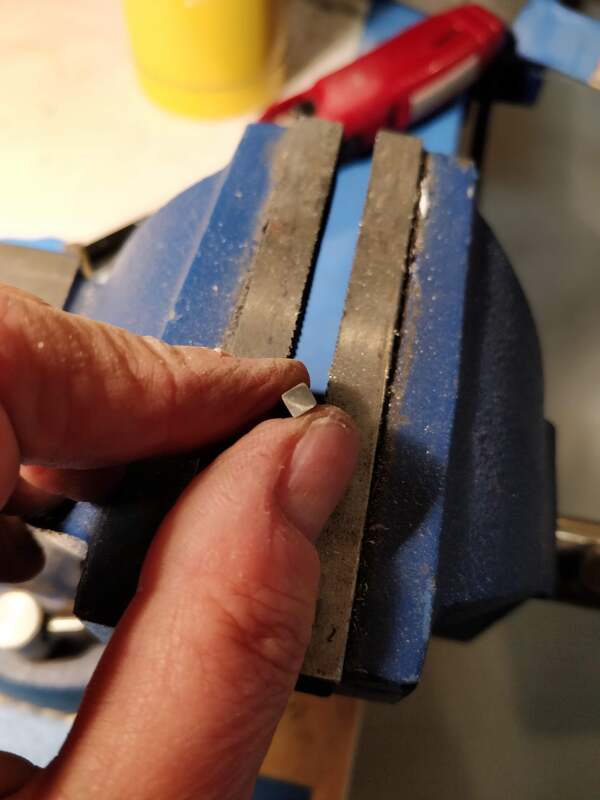
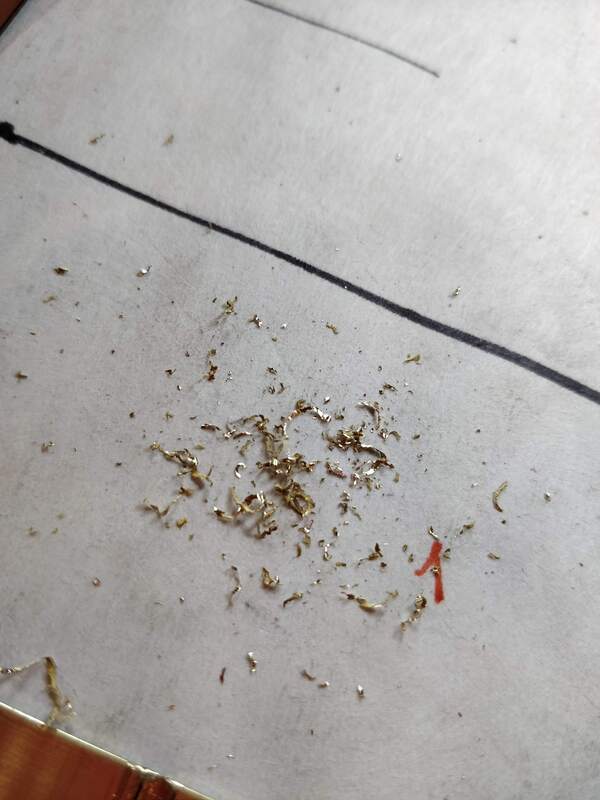
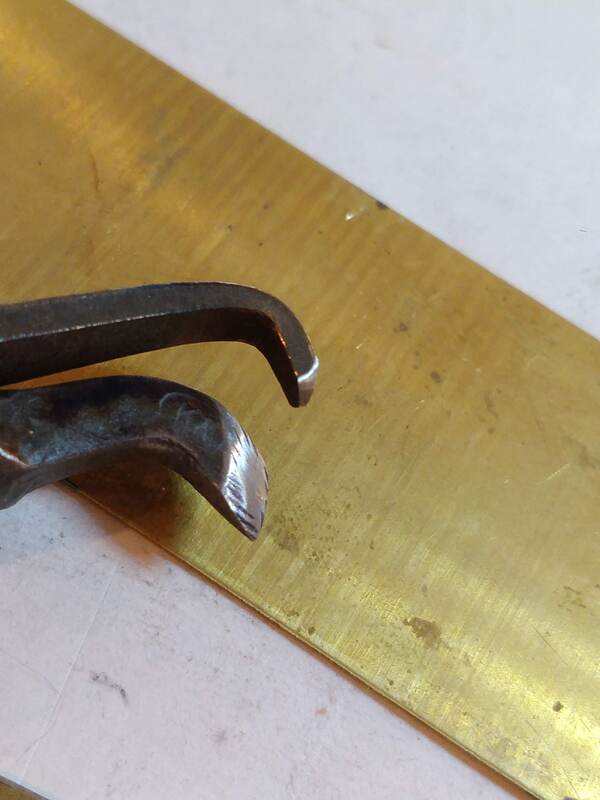
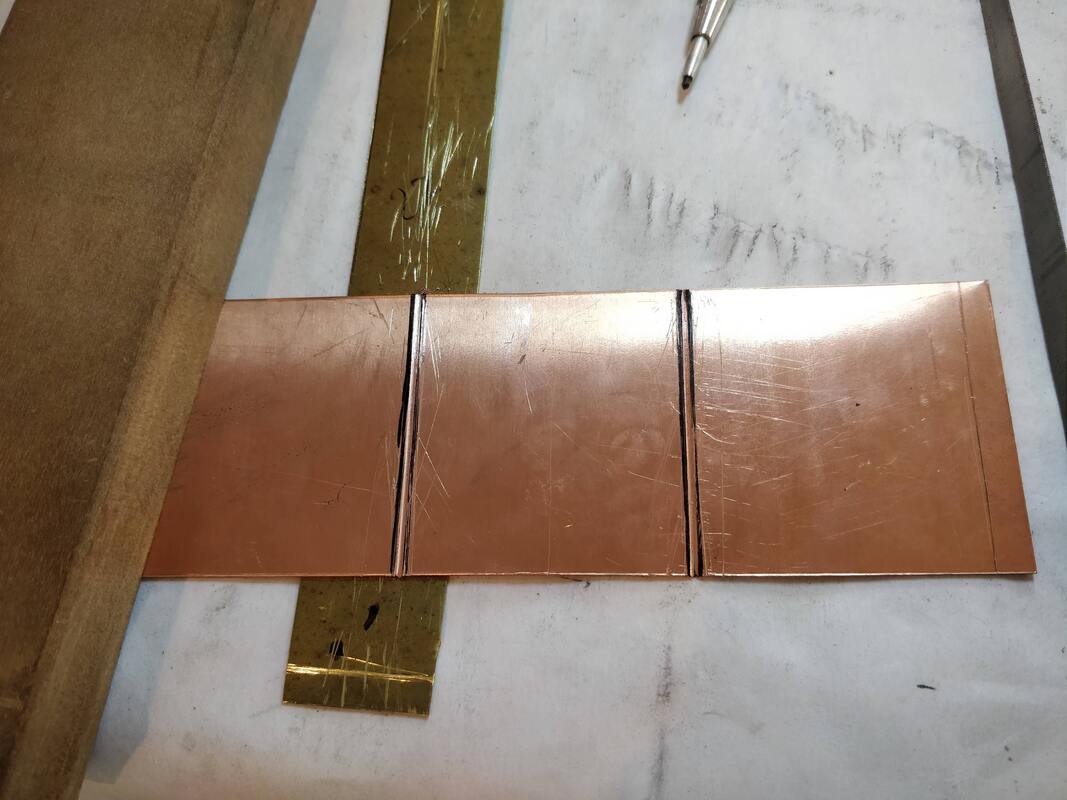
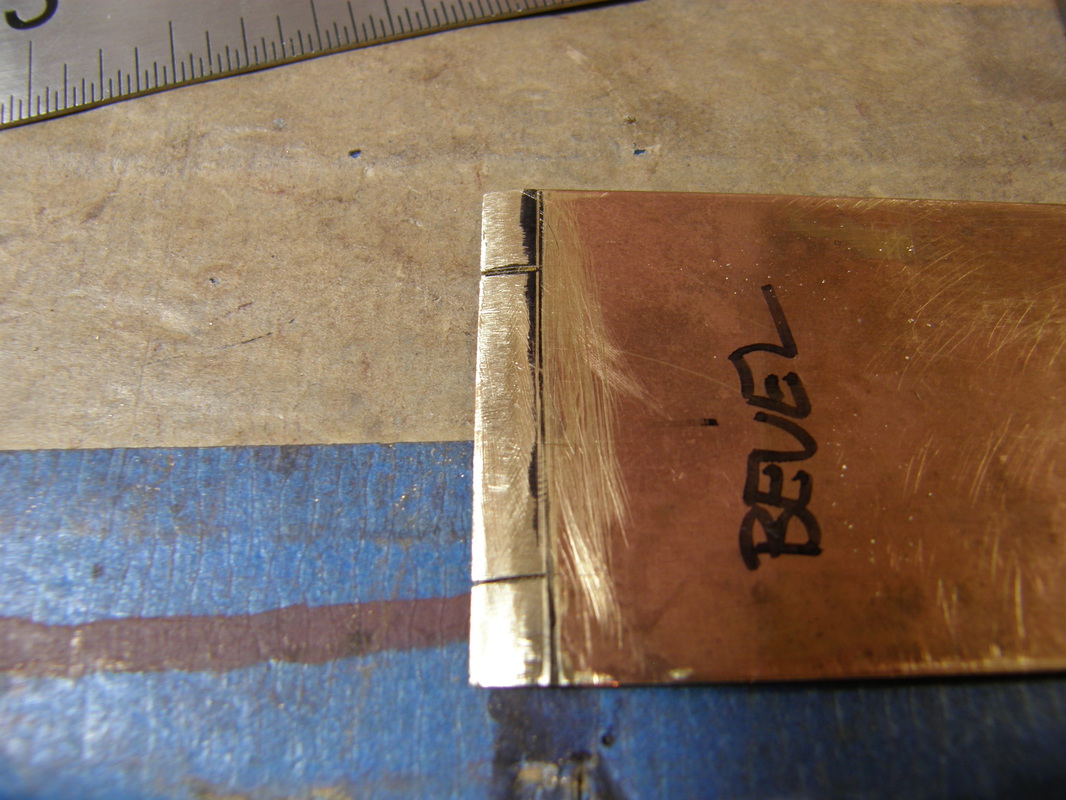
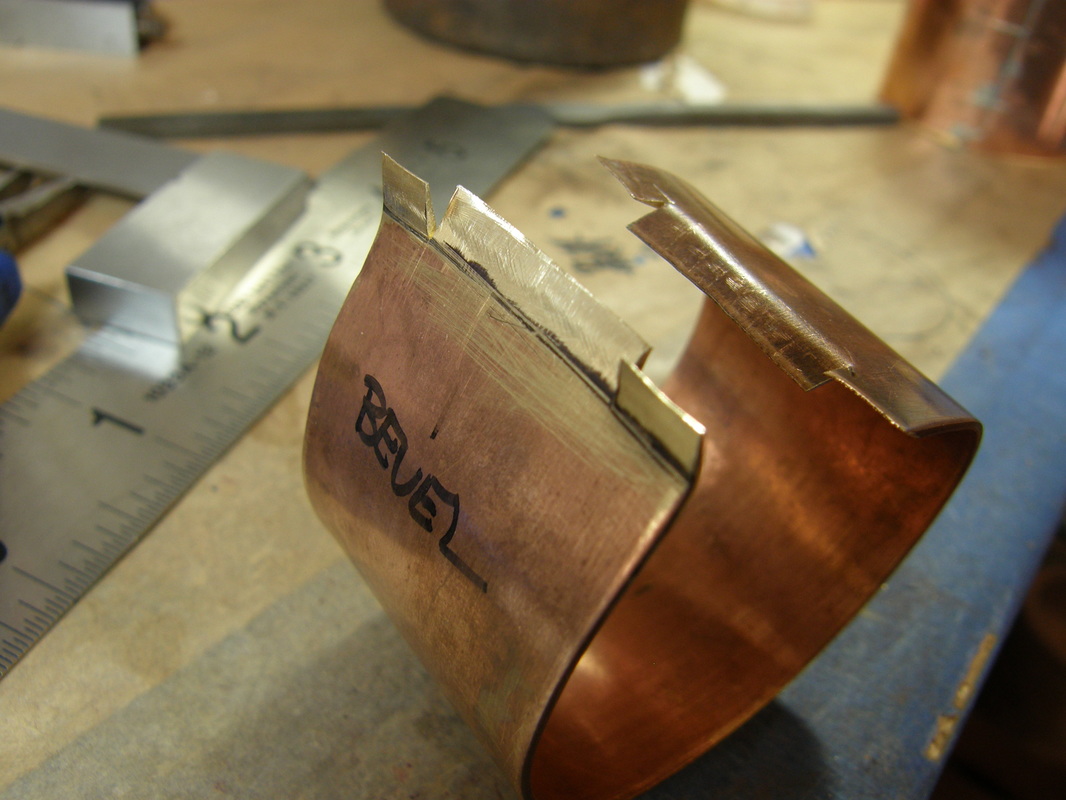
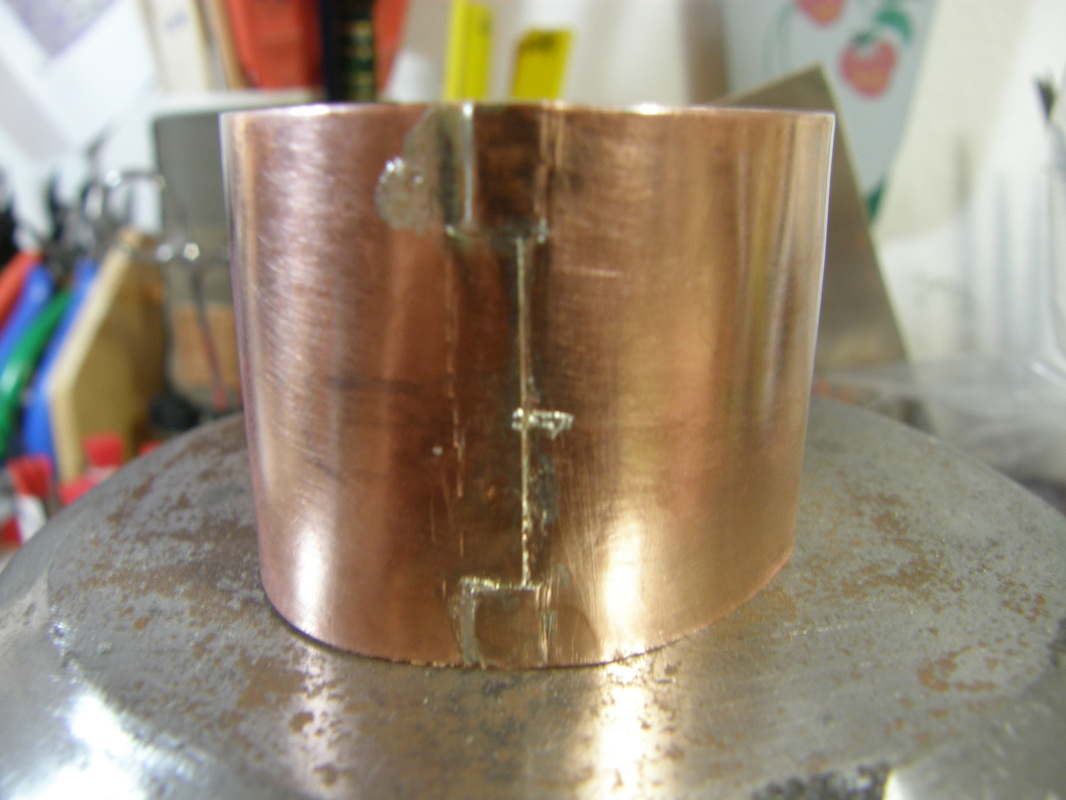
I took off my wedding ring and my good glasses and put on my safety glasses; sat down at the work table and started to work on the first of three scored joints. After a few minutes I realized I was not staying on the line and was making a real mess of it as the scoring tool for 90 degree had a very shot arm and my cutting point really wasn't 90 degrees. I tried to fix it and decided it was just easier to make a new one from another old rat tail file I had. That took over an hour and finally I was away and scoring and creating lots of nice brass curls. I did a check of my cutting and found I was a hair under 2" from the end so all my other scores would have to be moved to the left and a sliver of brass cut off one end.  I stopped scoring at 5pm, as I knew I would not get the third one done and I was very tired.  It was time to make dinner and relax for the evening.

Friday morning, a certain cat announced her presence not only at 7am but at 2 am.  I was able to roll over and go back to sleep for a bit but when a cat walks on you and purrs in your ear it it rather impossible to go back to sleep. Once again I went downstairs, fed the cat and coffee-d myself. I headed into the studio around 9 am and sat down to finish the scoring and beveling of the outer ends. 

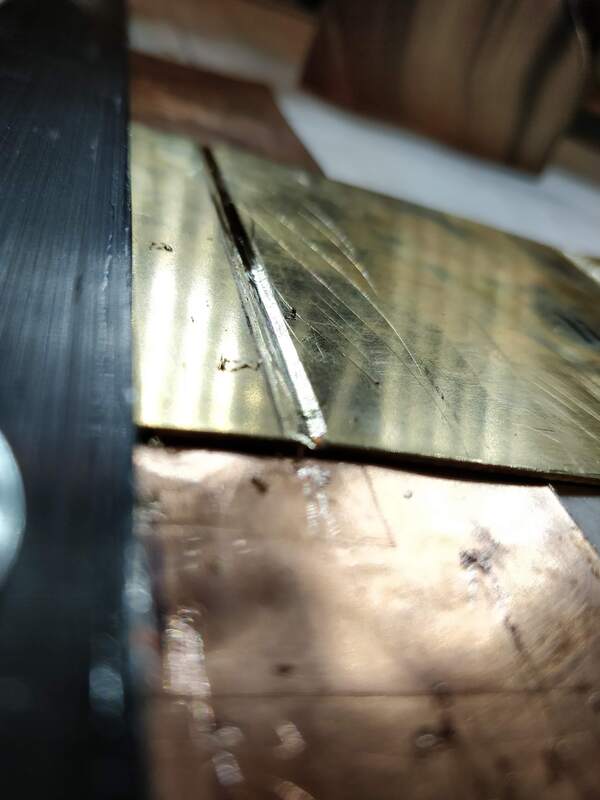
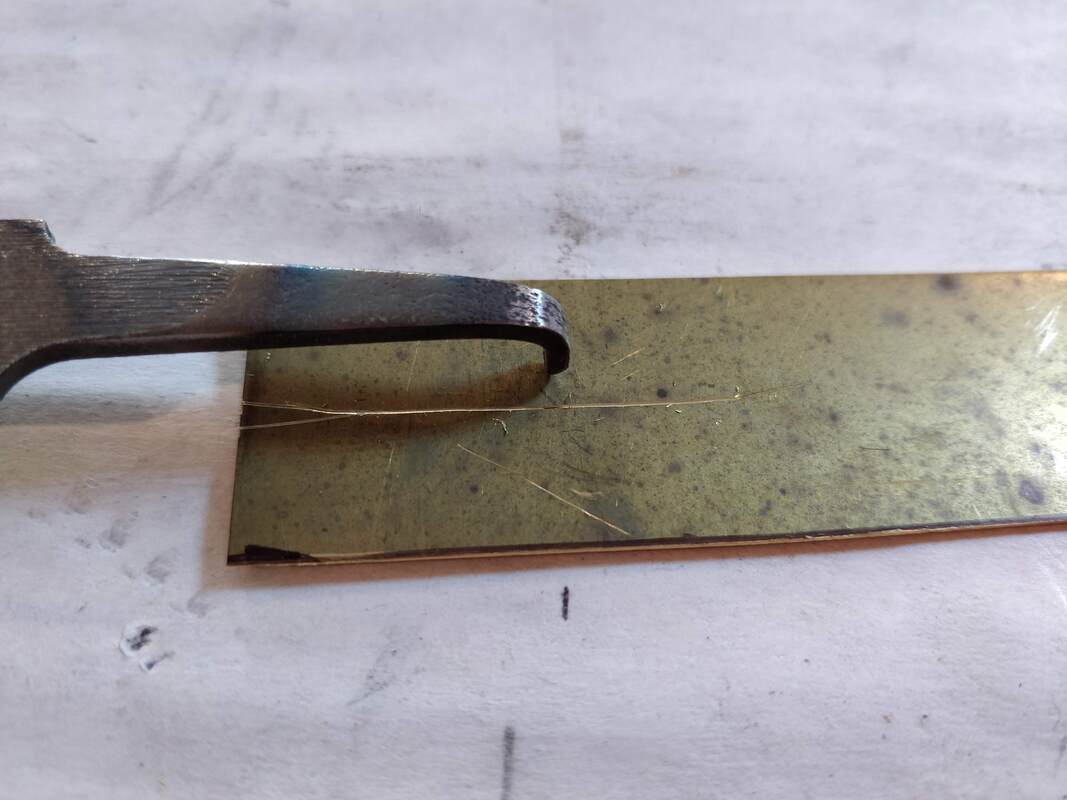
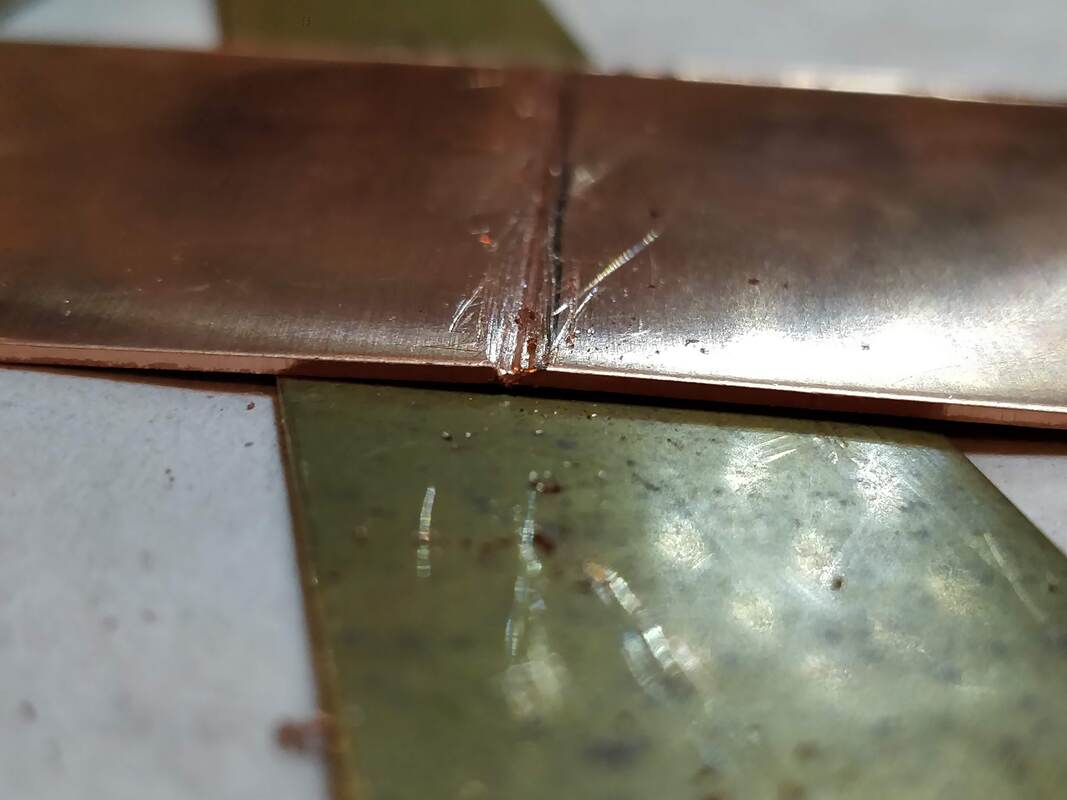
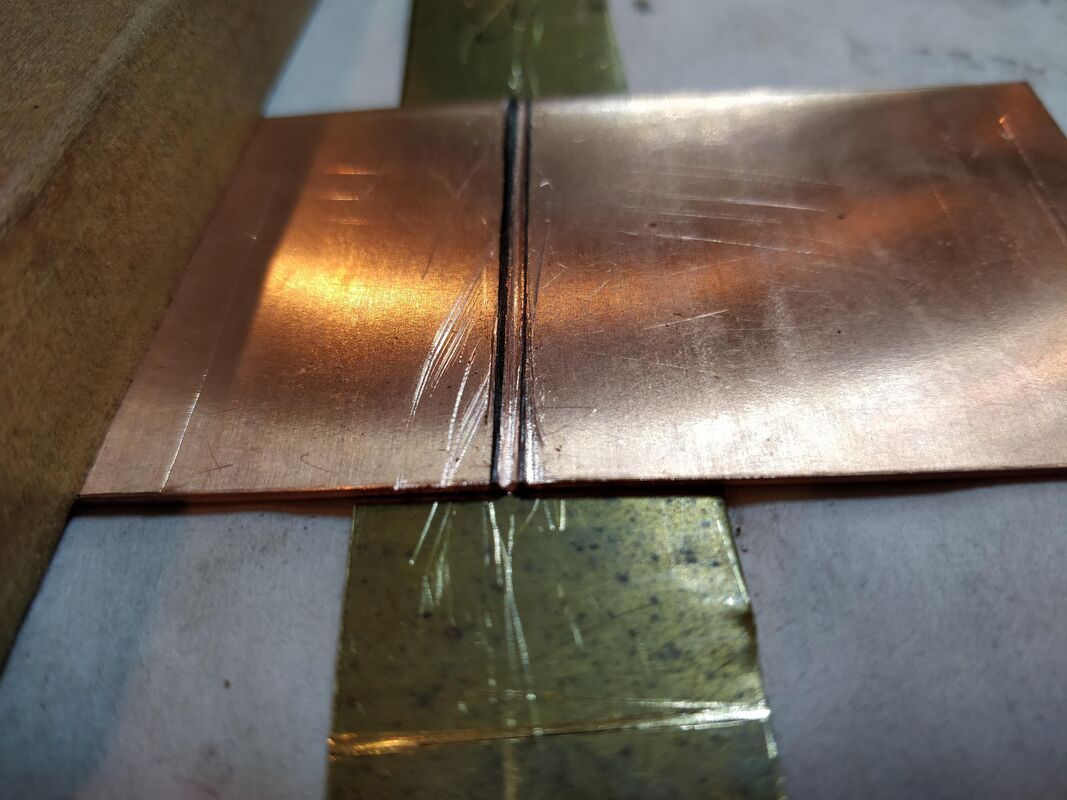
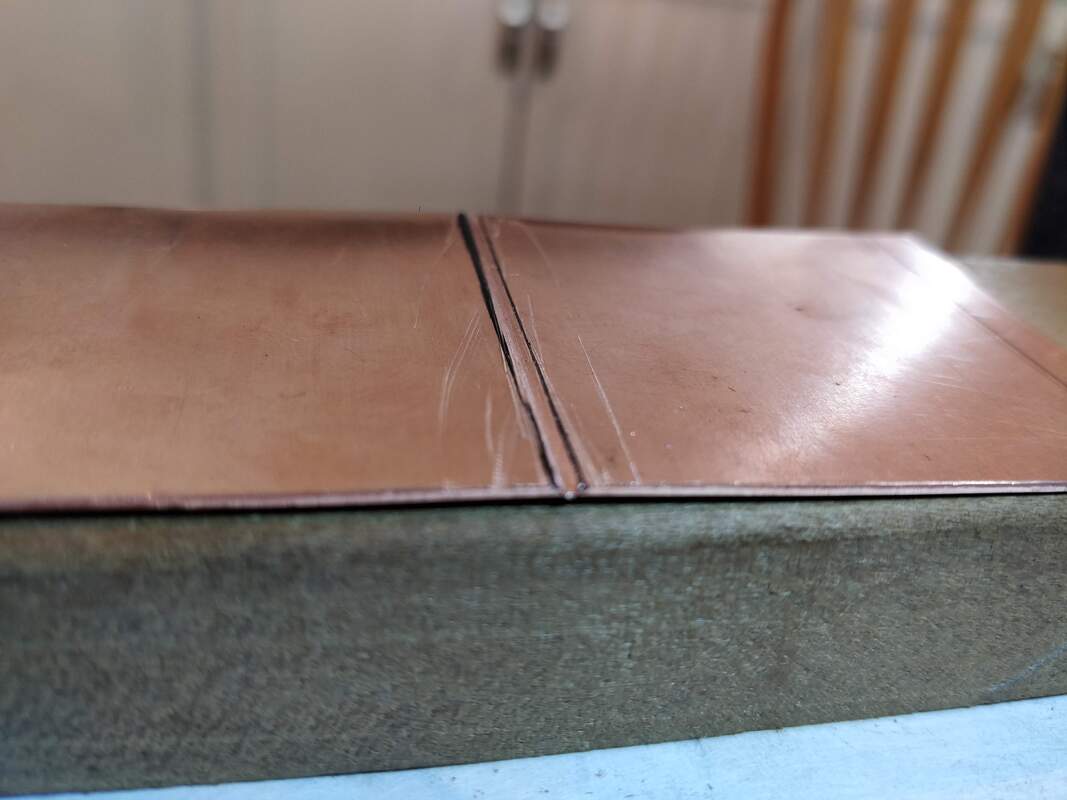
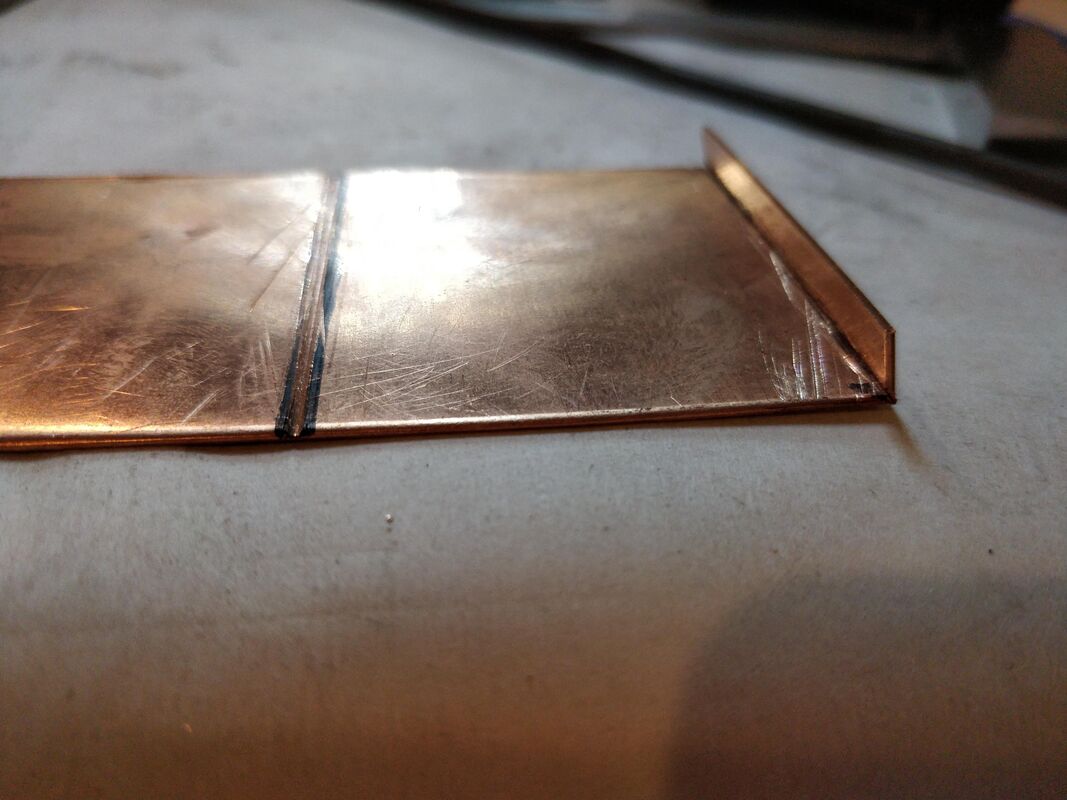
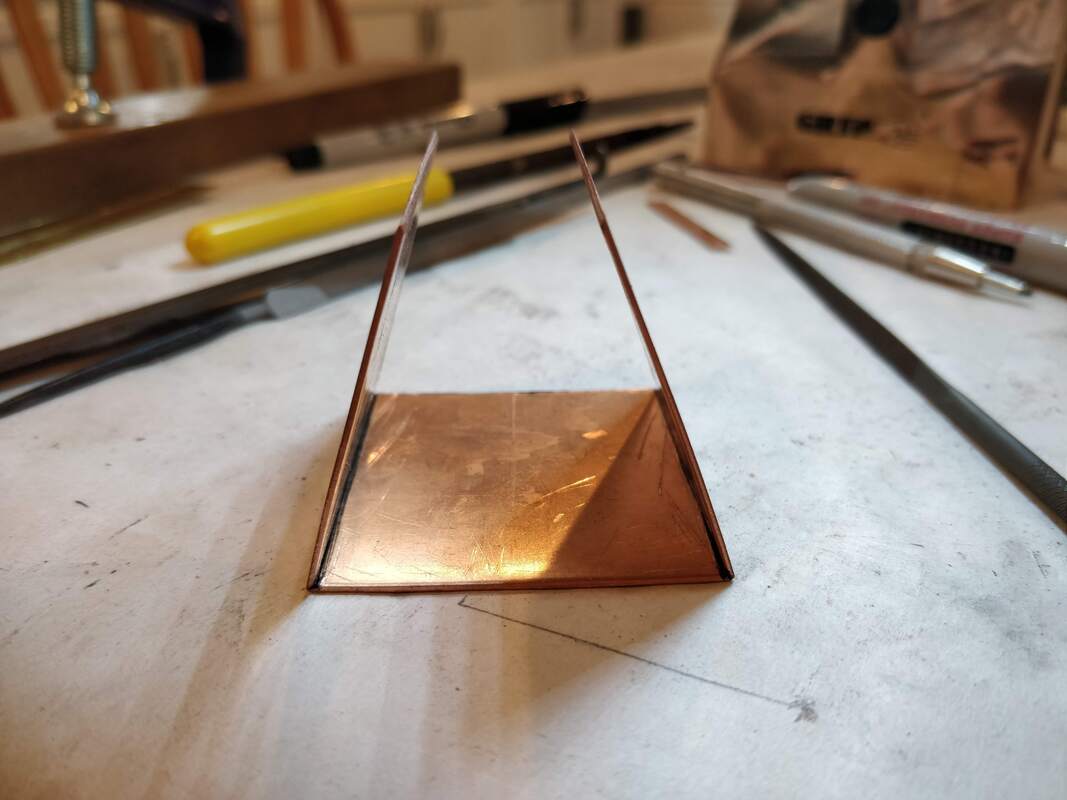
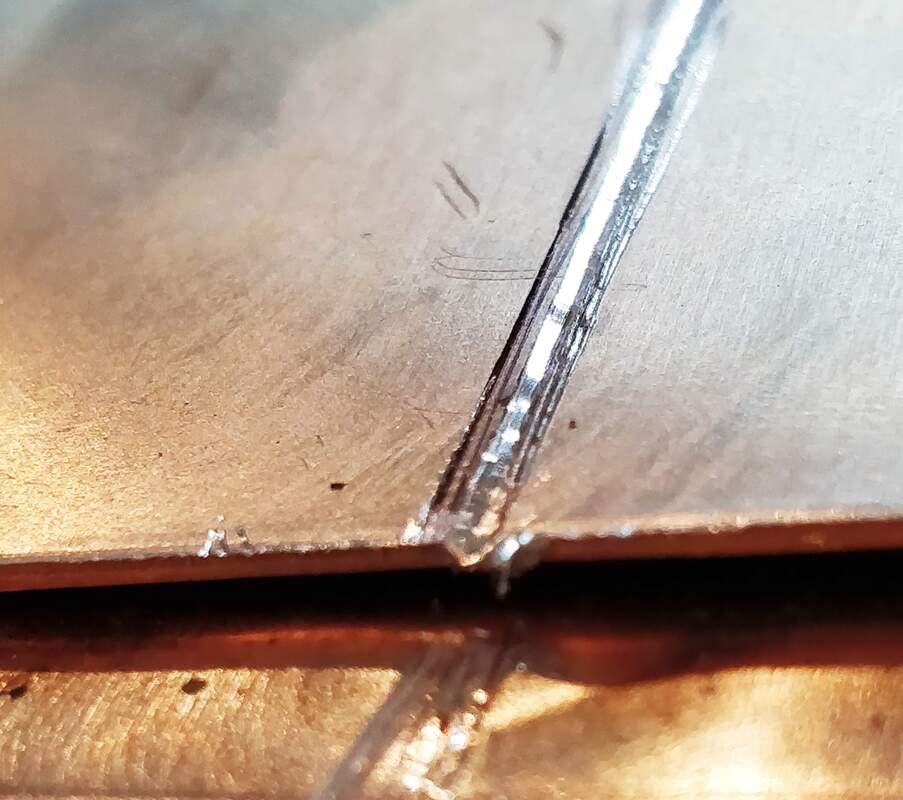
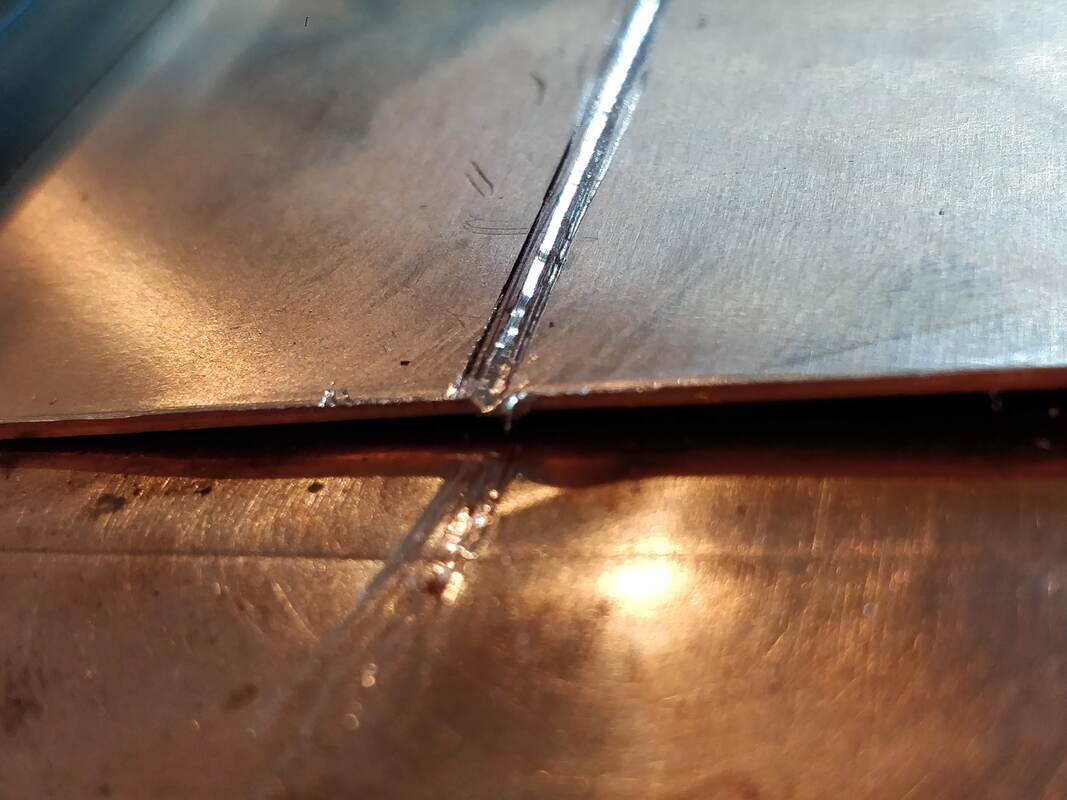
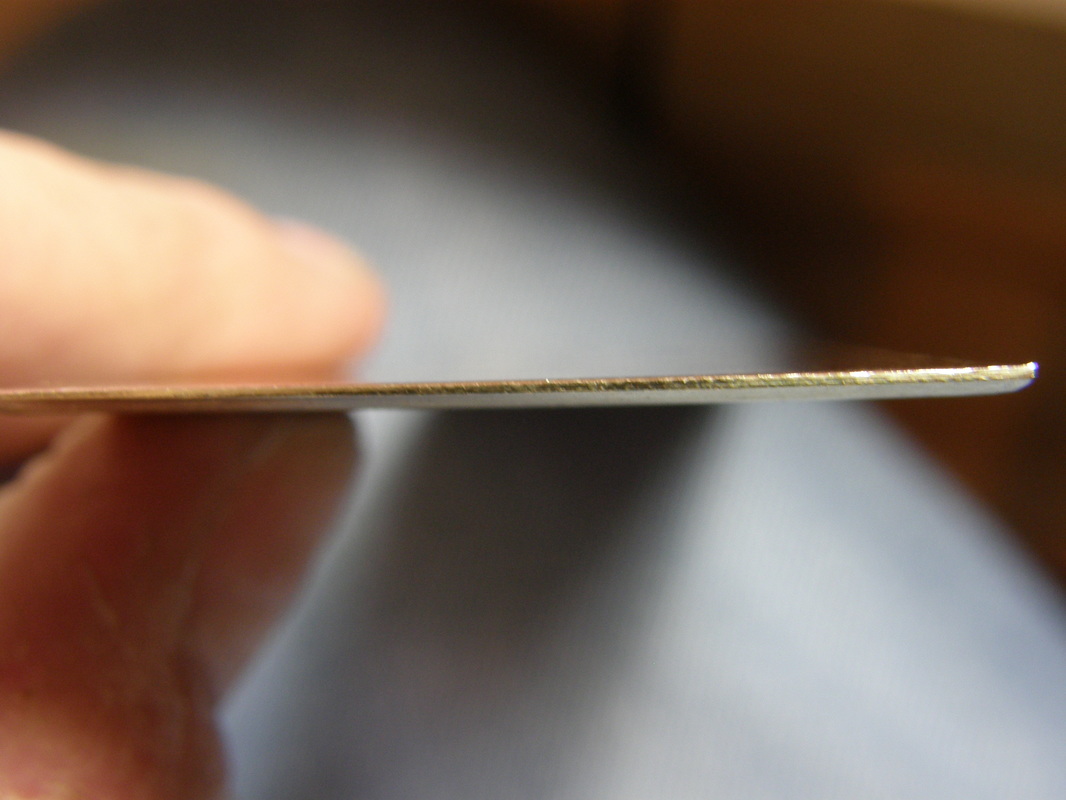
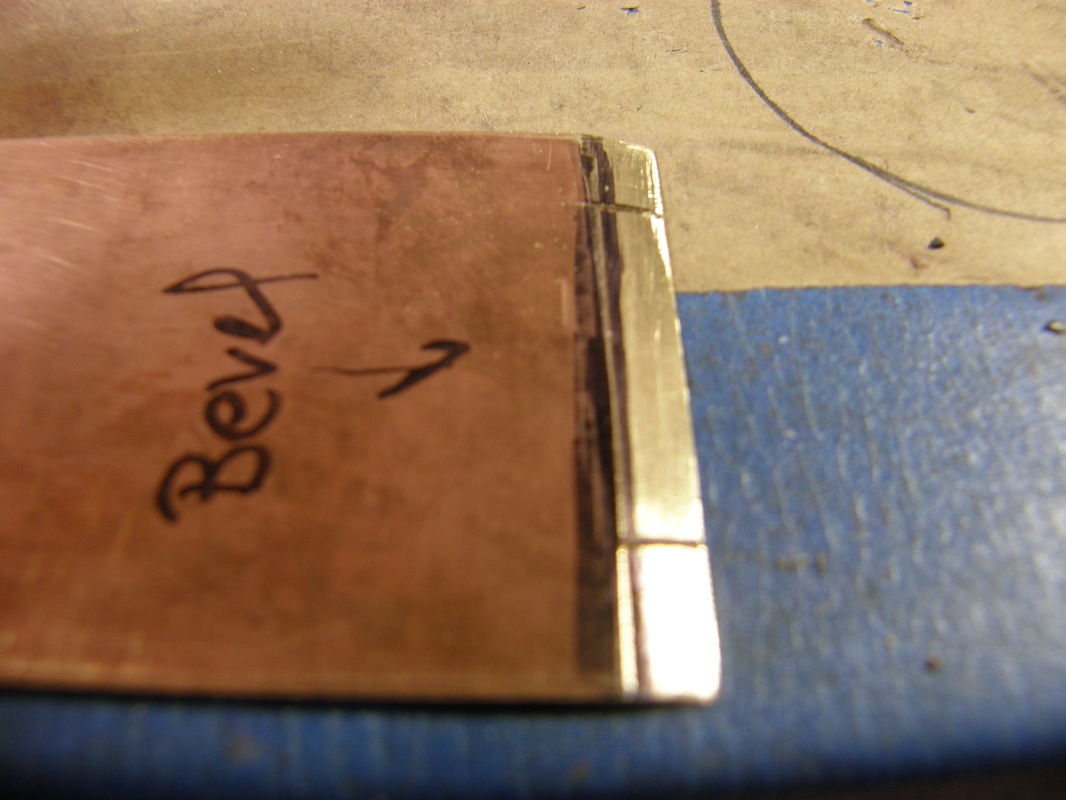
I will mention that when scoring, which is done on the inside, you watch the outside for a line to appear. This is from the pressure the tool puts on the metal because it is so much thinner having been scored. When you see this line you go very slow as removing too much will result in the joint giving out resulting in one part separating from the rest. The scoring continues until you can just begin to bend it by hand.

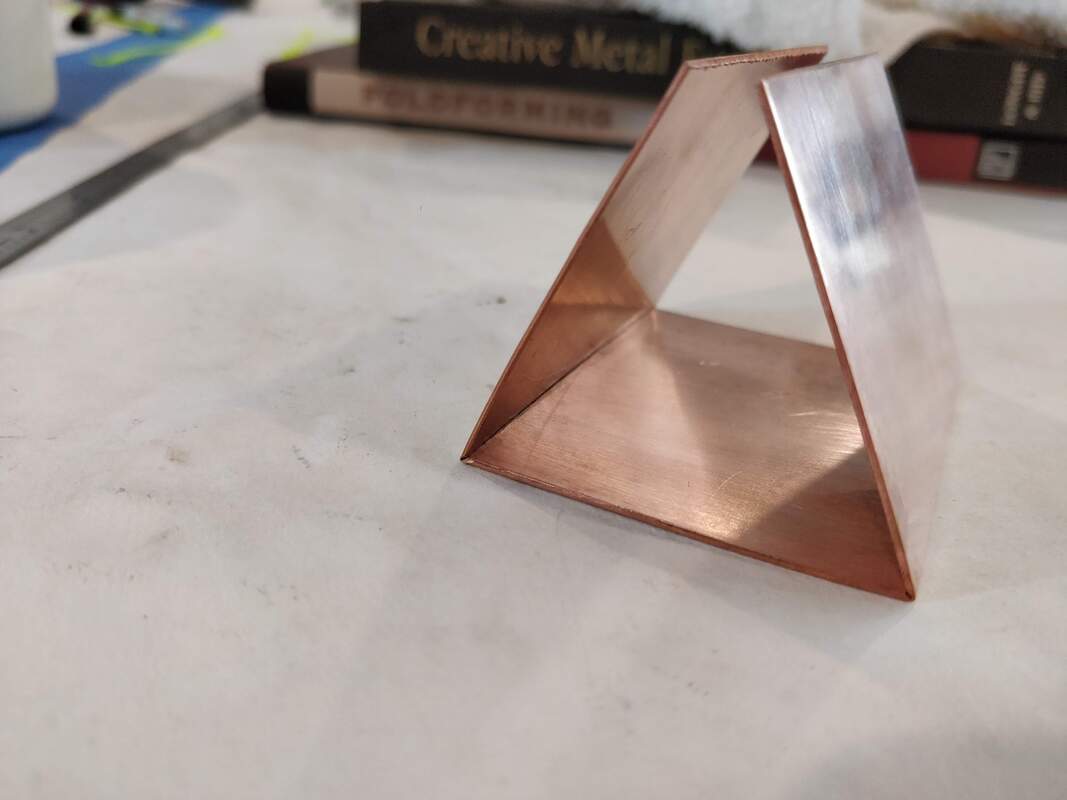
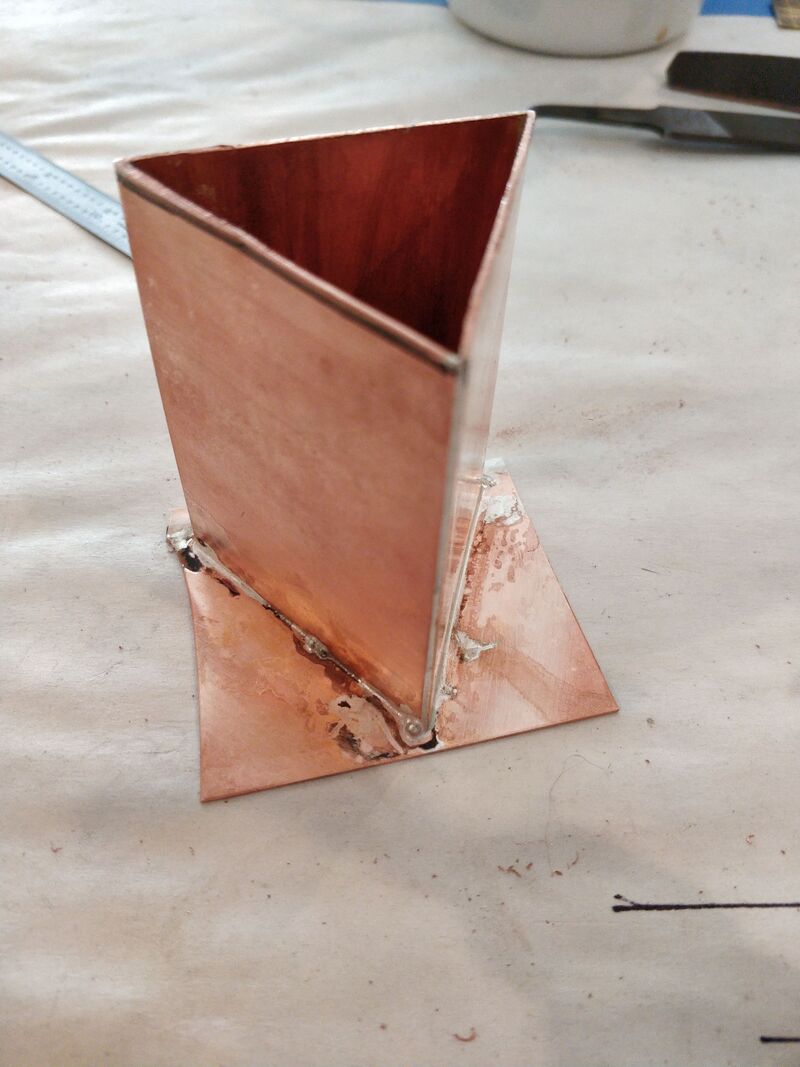
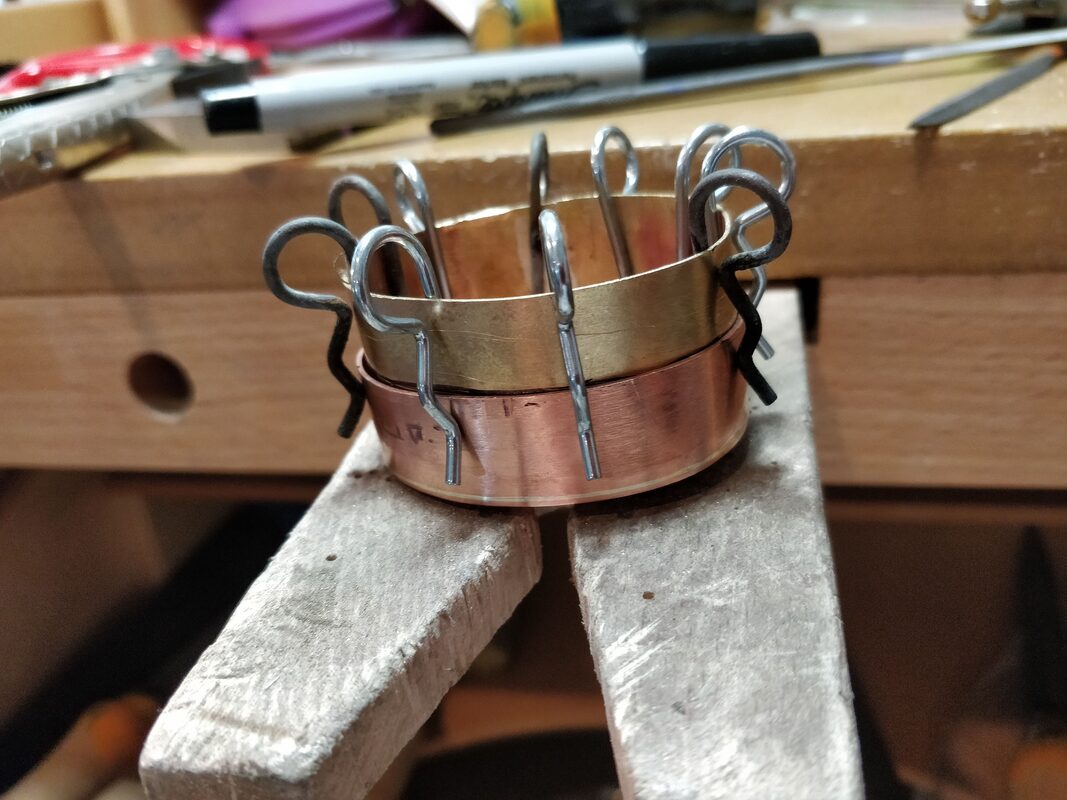
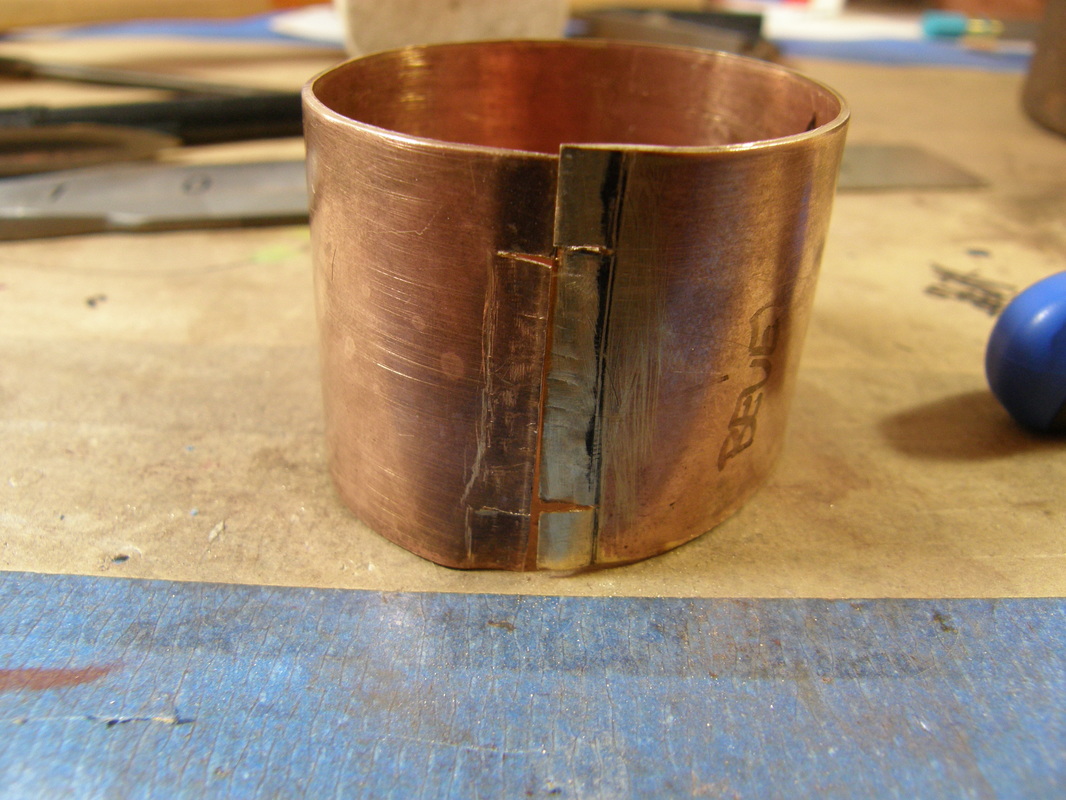
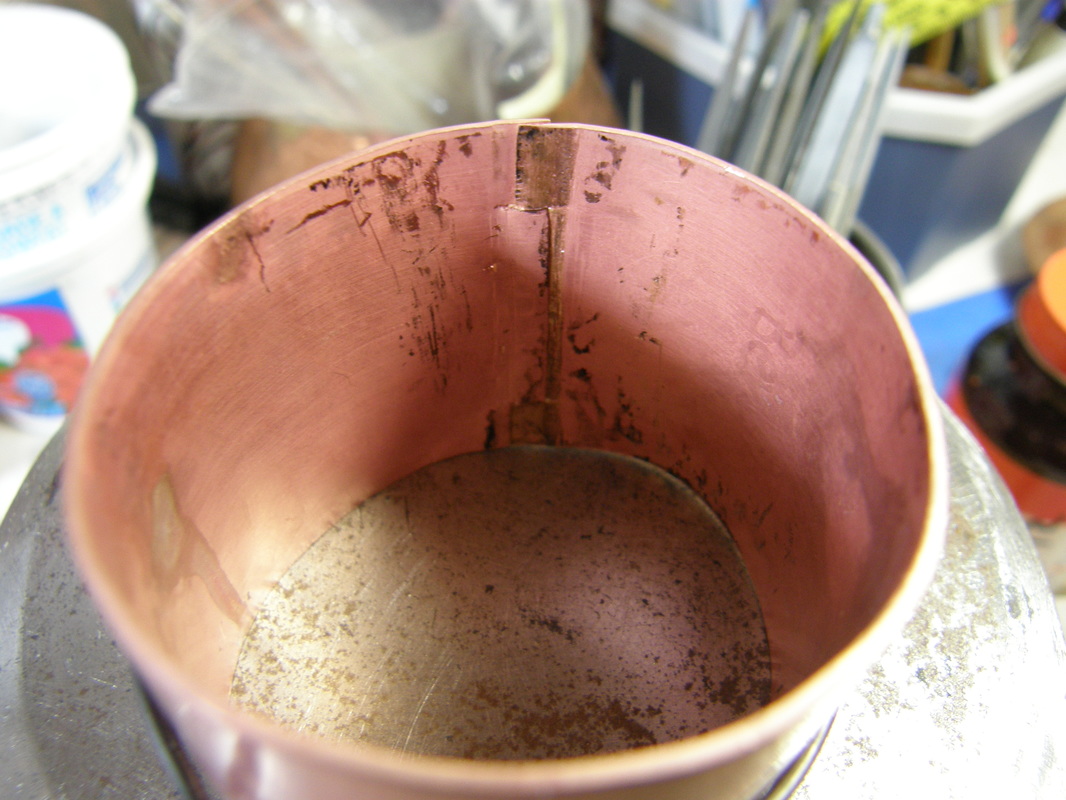
Finally it was time to solder. I started with the center joint, then doing each of the other two. I then cleaned it and then using binding wire, closed up that last corner nice and tight. 

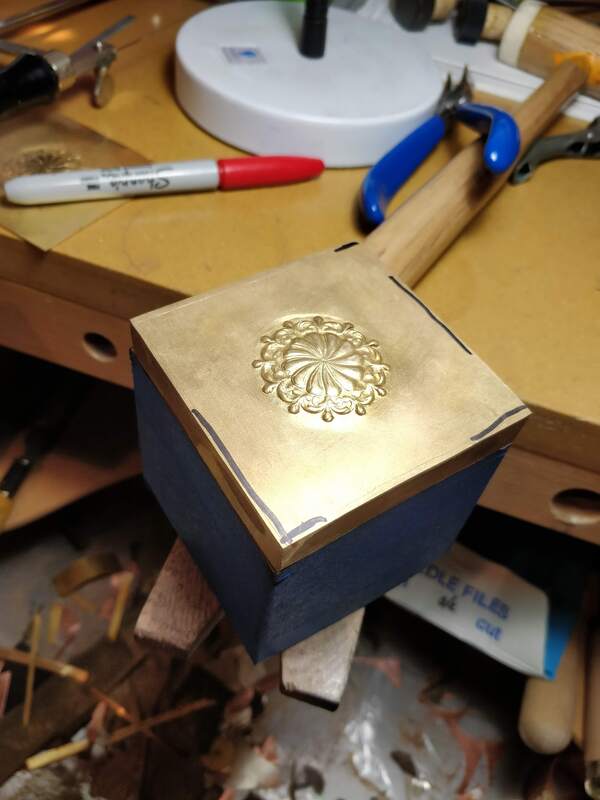
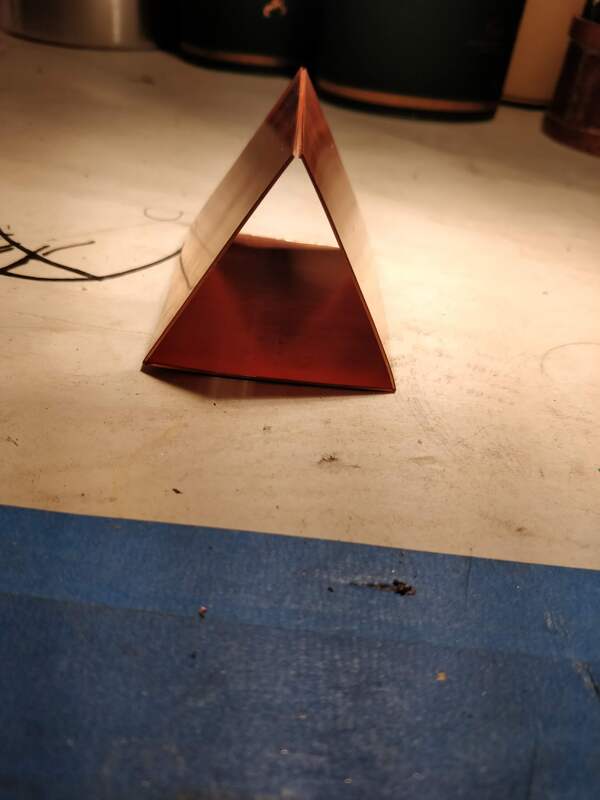
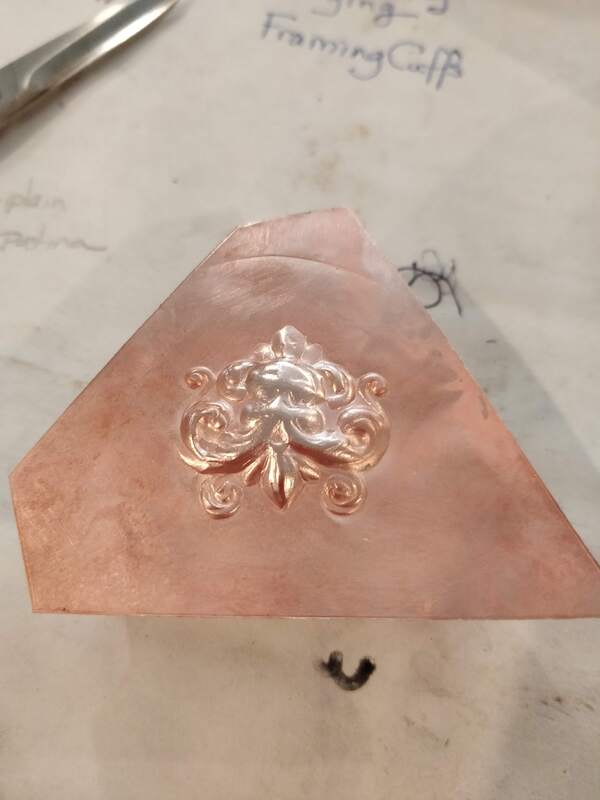
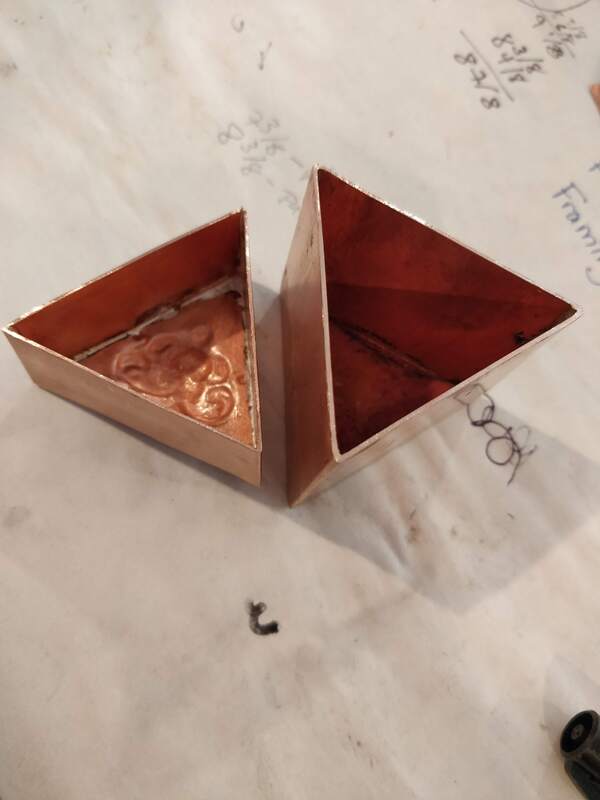
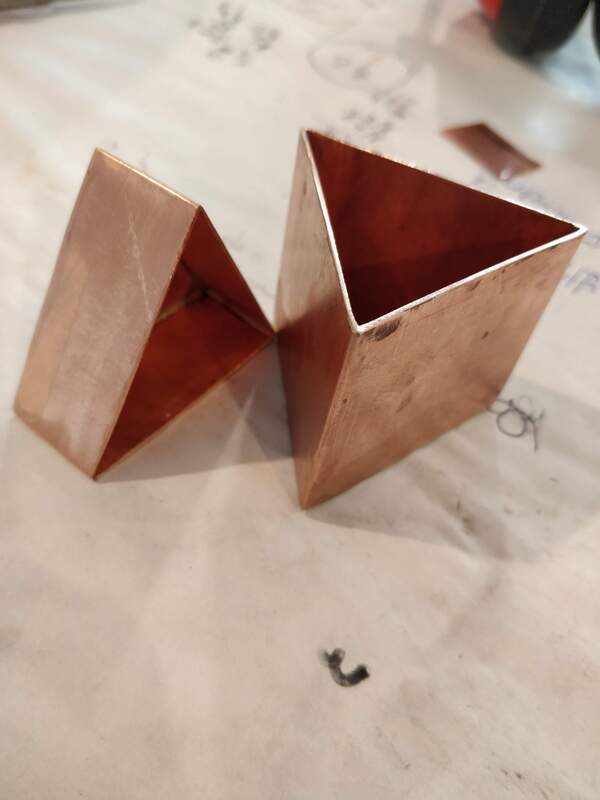
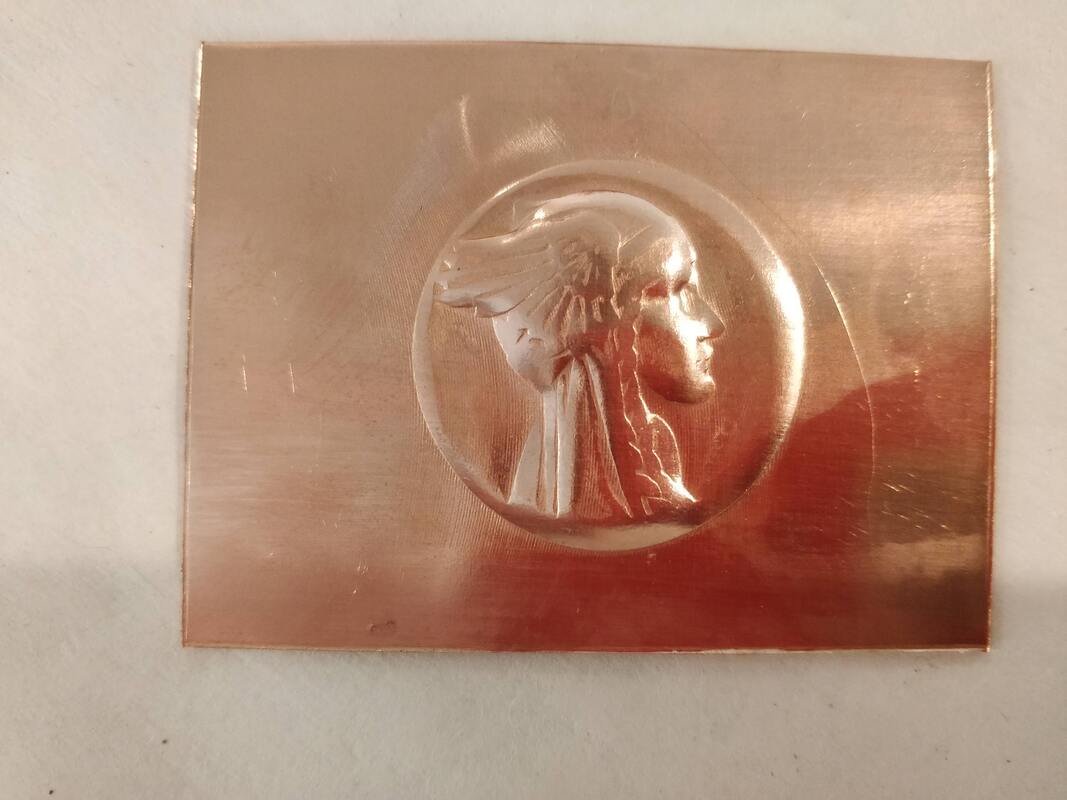
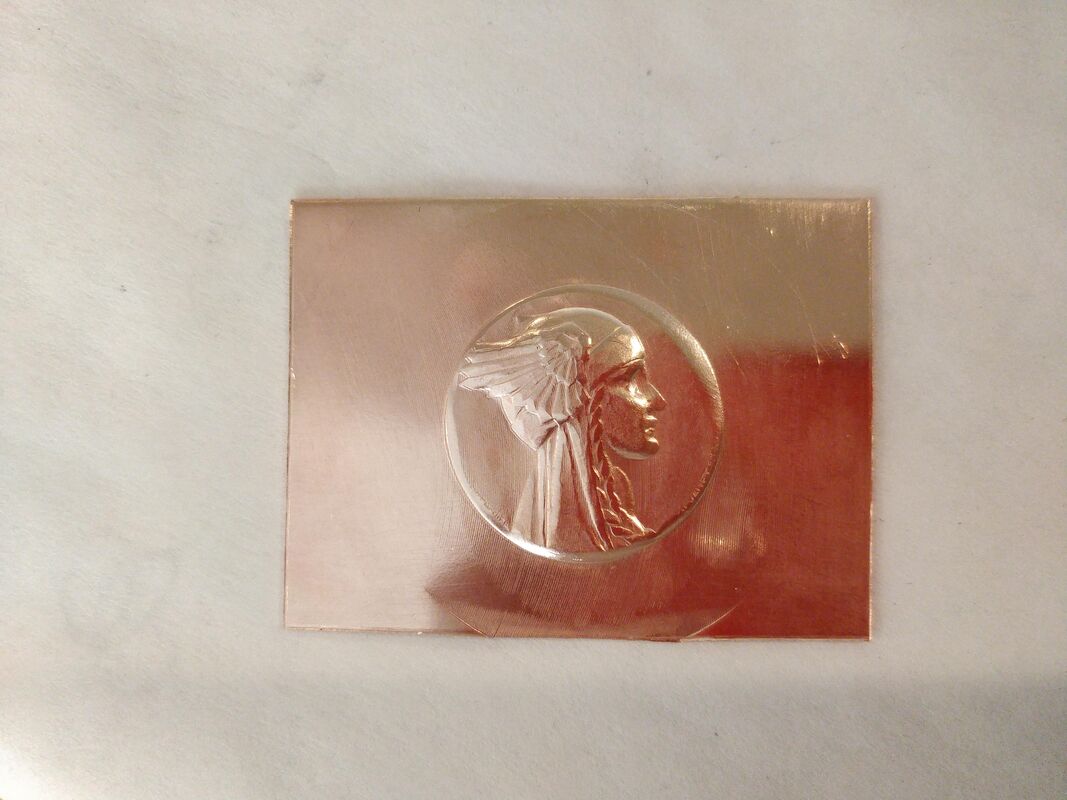
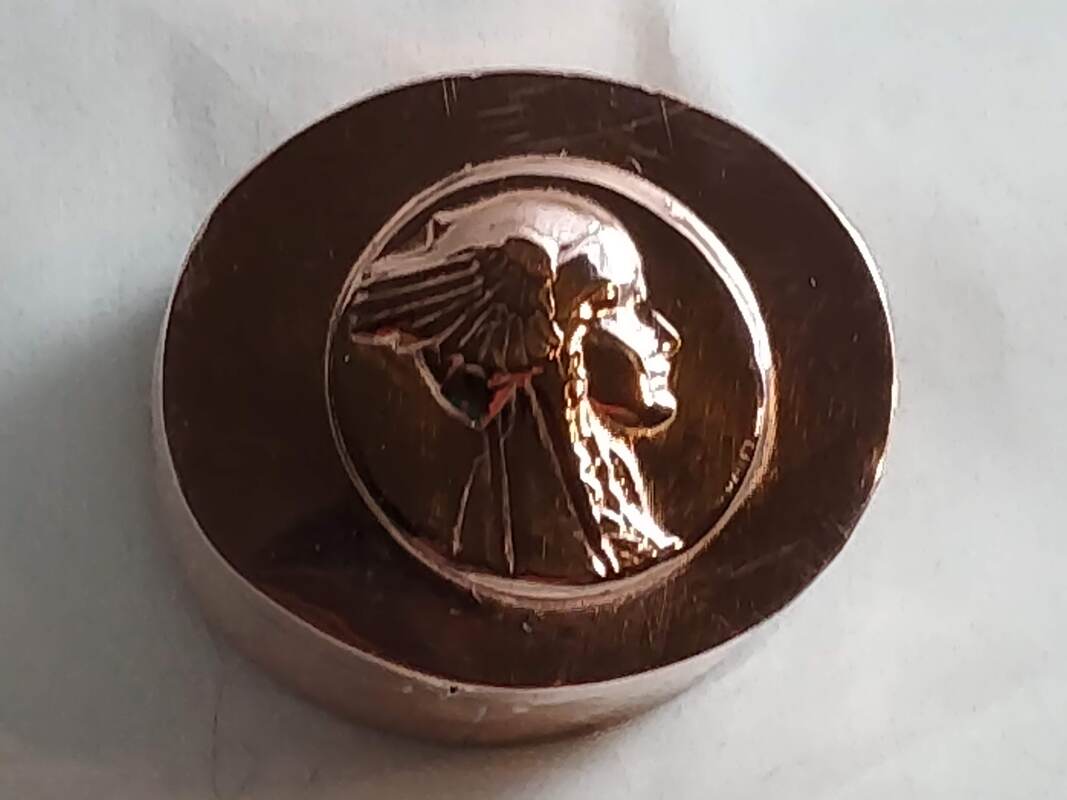
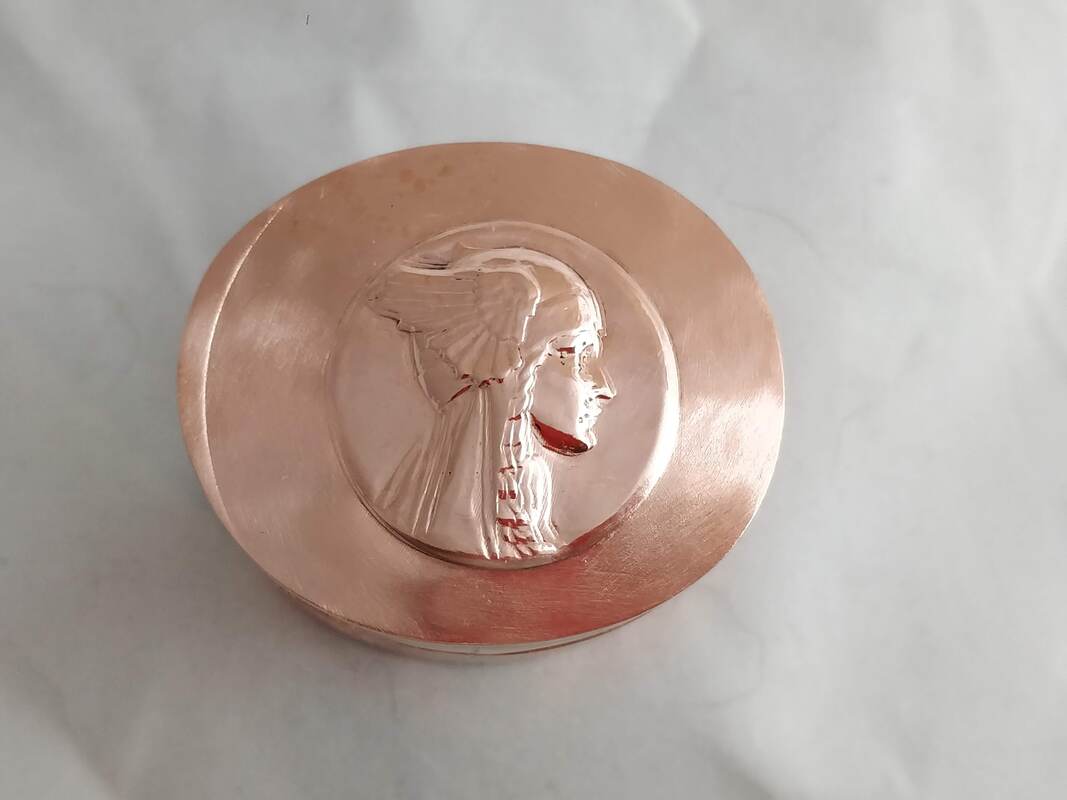
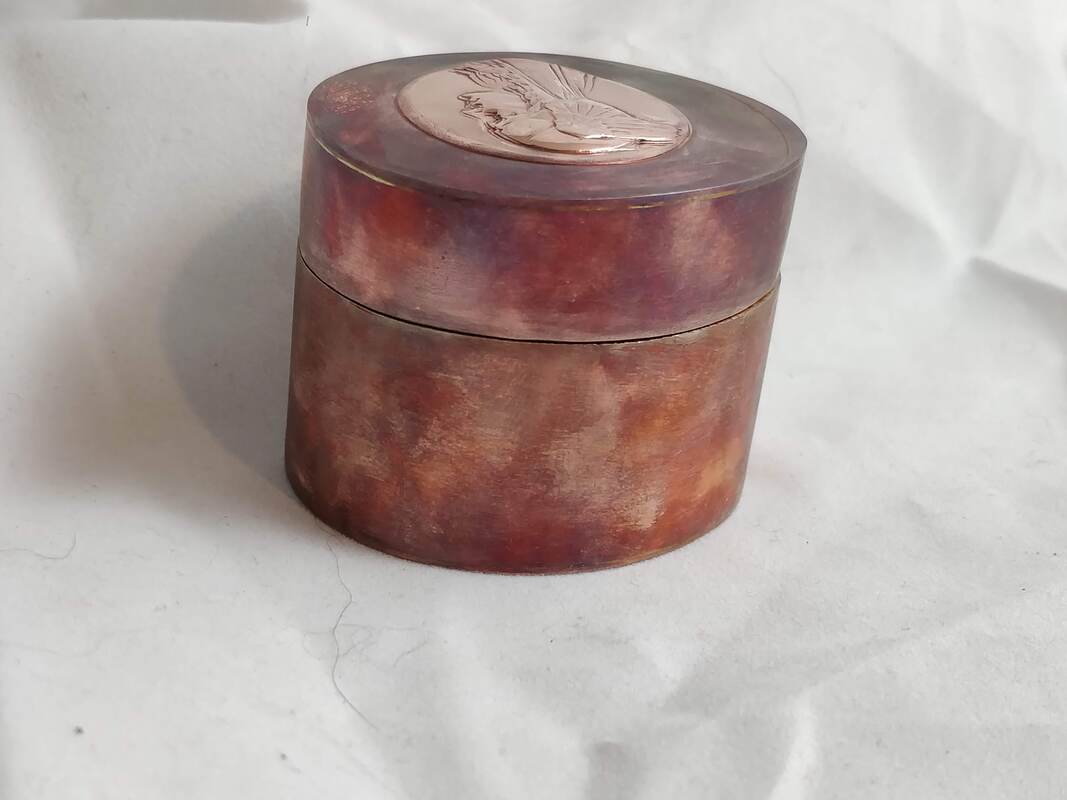
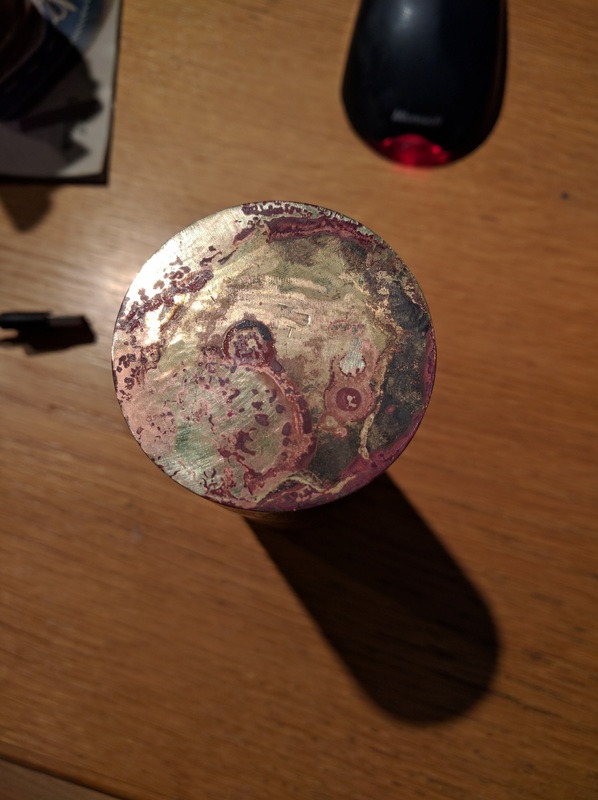
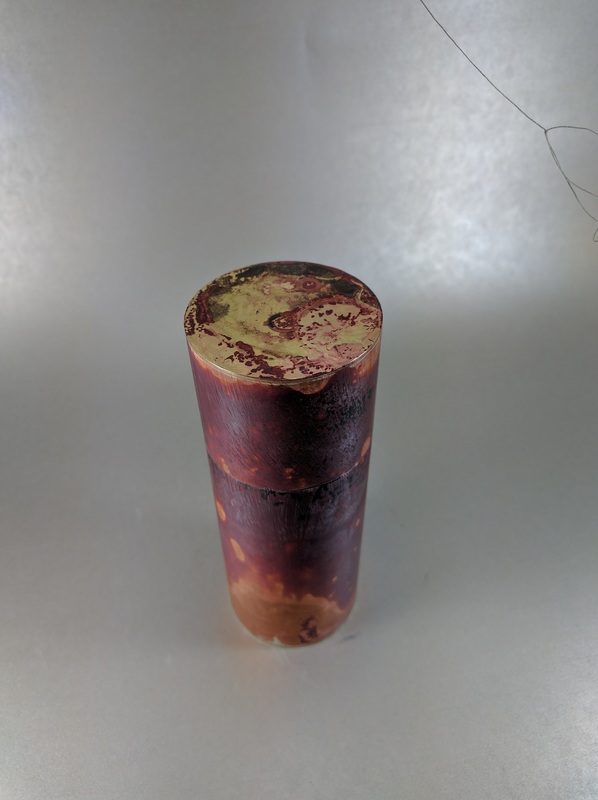
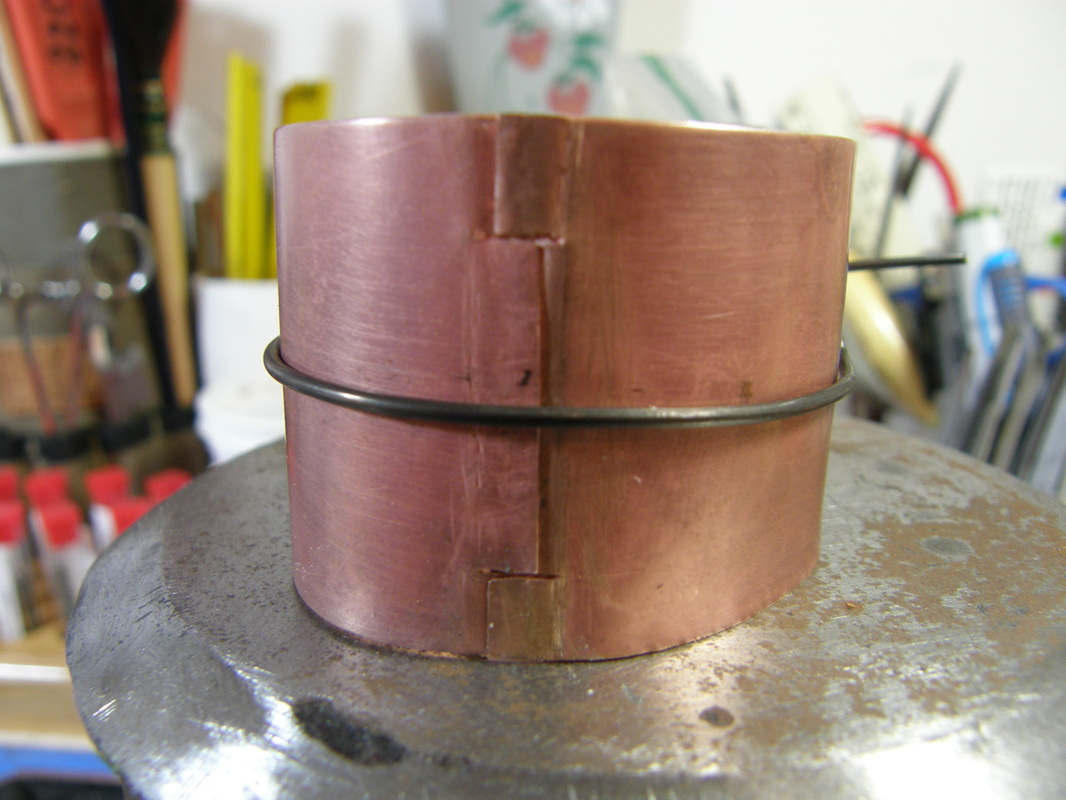
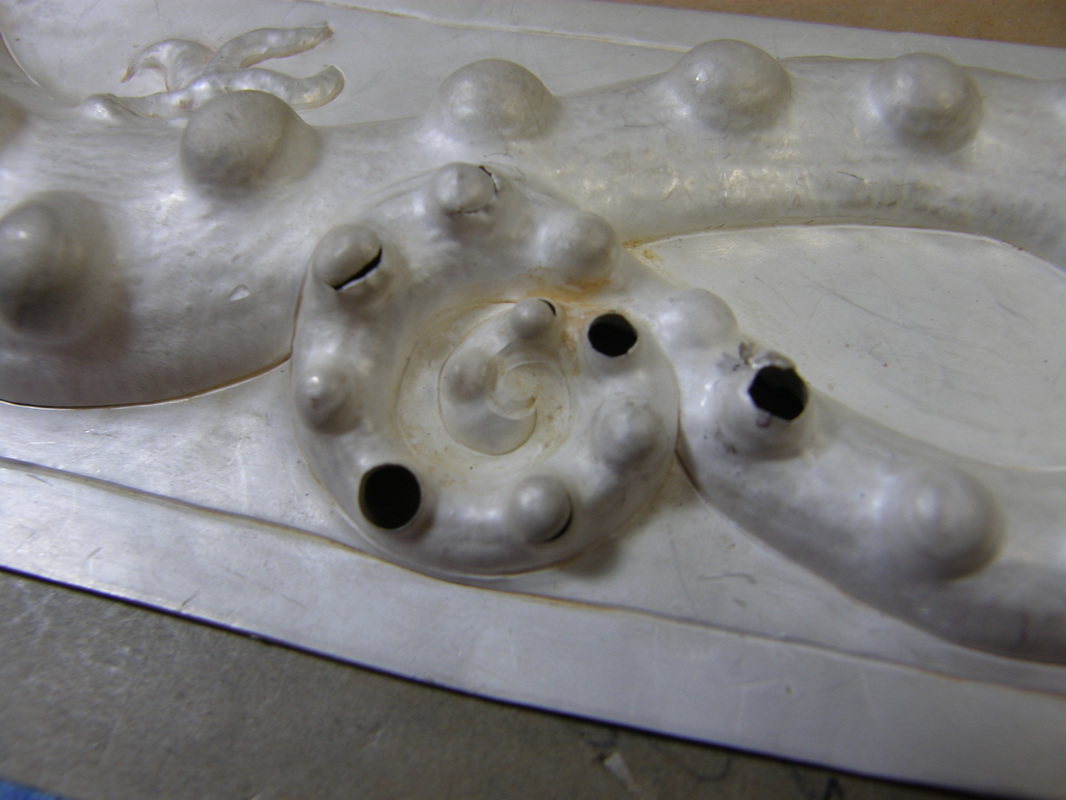
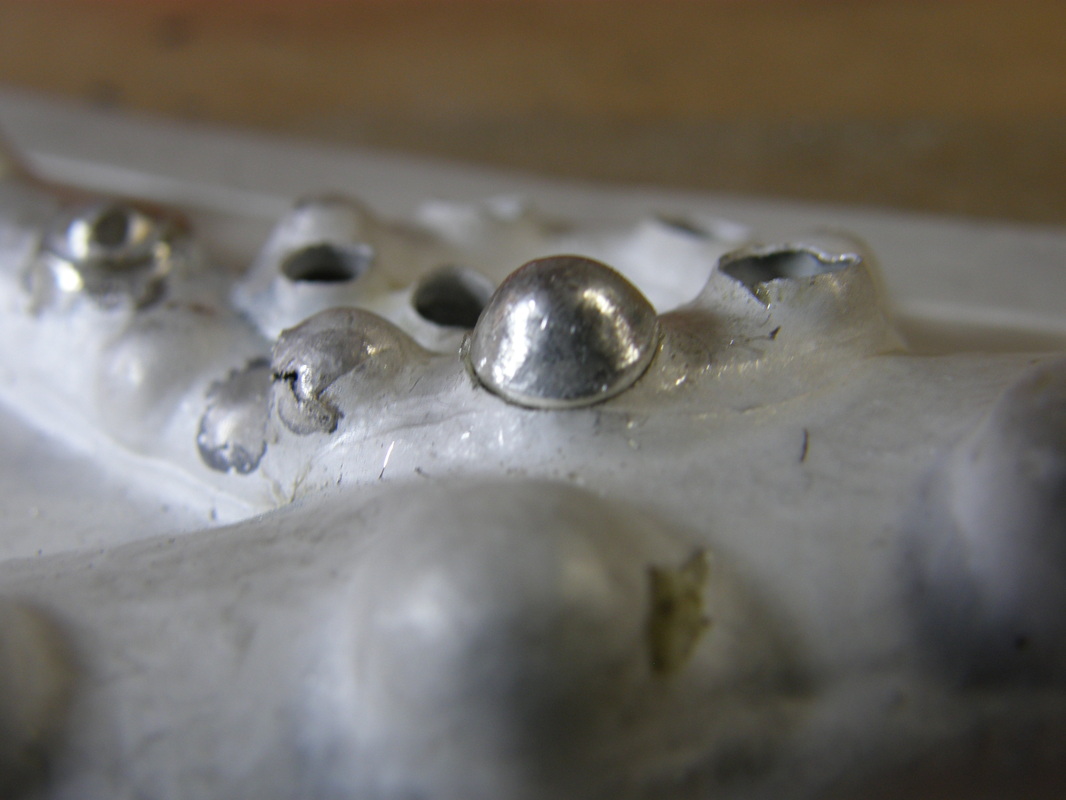
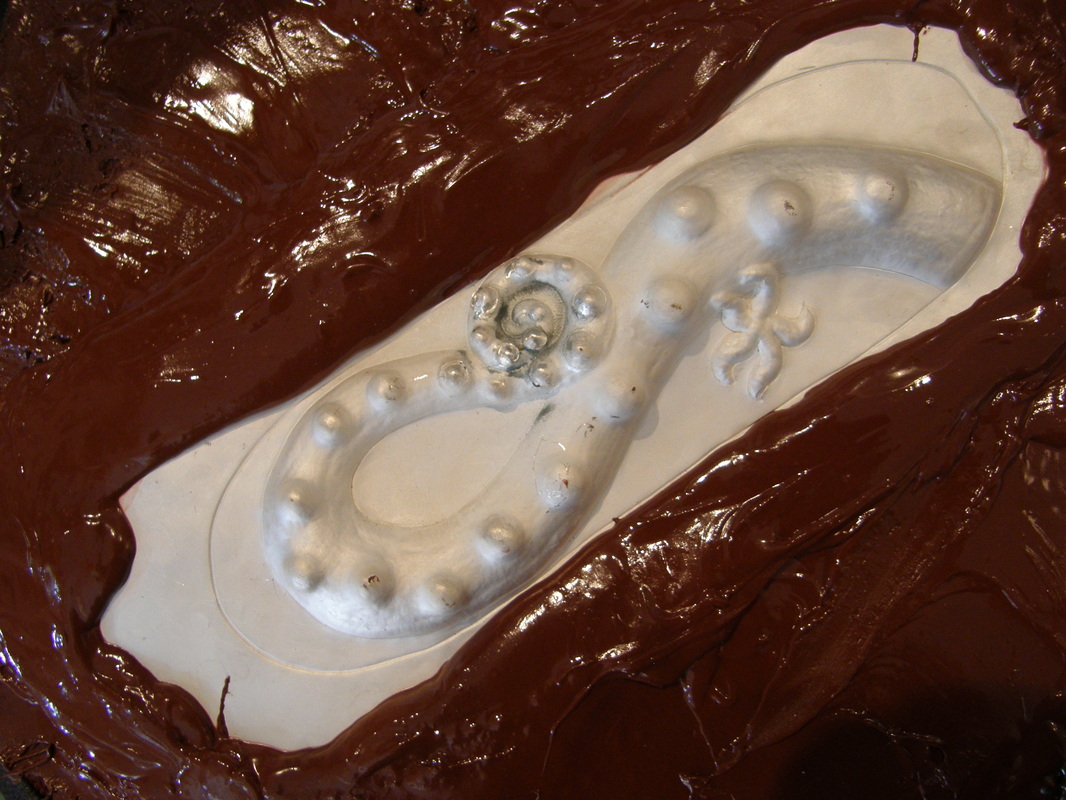
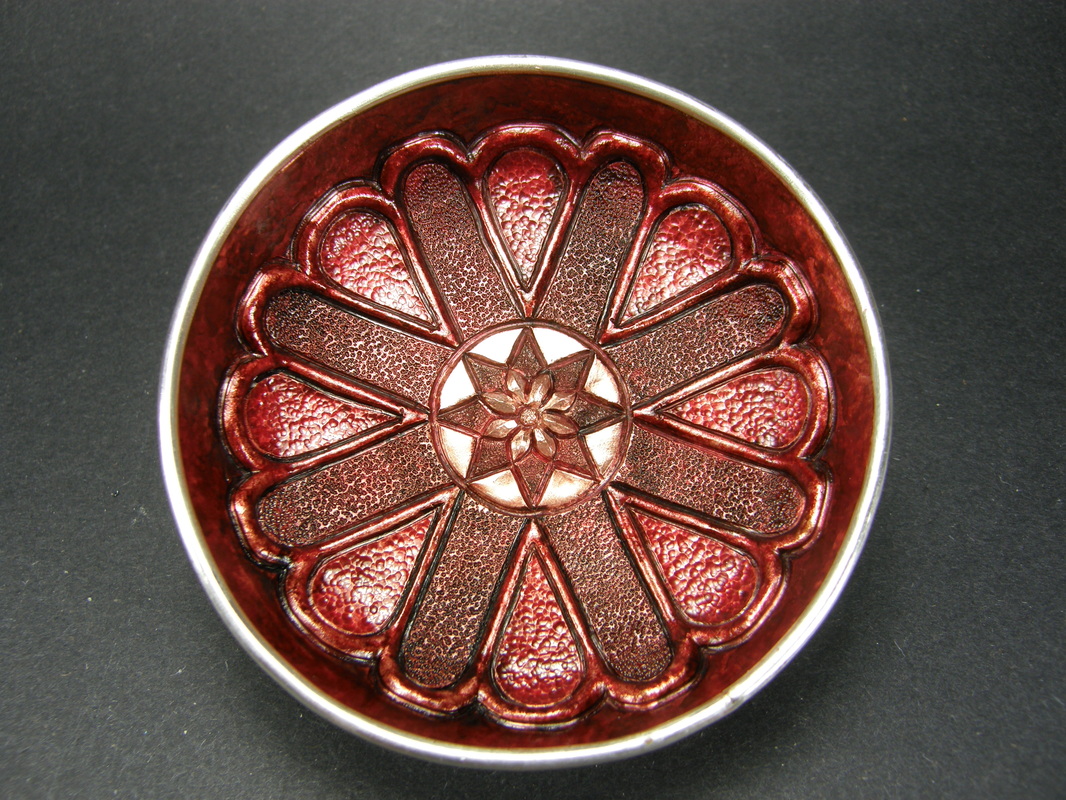
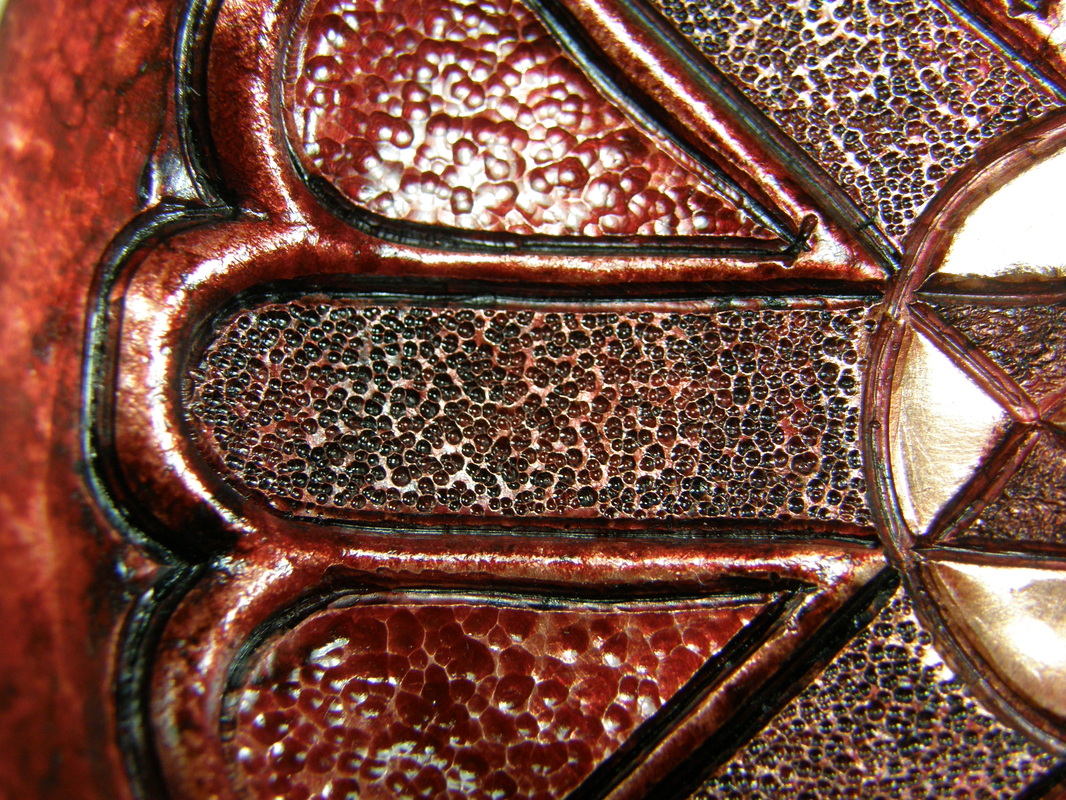
After soldering and cleaning it, I drew a line at the top as to where I would cut the lid from the bottom body. I also cut the top and bottom plates. After I soldered the bottom plate and the bottom was in the pickle, I took the top piece; annealed it and used the hydraulic press to form a design.  The design, having lots of little details required me to anneal the brass three times and to use lots of little pressure pieces to push it all out.    

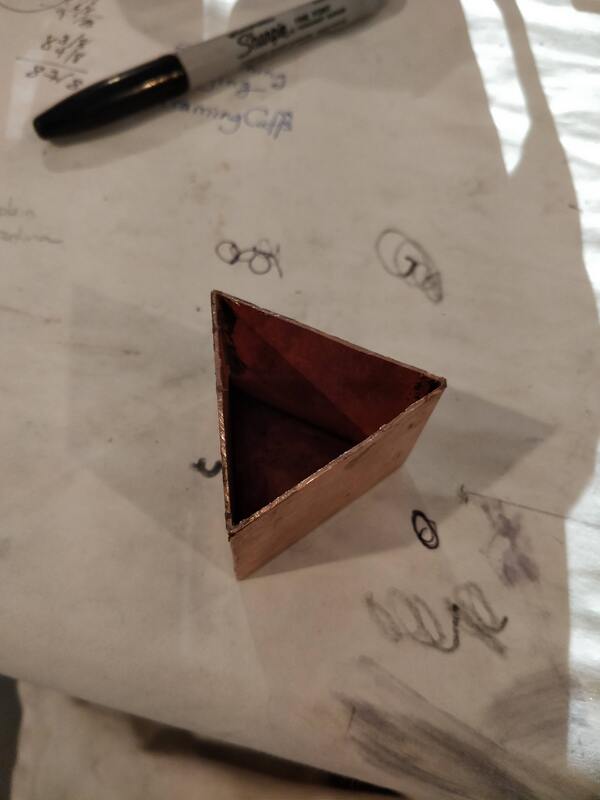
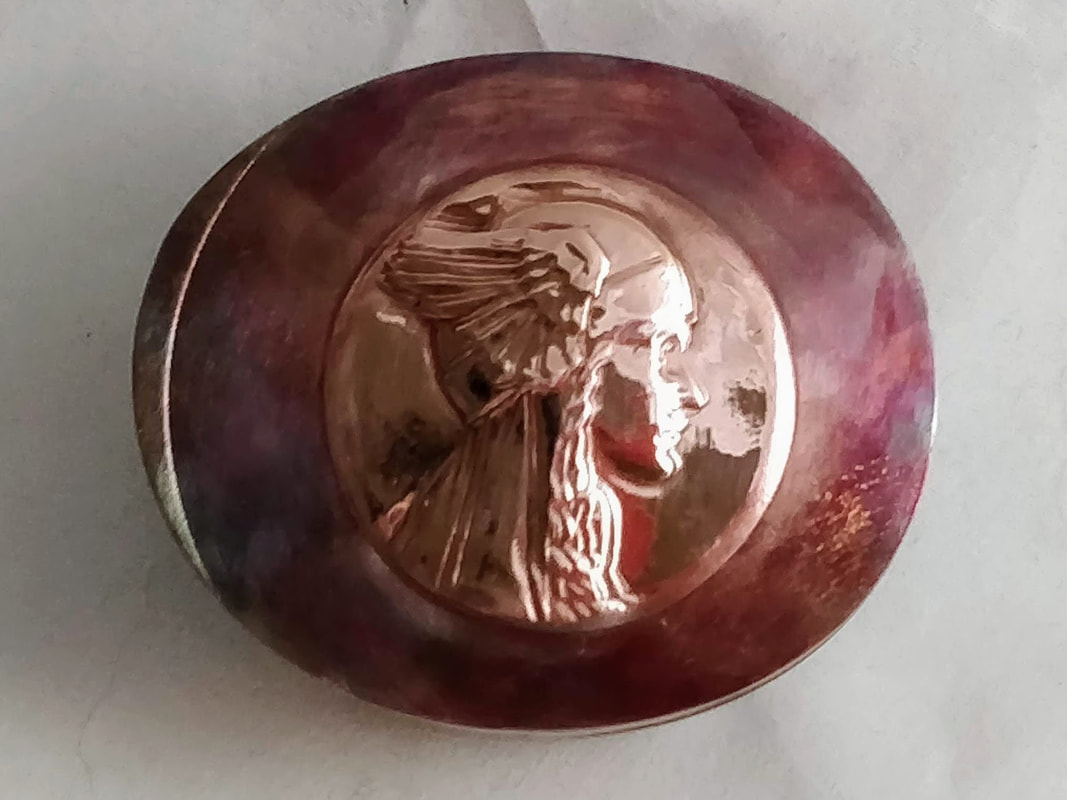
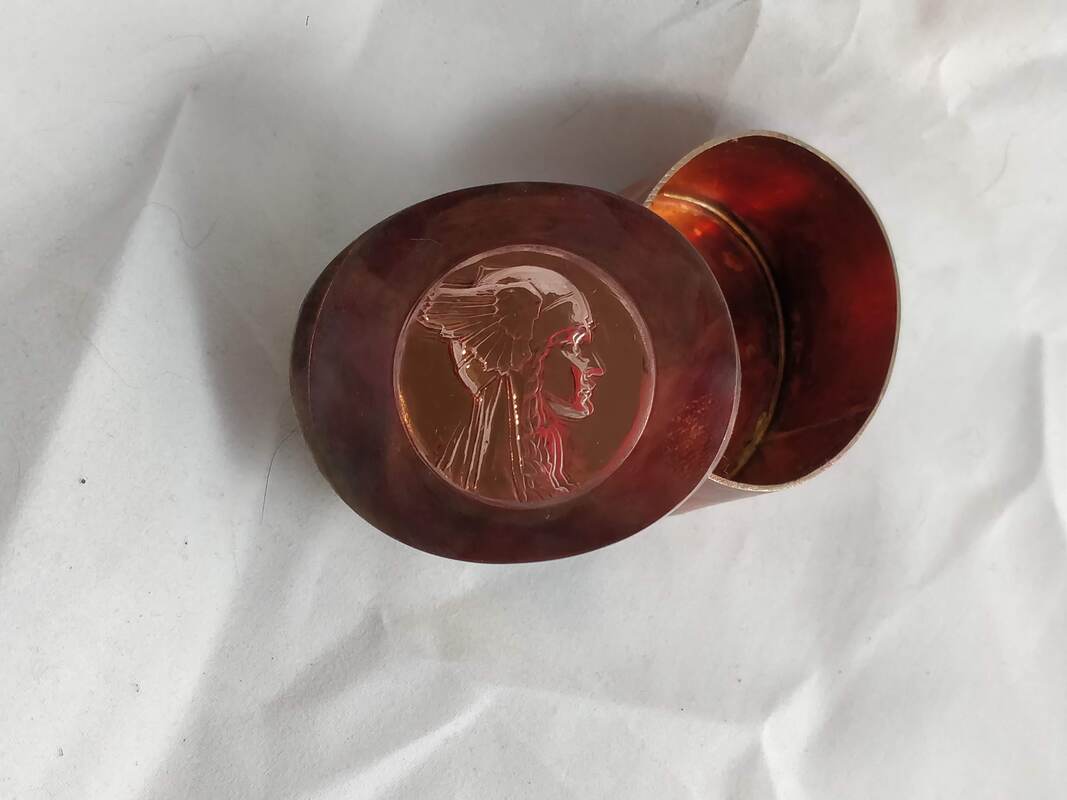
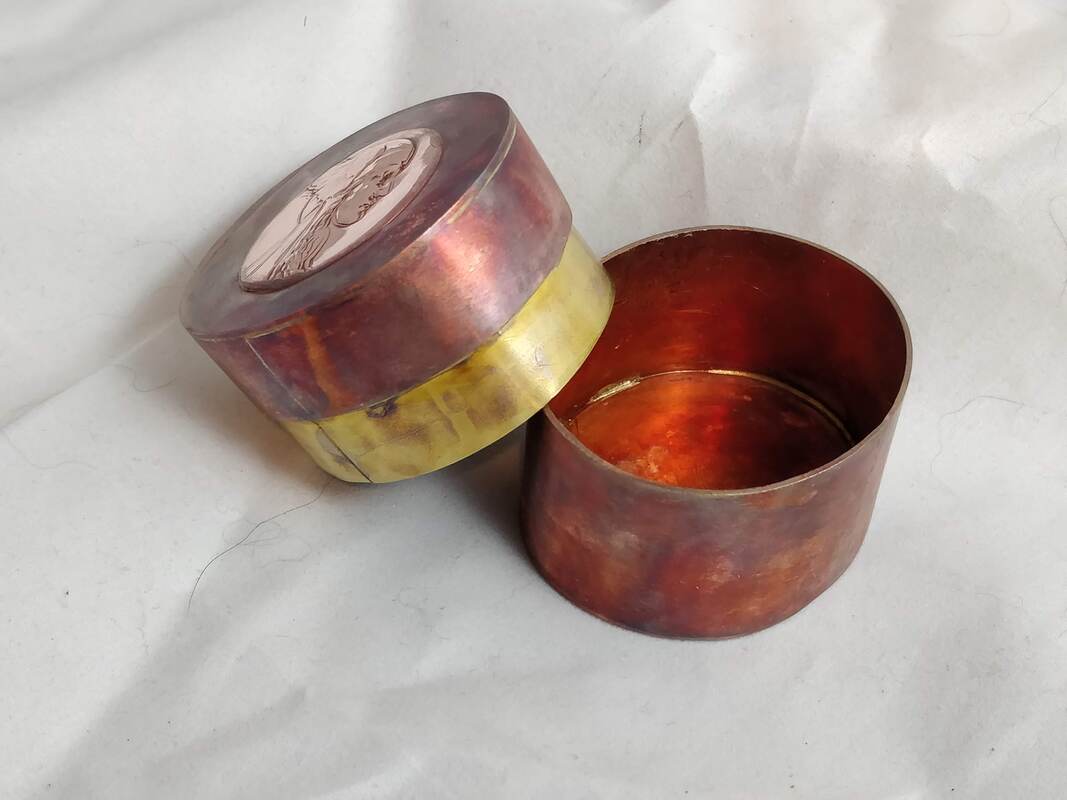
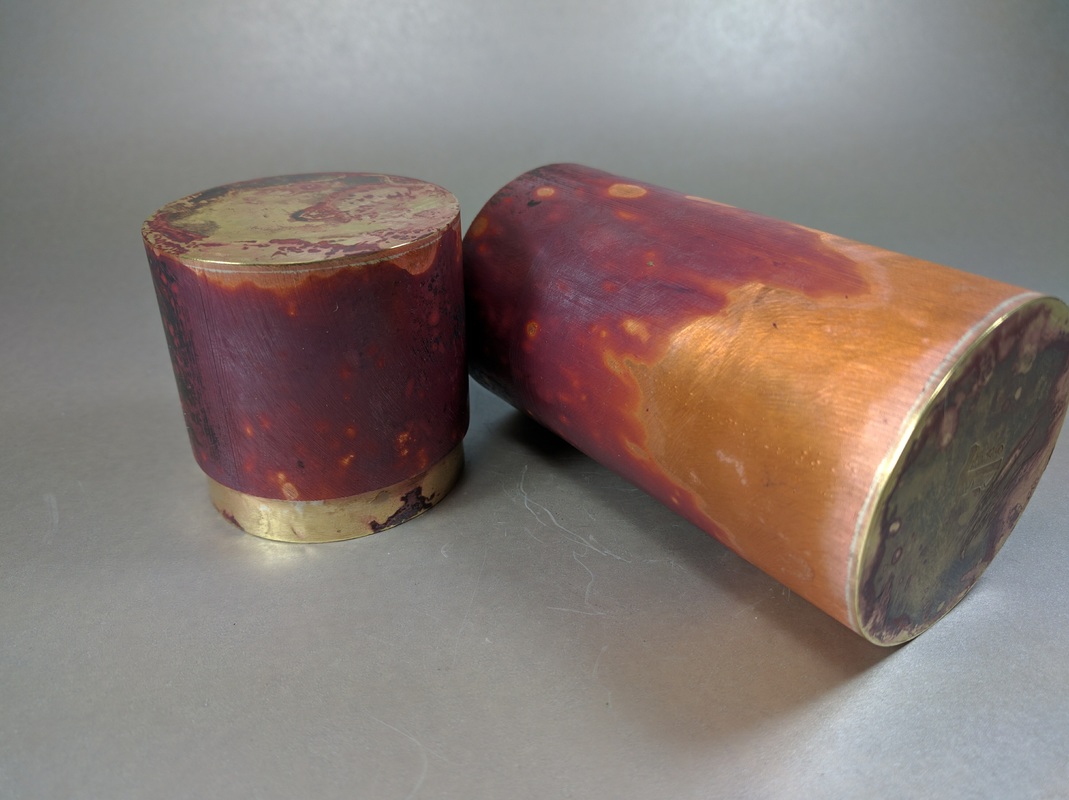
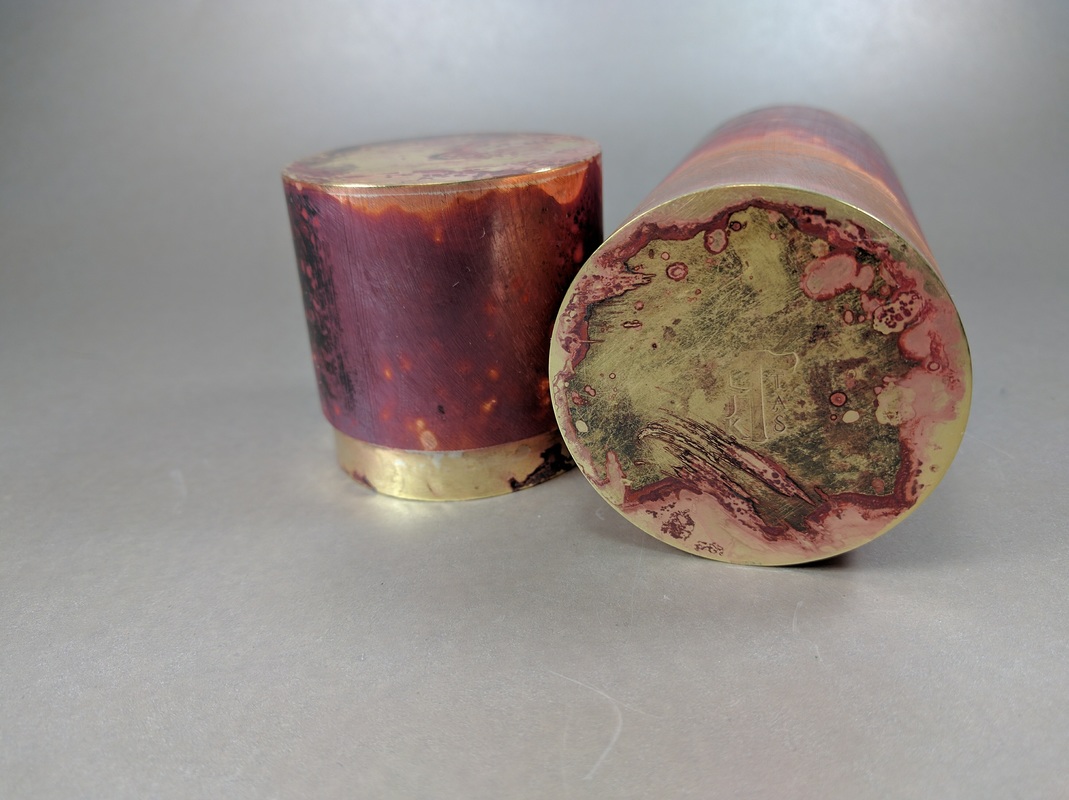
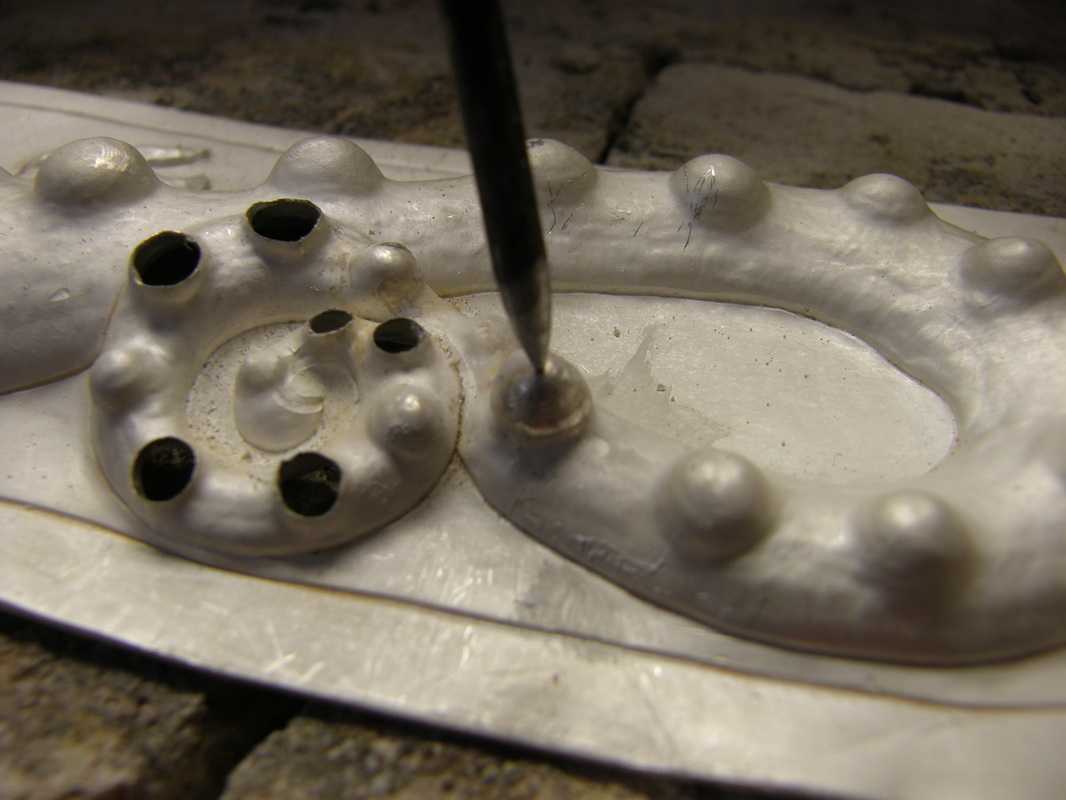
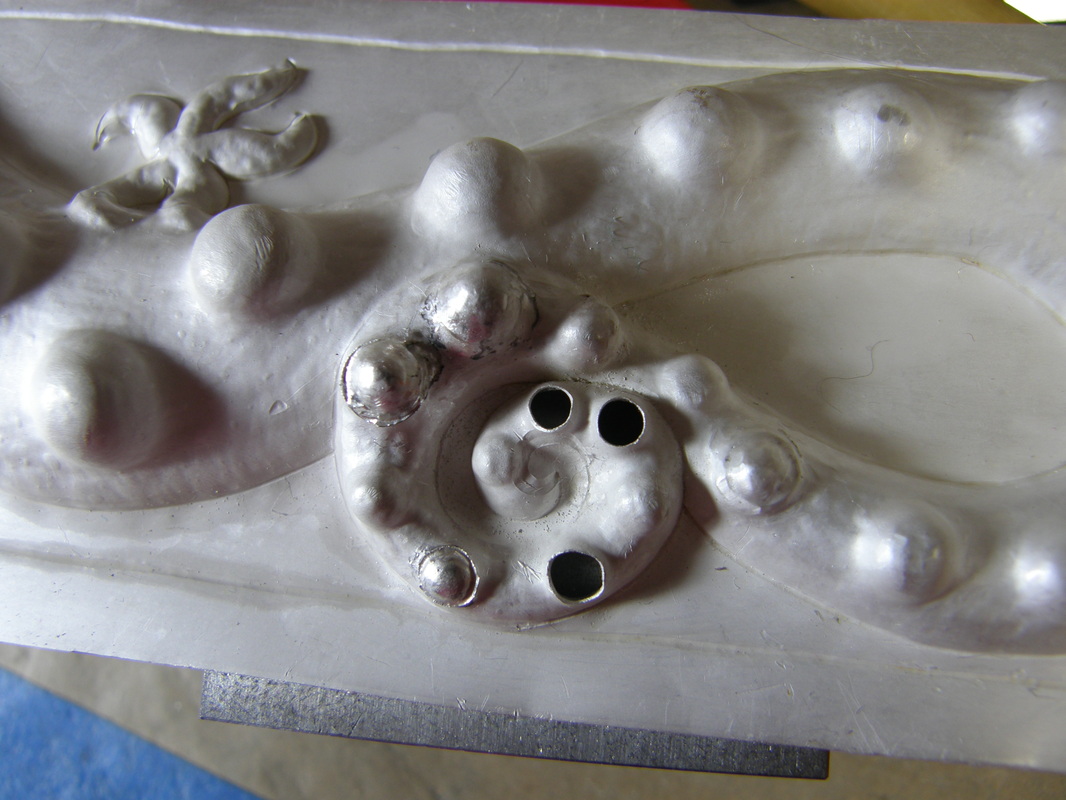
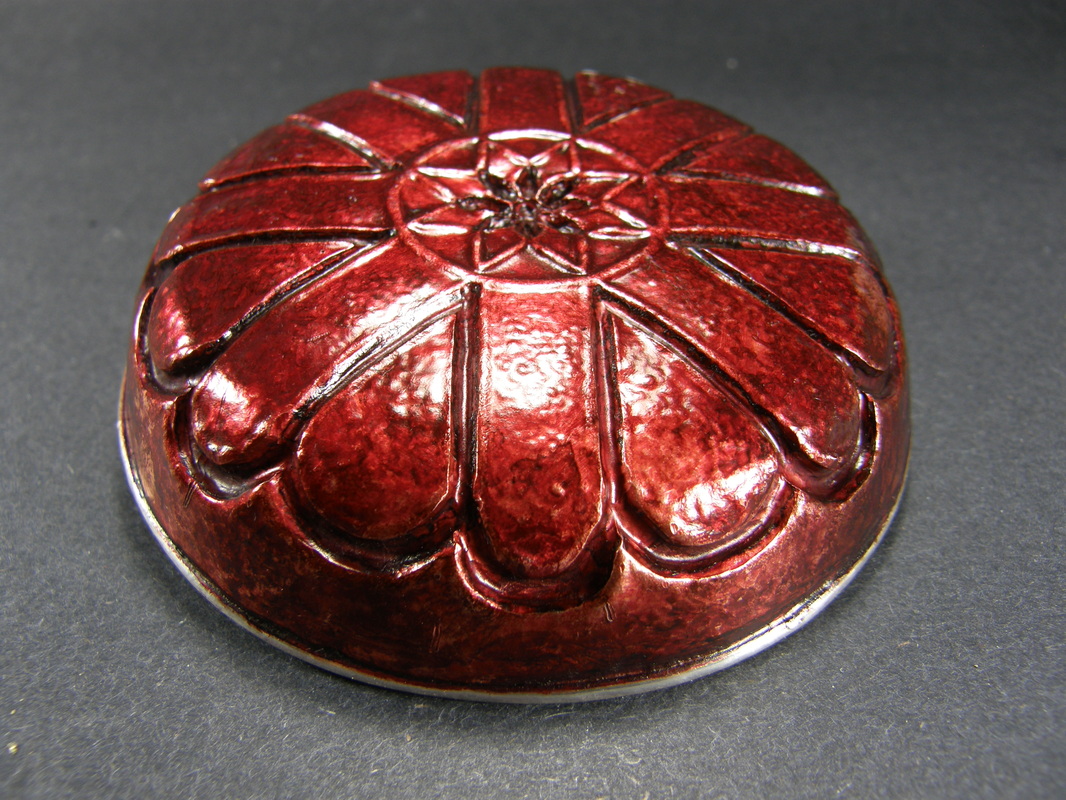
Using a cut off wheel I cut the lid from the bottom and soldered the top, with the design, on.  It was now time to file and mate the two parts; fit the bezel and polish it. 

Of course, along the way I had a few unintentional learning experiences (documented below) which I am a bit disappointed with but now I can see that doing something this big is not easy... It may not be perfect but I did make a box with FOUR corners and lots of soldering, filing, sanding, measuring.  The next one will be sooo much better. 

For the next part of the box project, I will continue to make a box but this one will have a hinge which will require me to make many samples of hinges before I add one to a box. That starts next weekend!! 

Picture
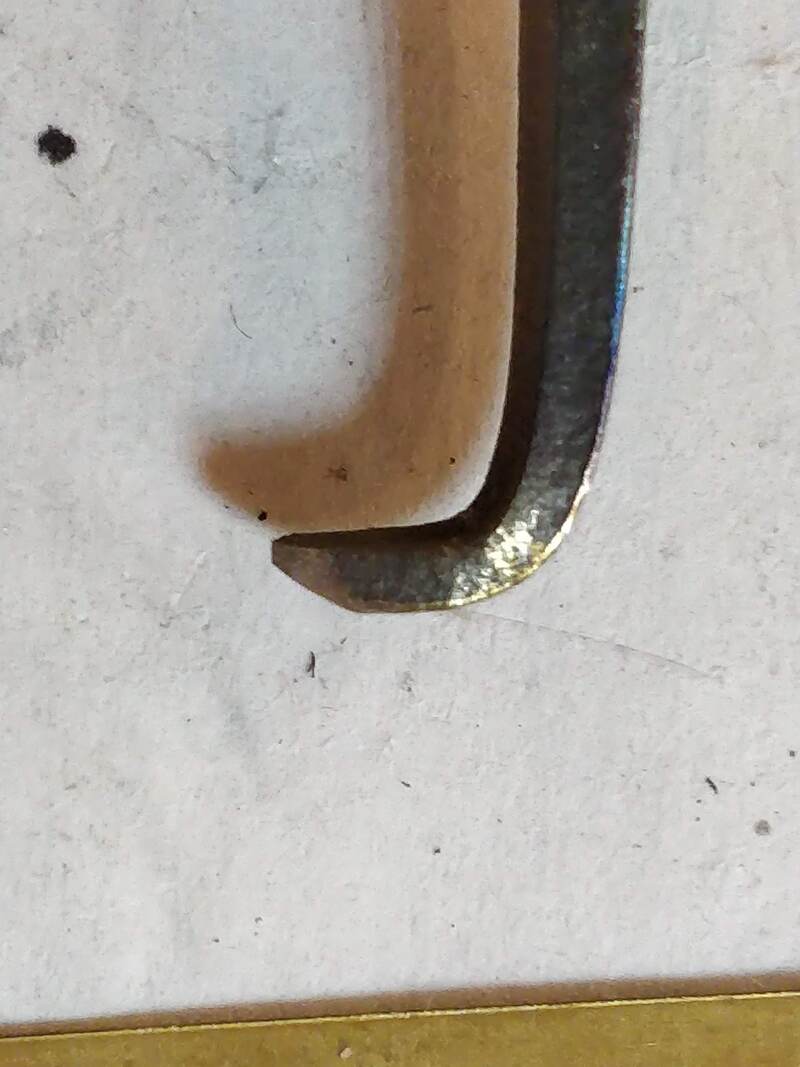
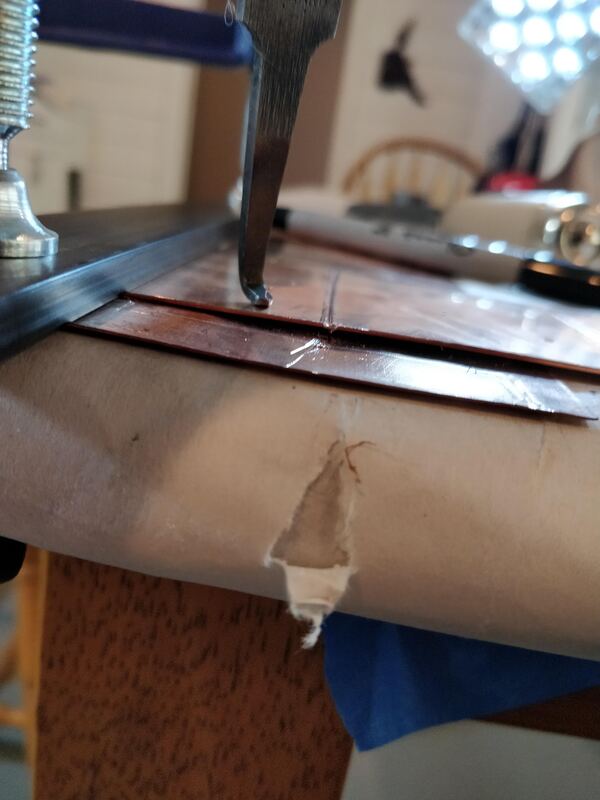
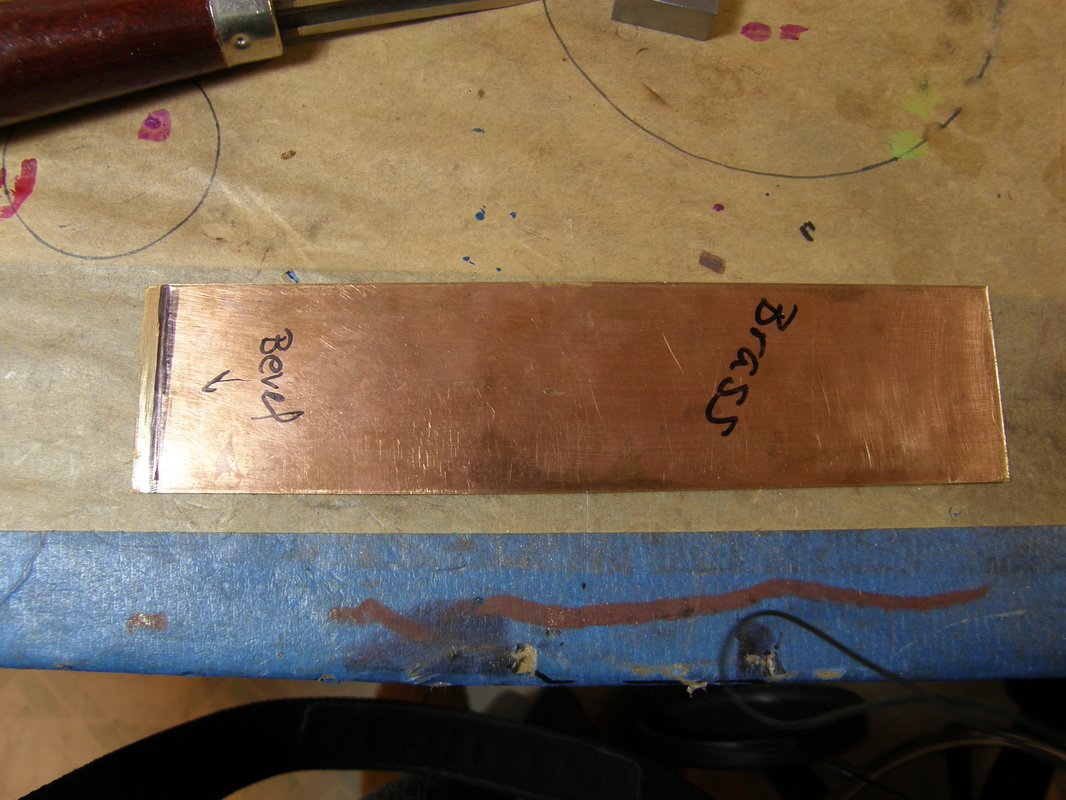
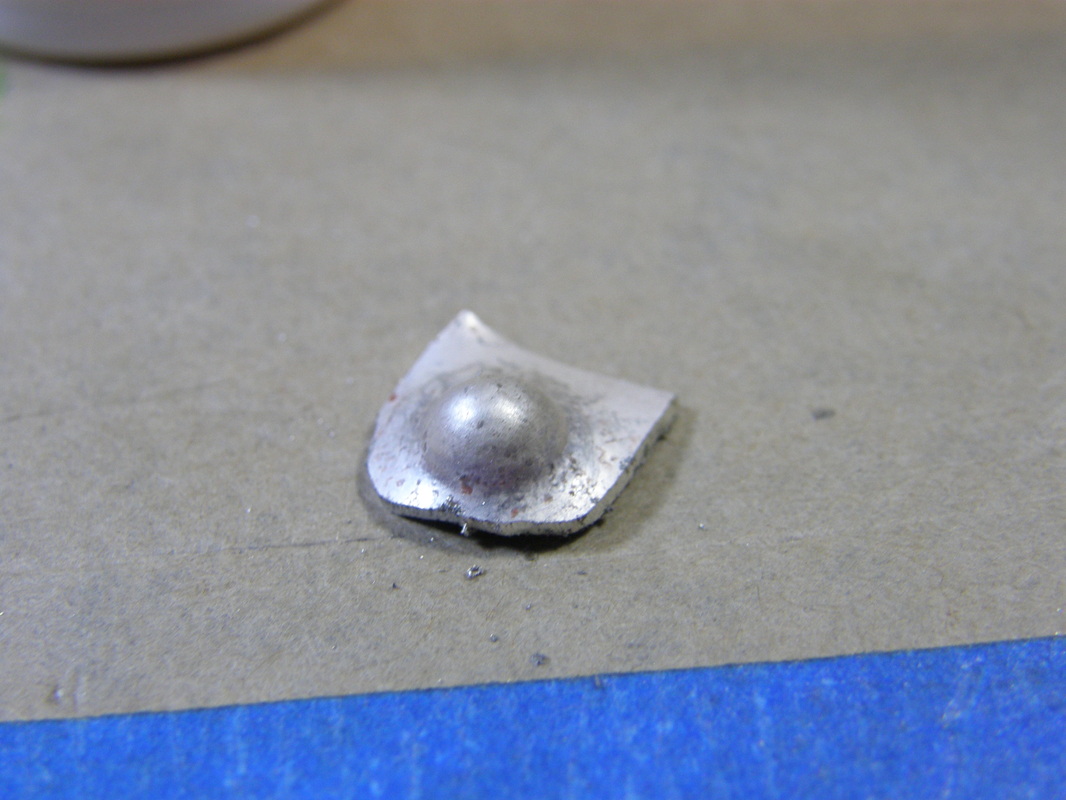
Big Learning Experience Number 1: 
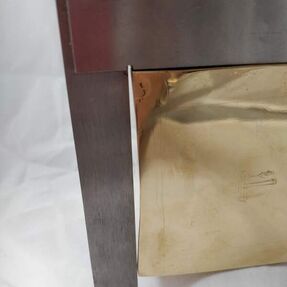
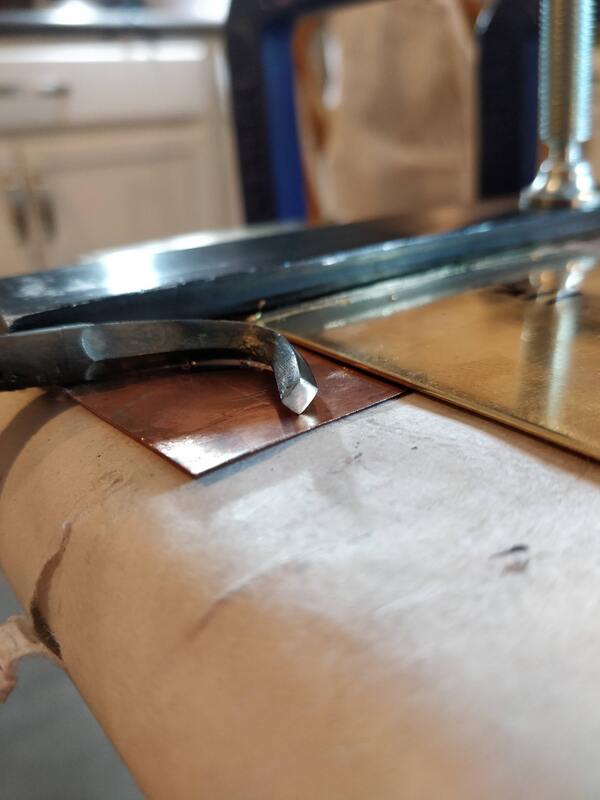
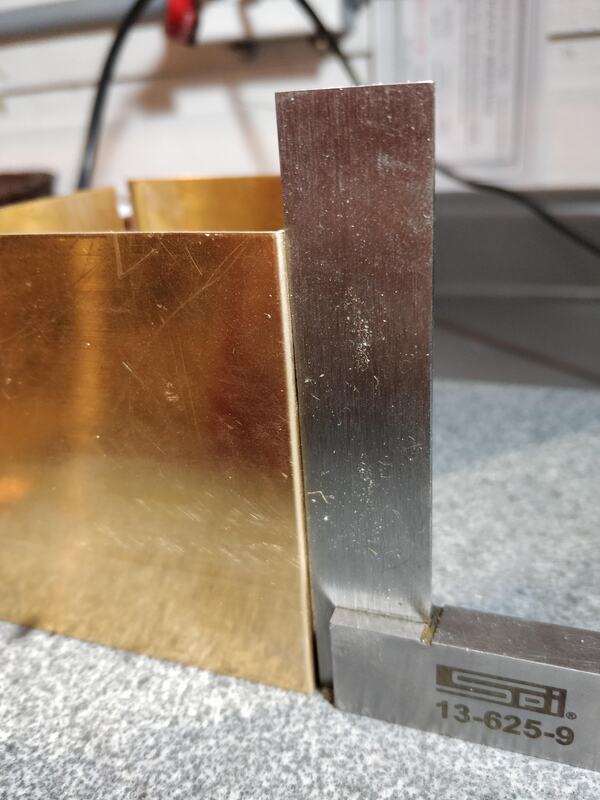
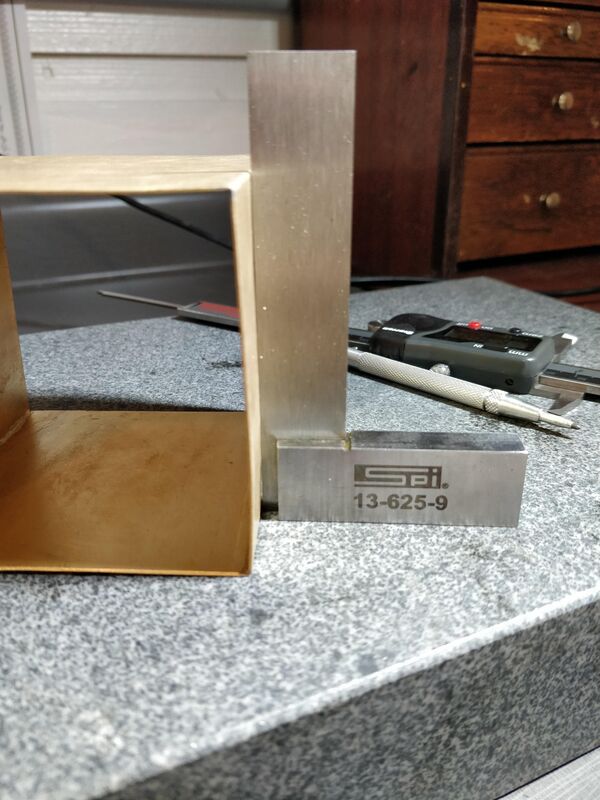
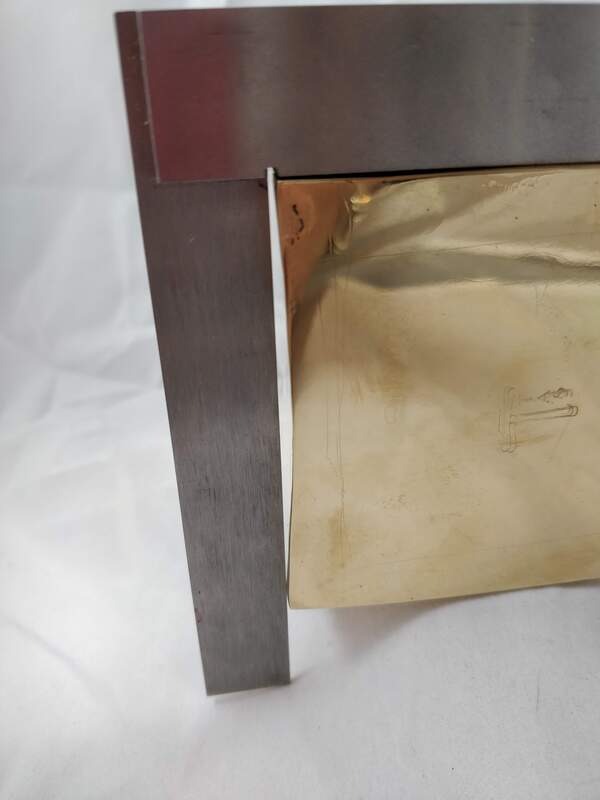
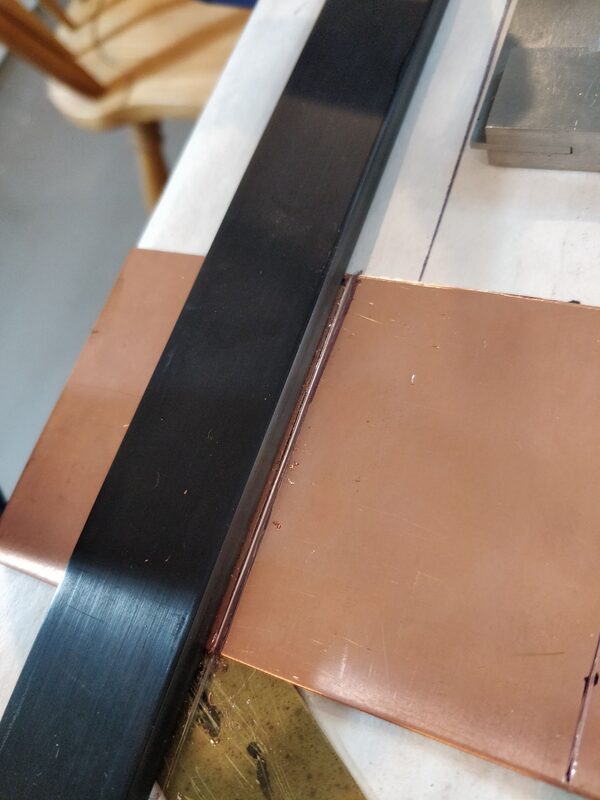
That is a machinist square so that is a true 90 degrees.
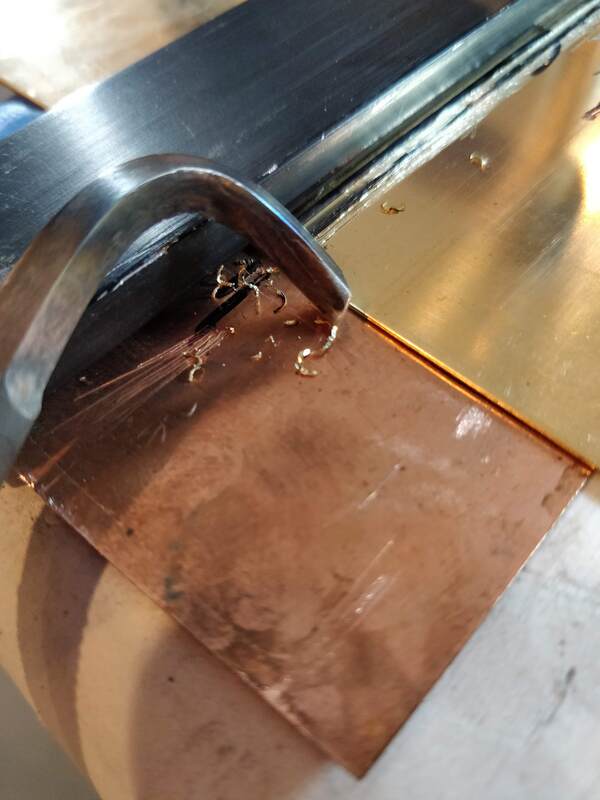
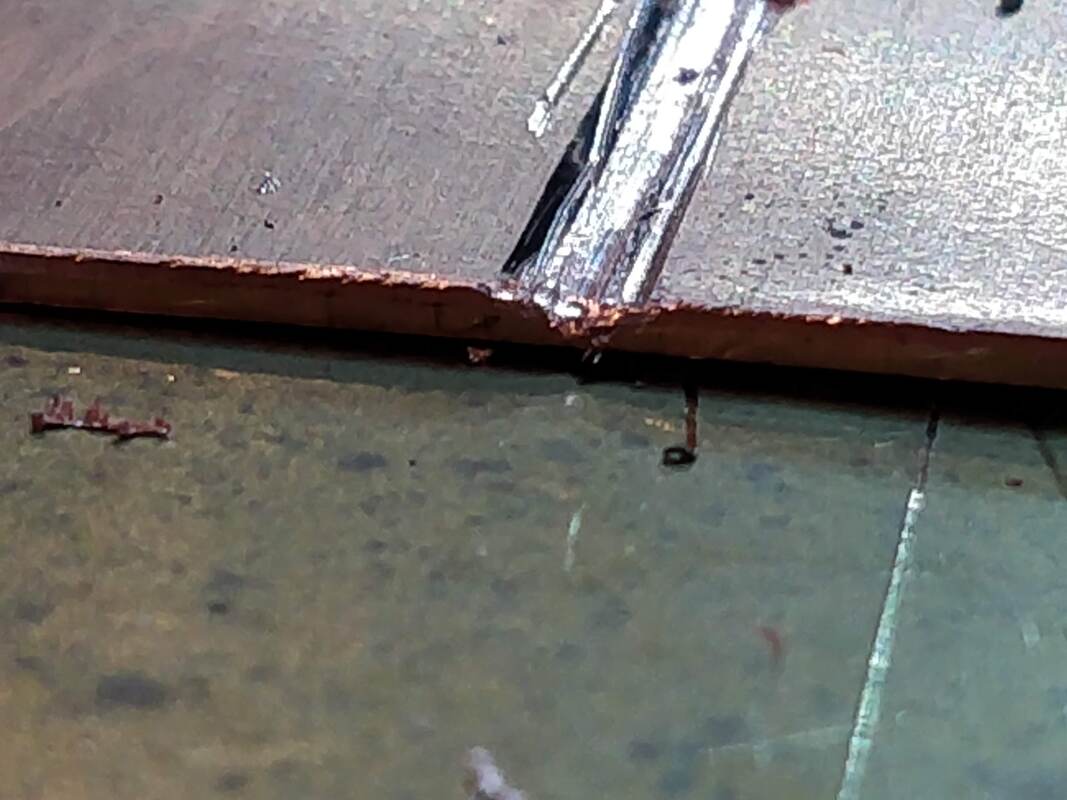
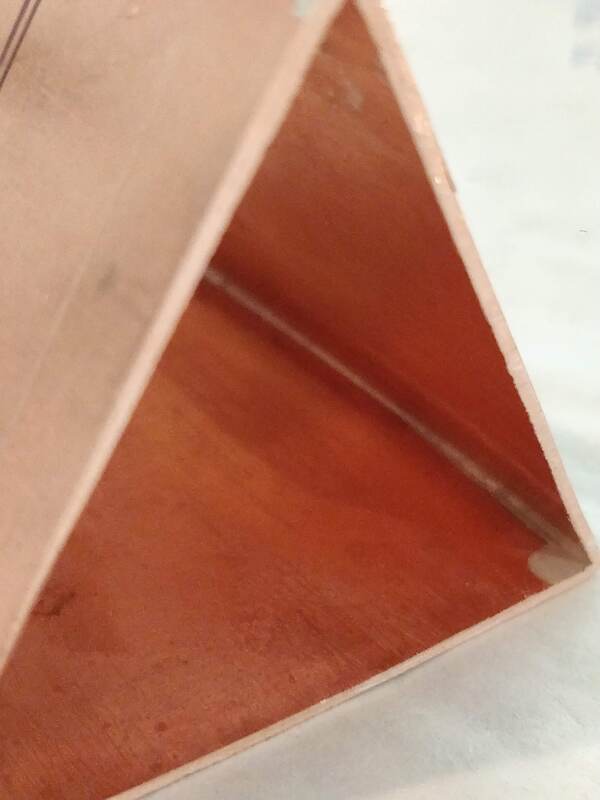
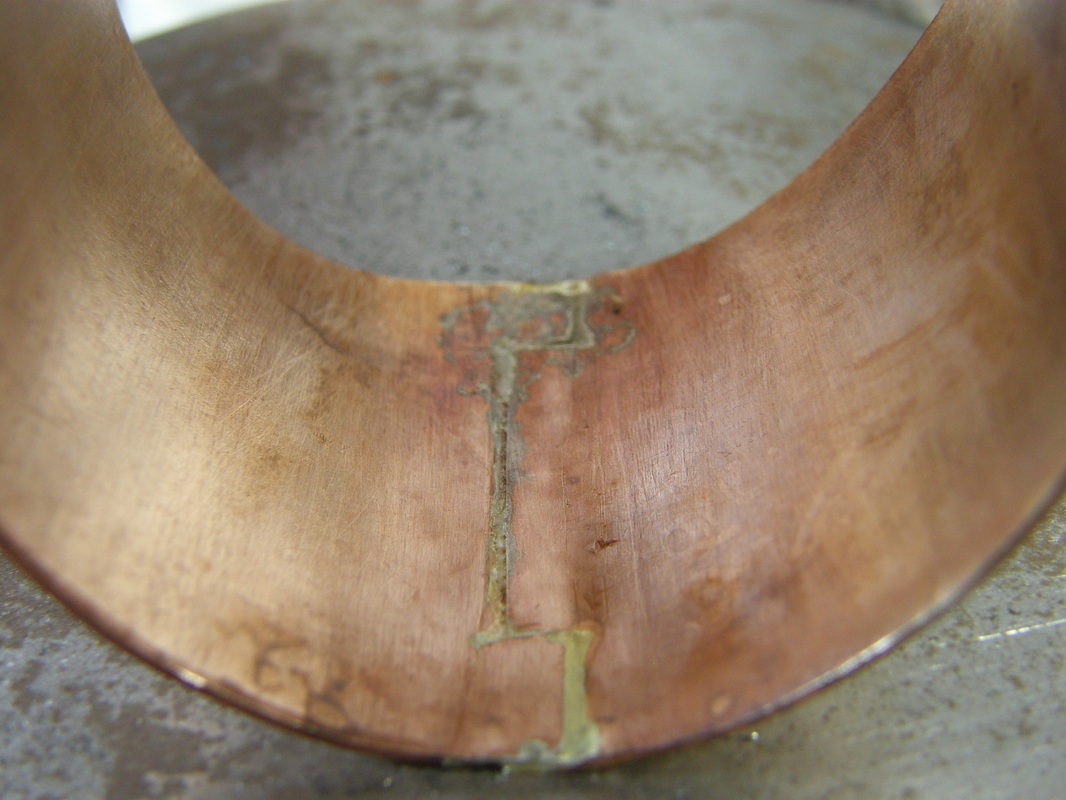
I have a side wall that is bowed inwards, this happened while soldering the base on and I didn't see it until I cut the lid off! And my walls were square when I was done soldering the joints because I did this with the square, hanging off the side to check. 

The silversmithing books warn of walls warping either when quenching or while soldering. The book makes mention of getting it up to temperature and clamping it and letting it air cool but since it was soldered I don't know what could have been done except to start over. 


Picture
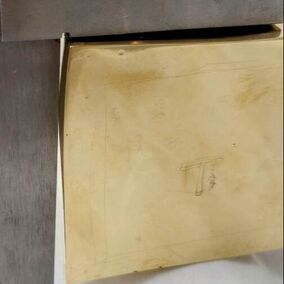
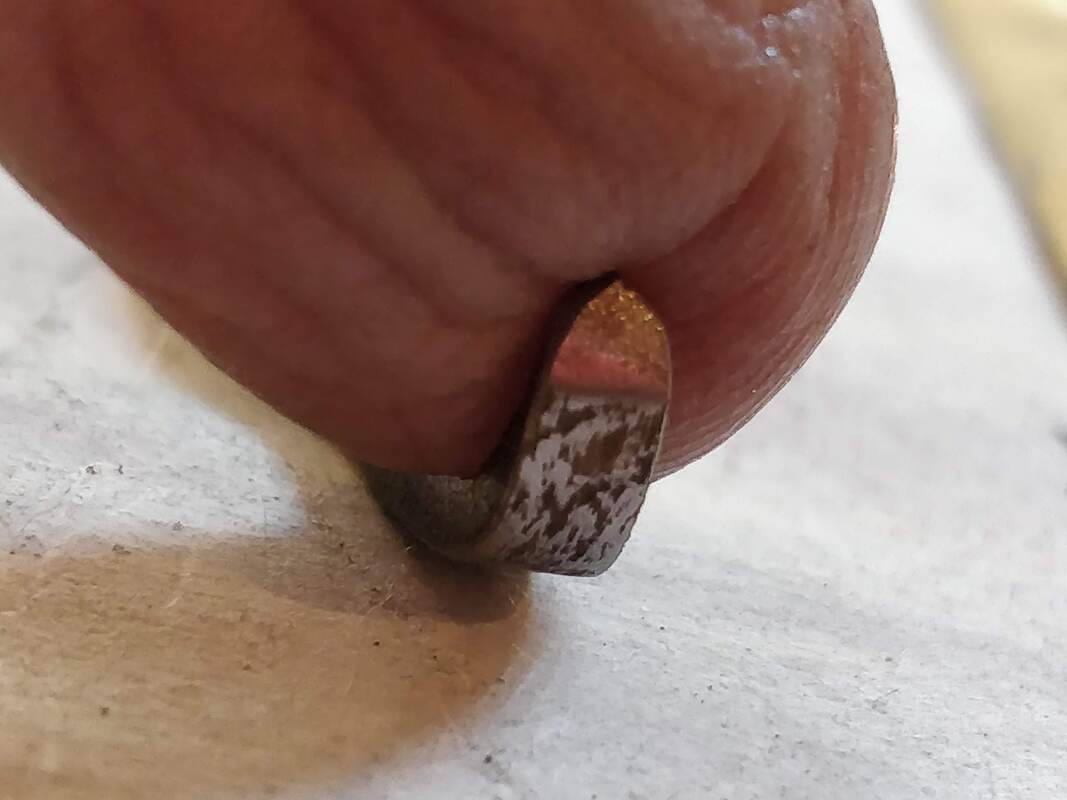
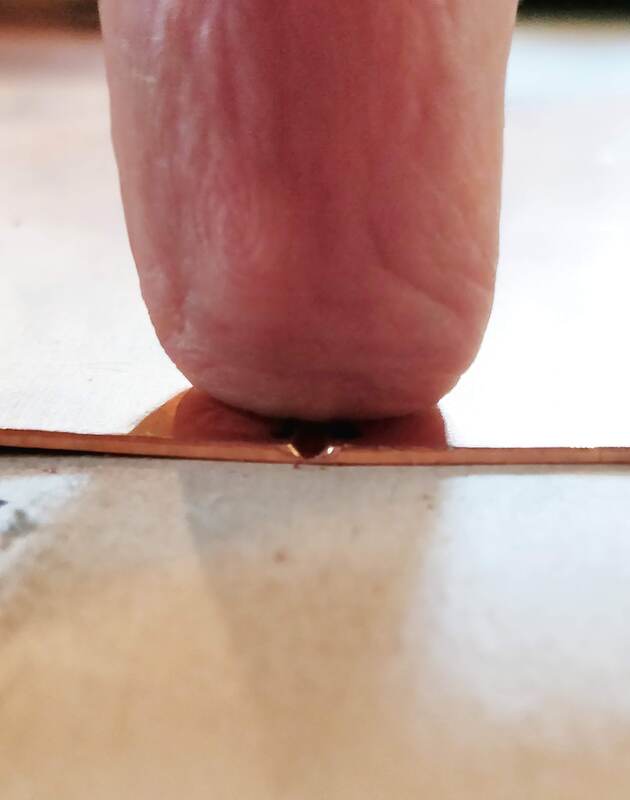
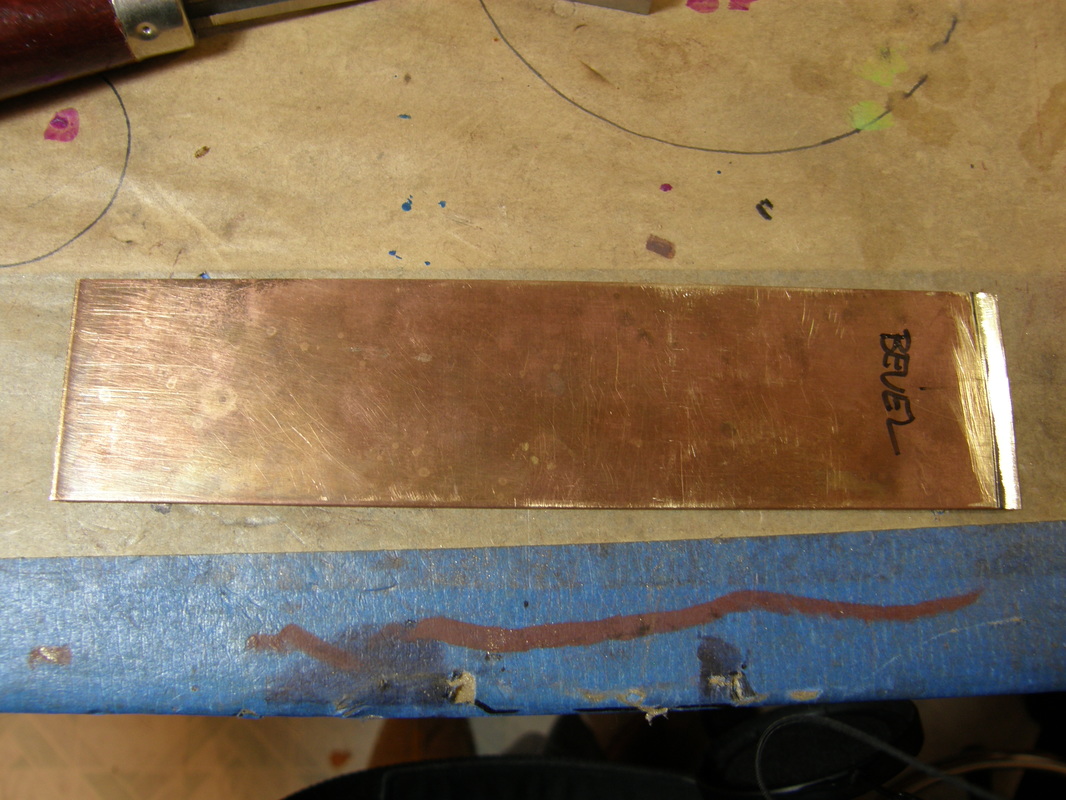
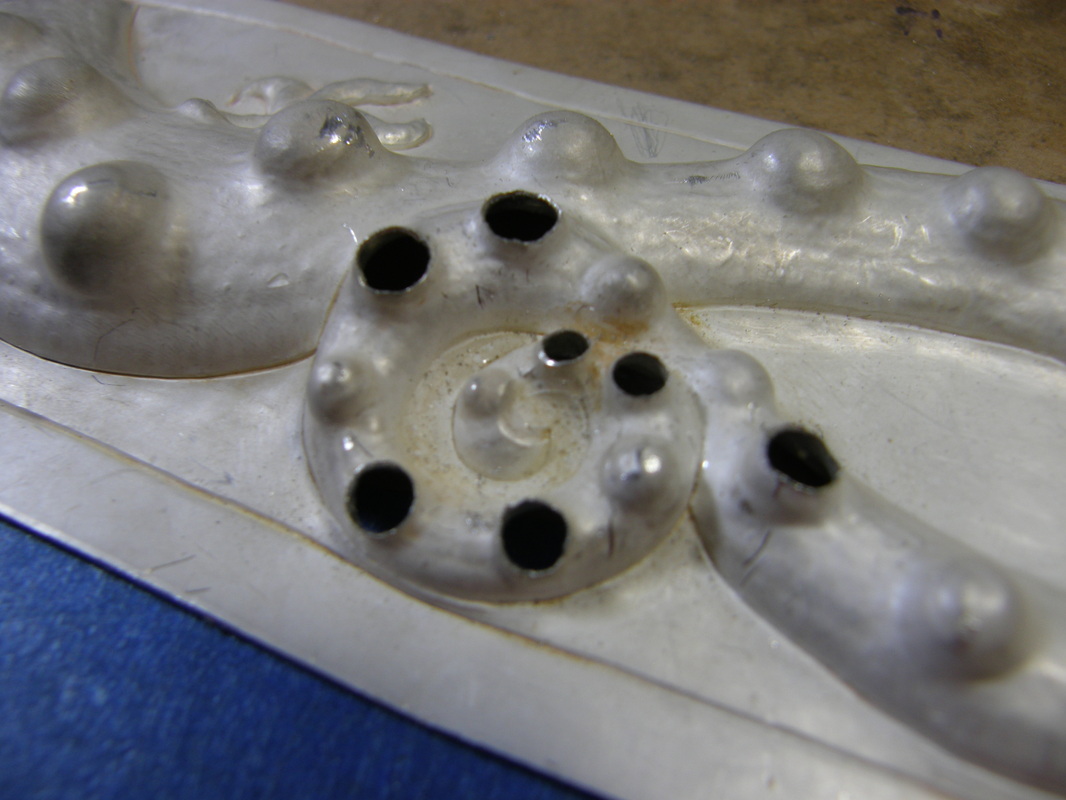
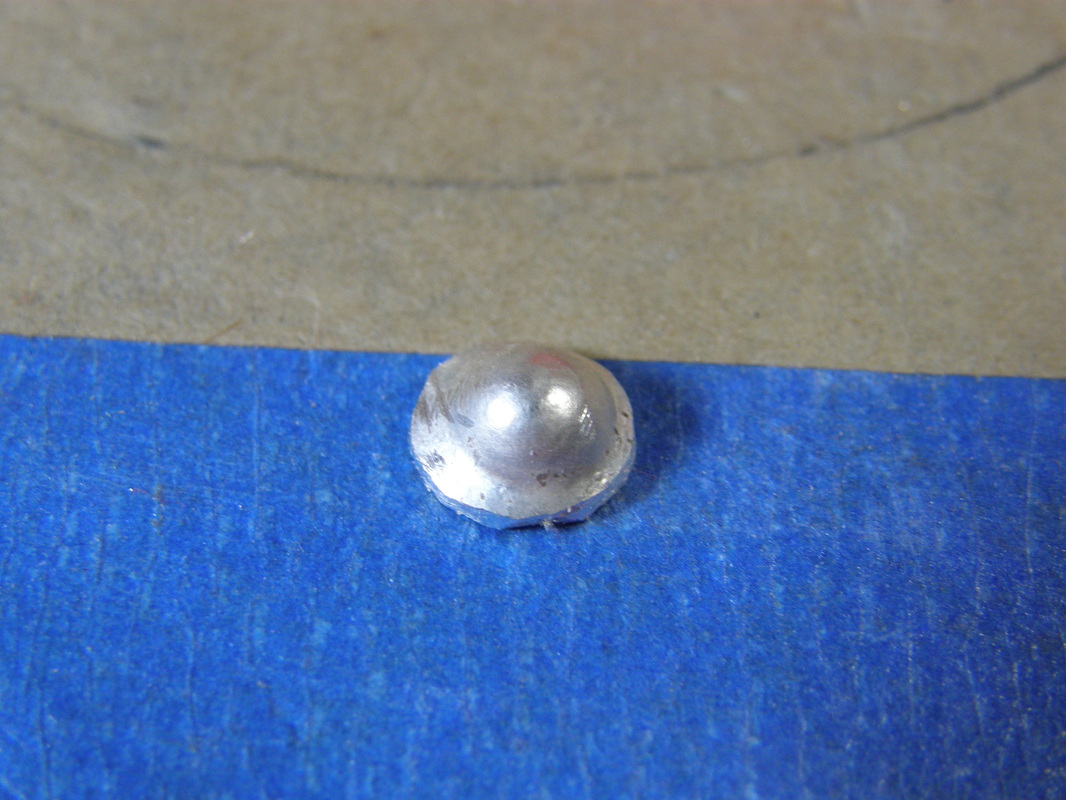
Big Learning Experience Number 2: 
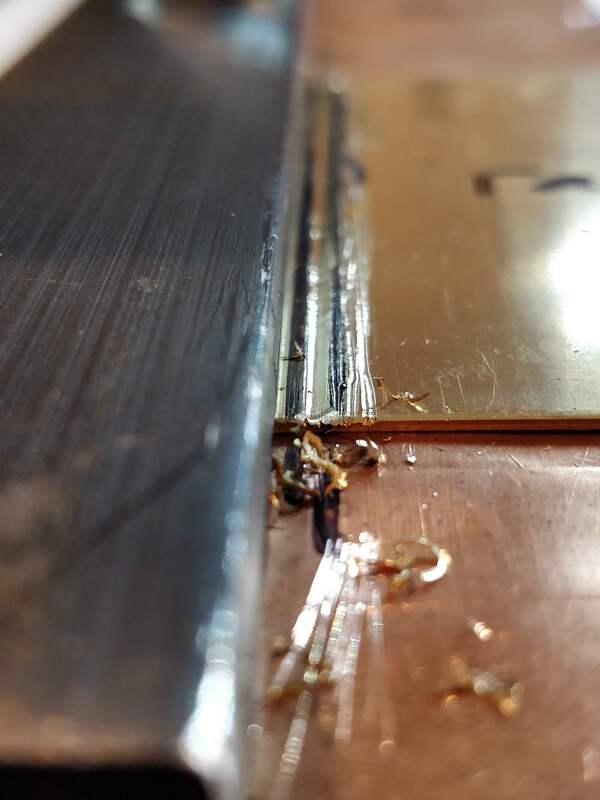
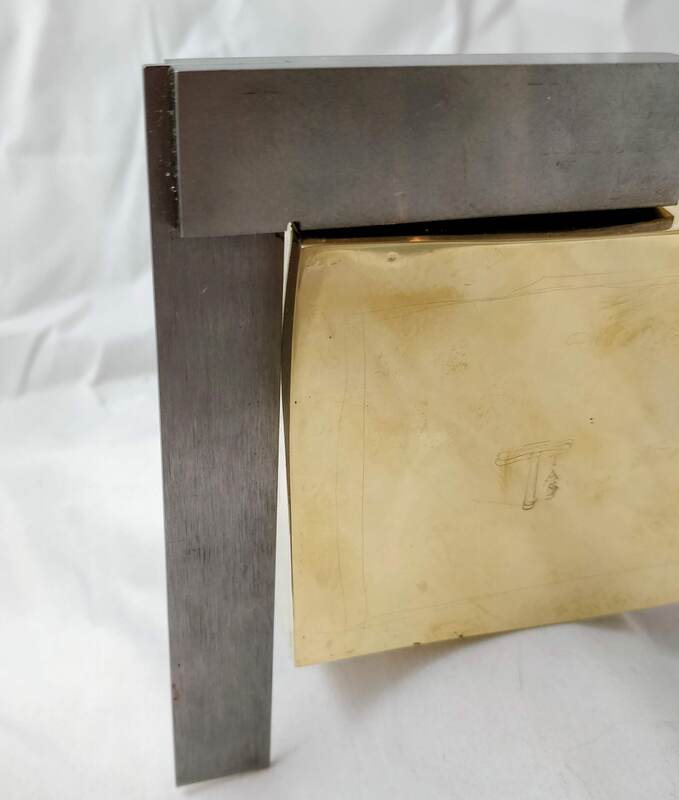
There is another warp along one of the other sides but it one bows outward.

Picture
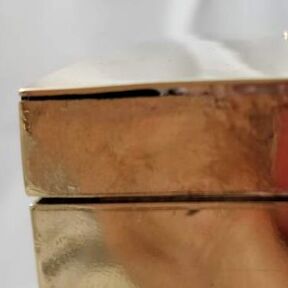
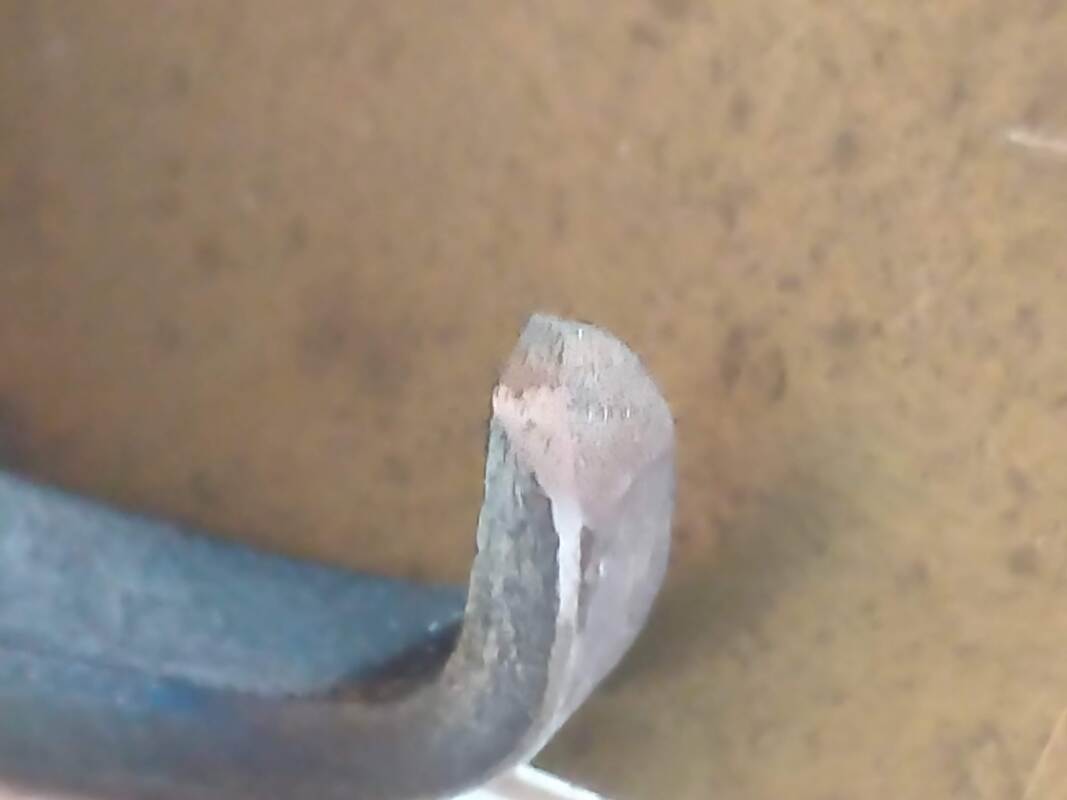
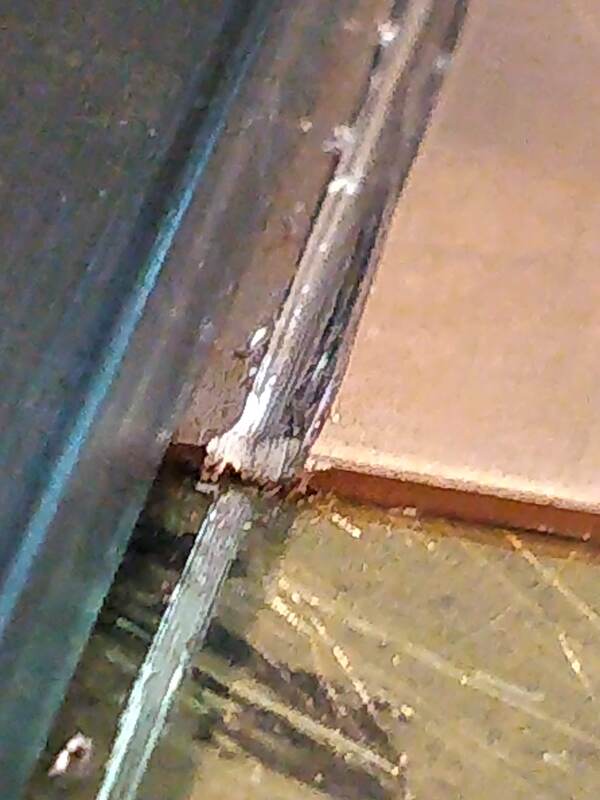
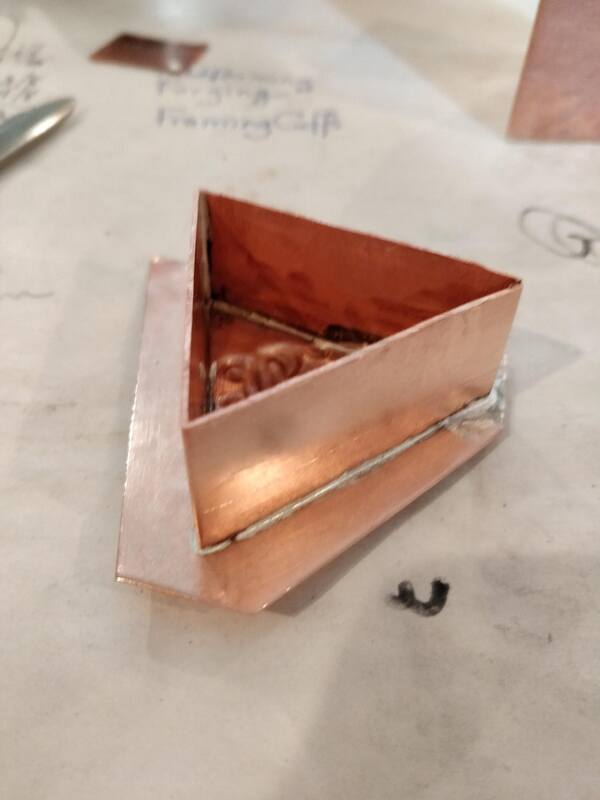
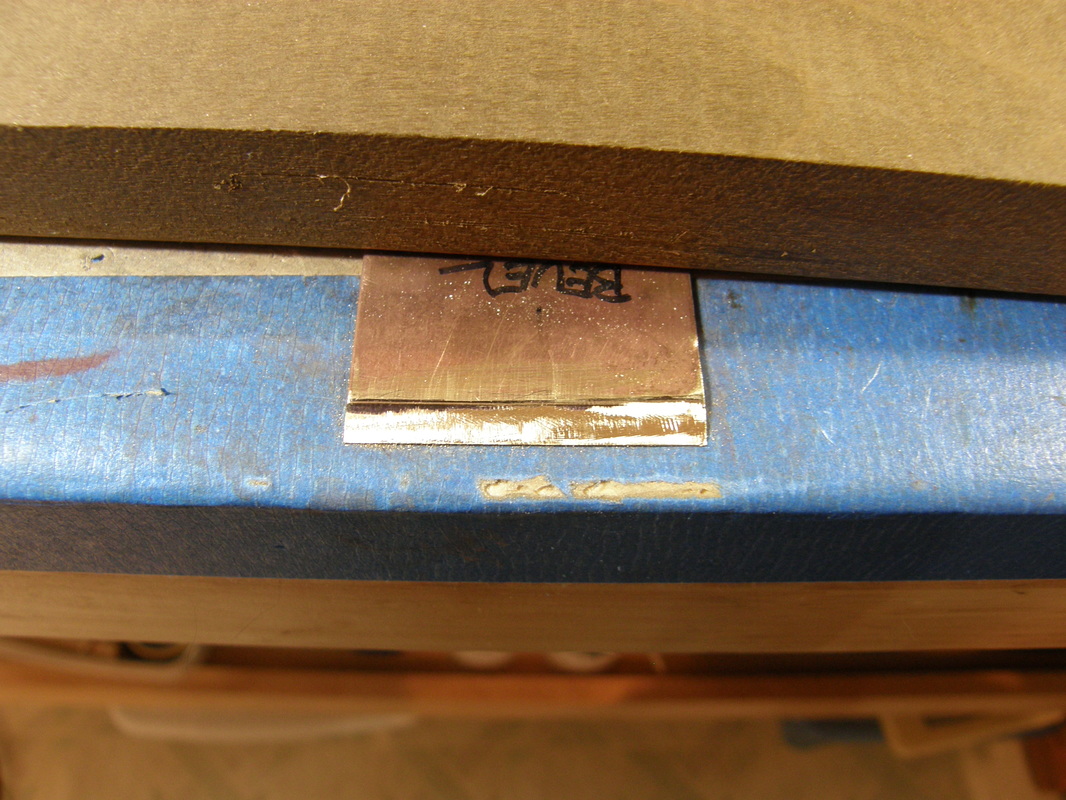
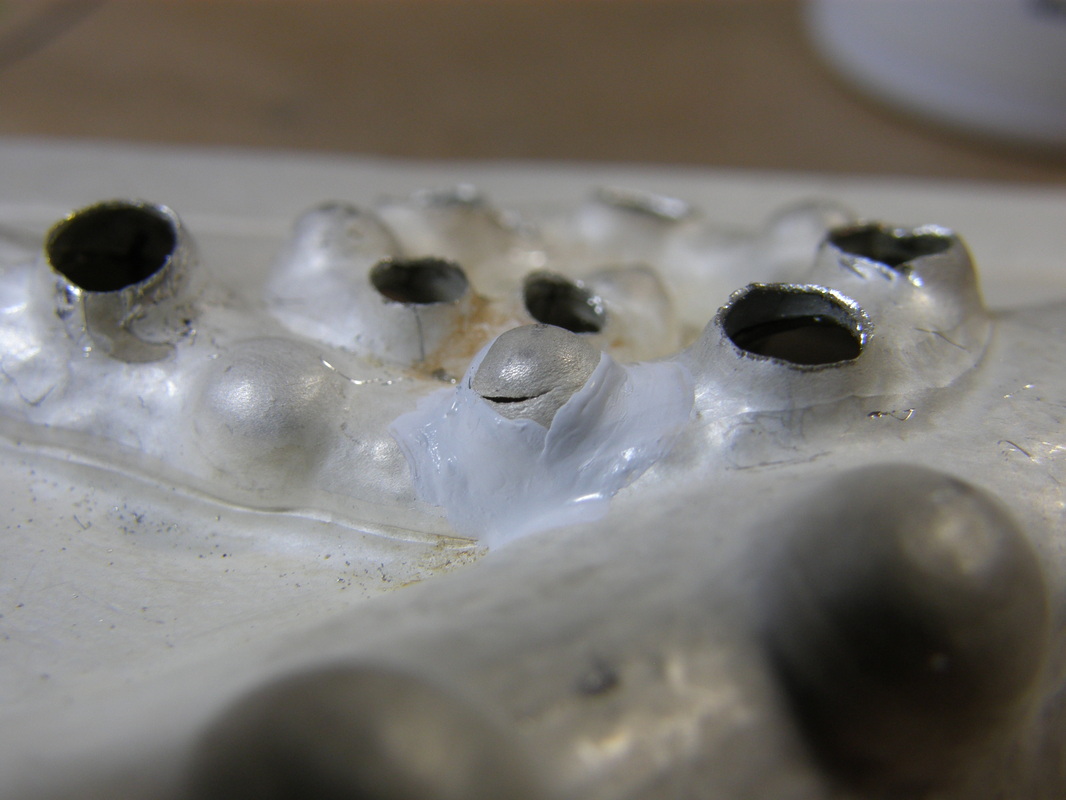
Big Learning Experience Number 3:
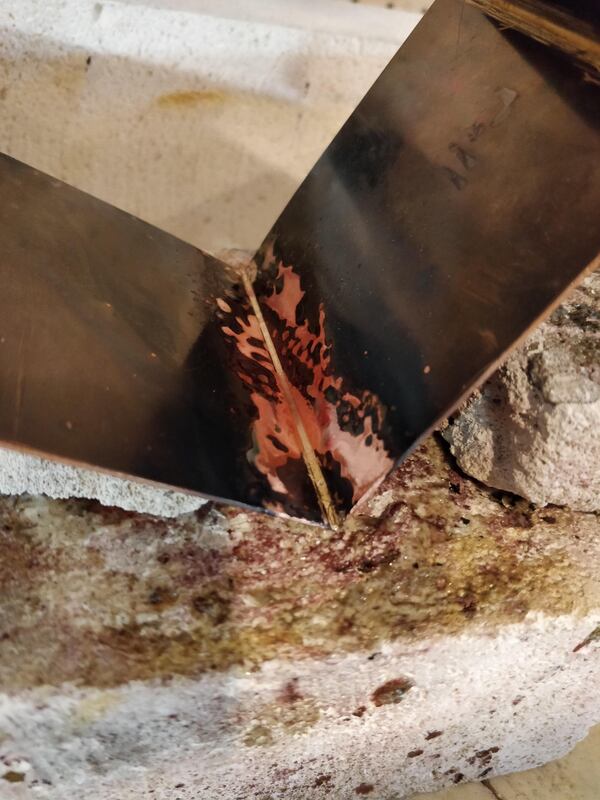
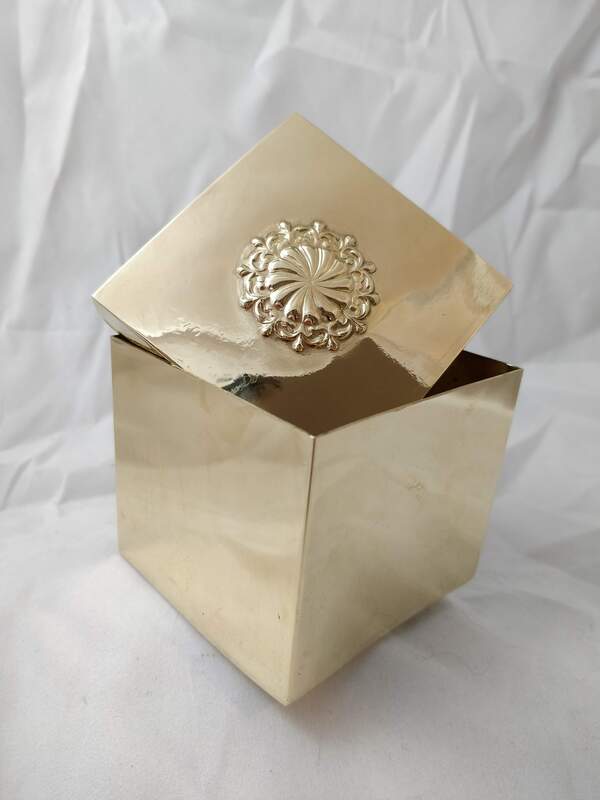
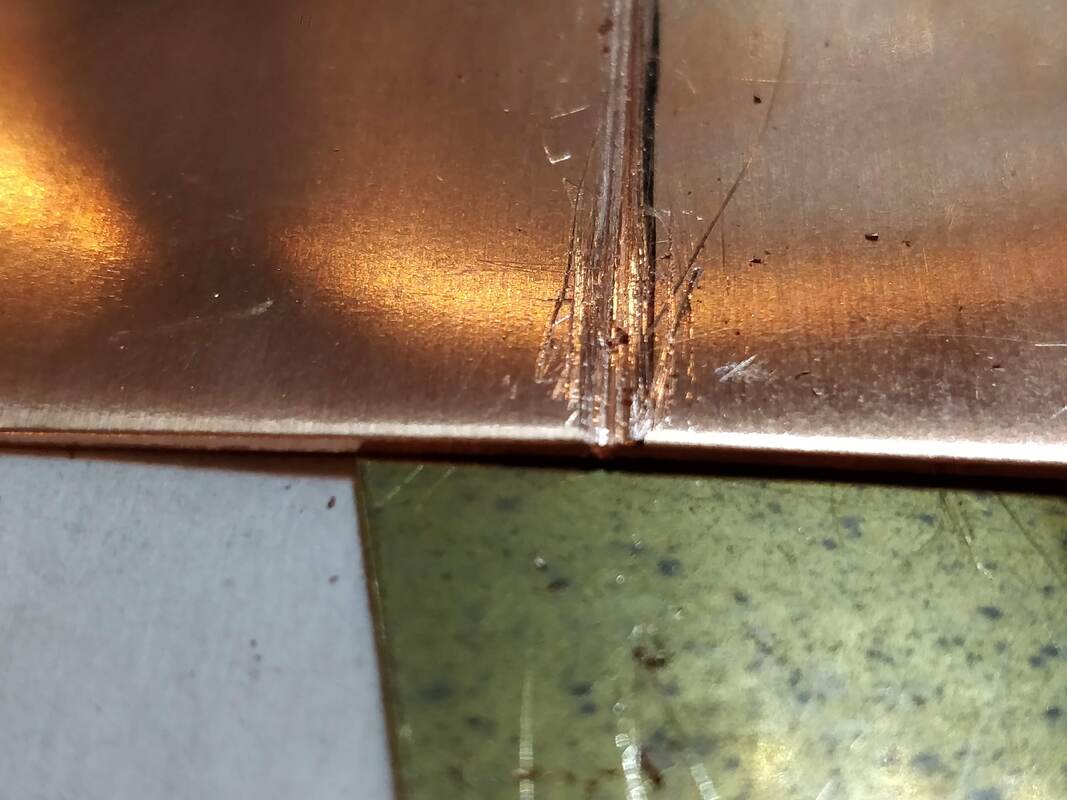
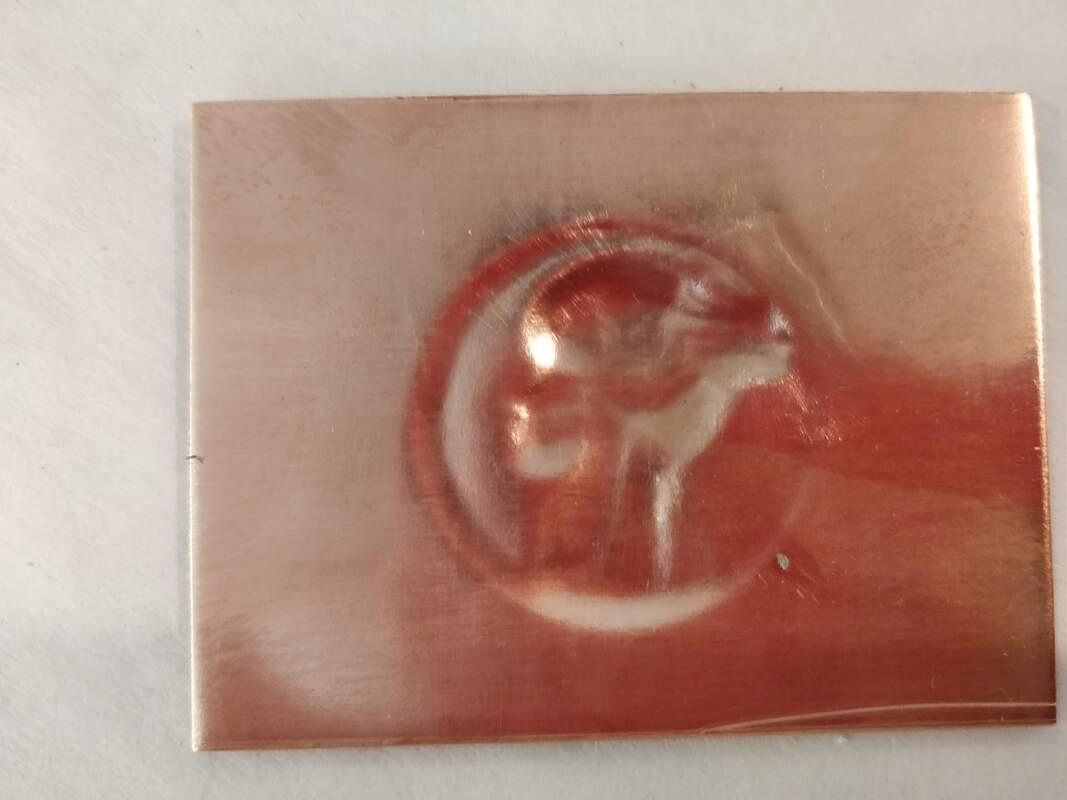
Yes, the top seperated from the wall; this happened while soldering in the bezel. Originally, it was just at the corner and as I tried to fix it but it opened more which is what you see here. I stopped while I was a head. 

Picture
0 Comments

The Box Project #4

11/24/2019

2 Comments

 
Picture
There are two parts to this installment of the box project

Part A was 2 weeks ago and B was finished today.

PART A
This box is a triangular box with corners; I figured doing 3 corners was easier than 4 which is why this box is triangular.
Before starting this phase, I pulled out my silversmithing books, again and read up on this subject.  Some of the books say to file a bevel on each edge of the corners where the angle depends on how many corers you will have; 45 degrees for 4 corners (45 times 2 equaling 90 degrees) and 30 degrees for 3 corners as the total of all the angles is 180 degrees, yes geometry comes into play here. Then using binding wire and supports, you solder all the corners together.  Other books say to scribe the angle into the metal such that the metal is still all connected, for n-1 corners and then you only have to bevel the 2 outside edges. The scribes/grooves are then bent to close up the box and it is easier to solder them all closed.  I asked my mentor what is best and she said to scribe but to do that, I had to make a tool to do the scribing cause no one makes them for you to purchase; welcome to silversmithing!!

Time to make TWO tools one with a 60 degree and another with 90 degrees.  One of my books gave information on how to make these tools out of old files or other tool steel and the shop elf sacrificed (handed over) two files he no longer used for the cause.  First you bend the handle down, as this will be scribe and the file become the handle. Then you file and grind in the angles and taper it so there is a very sharp edge right at the tip. I then hardened and tempered the tip.  After a few starts, trials and restarts I had my tools and sat down to scribe some lines.   

Let's just say it was a bit of a learning experience (not a failure!). I measured a 6" by 1" wide brass piece and drew lines for where the joints would be and then used a tungsten carbide tipped tool to do a shallow scribe using a machinists square. Using some C-clamps and a piece of wood I held the brass to my work table and started to scribe pulling towards me.  My tip was not sharp enough to actually pull off metal so I had to keep going back to the bench to refine the point. I also kept popping out of the groove and really scratched up the brass. Eventually I was able to bend the join and form the metal. Then I realized that my measurements were off and the sides were all different lengths and would not meet. 

Again, it's a learning experience and the next one would be, damn it, correct!  Here are pictures of my tools and my first trial at scribing 60 degree joints.  
PART B
Yesterday I started another piece of metal, this time copper, for a triangular box. I measured 3 or 4 times and this time I used a piece of steel as my clamp and guide which I could hold the scribing tool against to get a straight line. I also used a "three square" file to get a good 60 degree groove. I went slow and careful to get the two grooves and when that was done, I then used my belt sander to put 30 degree bevels on each edge and then it was time to bend; and YES! they met up and when I measure, only one side was 1/32" off.   

It was now time to solder. I fluxed the inside two joins and the inside and outside joint that was actually open. Then I heated and using hard solder just put a small ball at each open end and using heat, from the outside, I was able to pull the solder to the other open end  - isn't it wonderful when things go as they are supposed to. 

Now to put on a base. I found some scrap 20 g copper that was just the right side and so I soldered on the base and I took another piece to the hydraulic press to another impression for the lid.  After trimming up the base, I cut off the lid wall with a separating disk and soldered up the top for the lid.

Once the base and top were cleaned up, I tackled the mating edges and added a bezel and just a little bit of sanding to make sure the lid slid into the body; then did a quick polish and I was done! 

Next up, over the 4 day Thanksgiving weekend, a square box. 
2 Comments

The Box Project #3

11/10/2019

 
This project is from 2 weeks ago, I thought I posted it but I guess not.

This is an oval box (1 seam) but I put a hydraulic pressed stamping on the lid.  I did the stamping twice just to practice getting a good impression. Actually this is the second oval box too; the first was out of 24g copper which is just too soft and this one was made with 20g which is still a bit too thin, for copper but these are all about practice.

I spent a good amount of time working on the bezel for the lid and I am getting better at fitting it and soldering as I am not doing as much clean up.  This box is about 1.25" tall and a 6" circumference resulting in about 1.25" wide on the short axis and 1.5" on the long axis.

​Next up scribing corners, I am starting with a triangular box.

They Said... or More Red Oxide Patina

9/14/2016

0 Comments

 
Most of what I have read, has said that you should NOT do the red oxide patina on pieces that have been soldered ...
Because all that heat will cause the joints to un-solder. 

Do I listen?
                  I think NOT


I was making a tool canister this weekend and I wanted to have the red oxide patina on it. Again, I blame Jan.  I really only had the solder joints for the top and bottom and the slip sleeve on the top. I figured that IF I used hard solder and was really really careful, I could work on getting said patina.  Remember,  I ONLY had 1 or 2 solder joints on each piece. I would gather that if you had LOTS of tiny little solder joints that could wiggle and move, this won't work - your milage may vary.

I made the canisters and after soldering on all three pieces, I trimmed off the excess brass, for the top and the bottom and put a steel brush texture on the outside of the canister.  Today during lunch, I setup the fire bricks and a pot of HOT borax water. I fluxed the outside really well and turned on the torch. I had to position the torch such that it did not flame out and kept my eyes on the solder. When I could see it flow, I backed the heat off a bit but I was able to get it really RED hot by keeping the heat on for a long time, using bricks to help hold in the heat and occasionally turning the piece. 

Here are the results. I am rather quite piece and what I was surprised to see what that the oxide started to form on the brass end pieces. Brass has some copper in it but I was not expecting the red oxide to appear with any great color. 

The first two pictures are before I waxed it.
0 Comments

A Private Workshop

9/6/2016

0 Comments

 
Over the 3-day, Labor Day weekend, I was up in Arroyo Grande, California giving a private tool making workshop to Jan who makes metal sculptures and also does chasing & repousse.. Jan, I met via Facebook but we have never actually met until she attended the In-Saign workshop just a few weeks ago. It was during this workshop that Jan and I discussed a chasing & repousse tool making workshop, as she had never made any tools before; she had just seen demonstrations. It was after she went home, that we settled on having the workshop over Labor Day.

I arrived late Friday night so we could start Saturday morning, making tools.  We went over the basics and started her off making a tool and by lunch time Jan's first tool was completed. She was very excited to have accomplished this.  After lunch,  Jan completed a second tool as well. While Jan was working on her tools, I was working on a few for myself, all the while watching and instructing her. 

We finished up the tool making at around 4pm so we went for a walk with Sophie, Jan's dog and afterwards we played with learning how to get a red-oxide patina on copper which had been a topic we had discussed with Saign our awesome teacher, during the In-Saign workshop. 

On Sunday, day 2, Jan made THREE more tools and I made her a bonus tool too. As the day ended we took Sophie for another walk and just enjoyed the weather.

On Monday, day 3 or 2.5, I gave Jan as soldering lesson with the goal that we would make, together, a tool canister. Jan, being a metal artist knows how to braze and weld but not solder - go figure. We cut the canister bodies from pipe, the bases from sheet and then went for it and by lunch the can's were soldered and now she just has to trim the bases and clean them up. 

Here is a little side/movie of the days adventures.
0 Comments

It Seamed Easier Than I Remembered!

12/13/2015

0 Comments

 
Back in October when I went to the Nechamkin Silver Studio to start work on the tea pot, that session was to learn about seaming. Seaming a tube to then raise further is much faster than raising. I came home with assignment to seam some tubes not only for the practice of making and soldering the seams but to end up with some that I can then practice the clean up (of the solder) and the planishing. 

Now, once does not start off making a 6" tall tube unless you have your teacher/instructor/mentor there with you; which is why I was able to the the tube for the actual tea pot; Liza was there and she assisted with the difficult bit.  In other words, you work your way up to something that big. 

To get me started I went with 1 1/2" wide brass that was just under 6" long. This is close to what you would use to make a napkin ring. In this post I did make some napkin rings but I used brass tubing. So why solder a seam using brass if I can get and use tubing? Well dear readers, brass is close to sterling silver in how it works and you can't get sterling silver tubing - you might be able to but it is going to be very expensive. Thus I am practicing with brass and bronze before I move to sterling silver. 

There are several ways to make tubing. You can do a butt joint like you might do with a bezel set stone.  The second type of seam is a beveled seam which gives you more surface area to join and is stronger and better suited when there will be raising.  The third and best type is a keyed, tabbed or interlocked finger joint. This is where cuts are made in the beveled areas and the joined ends are interlocked.  If you have a copy of the Complete Metalsmith, refer to page 60 or look in the index for "seaming". 

Over the past few weekends I have been beveling the edges; they need to be the same width, taper and flat. Yesterday I finished that I cut the tabs and prepared myself for rolling the tube and interlocking the tabs. The tabs must be cut to the same size and the same distance from one edge or they won't match up. I almost got it to fit but I had to anneal again which I did and I let it sit overnight. This morning I finished the rolling of the tube and mating up the tabs and voila - I was able to fit the ends and it held together with only tiny pass of the file. I then put on some binding wire to hold it all while I did the soldering.   I prepped my napkin ring (tube) by fluxing it and getting out my hard solder. I positioned the fire bricks around the tube to hold the heat in and then brought it up to temperature it with my big torch. I carefully first soldered each edge/end of the tube and then focusing the head on the seam, applied more solder and used the heat to pull it down and up the seam; outside and then inside.  It was one of the best soldering jobs I have done and won't have much clean up to do.   

I have now setup my bench for another wider tube - this once in bronze. Overall I will make 4 tubes and the worst one I will attempt to clean and planish by myself (and probably do wrong) before I return to Nechamkin Silver studio next summer when I learn to do it the correct way. 
​

Here are my process pictures
0 Comments

Making A Teapot - Session One

10/10/2015

 
Two weeks ago I was Nechamkin Silver Studio to start what I consider to be an essential project for silversmiths. I am going to say it is a must on the silversmith's "bucket list"  - THE TEAPOT.  

Note: we are talking traditional silversmith, not a present day silversmith who makes jewelry out of silver.  A traditional silversmith how makes hollowware such as bowls and other vessels, trays, dishes, cutlery; and other functional items.

Making a teapot has been on my list of things to learn and make since I started on this path over 5 years ago. Actually it was on my list since I was a little kid and read about silversmiths and now I am finally starting the project.

I have read as many books as I can get my hands on about raising and the various parts of the teapot - the body, the spout, the handle, the lid and the feet or support on the bottom. Then there is the making of the parts - the raising, sinking soldering, making patterns and more. BUT until you start planning and making one, the concept of how much time and effort it takes starts to sink in (yeah, that's a metal pun) and unless you have someone to guide in mentor you, the teapot can be an exceptional failure. 

That brings us to earlier this year when Liza Nechamkin and I started to plan this project which will take many visits to her studio and a lot of homework on my part afterwards to either practice what I learned in each studio visit or to move the project along. 

Which brings us to two weeks ago, which was the first session - Making the body of the teapot.  Way back when, many teapots had raised bodies but raising a body can take time and can be tea-dious (see another pun) and so the body of this teapot will be seamed.     The best seam for long tubes is lapped and keyed which is what I learned to do on the first day of my visit along with forming the sheet into the tube and wiring it for soldering.  On the second day I soldered the tube with hard and I mean HARD solder.  Trust me hard solder does not like to flow and getting a 6" long seam soldered is difficult - imagine that easy solder flows like butter when melted; then hard solder flows like frozen cheese!  Plus the tube started out as 12" long and is 18g (0.04") thick which requires massive amounts of heat to just bring it up to temperature and THEN you have to solder it with hard solder.    

But before I soldered the silver tube, I made a practice tube out of copper with the lapped and keyed seam so I had twice the practice of doing it all including the soldering. 

The soldering was done in three phases - tacking it, the soldering and then the fixing of areas where the solder did not flow or did not flow enough.  The entire process was nerve wracking to say the least but I did it with Liz's wonderful instruction.

Now I have a massive tube of silver on my workbench.  Next time we will clean up the solder and planish the seam and THEN we will raise the top and bottom in.  Until that next session, which will be sometime next year, I will be practicing making lapped and keyed seam and soldering the seams closed.  Hmm, tricket boxes?

Here is a video of the process, enjoy. 

How to Transplant an Octopus Sucker

7/3/2014

 
Open the first image and then scroll forward to see what each step was. 
Over all it was 9 hours of work

A BIG thank you goes to Liza Nechamkin Glasser for sending me countless emails on how to do this and being patient with my freak-outs.

Sucker Surgery

6/28/2014

 
Amputation:
Friday I cut off the cracked suckers. There 4 that had to come off. Then there were the two that were gone and so in all I had to clean up 7 suckers.
There was an eight sucker but it had a minor crack so I left it to just be filled in with solder from the back.

The patient was resting comfortable but the surgeon was a bit nervous. 

Transplantation:
Today I started the  cutting out of the replacement suckers.  

1st sucker and largest:
the first  replacement sucker melted while soldering - luckily it had not been soldered in so into the scap bin it went.  At this point was a ready to just give up but figured that even if I ruined the piece I would learn something so I pressed on.  I went back to the sheet with all the replacements I had made and started to cut out the second. I was having problems filing it to fit so  cheated on and pushed it in through the back. I have a bit of clean up to do but it is soldered in. 

2nd sucker
this one had that minor crack so I filled it from the back with solder (yeah I cheated again) 

3rd sucker
I cut this one out and started a better filing job constantly going between the hole in the tentacle and the bevel on the replacement.  This is where those riffler files come in handy... I eventually got an ok fit. I just finished soldering it in - so I am learning and making progress. This one took 45 min to accomplish but it looks pretty good.

4th sucker being cut out now. 

Back to work. Pictures of the various steps to follow later when we are all done and the patient is in recovery. 
<<Previous

    RSS Feed

    How to Aquire Your Own Shop Elf

    Archives

    April 2025
    March 2025
    February 2025
    January 2025
    December 2024
    November 2024
    October 2024
    September 2024
    August 2024
    July 2024
    June 2024
    January 2024
    November 2023
    October 2023
    September 2023
    October 2020
    August 2020
    March 2020
    December 2019
    November 2019
    October 2019
    September 2019
    August 2019
    July 2019
    June 2019
    May 2019
    March 2019
    February 2019
    January 2019
    December 2018
    November 2018
    October 2018
    September 2018
    August 2018
    July 2018
    May 2018
    April 2018
    February 2018
    January 2018
    November 2017
    October 2017
    September 2017
    July 2017
    June 2017
    May 2017
    April 2017
    March 2017
    February 2017
    January 2017
    December 2016
    November 2016
    October 2016
    September 2016
    August 2016
    July 2016
    June 2016
    May 2016
    April 2016
    March 2016
    February 2016
    January 2016
    December 2015
    November 2015
    October 2015
    September 2015
    August 2015
    July 2015
    June 2015
    May 2015
    April 2015
    March 2015
    February 2015
    January 2015
    December 2014
    November 2014
    October 2014
    September 2014
    August 2014
    July 2014
    June 2014
    May 2014
    April 2014
    March 2014
    February 2014
    January 2014
    December 2013
    November 2013
    October 2013
    September 2013
    August 2013
    July 2013
    June 2013
    May 2013
    April 2013
    March 2013
    February 2013
    January 2013
    December 2012
    November 2012
    October 2012
    September 2012
    August 2012
    July 2012
    June 2012
    May 2012
    April 2012
    March 2012
    February 2012
    January 2012
    November 2011
    August 2011
    July 2011
    June 2011
    May 2011
    April 2011
    March 2011
    February 2011
    January 2011
    December 2010
    November 2010

    Jan - Nov 2010 History
    File Size: 2272 kb
    File Type: pdf
    Download File

    Jan - Dec 2009 History
    File Size: 2332 kb
    File Type: pdf
    Download File

    Categories

    All
    42
    Art
    A Year Of Repousse
    BFA
    Blacksmithing
    Blogoversary
    Box Project
    Business
    Chasing & Repousse
    Commission
    Education
    Embroidery
    Enamel
    Entries
    Entry
    Exhibition
    Facebook
    Filing
    Fold Forming
    Gold
    Holloware
    Hot Forging
    Hydraulic Press
    Jewelry
    Keum-boo
    Knitting
    Learning
    Leather
    Market
    Metal
    Patina
    Photography
    Polishing
    Publications
    Quilt
    Raising
    Sanding
    Santa Fe Symposium
    Shop Elf
    Sinking
    Social Media
    Soldering
    Store
    Studio Visits
    Superbowl Challenge
    Teaching
    Teapot Project
    Technique
    Temari
    Tin
    Tools
    Vessels
    Visiting Workshops
    Weaving
    Website
    Workshop
    Yubinuki

Powered by Create your own unique website with customizable templates.