
I love, Love, LOVE, LOVE sewing with silk
My love of silk began with sewing clothing and then when sewing hand embroidery and now I am looking at Yubinuki.
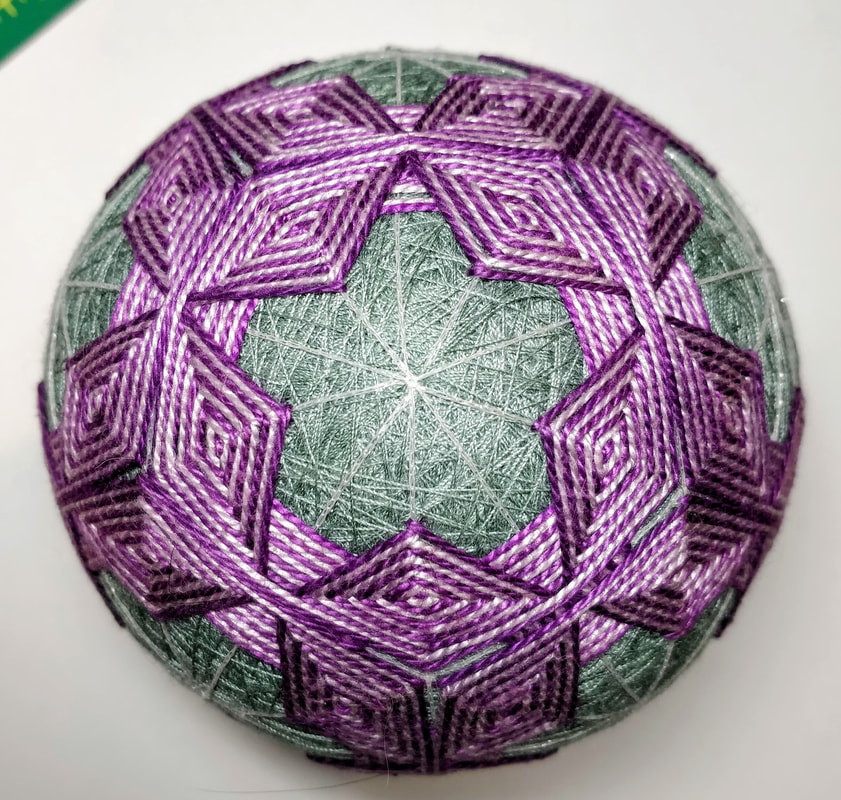
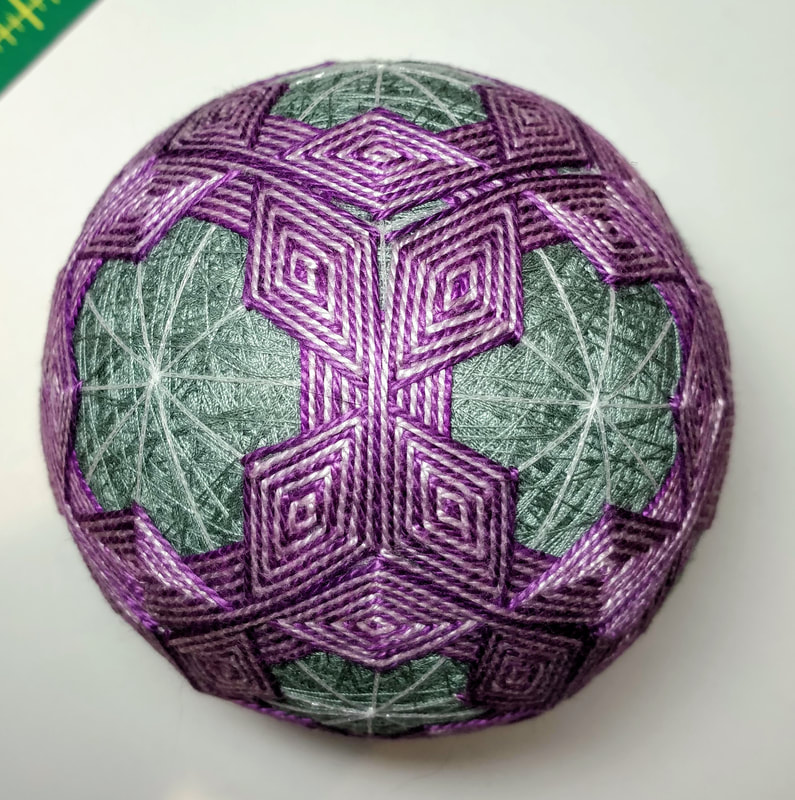
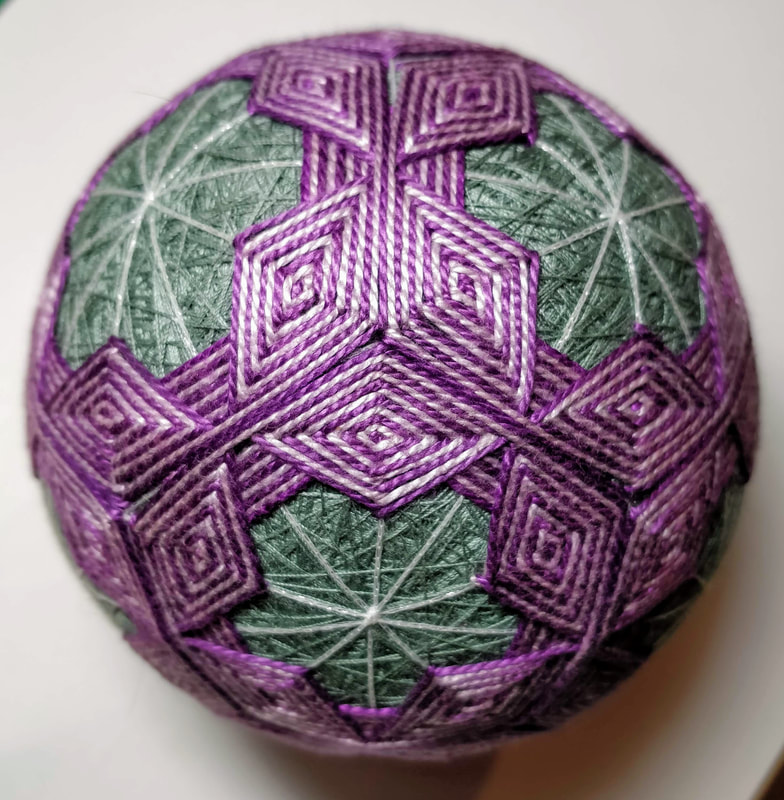
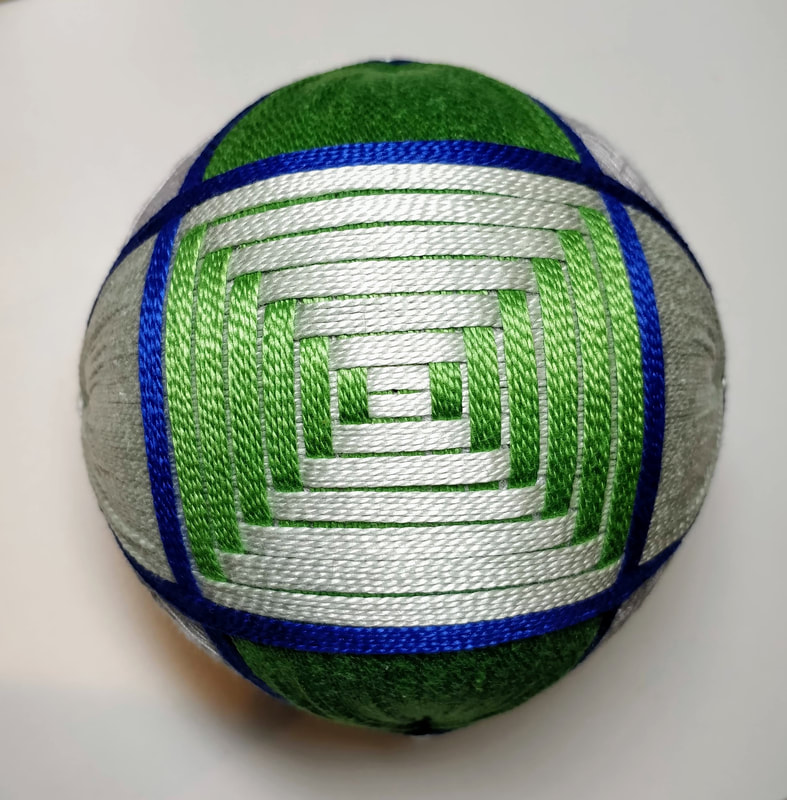
Yubinuki are traditionally sewn with silk and to date, the tutorials have been using perle (or pearl) cotton. I have done this to gain skill and not waste an expensive thread on something that might not look so as I learned.
So the question is what size silk thread does one use and where do you get it. Soon after getting my Yubinuki books from Japan, I was looking at the images of the supplies and they showed a silk thread on a cardboard bobbin marked KNK.
Thus began my hunt to find this thread/chord and/or equivalents. I am now ready to share what I have found.
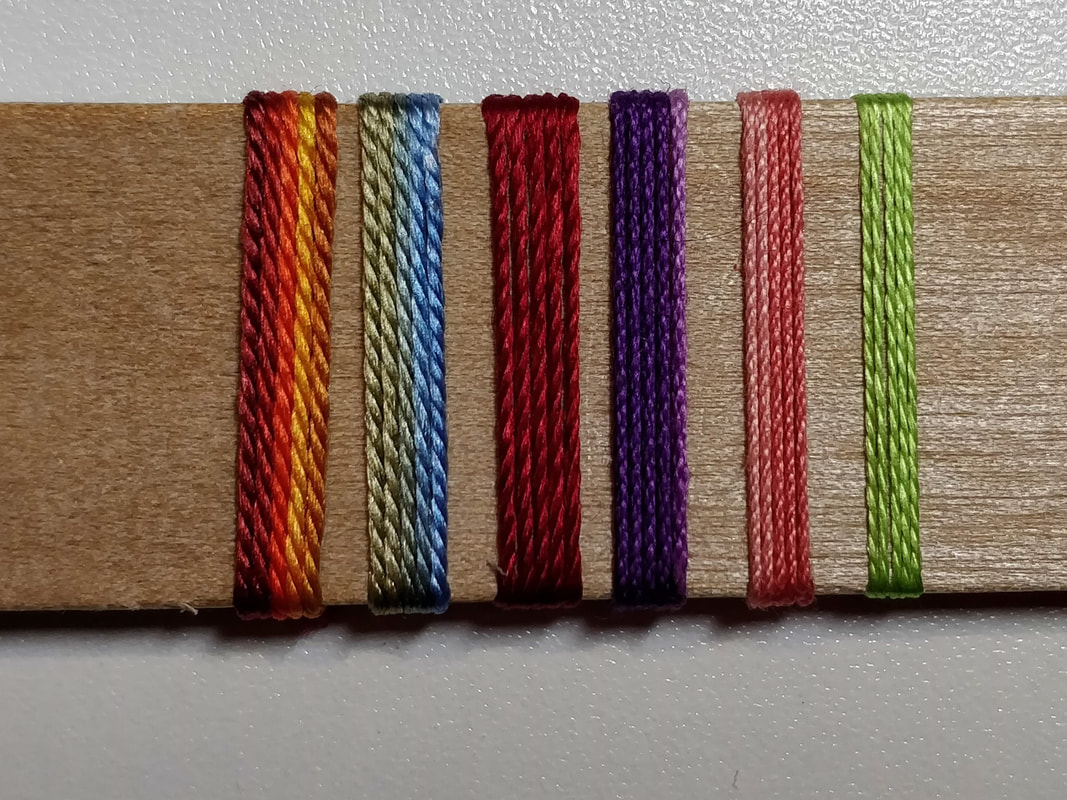
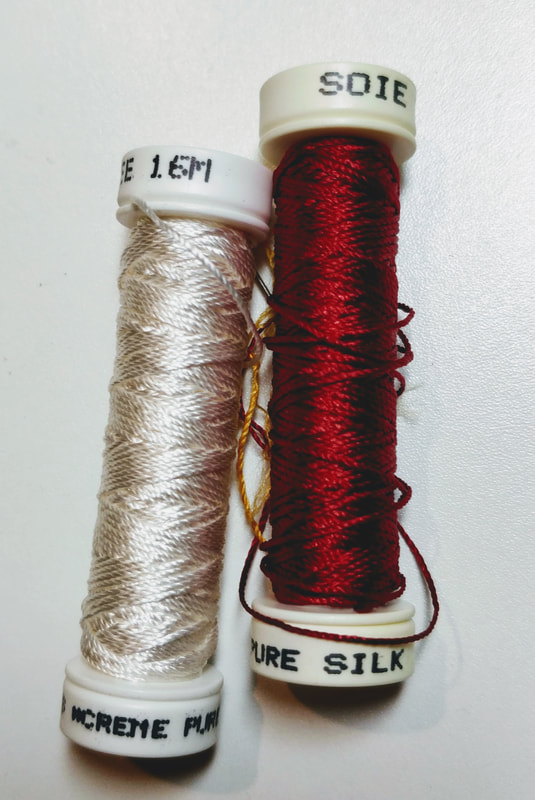
One place I went looking was high-end needle-point and embroidery stores. There I found the Au ver Soie Perlee (3rd from left above, which is RED), which is translated, a silk perle. I have made one yubinuki with it (2 colors) and found it very slippery but the sheen and colors wonderful. This 2 color yubinuki will be the next tutorial so stay tuned.
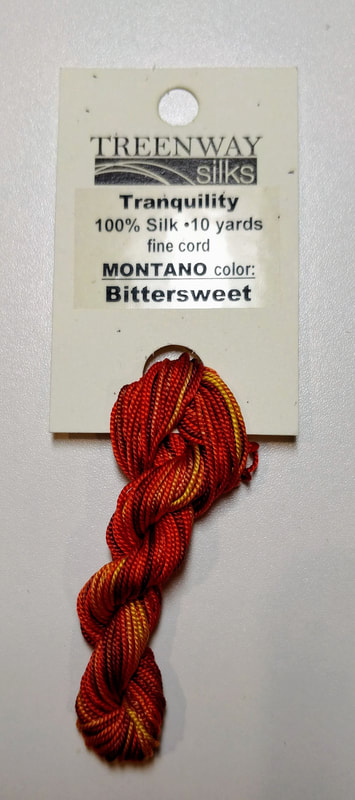
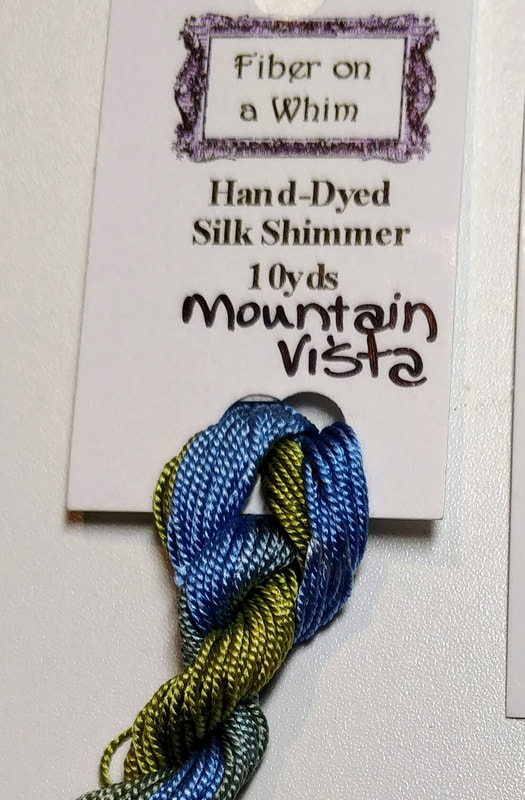
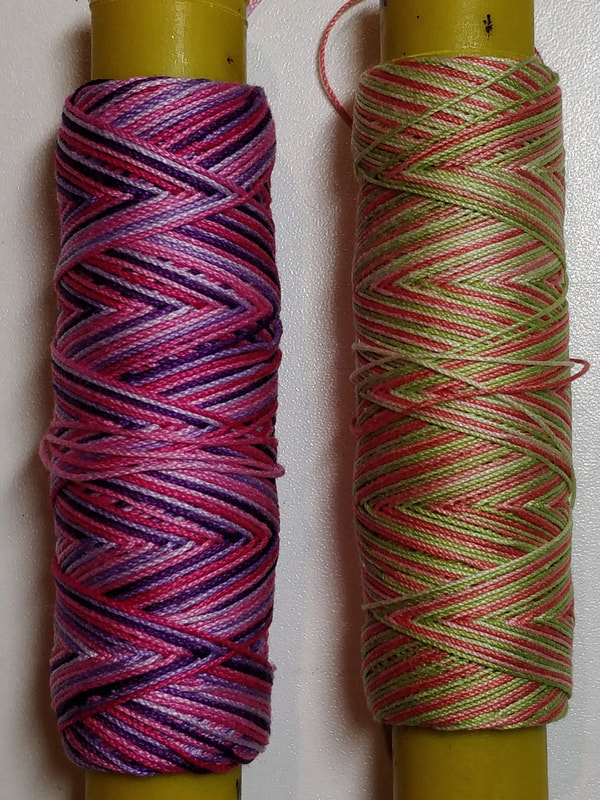
Then I went to the Houston Quilt Fest looking for other sources and I found Treenway Silk (1st on left, variegated Red/Orange) and Fiber on a Whim (2nd on left, variegated Blue/Green). These two are slightly thicker than the Silk Perle and are described as a silk chord.
4th (Purple) and 5th (Pale Pinks) in the image are NOT silk but size 20 and size 40 cotton used for tatting. These are shown for size comparison but you might want to sew a few yubinuki with this size before tackling the REAL Japanese silk which is the far right in Green.
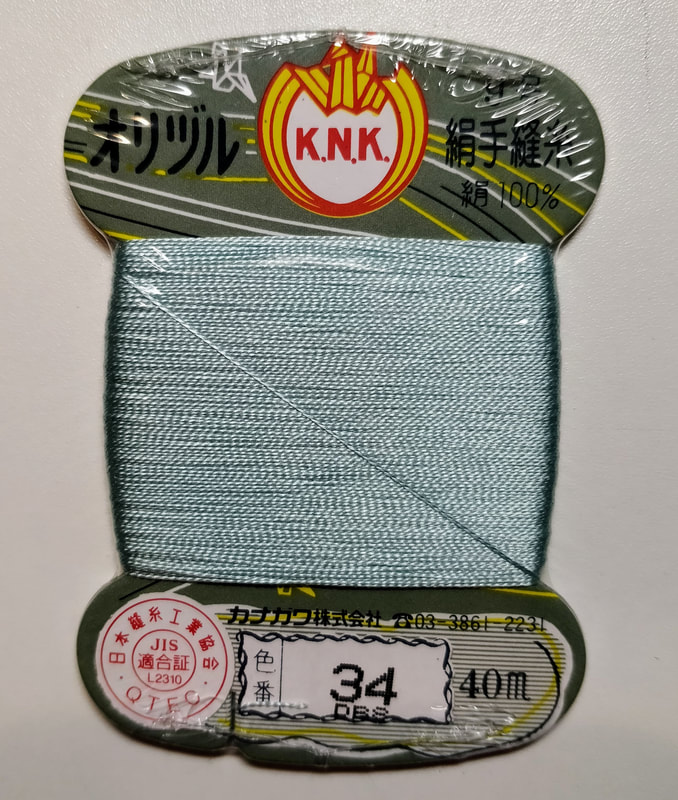
Now it is time to get to it - the elusive Japanese Silk. I have found two manufacturers of the size shown in the books; they are Fujix and Kanagawa. I spent weeks Googling and trust me I am a good Google-er; it took time but it has come to light that for traditional yubinuki silk the thread marked #9 is what should be used. There are many a websites (Etsy or Amazon) selling #16 button hole twist thread but trust me, #16 is even finer than #9 and it is not what "we" want. I also discovered that you can, with time, find a random bobbin of #9 on eBay and on Amazon but not the full assortment of colors.
I did purchase a bobbin of each thread via Ebay so I could do more research.
After finding the companies and their websites, I used Google translate navigate and find the pages for not only the individual bobbins of thread, but their thread sample books that show ALL the colors; at least 100 from each company but there was no way to place an international order. The KNK on-line order forms also assumed you were in Japan and they don't take credit cards OR Paypal, only checks or bank transfers. I then used their "Contact Us" for to send an email to ask HOW can I order. It took over 10 emails of: what I wanted to purchase; where to send it in the USA; where to send the money, in Japan; and bank transfer information but the deed is done - I have paid for the order.
So what did I get?
I hoping that I will be able to sell these items soon, here on this website, stay tuned for that!
As I stated earlier, the next tutorial will be with the Au ver Soie Perlee. After than I will do an experiment using the same pattern and sized bases but with different sized threads. This comparison will allow you and me to find out what it is like to use these threads, and what the finished Yubinuki looks like, when compared side by side.
Links to thread sources in the USA if you want to use these other silks and cottons
The 6 pictures below are of the threads, as I purchased them. The last two are the Fujix and the KNK.
My love of silk began with sewing clothing and then when sewing hand embroidery and now I am looking at Yubinuki.
Yubinuki are traditionally sewn with silk and to date, the tutorials have been using perle (or pearl) cotton. I have done this to gain skill and not waste an expensive thread on something that might not look so as I learned.
So the question is what size silk thread does one use and where do you get it. Soon after getting my Yubinuki books from Japan, I was looking at the images of the supplies and they showed a silk thread on a cardboard bobbin marked KNK.
Thus began my hunt to find this thread/chord and/or equivalents. I am now ready to share what I have found.
One place I went looking was high-end needle-point and embroidery stores. There I found the Au ver Soie Perlee (3rd from left above, which is RED), which is translated, a silk perle. I have made one yubinuki with it (2 colors) and found it very slippery but the sheen and colors wonderful. This 2 color yubinuki will be the next tutorial so stay tuned.
Then I went to the Houston Quilt Fest looking for other sources and I found Treenway Silk (1st on left, variegated Red/Orange) and Fiber on a Whim (2nd on left, variegated Blue/Green). These two are slightly thicker than the Silk Perle and are described as a silk chord.
4th (Purple) and 5th (Pale Pinks) in the image are NOT silk but size 20 and size 40 cotton used for tatting. These are shown for size comparison but you might want to sew a few yubinuki with this size before tackling the REAL Japanese silk which is the far right in Green.
Now it is time to get to it - the elusive Japanese Silk. I have found two manufacturers of the size shown in the books; they are Fujix and Kanagawa. I spent weeks Googling and trust me I am a good Google-er; it took time but it has come to light that for traditional yubinuki silk the thread marked #9 is what should be used. There are many a websites (Etsy or Amazon) selling #16 button hole twist thread but trust me, #16 is even finer than #9 and it is not what "we" want. I also discovered that you can, with time, find a random bobbin of #9 on eBay and on Amazon but not the full assortment of colors.
I did purchase a bobbin of each thread via Ebay so I could do more research.
After finding the companies and their websites, I used Google translate navigate and find the pages for not only the individual bobbins of thread, but their thread sample books that show ALL the colors; at least 100 from each company but there was no way to place an international order. The KNK on-line order forms also assumed you were in Japan and they don't take credit cards OR Paypal, only checks or bank transfers. I then used their "Contact Us" for to send an email to ask HOW can I order. It took over 10 emails of: what I wanted to purchase; where to send it in the USA; where to send the money, in Japan; and bank transfer information but the deed is done - I have paid for the order.
So what did I get?
- kits (thread on bobbins, silk for the padding, a pre-made base and instructions in Japanese, and extra paper and fabric to make another base)
- an assortment threads
- pre-made bases (which I also call a core)
- silk padding
- fabric
- paper
- and the thread colors card.
I hoping that I will be able to sell these items soon, here on this website, stay tuned for that!
As I stated earlier, the next tutorial will be with the Au ver Soie Perlee. After than I will do an experiment using the same pattern and sized bases but with different sized threads. This comparison will allow you and me to find out what it is like to use these threads, and what the finished Yubinuki looks like, when compared side by side.
Links to thread sources in the USA if you want to use these other silks and cottons
- Treenway Silk : This silk is listed as a button hold twist but depending on the company, the size can vary.
- Fiber on Whim : Silk Chord equivalent to size 8 and 12 Perle Cotton
- Au ver Soie Perlee: A silk perle that is 3 ply and equivalent to a 12 Perle Cotton.
- Lizbeth Tatting Size 20 Perle Cotton
- Lizbeth Tatting Size 40 Perle Cotton
The 6 pictures below are of the threads, as I purchased them. The last two are the Fujix and the KNK.


 RSS Feed
