Follow Me On:
The Adventurous Silversmith
  • Home
  • Blog
  • Portfolio
    • Metal Work >
      • Chasing & Repousse
      • Holloware
      • Jewelry
      • Other Wonderful Items
    • Fiber Arts >
      • Temari
      • Yubinuki
  • Resources
    • Library
    • Tools & Equipment
    • Links
  • About
    • Artist Statement
    • Curriculum Vitae
    • How it is Made
    • Contact

Yubinuki - Tutorial 9: Three Colors (Part B The Bases)

1/27/2019

0 Comments

 
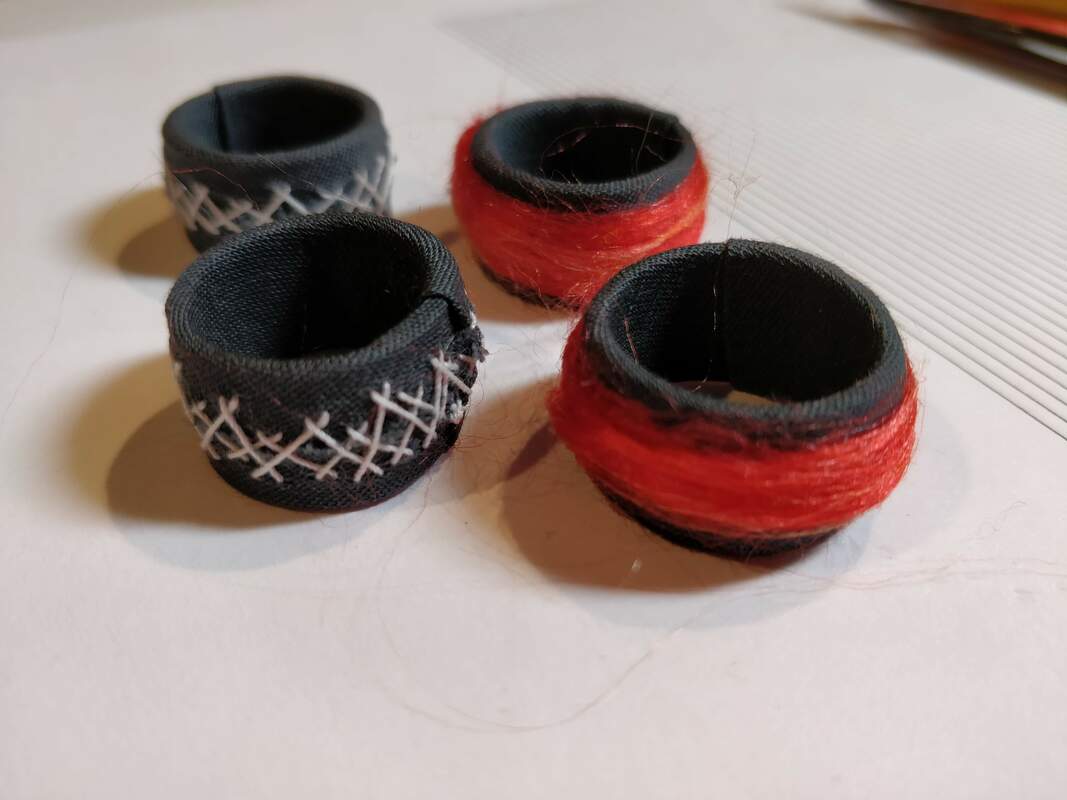
I have prepared 4 bases, as they are called in Japan, I was calling it a core which I guess is wrong and I will probably make a few more since there are some more silk threads for me to try, on the way. 

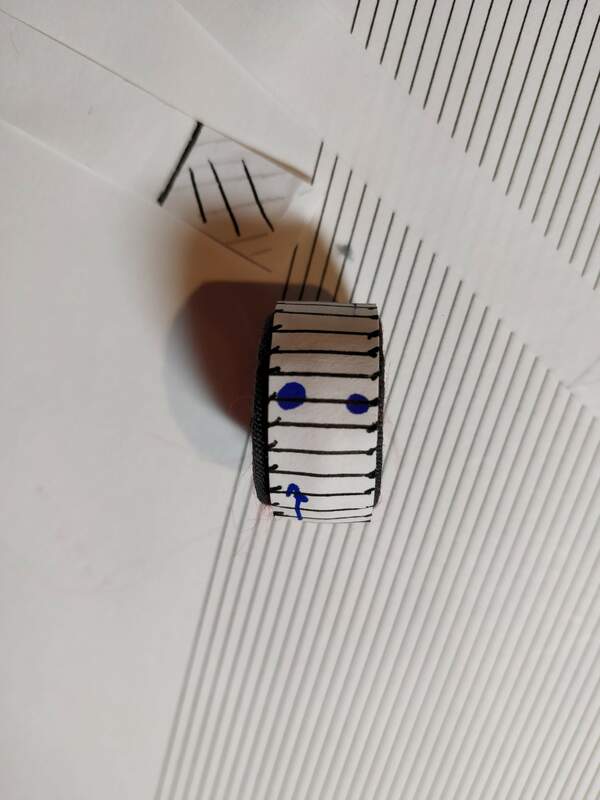
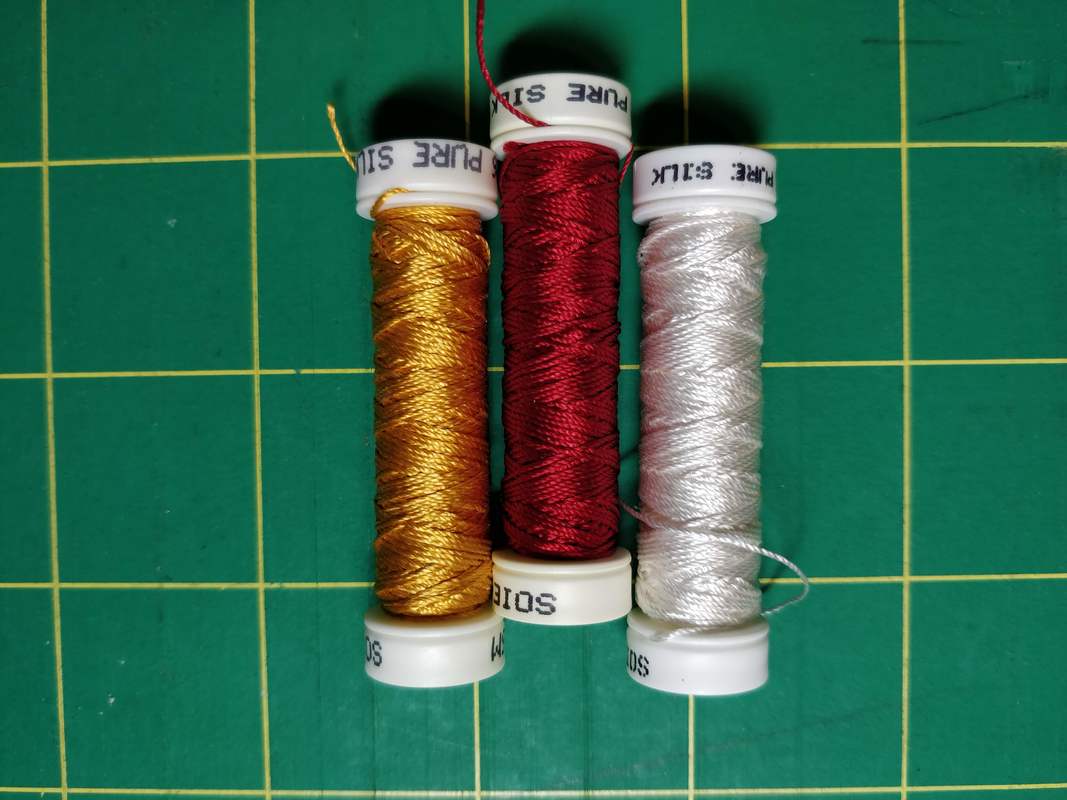
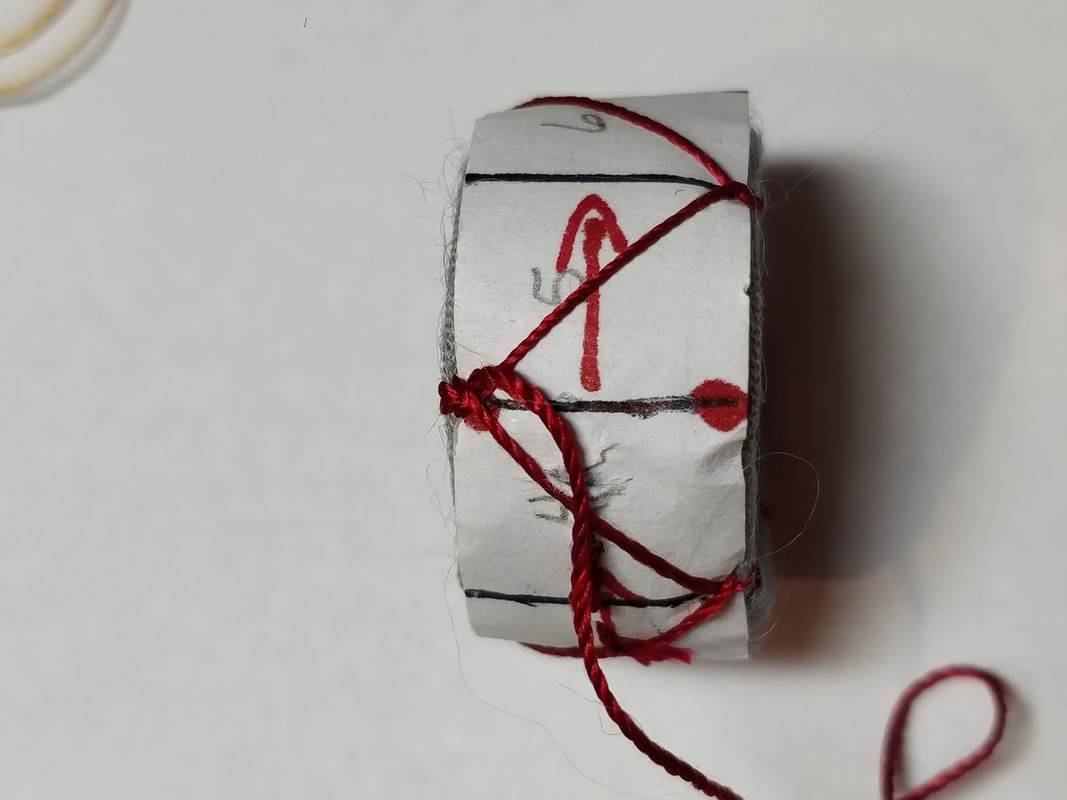
I used the same sized mandrel for all of the bases and I cut everything the same - the paper, the fabric lining and even the pattern paper and marked them with 30 divisions. I then took the silk I had, from my spinning supplies, to add the padding. To make sure all the patterns matched up I had to add a bit more or a bit less silk as I wound it around the base. 

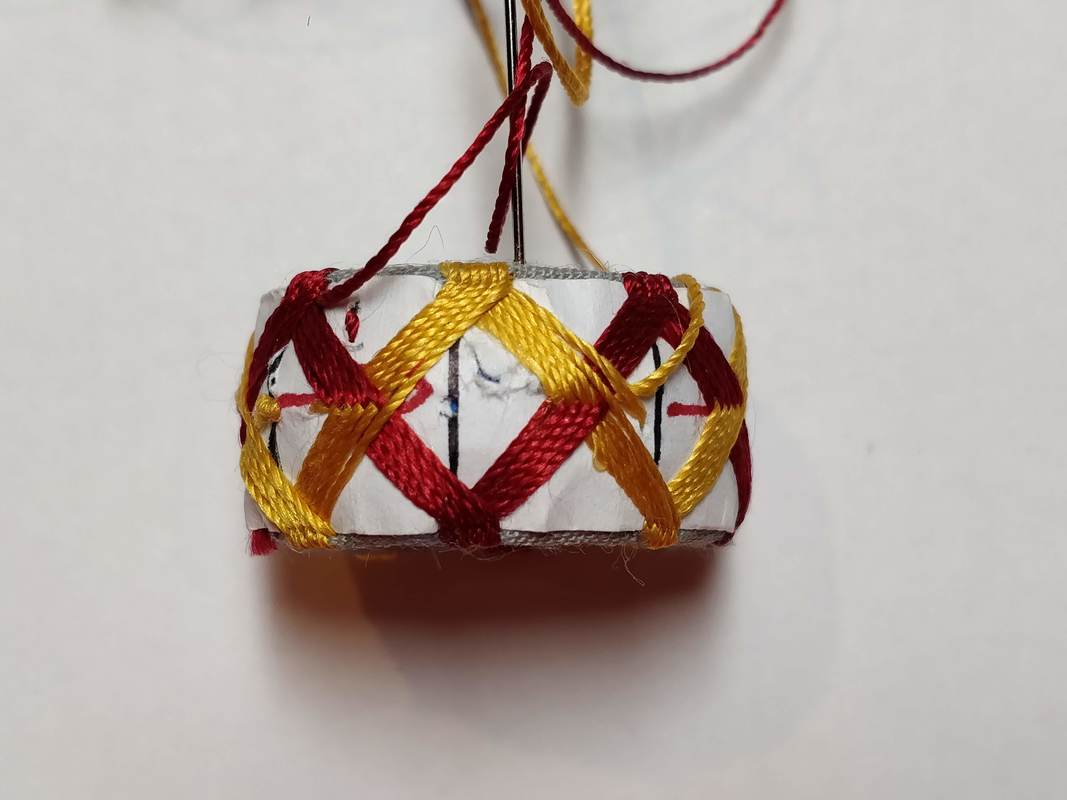
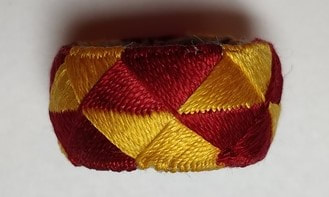
The 4 bases are now ready for sewing, which I will cover in Part C and I will start with a size 8 Perle cotton.  

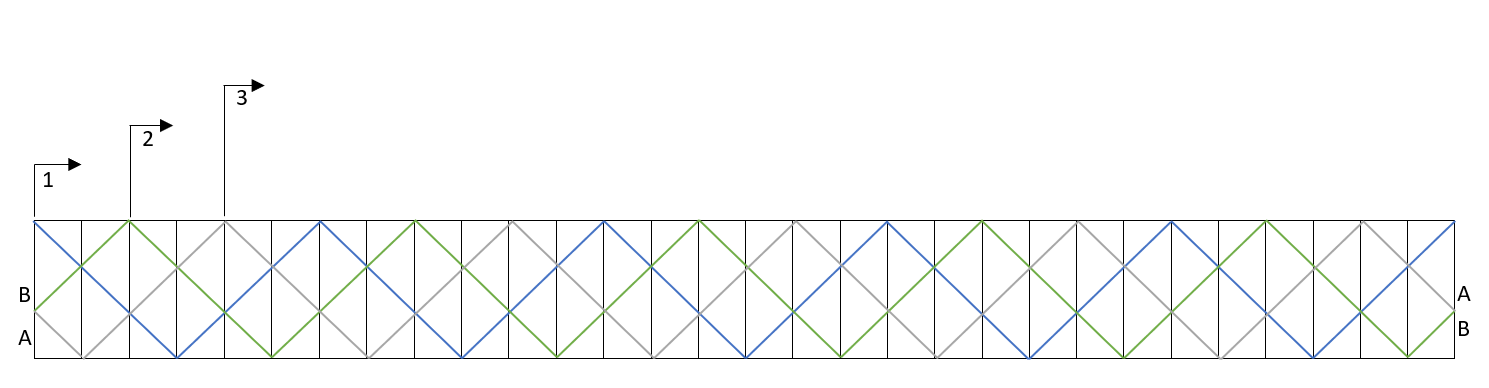
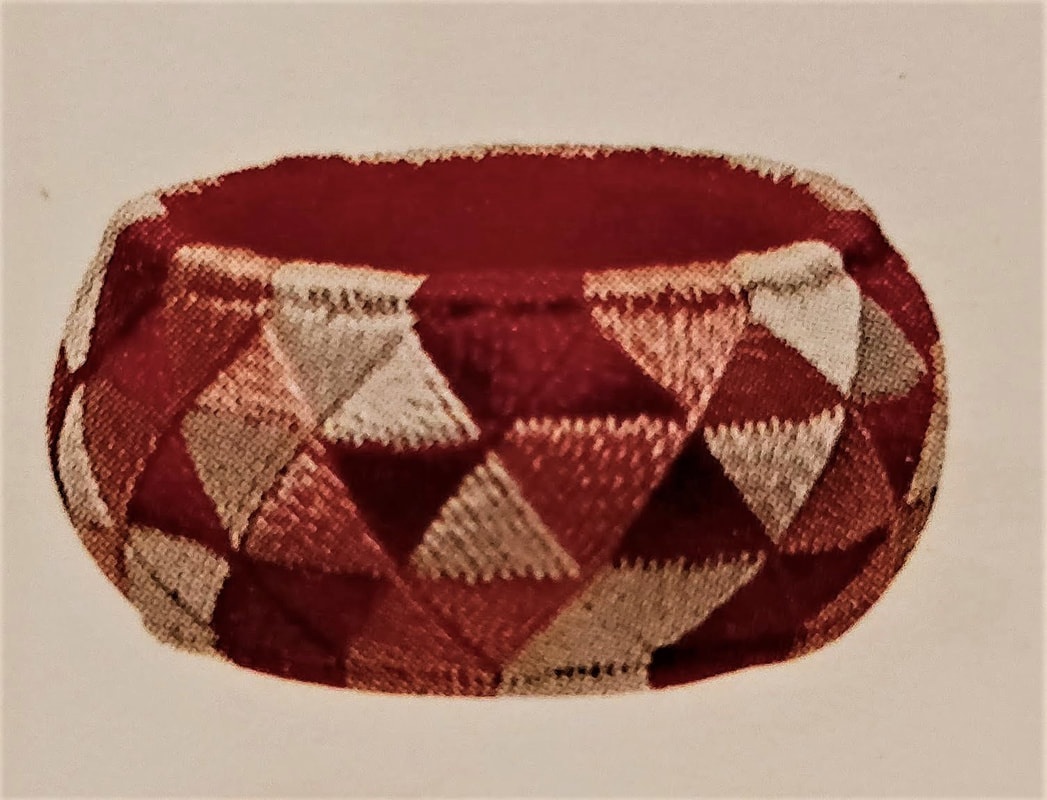
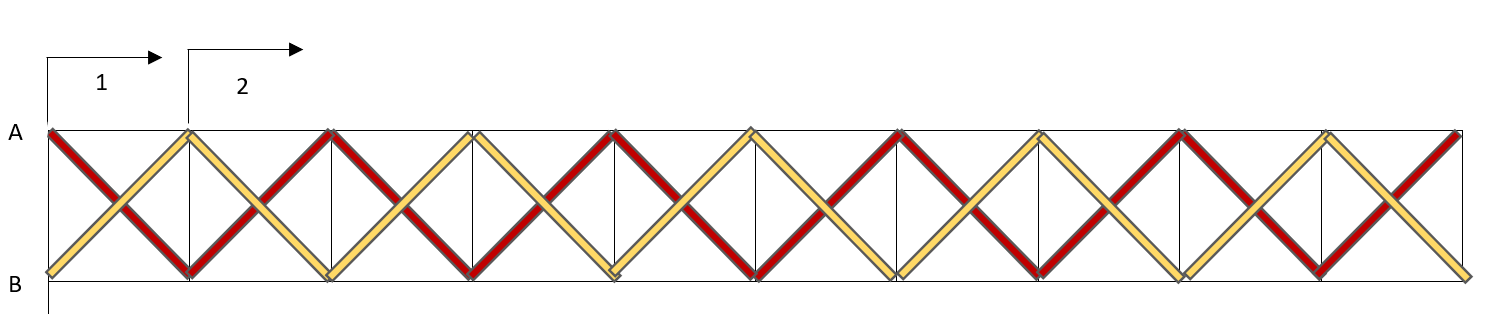
So I bet you are wondering WHY I am doing this. Well the answer is that I tried to sew this pattern with the Japanese silk and made an absolute mess of it. The silk kept twisting and knotting and I could not undo them so I had to cut the thread; my divisions, using the 15 per the original pattern and not the 30 I am suggesting you use, were all off and not evenly spaced;  and so I got frustrated with it and set it aside. 

That is when I had THIS idea to try different thread material and work my way down to finer threads.
0 Comments

Yubinuki - Tutorial 9: Three Colors (Part A The Pattern)

1/20/2019

1 Comment

 
This tutorial is a follow on to the The Hunt for Silk post from a few weeks ago. This tutorial will be made up of several parts that not only cover the pattern and sewing but I will sew the same pattern with different sized threads  - yes, I am making the same Yubinuki at least 4 times in cotton and 4 more in silk.  

So let's discuss the pattern (show below), here are the details
  • Colors: 3 shown with Blue, Green and  White (shown as Grey)
  • Needles: 3
  • Divisions:  30

Sewing Notes: Each color is sewn, in order: once around in Blue, once around in Green, and once around in White. This is why you need 3 needles because using one needle and constantly re-threading the eye after each round would be extra steps. The sewing continues until all spaces are filled.

Note that after the first stitch at the top edge is taken, the second and all even numbered stitches, on the bottom edge is 3 divisions marks over.  The original pattern had 15 divisions and the second stitch was to be placed half way between two division lines, so I decided that to keep the sewing more even, it would be better to double the number of divisions; which makes the placement of the even stitch numbers much more accurate.

So what does the completed Yubinuki look like? Below the pattern are several images (used without permission) from the various Japanese books. 

So prepare your bases to follow along. 

Note: You may have to zoom in on the picture to see the lines, which are the threads, because with 30 divisions, I had to shrink the image to fit on the page.
Picture
1 Comment

Yubinuki - Tutorial 8: Sewing with 2 Colors from a Pattern

1/5/2019

0 Comments

 
Now that we have sewn 2 yubinuki with a single thread (odd and even number of divisions); it is now time to add some color. This yubinuki is sewn with 2 colors which means  TWO needles are required. The yubinunki will also be sewn in ONE one direction with an even number of divisions. To also tie into what has been learned so far, the pattern is shown below
Picture
Before the sewing begins, let's go over the pattern.
  • The numbers 1 and 2 as shown in the by the arrows indicate where each color is to start. Thus Color 1 as shown by the red, starts at any division line (this pattern starts technically at zero);  then color 2, the gold, starts one division line over (which would be at division line one). 
  • This pattern has 10 divisions.
  • The first color is sewn for a complete round and when the thread is back at the starting point the edge stitch is made and then the needle is parked. I put it in a little pin cushion that I have placed near me on the table.
  • The second color is then sewn, around the code and again, when the stitching returns to the starting point the edge stitch is made and then this second needle is parked.
​Let's get started.
  • On the core place a pattern paper with 10 divisions
  • First select 2 colors in the same weight thread. I am using a silk perle and I chose the Gold and the Red colors.
  • Then thread each color in a needle.
  • Create the starting knot at the "first division". 
  • Stitch the first round until returning to the starting mark.
  • Park the needle and thread off to the side.
  • Take the second color thread and needle and start by making a stitch at the next, division mark, on the same edge that the first thread was started.
  • Stitch all the way around with the second thread and take a second stitch next to the very first stitch for the round.
  • Park the needle and thread off to the side.
  • Keep sewing rounds in alternating colors; the cross of the two threads should be in the middle, between the top and bottom. 
  • When all the divisions are filled take the last stitch with each color and then bury the thread end under the sew threads.
And here is the completed Yubinuki
Picture
0 Comments

    RSS Feed

    How to Aquire Your Own Shop Elf

    Archives

    October 2020
    August 2020
    March 2020
    December 2019
    November 2019
    October 2019
    September 2019
    August 2019
    July 2019
    June 2019
    May 2019
    March 2019
    February 2019
    January 2019
    December 2018
    November 2018
    October 2018
    September 2018
    August 2018
    July 2018
    May 2018
    April 2018
    February 2018
    January 2018
    November 2017
    October 2017
    September 2017
    July 2017
    June 2017
    May 2017
    April 2017
    March 2017
    February 2017
    January 2017
    December 2016
    November 2016
    October 2016
    September 2016
    August 2016
    July 2016
    June 2016
    May 2016
    April 2016
    March 2016
    February 2016
    January 2016
    December 2015
    November 2015
    October 2015
    September 2015
    August 2015
    July 2015
    June 2015
    May 2015
    April 2015
    March 2015
    February 2015
    January 2015
    December 2014
    November 2014
    October 2014
    September 2014
    August 2014
    July 2014
    June 2014
    May 2014
    April 2014
    March 2014
    February 2014
    January 2014
    December 2013
    November 2013
    October 2013
    September 2013
    August 2013
    July 2013
    June 2013
    May 2013
    April 2013
    March 2013
    February 2013
    January 2013
    December 2012
    November 2012
    October 2012
    September 2012
    August 2012
    July 2012
    June 2012
    May 2012
    April 2012
    March 2012
    February 2012
    January 2012
    November 2011
    August 2011
    July 2011
    June 2011
    May 2011
    April 2011
    March 2011
    February 2011
    January 2011
    December 2010
    November 2010

    Jan - Nov 2010 History
    File Size: 2272 kb
    File Type: pdf
    Download File

    Jan - Dec 2009 History
    File Size: 2332 kb
    File Type: pdf
    Download File

    Categories

    All
    42
    A Year Of Repousse
    Blacksmithing
    Blogoversary
    Box Project
    Business
    Chasing & Repousse
    Commission
    Education
    Embroidery
    Enamel
    Entries
    Entry
    Exhibition
    Facebook
    Filing
    Fold Forming
    Gold
    Holloware
    Hot Forging
    Hydraulic Press
    Jewelry
    Keum-boo
    Learning
    Leather
    Market
    Metal
    Patina
    Photography
    Polishing
    Publications
    Raising
    Sanding
    Santa Fe Symposium
    Shop Elf
    Sinking
    Social Media
    Soldering
    Store
    Studio Visits
    Superbowl Challenge
    Teaching
    Teapot Project
    Technique
    Temari
    Tin
    Tools
    Vessels
    Visiting Workshops
    Weaving
    Website
    Workshop
    Yubinuki

Powered by Create your own unique website with customizable templates.