First we measured a finger for the ring hole and soldered it round and to one side of the ring, using hard solder. Then it was figure out what the side wall(s) would be and using various round pliers and round mandrels, form the side piece and solder it to the same piece of metal as the ring hole. It was on my way home that night that I thought I wanted to texture my surfaces so what did I do... I redid what I did in class and used my rolling mill to put a spiral texture on all the exterior metal; I unsoldered the ring band, cleaned it up and re-used it. I drilled some air holes to be a decorative element and using a setting burr, counter sunk them. I was getting ready to solder the other (shall we say back plate on) side on when I had the idea to do tube sets over the holes... This is when I realized that setting the stones would be rather difficult since it was a hollow ring. MY engineering kicked in and thought that IF I soldered a support wall, inside, and around the holes, it would provide the support I needed, which I did. And... then I realized I had more than enough 4mm CZ's but not enough tube settings and ordered them from Rio; I would have to use silver because they don't make brass one and I was not going to make them either. While waiting for the settings to arrive, I did the soldering of the back plate, trimmed and removed the extra metal. Yesterday the settings arrived and today I soldered them on; I had a little bit of solder creep and removed what I could because I forgot to mask the seams with white out; you can see it in the last few pictures. Then I set a green, yellow, purple, and lavender stone on each side.
|
For the past 2 weeks, in Beginning Metals, we have been working on hollow rings or a way to learning sawing, soldering with hard, medium, and soft solder, filing, and finishing. Yes, I do know these things BUT I have never made a hollow ring before so that was what I WAS LEARNING. First we measured a finger for the ring hole and soldered it round and to one side of the ring, using hard solder. Then it was figure out what the side wall(s) would be and using various round pliers and round mandrels, form the side piece and solder it to the same piece of metal as the ring hole. It was on my way home that night that I thought I wanted to texture my surfaces so what did I do... I redid what I did in class and used my rolling mill to put a spiral texture on all the exterior metal; I unsoldered the ring band, cleaned it up and re-used it. I drilled some air holes to be a decorative element and using a setting burr, counter sunk them. I was getting ready to solder the other (shall we say back plate on) side on when I had the idea to do tube sets over the holes... This is when I realized that setting the stones would be rather difficult since it was a hollow ring. MY engineering kicked in and thought that IF I soldered a support wall, inside, and around the holes, it would provide the support I needed, which I did. And... then I realized I had more than enough 4mm CZ's but not enough tube settings and ordered them from Rio; I would have to use silver because they don't make brass one and I was not going to make them either. While waiting for the settings to arrive, I did the soldering of the back plate, trimmed and removed the extra metal. Yesterday the settings arrived and today I soldered them on; I had a little bit of solder creep and removed what I could because I forgot to mask the seams with white out; you can see it in the last few pictures. Then I set a green, yellow, purple, and lavender stone on each side. In my last post, I showed the Gold and Sterling Silver kinetic earrings I made. While cleaning up after that project I thought of making bi-metal one. Instead of each side being a different metal, each side would be 2 metals and when soldered into the bead, there would be an appearance of a checkerboard because the bi-metal seams would be rotated 90 degrees from each other.
I started with Copper and Yellow brass. Nice clean edges that were flush and soldered with hard solder. Again I used a circle template I made to put the drill holes on each side of the seam. Holes drilled and then the disk cutter punched the disks out. I did an anneal and deburred the holes. Next was the dapping block and I first went into a shallow dapping hole. Then the disks were moved to a deeper hole and that when the seam gave way. I tried a sample without drilling that I even annealed a second time and the seam failed also. I asked in a FB metals group and I was convinced that brass was not going to work since it is a harder metal than pure copper (which I knew). The hive mind consensus was to try copper and sterling silver - which I was going to do eventually but wanted to perfect the process with a less expensive material but at this point I had nothing to loose. I went through my silver scrap and found pieces of sheet that would work but needed to be rolled a bit thinner. So I started over again. Everything was going well until I went to solder the first bead together. I used cross locking tweezers and my mini-torch with oxy/propane.... the bi-metal seams gave way probably due to the pressure of the tweezers AND the OXY/propane getting the bead too hot. Luckily I had cut enough disks for THREE beads just incase. On the second bead I used T-pins to hold the bead in alignment and used by hand held butane torch which would take longer to heat up the bead and melt the easy solder but there was *almost* no chance of melting the hard solder. I took it real slow and after an hour both beads were soldered and pickled. Then it was time to polish and mount on ear wires. The completed earrings are the very last picture! 
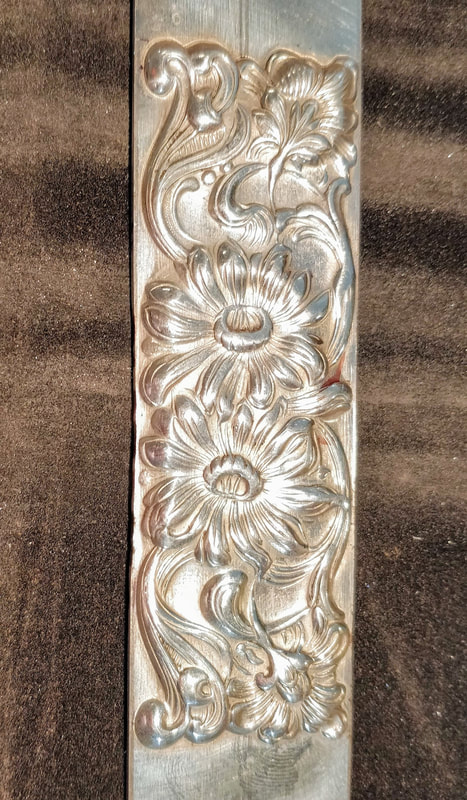
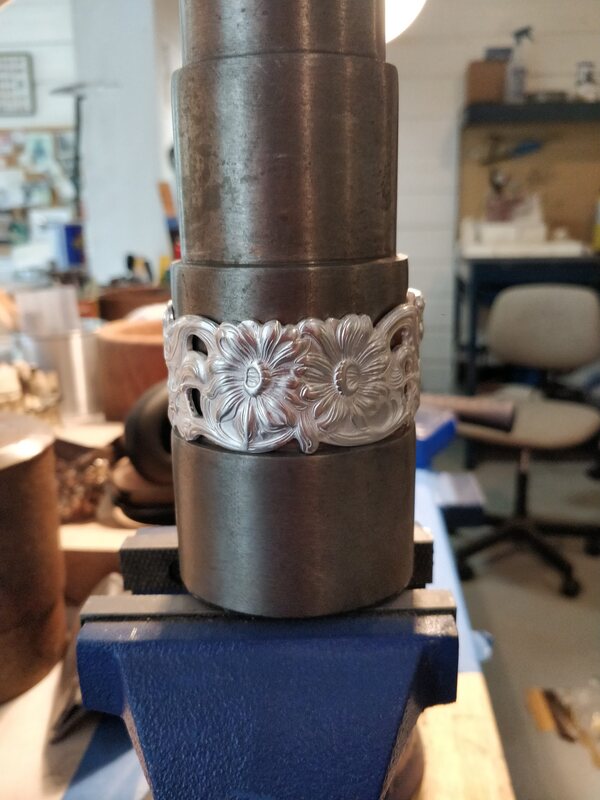
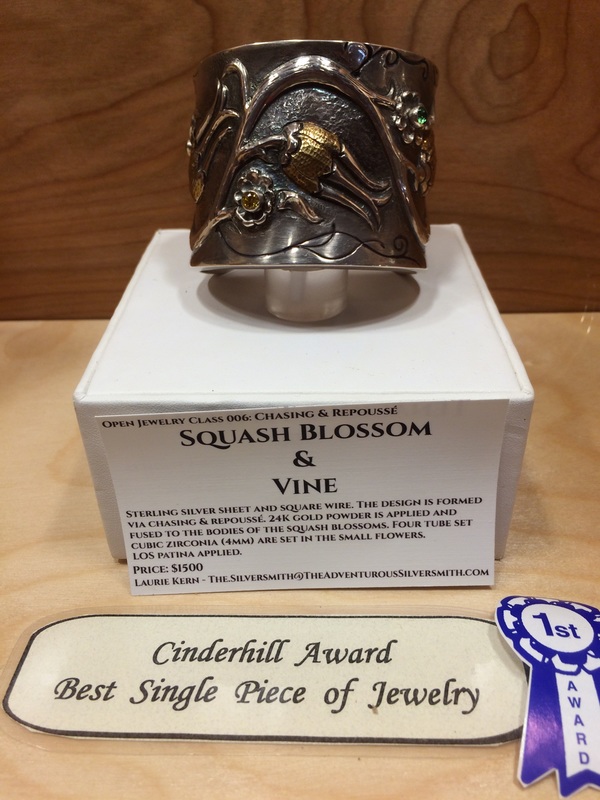
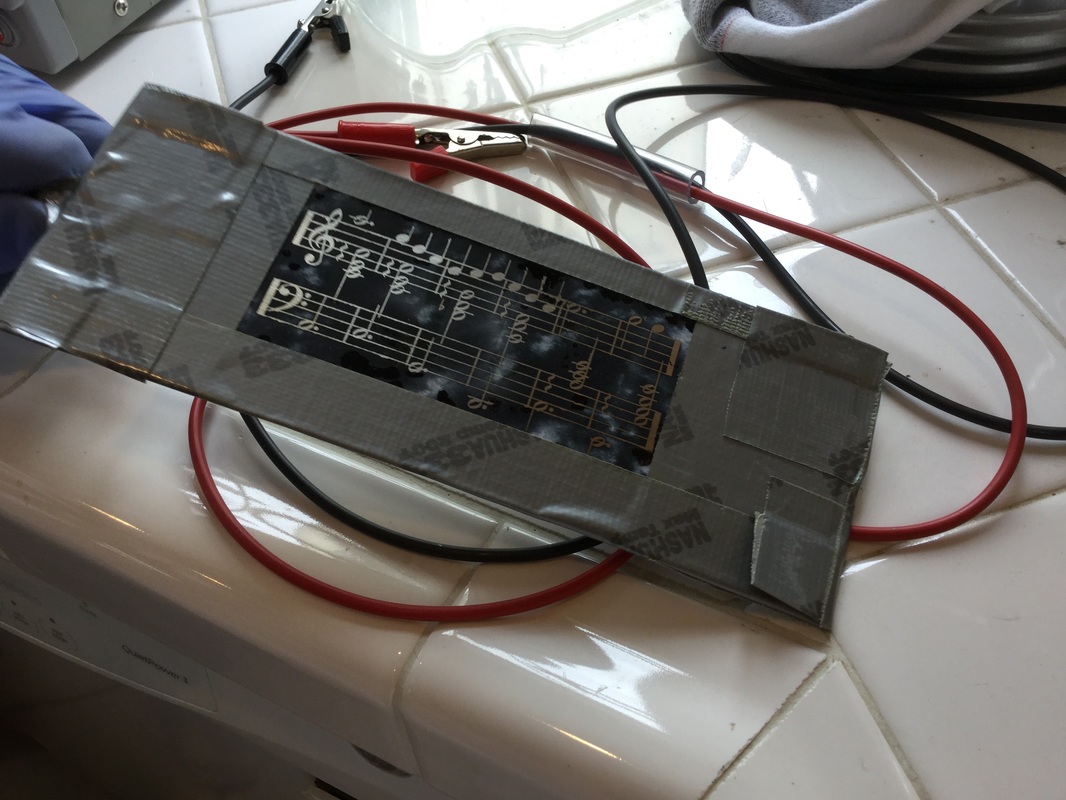
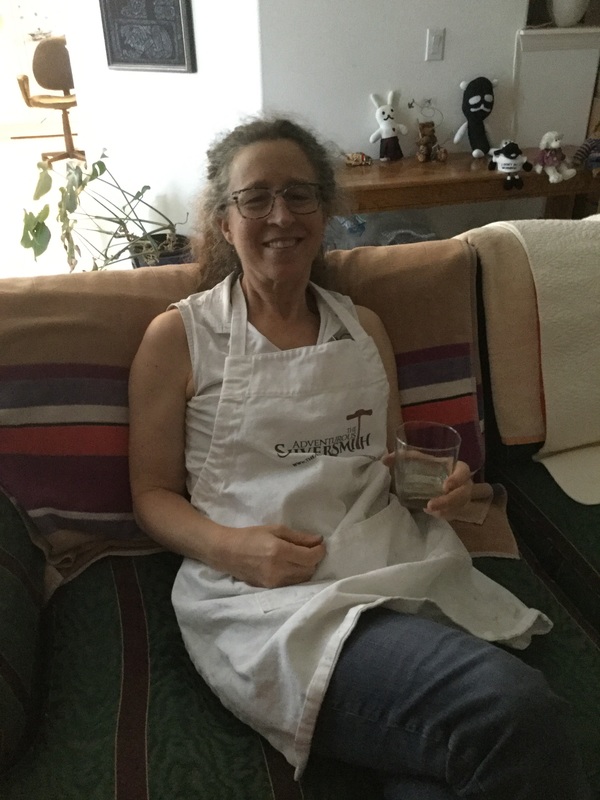
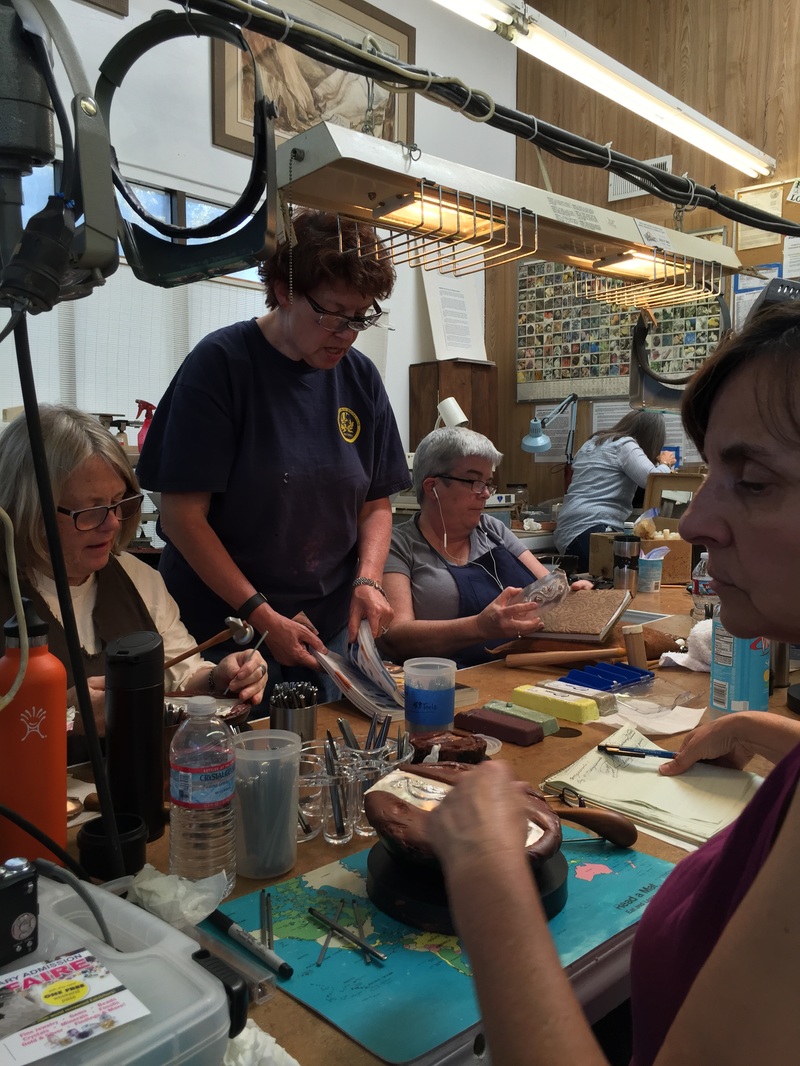
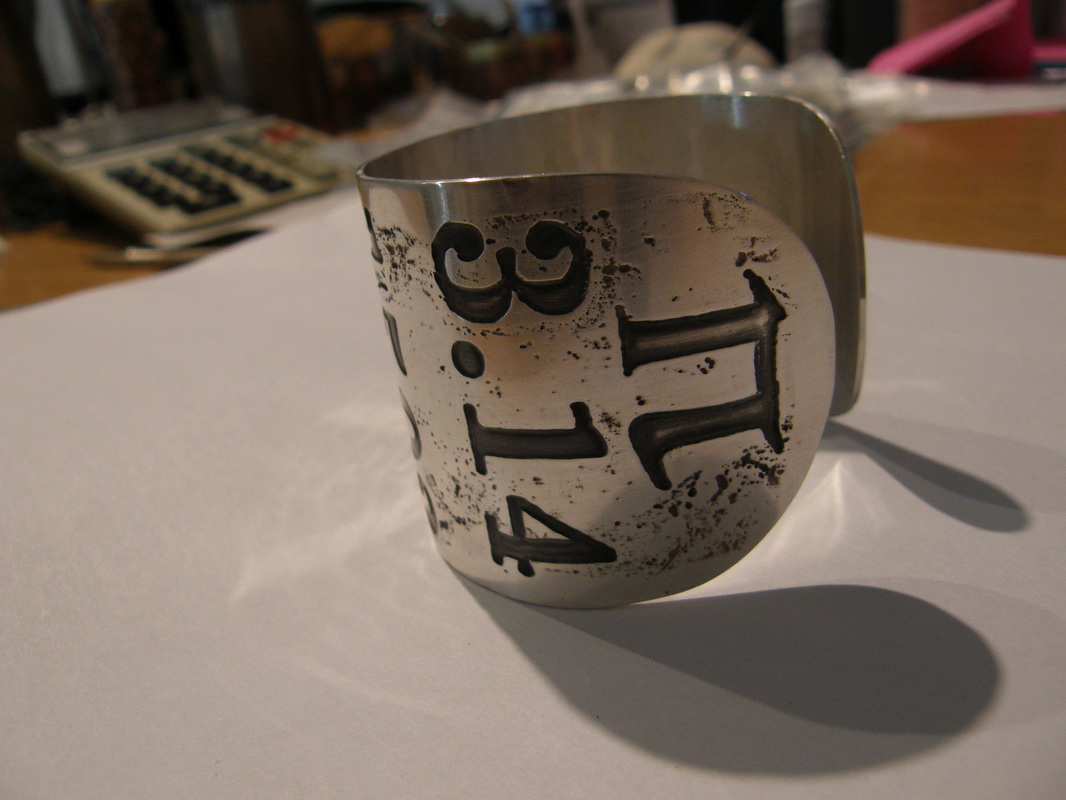
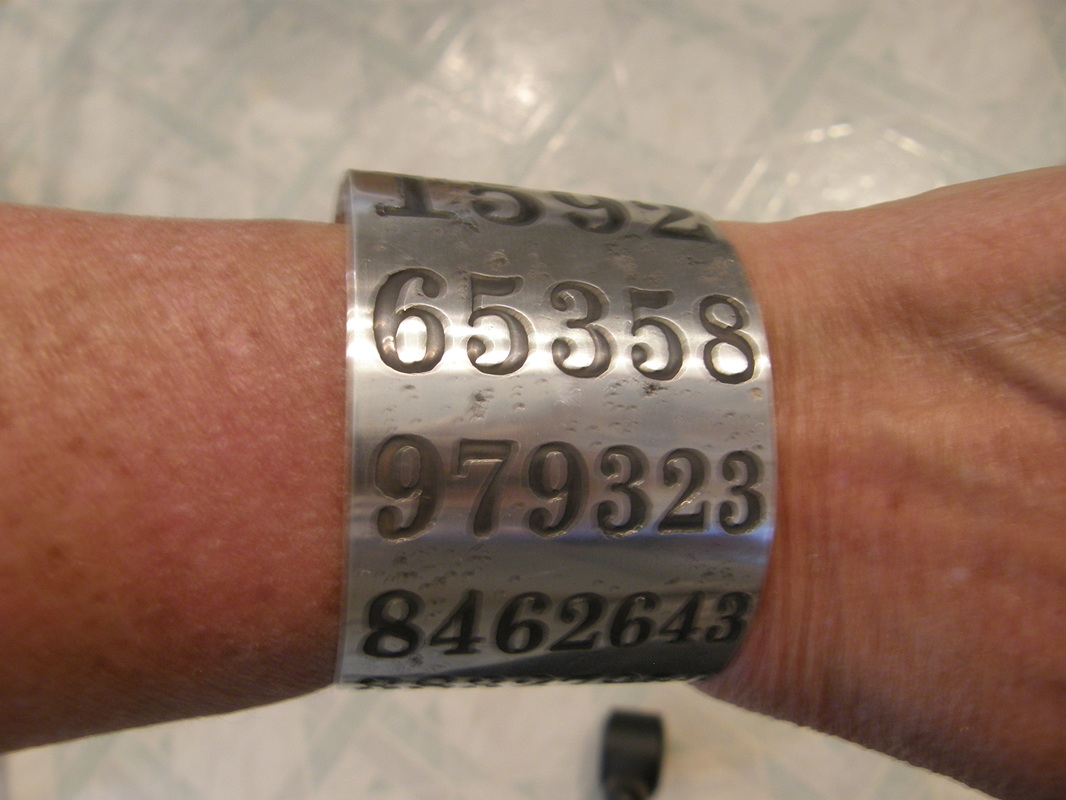
After I completed my Art Nouveau cuff last month, a friend asked to make one for herself (she is a cuff person, like me) so we scheduled a private session for her but I should note that she is a metalsmithing novice having only made a small bowl back in June. Barbara was aware that making the cuff was going to be intense with lots of information about technique and tools to absorb as she worked on the cuff but she was game. Oh, and I would be making a cuff, as well, along side her since I had received a commission for one. 
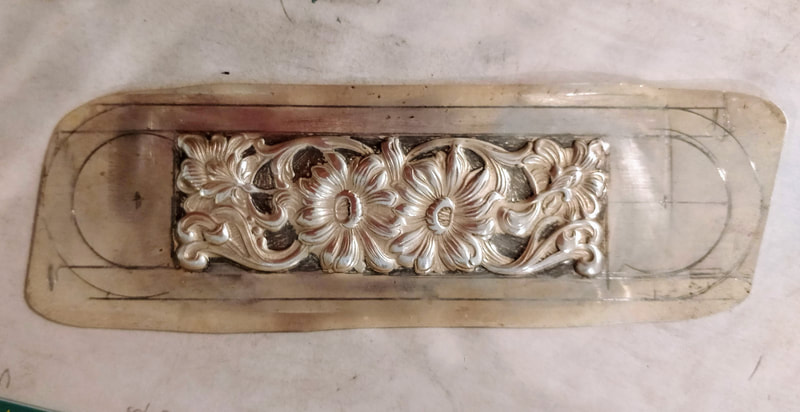
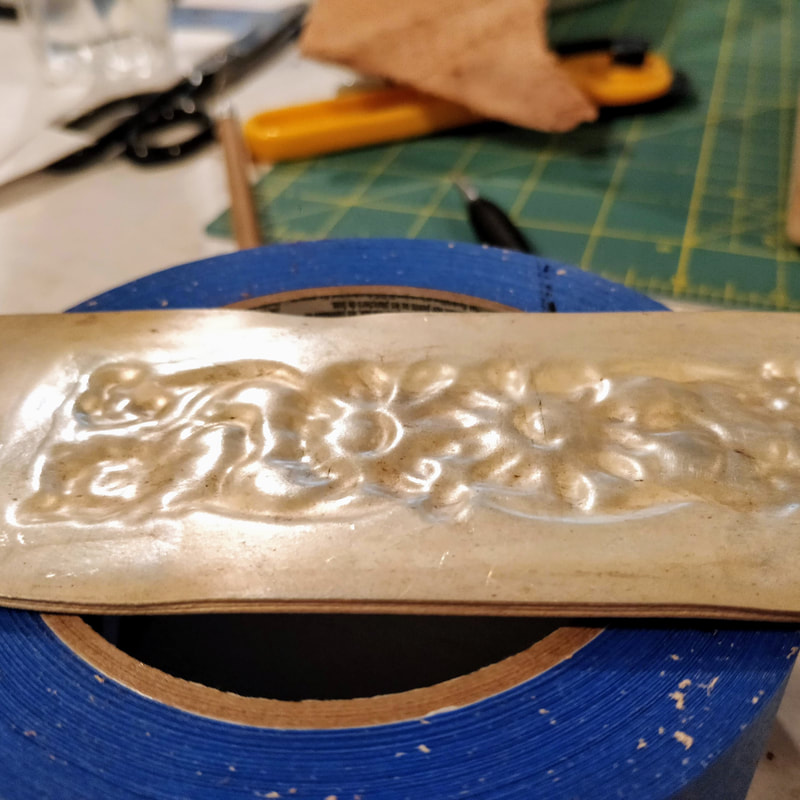
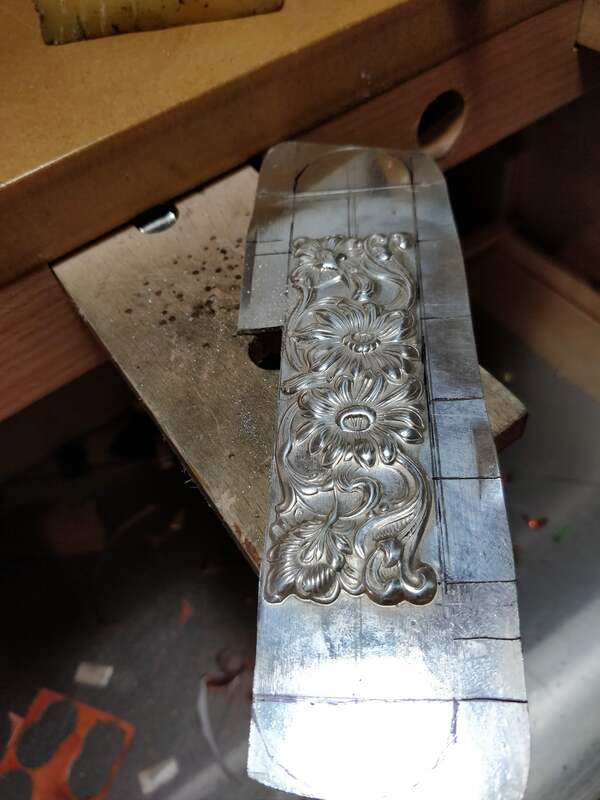
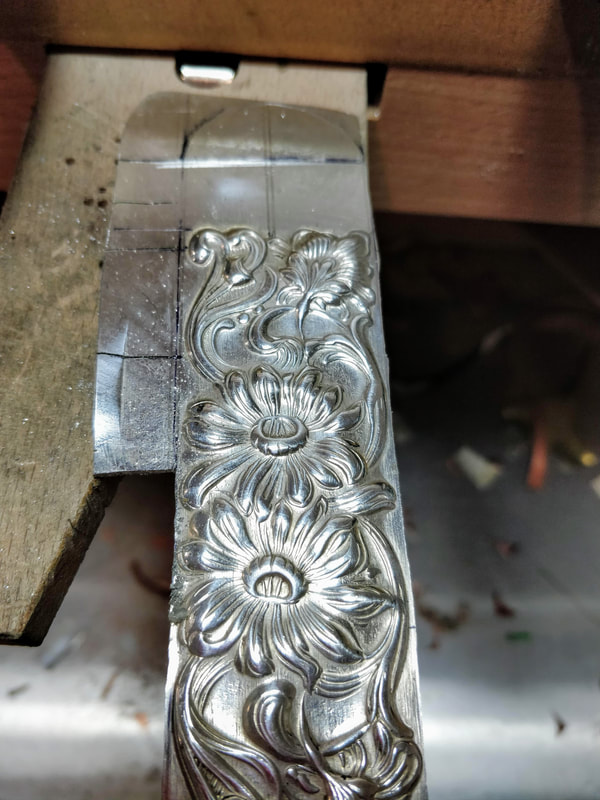
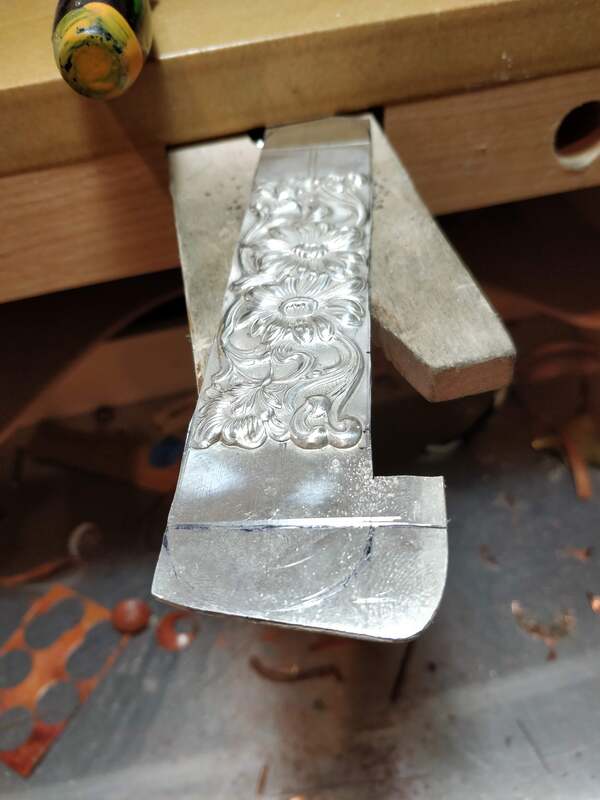
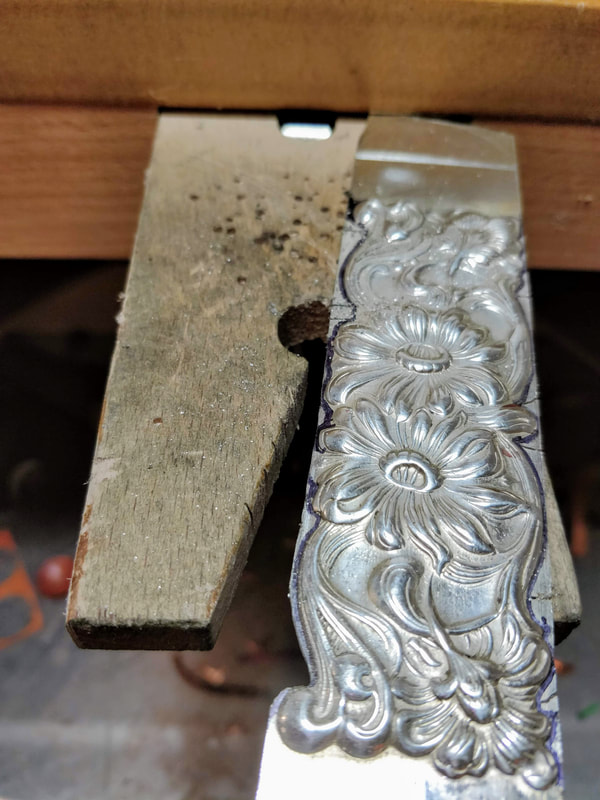
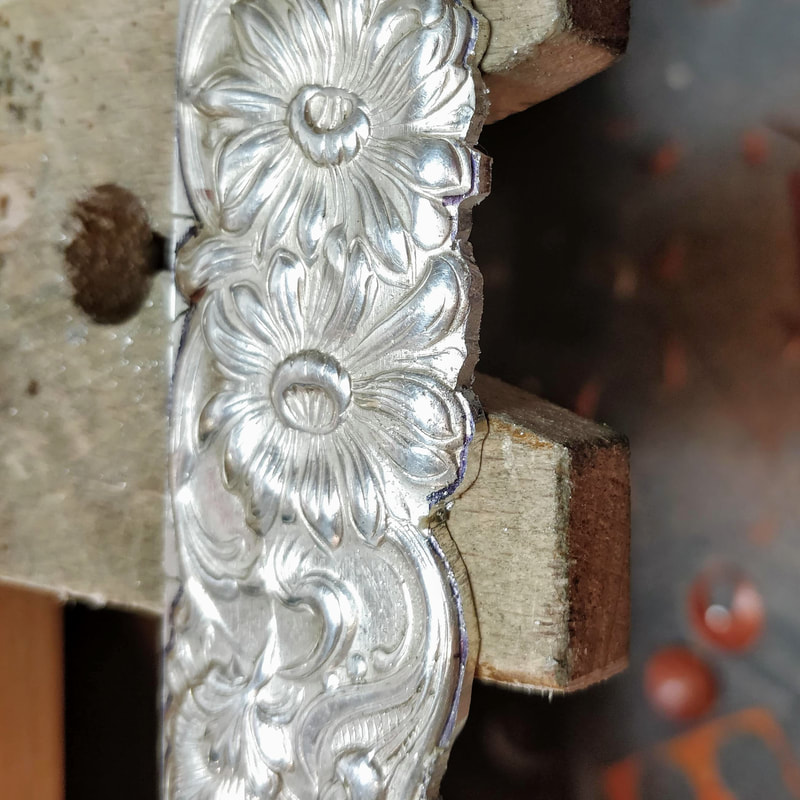
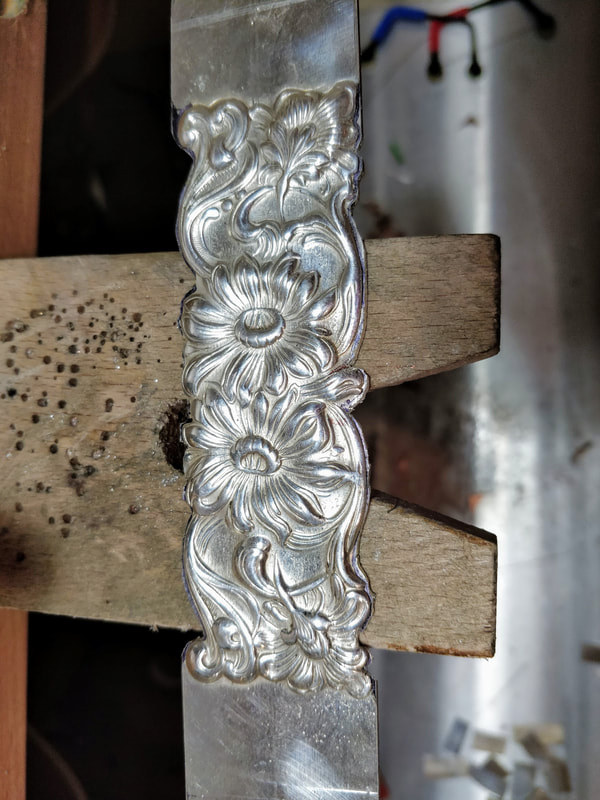
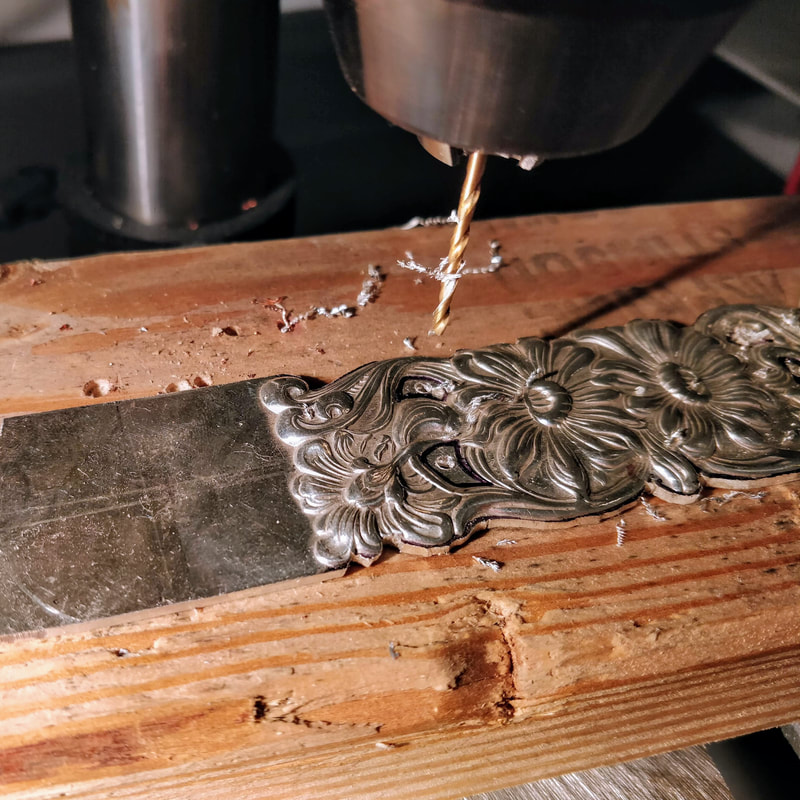
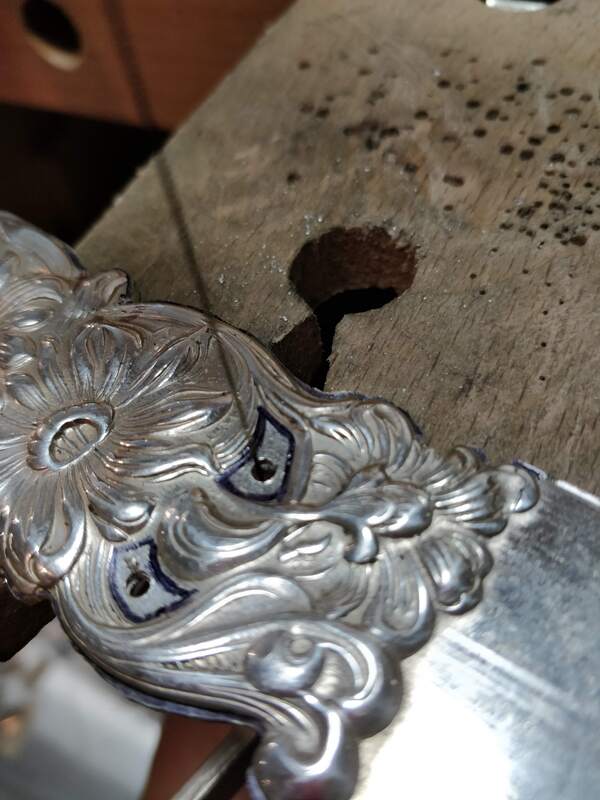
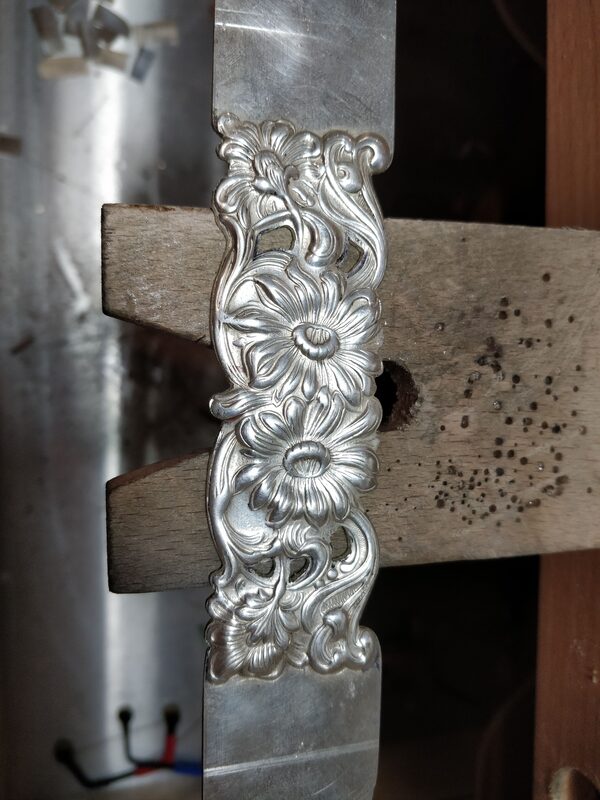
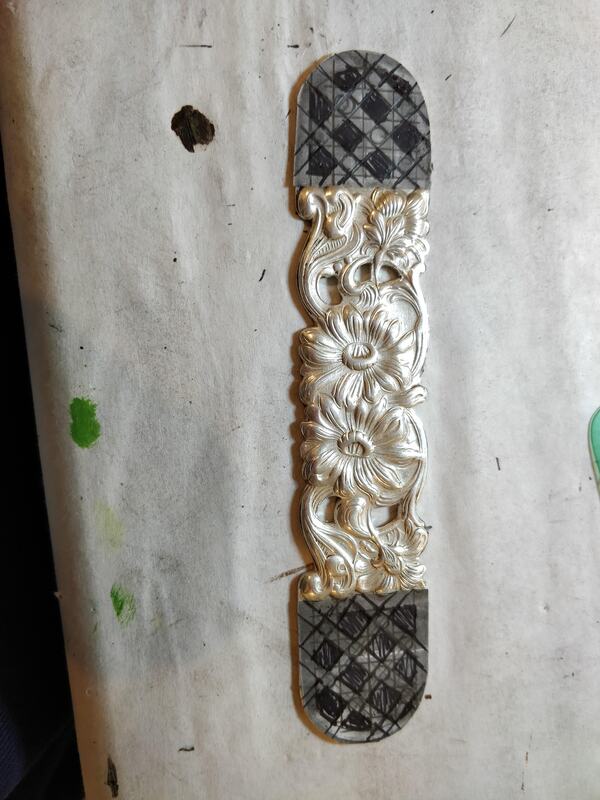
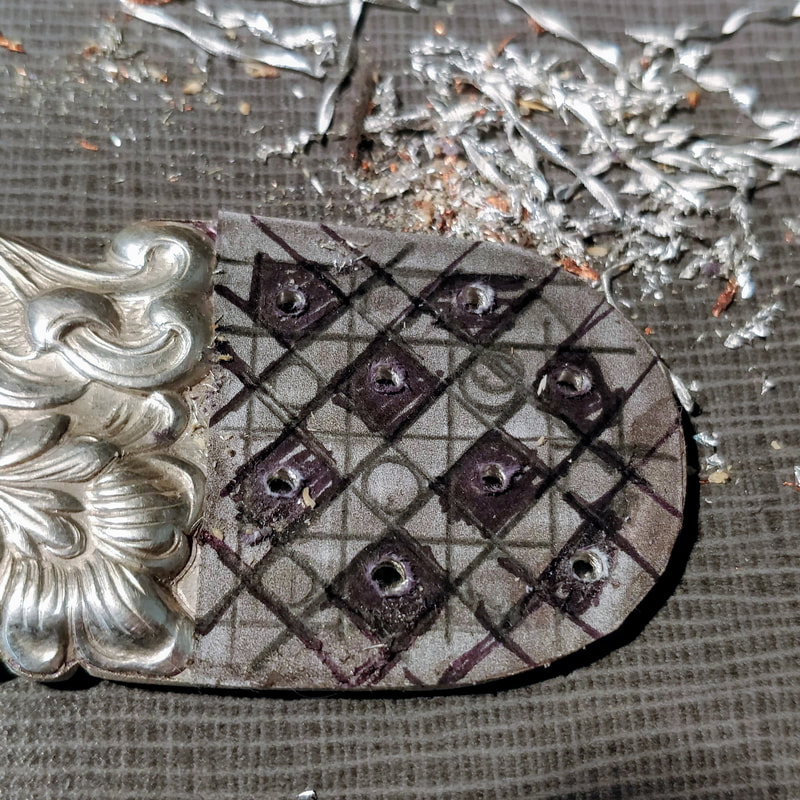
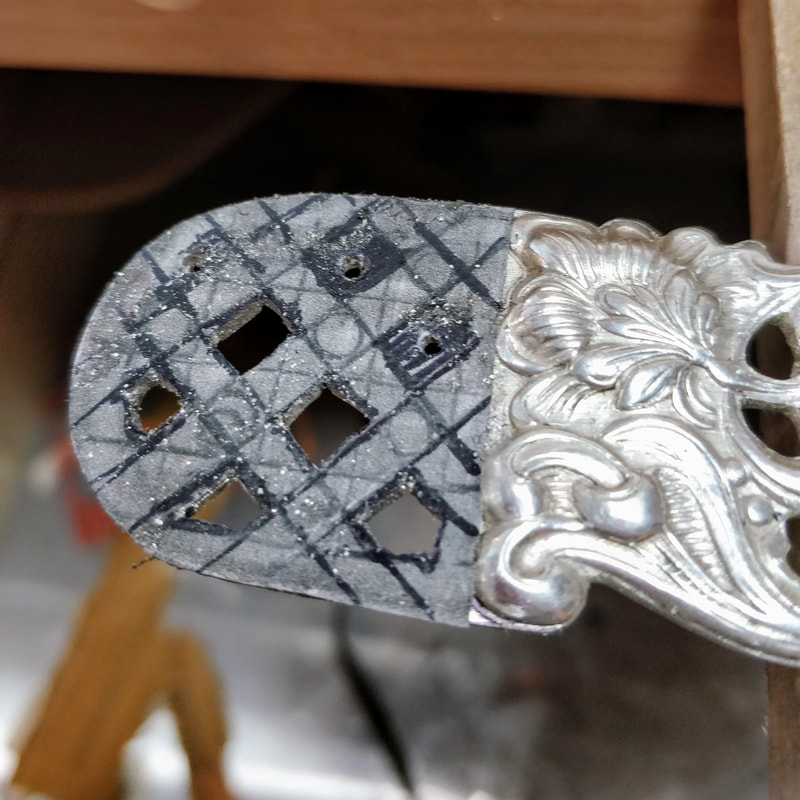
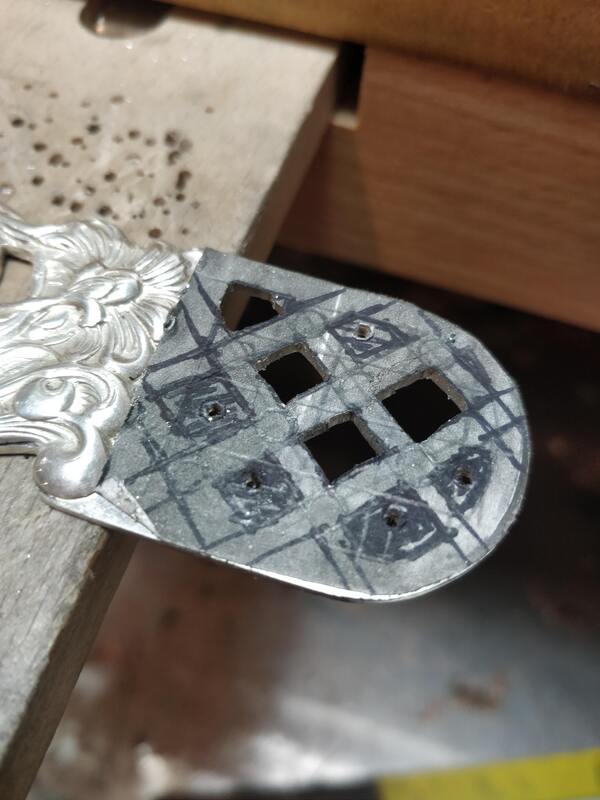
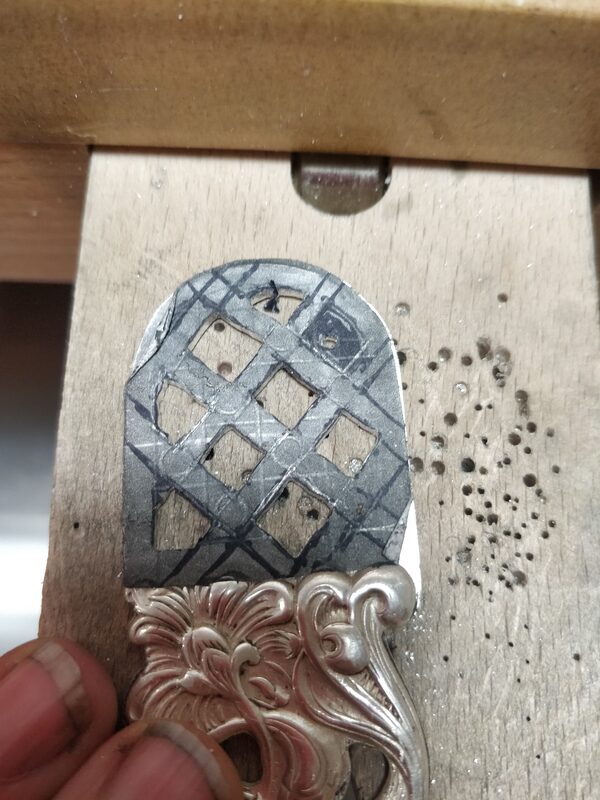
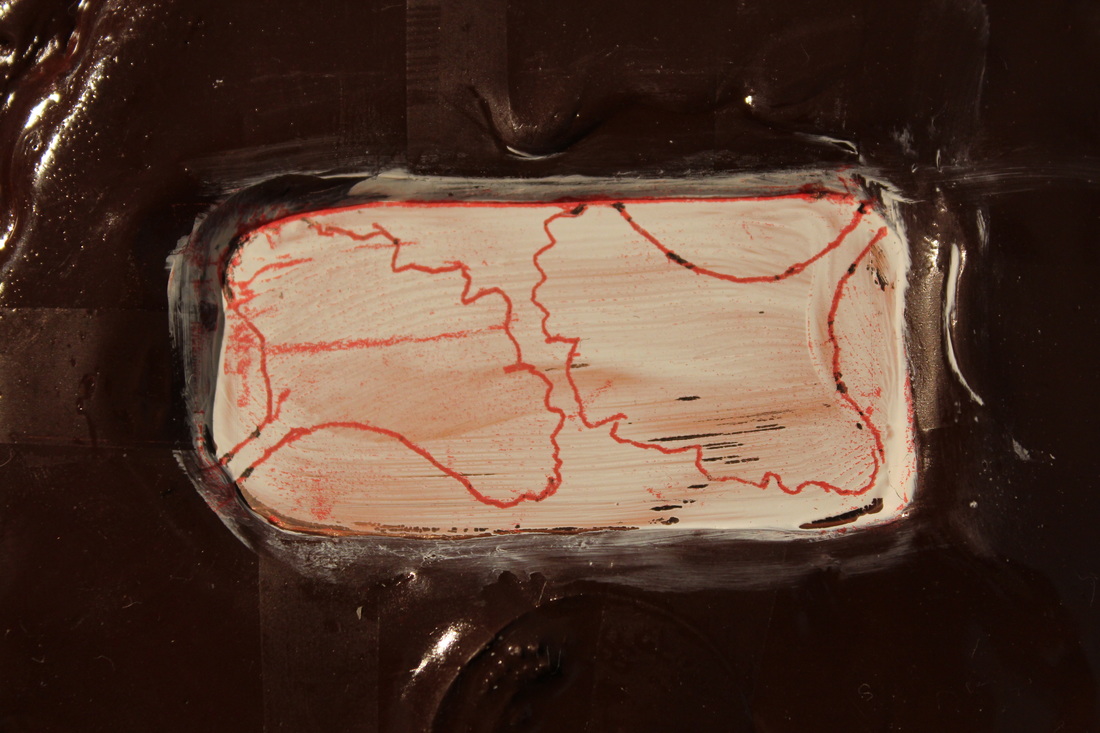
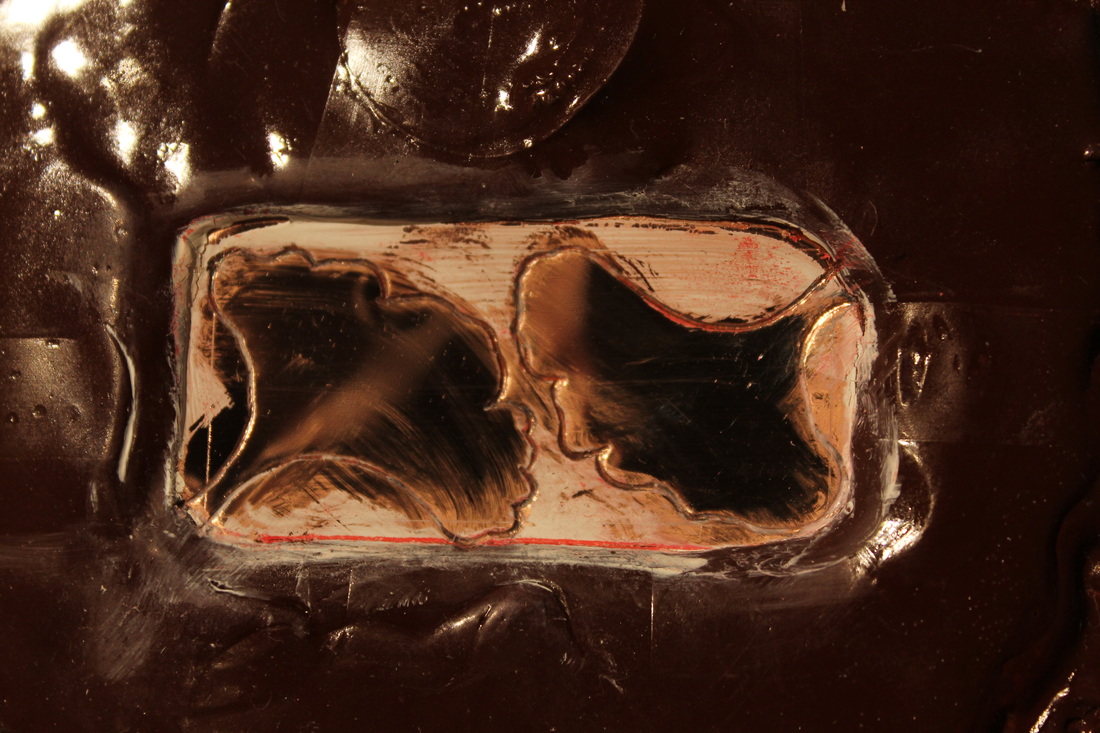
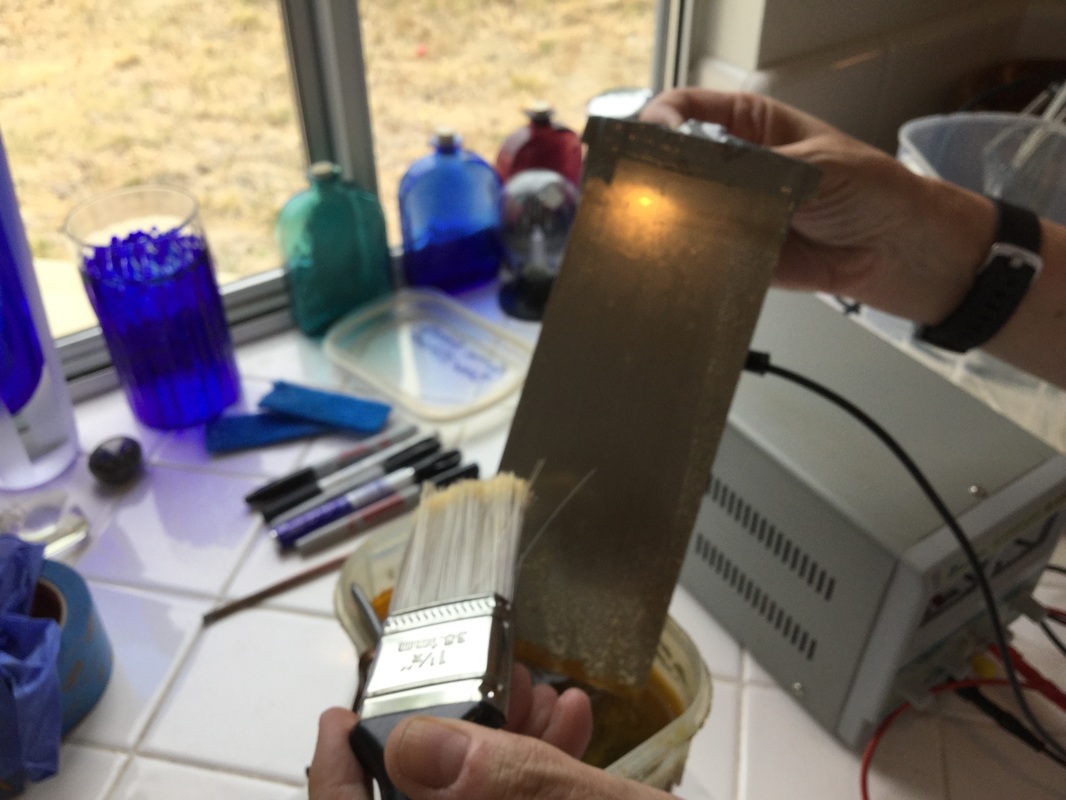
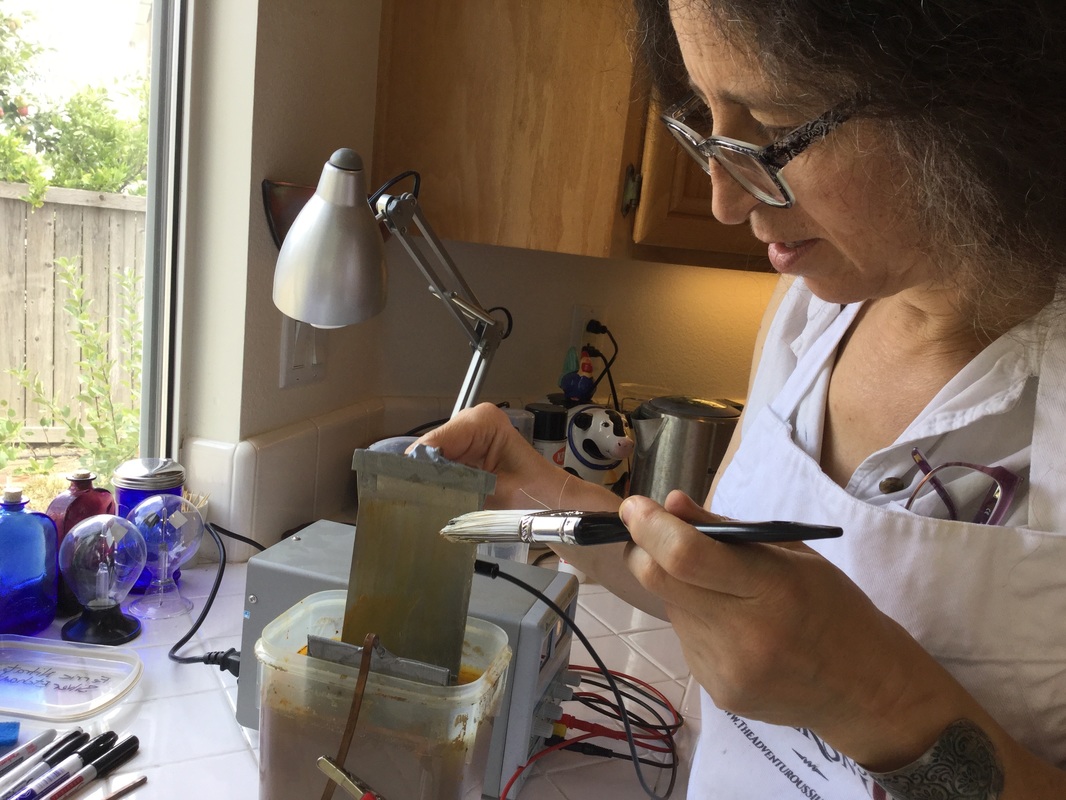
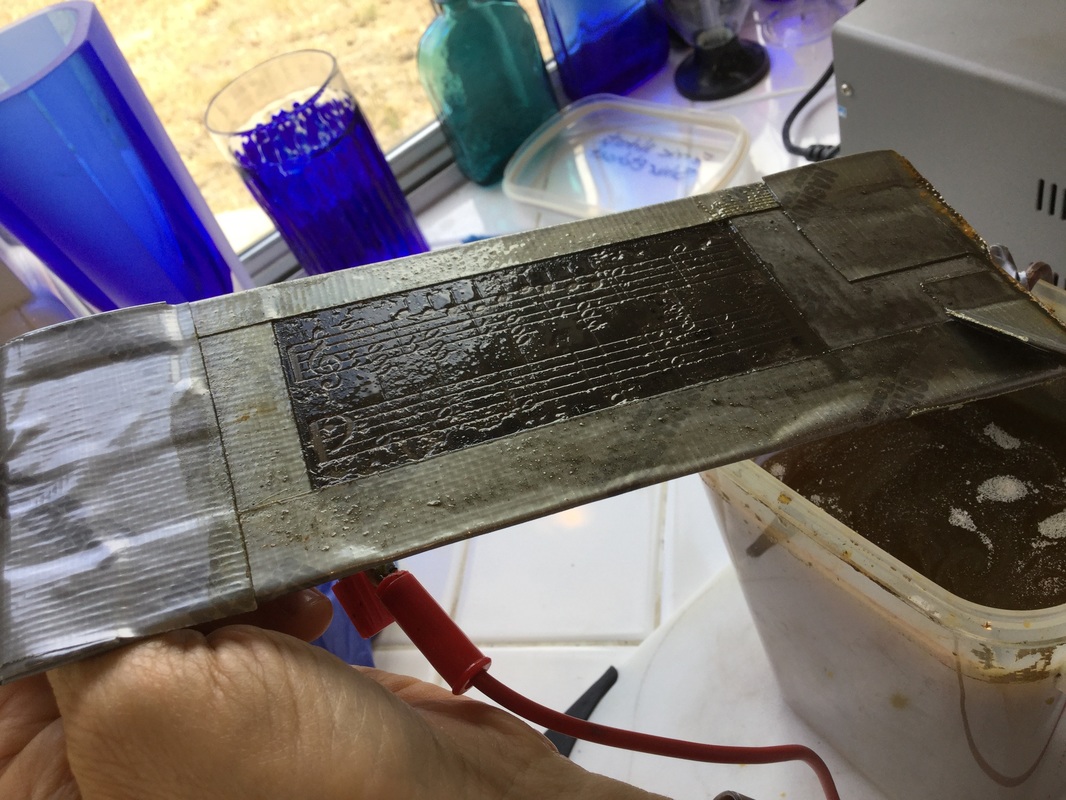
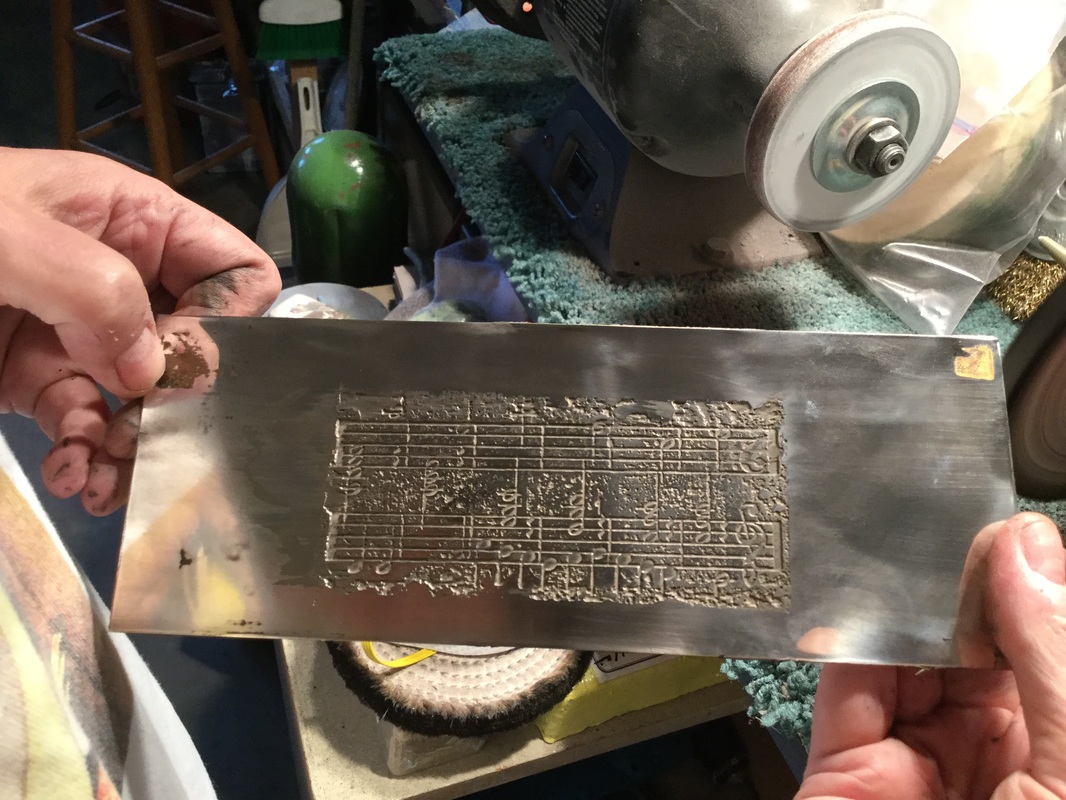
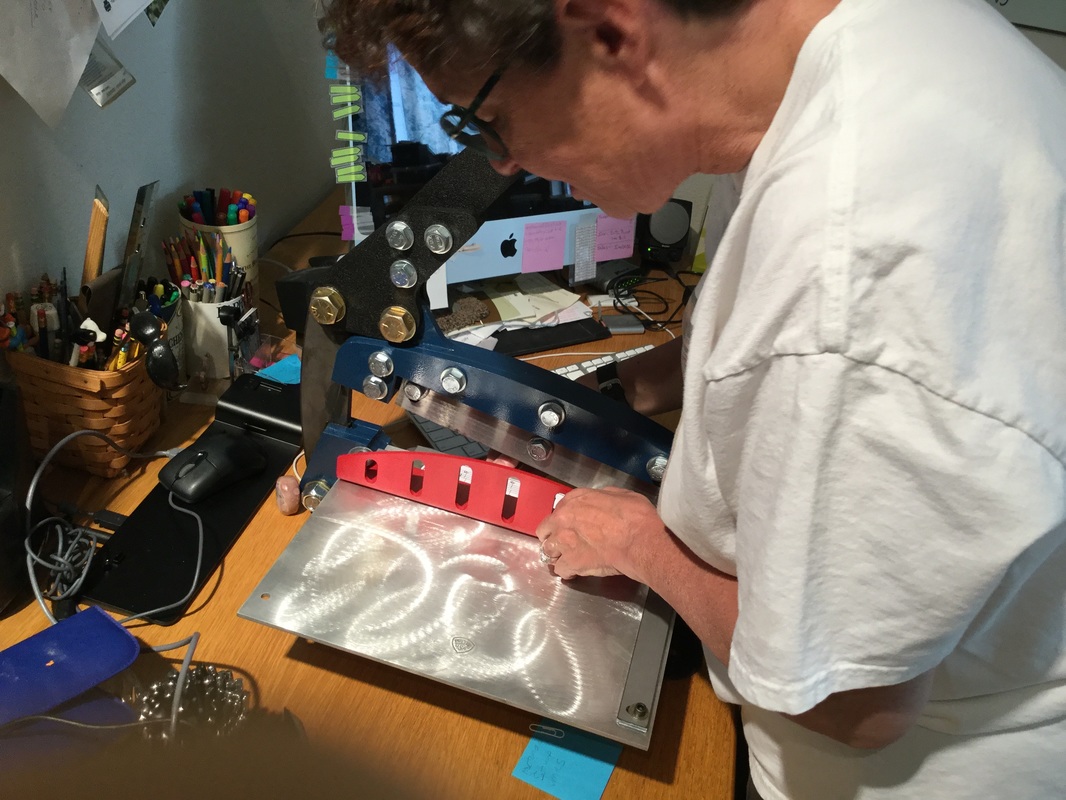
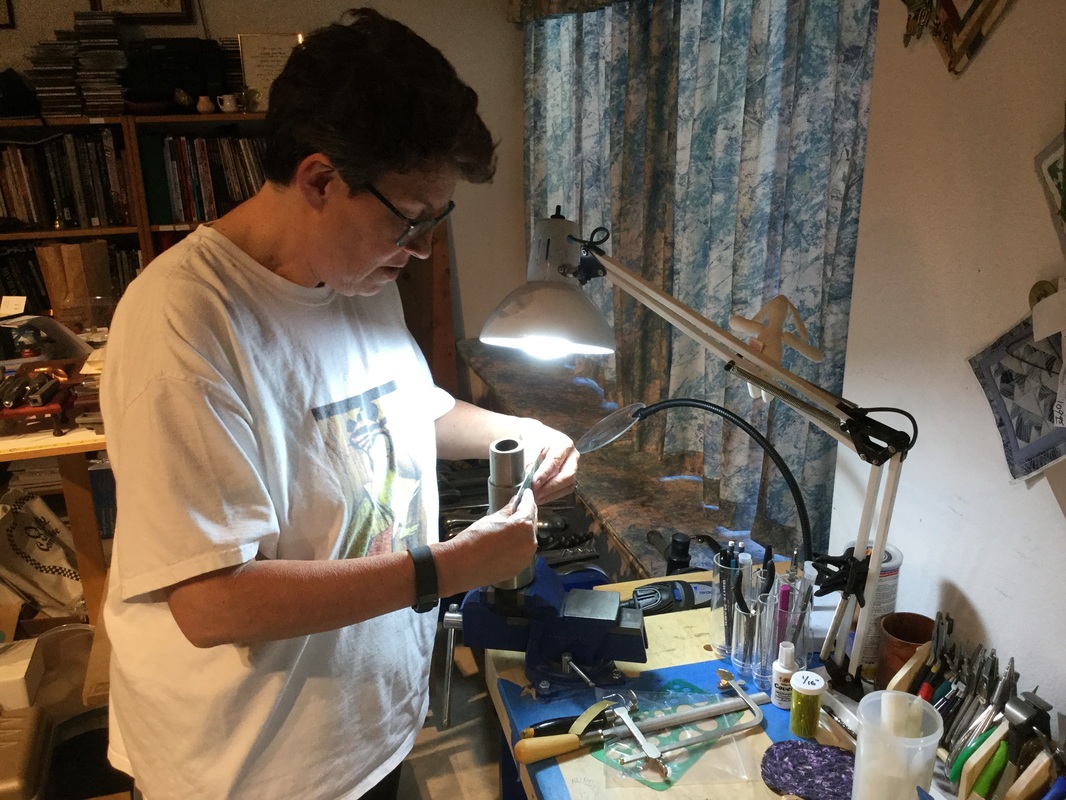
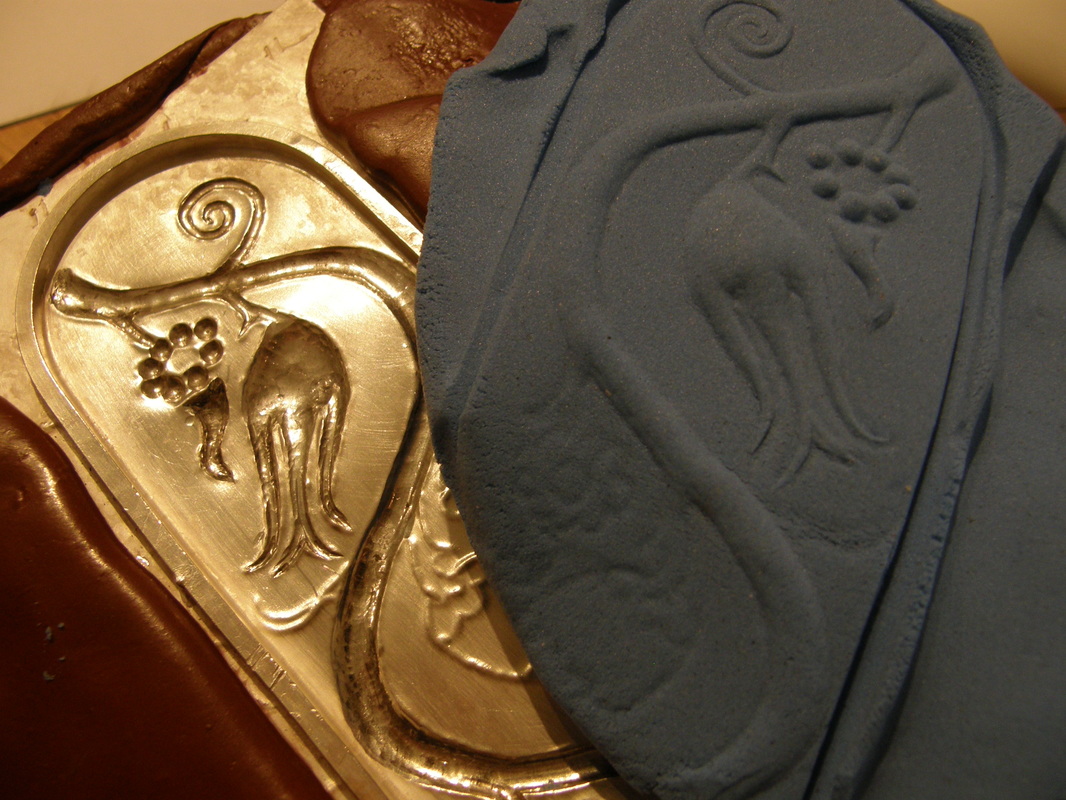
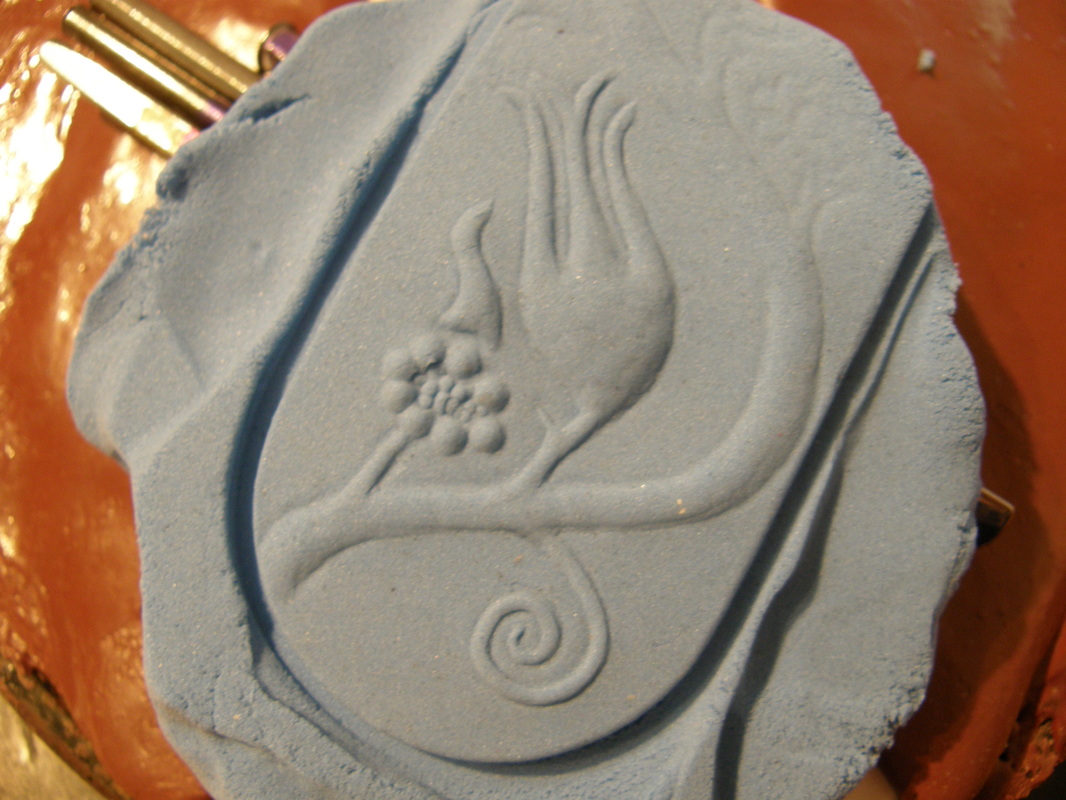
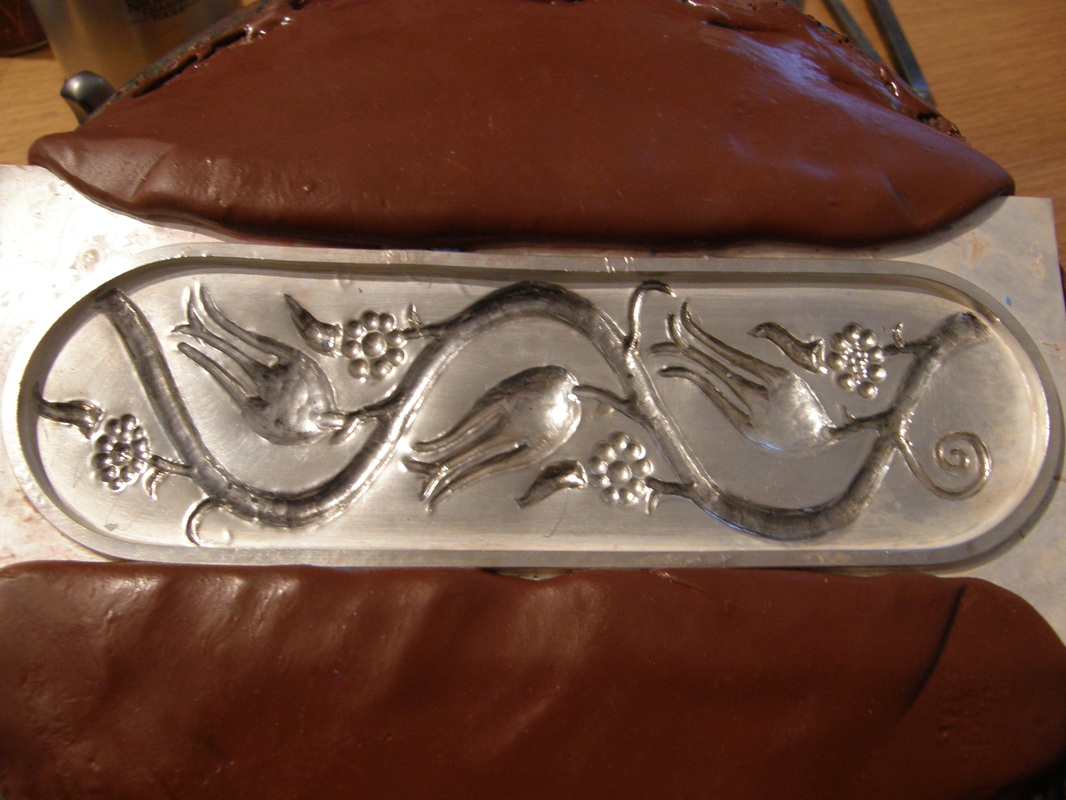
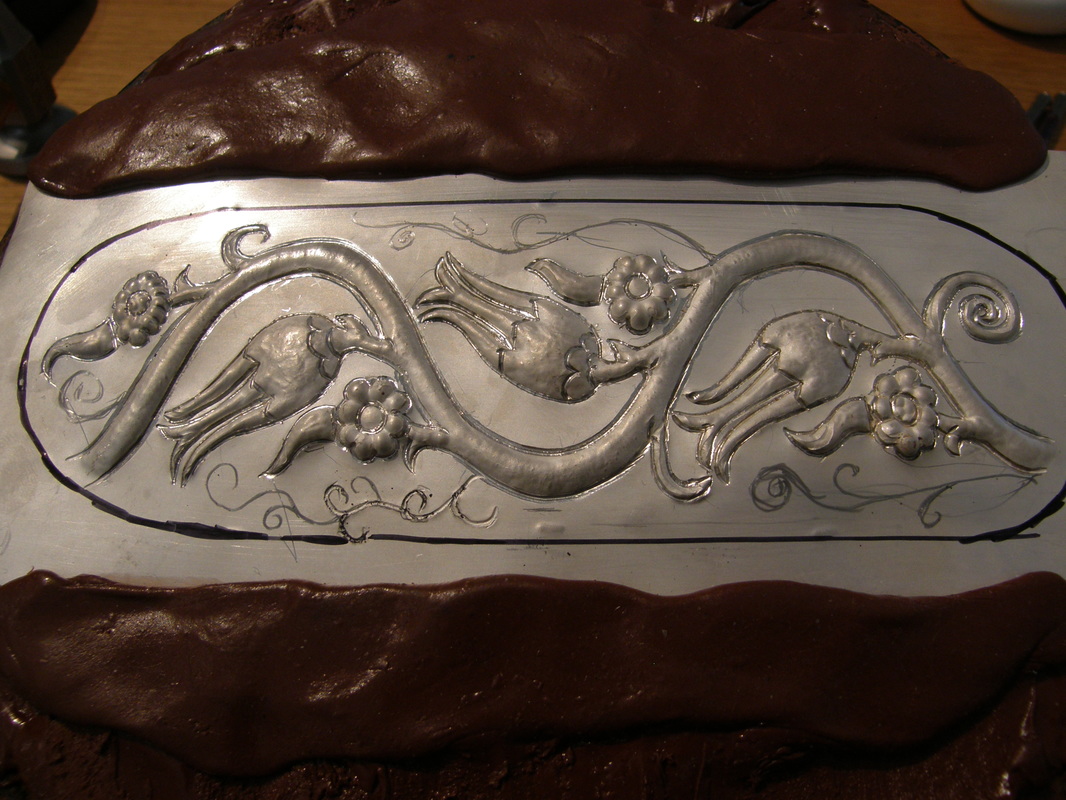
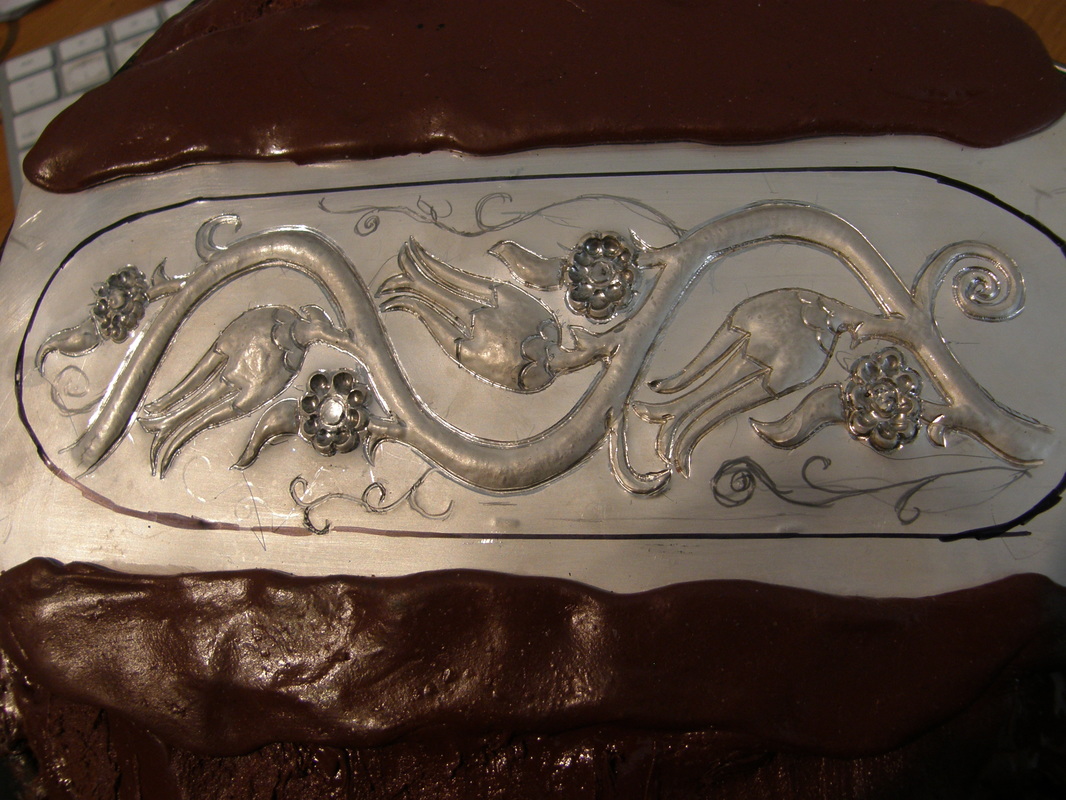
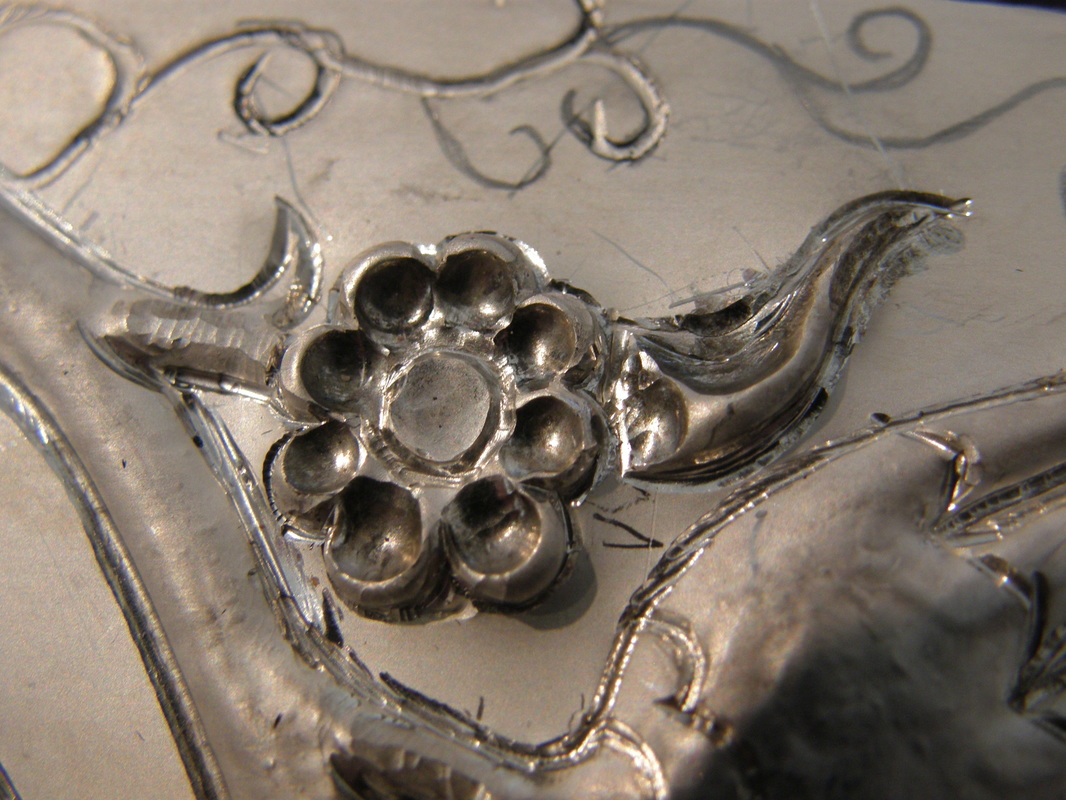
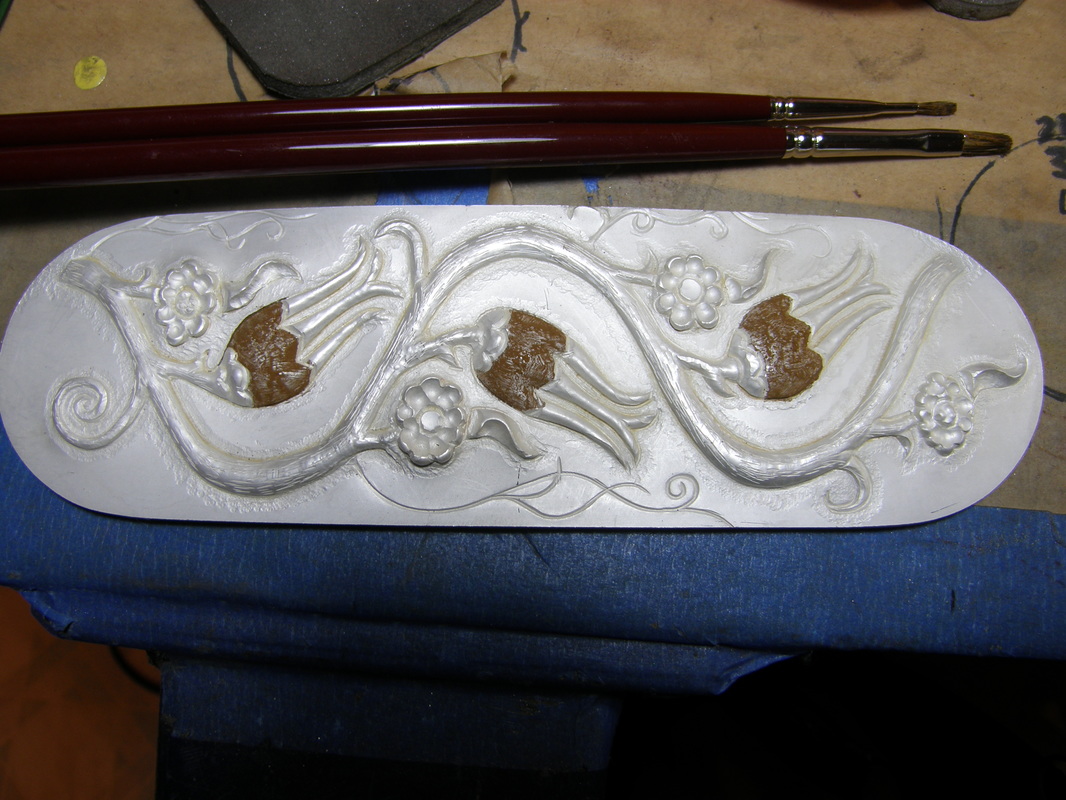
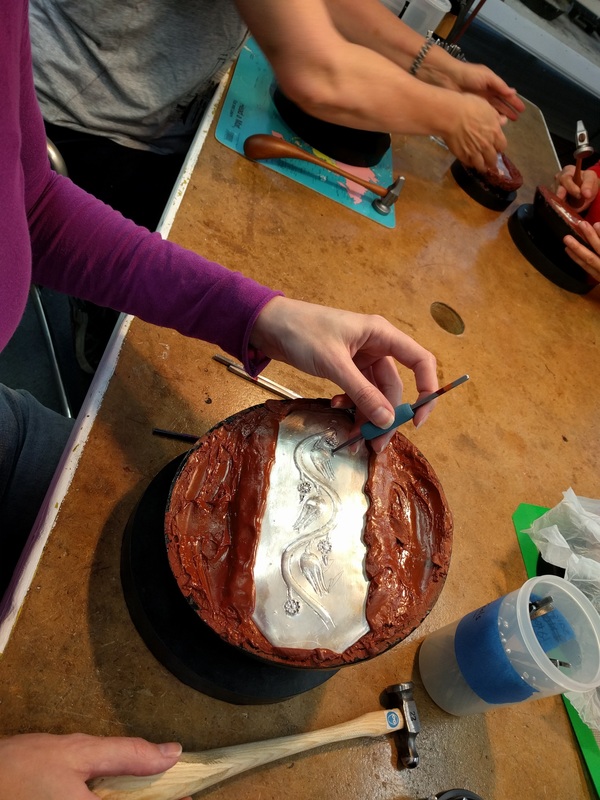
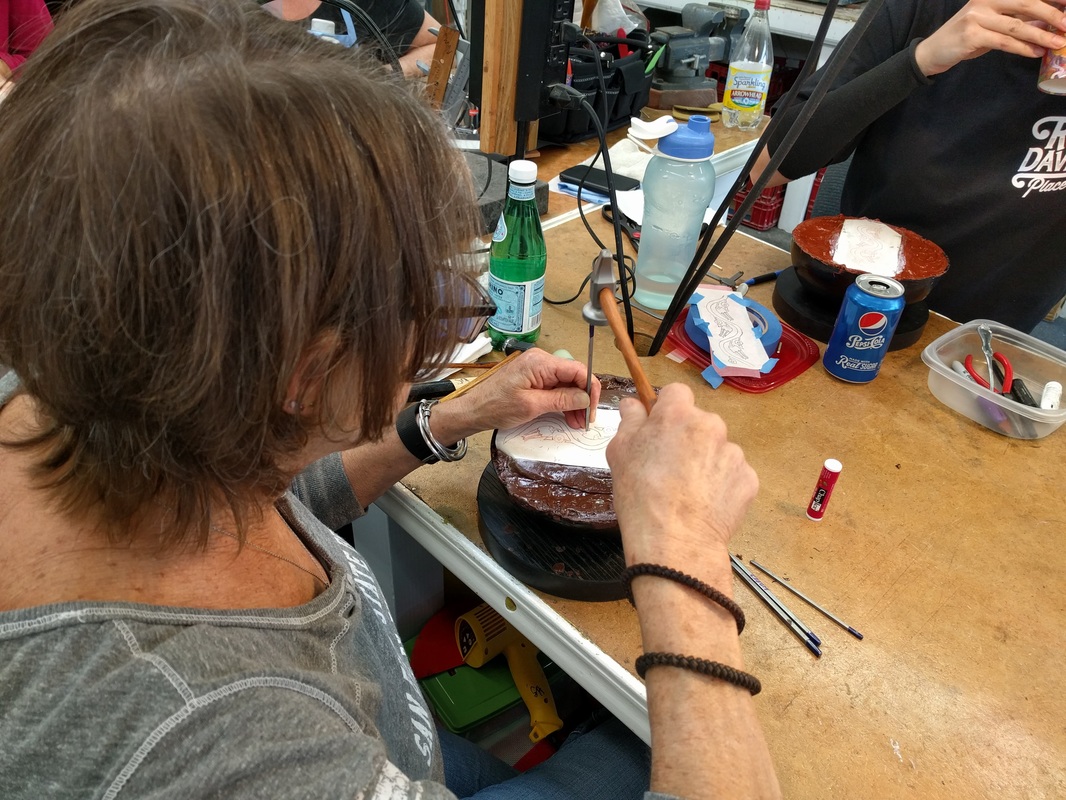
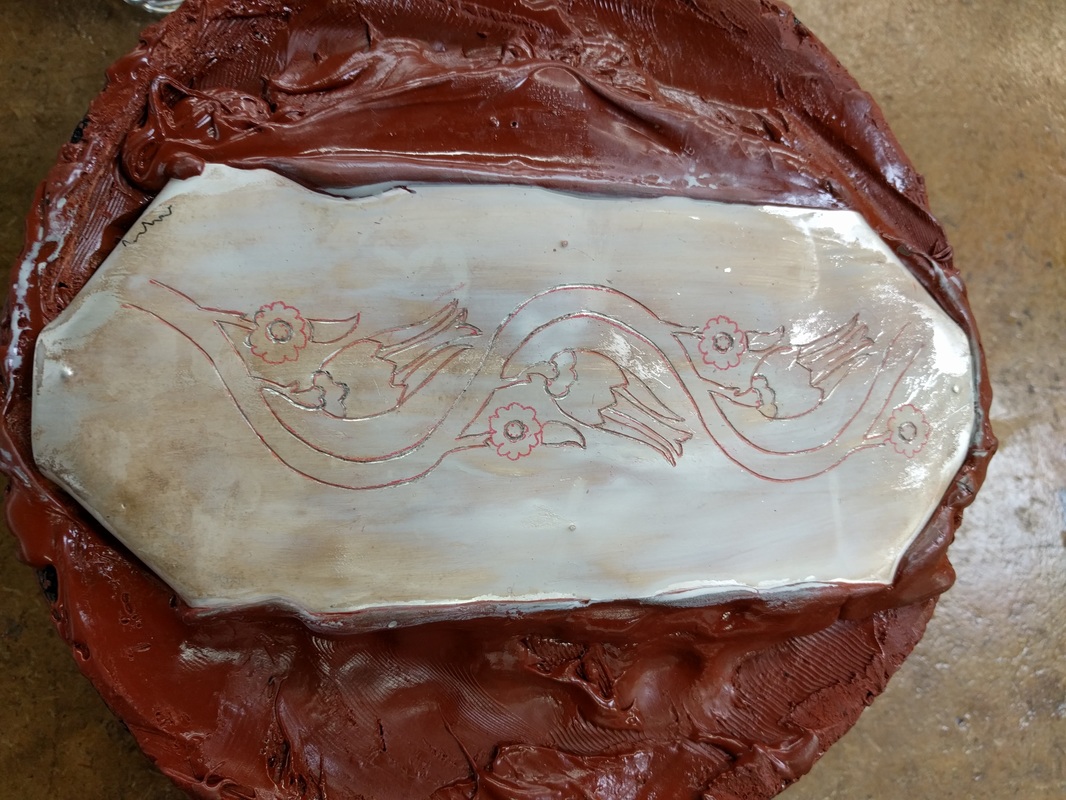
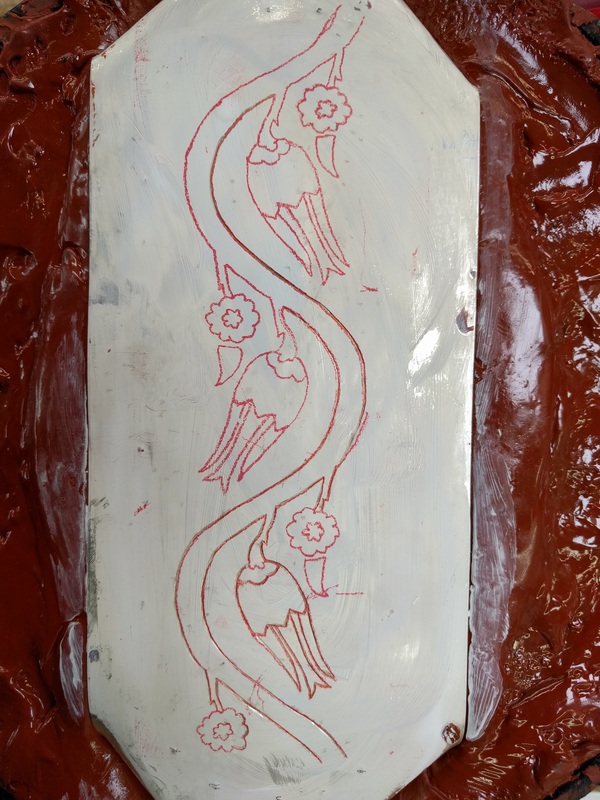
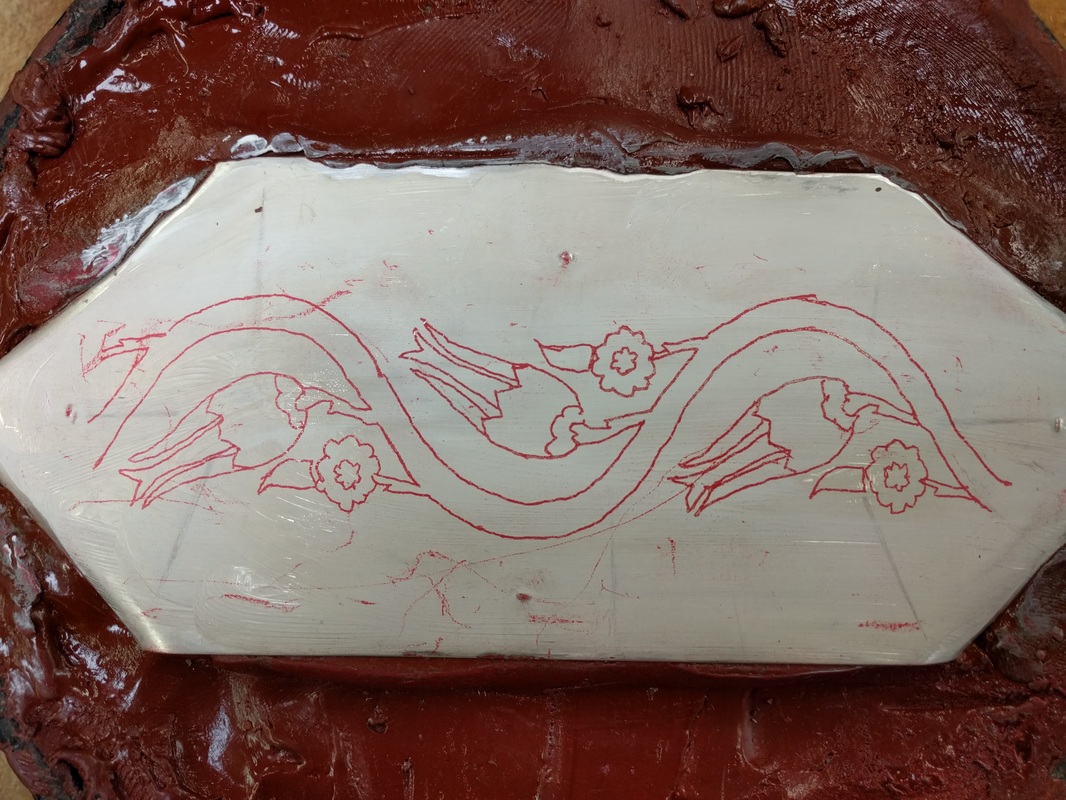
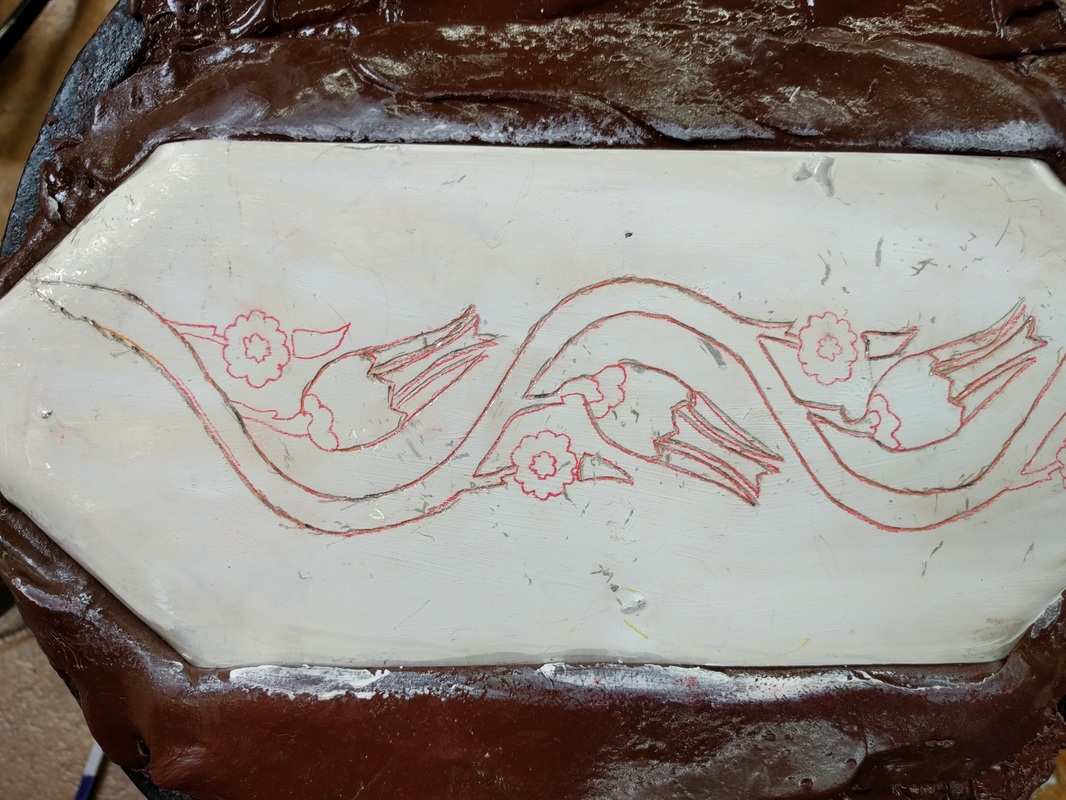
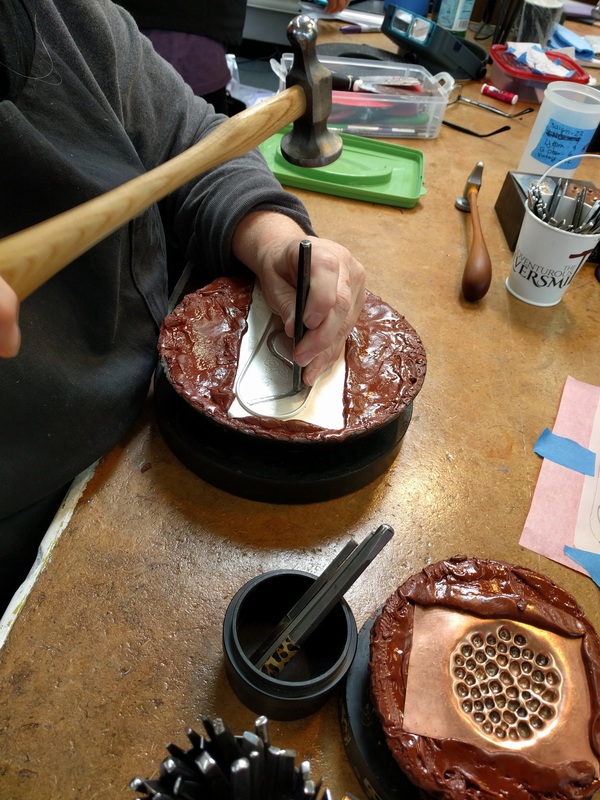
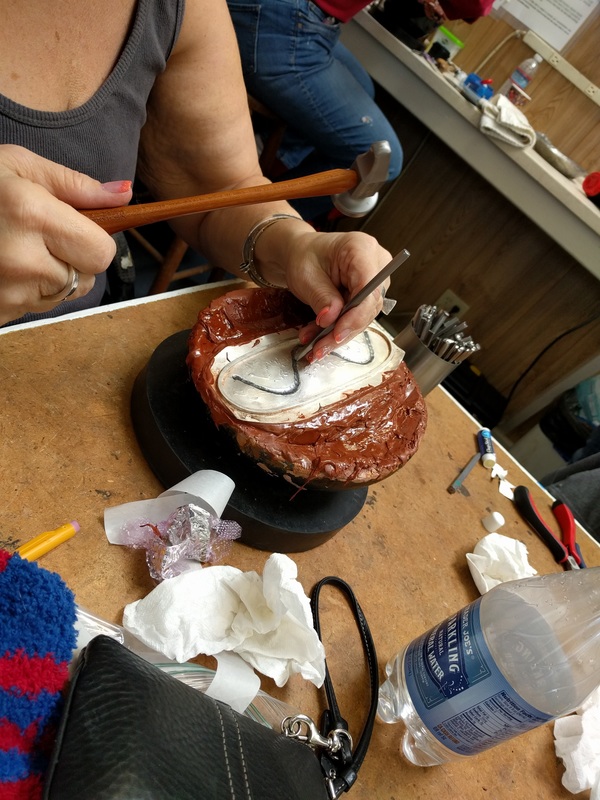
We started off measuring her wrist so we could size the cuff and marking it. Then it was time to saw the outside and do the pierce work. I only broke 3 saw blades but Barbara broke 12 but she now knows how to saw. 
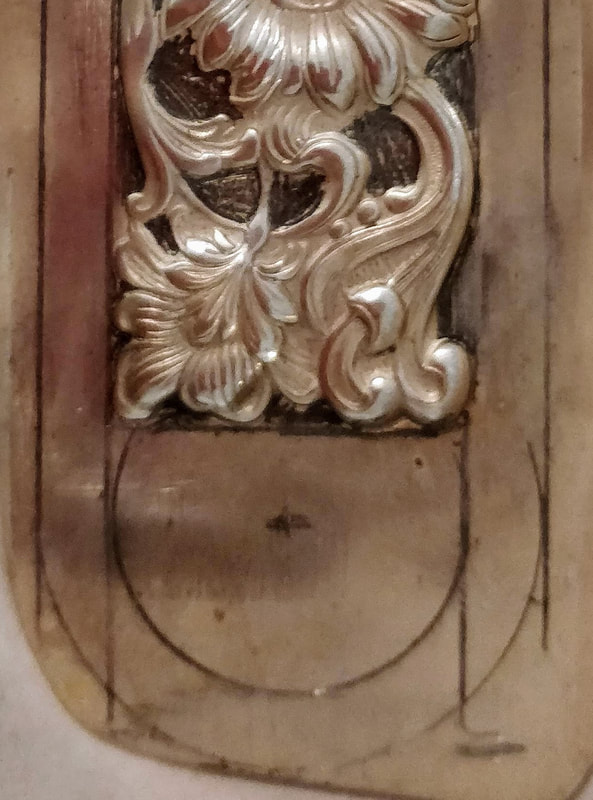
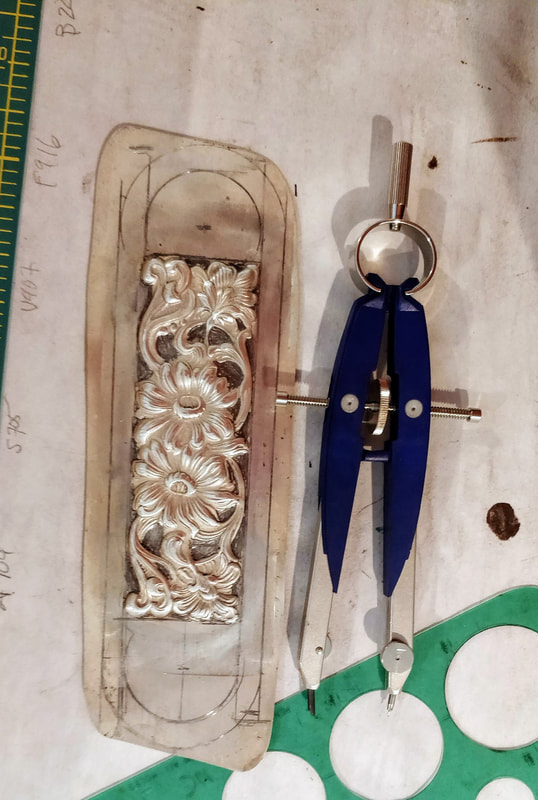
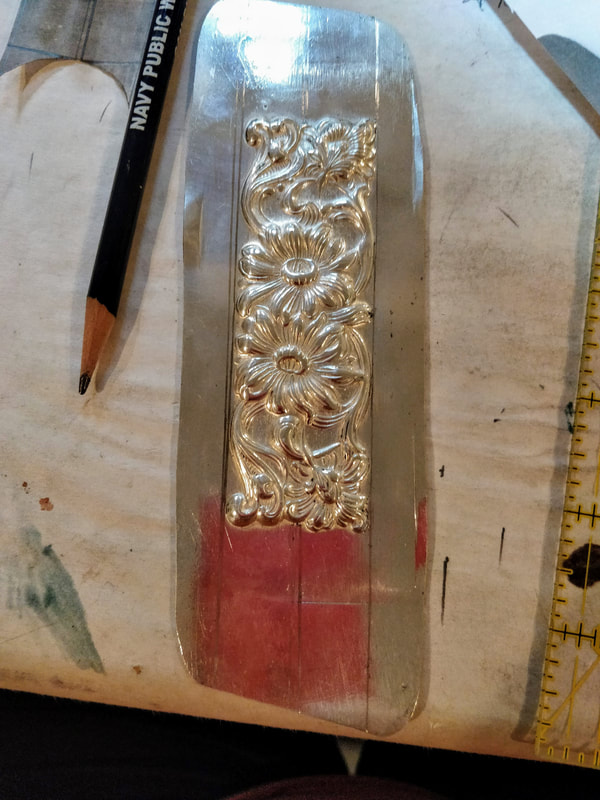
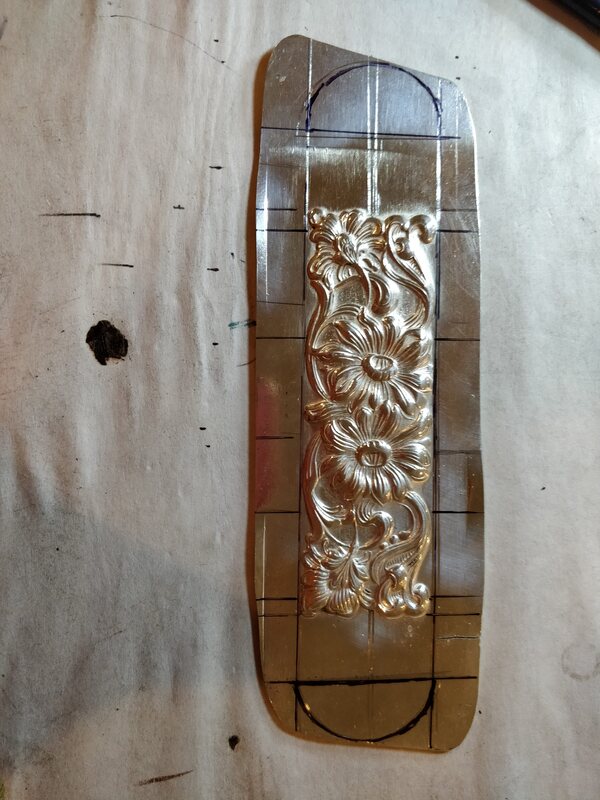
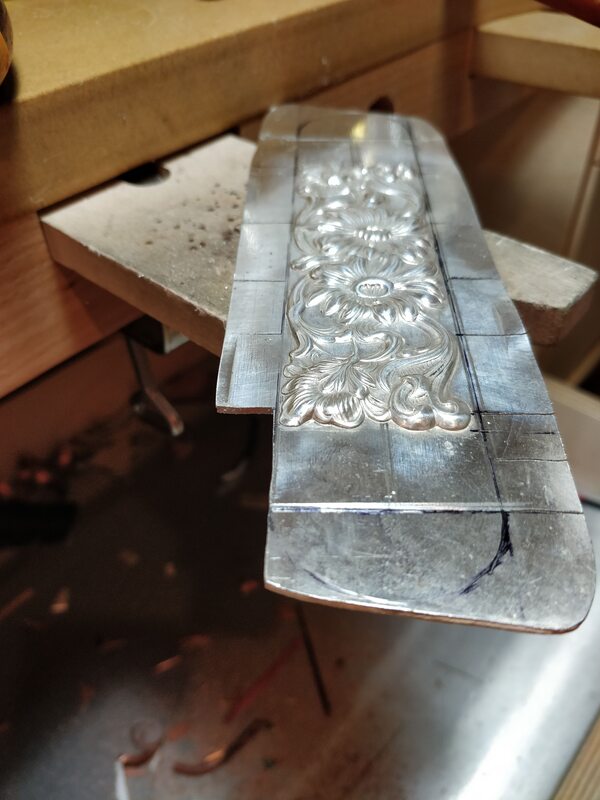
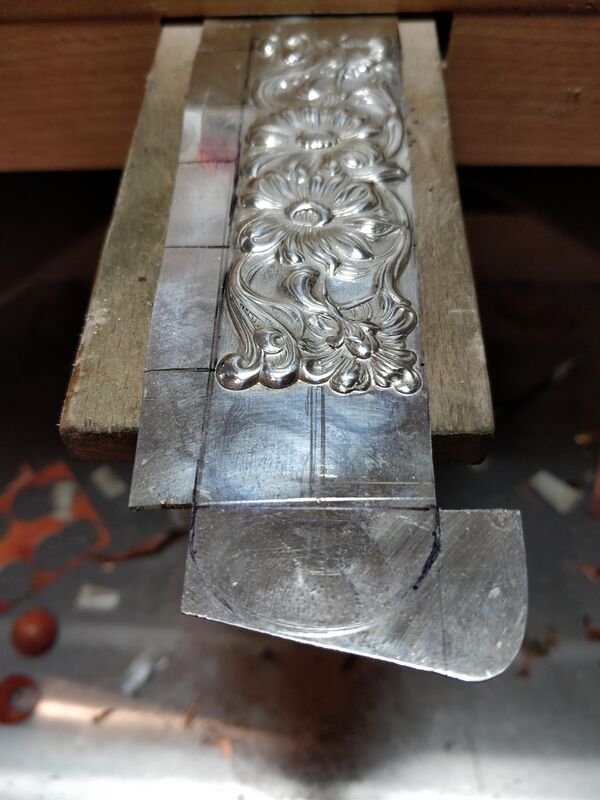
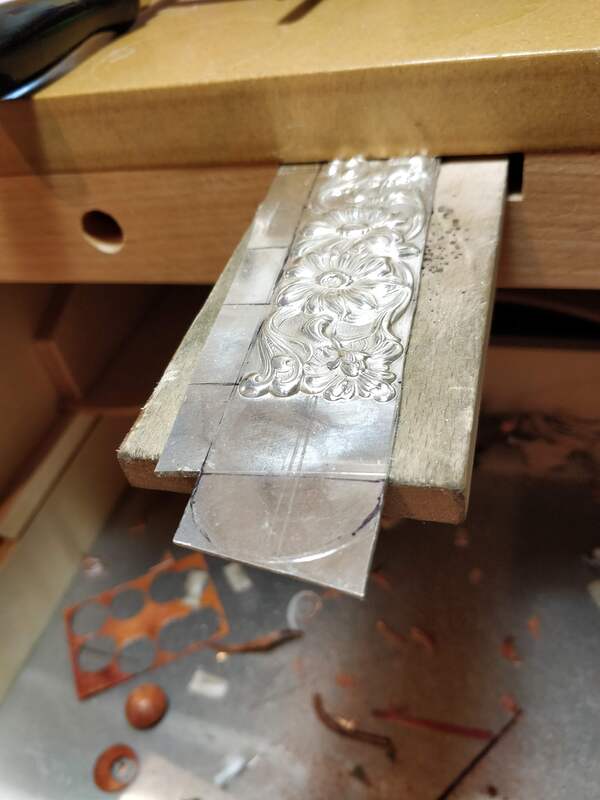
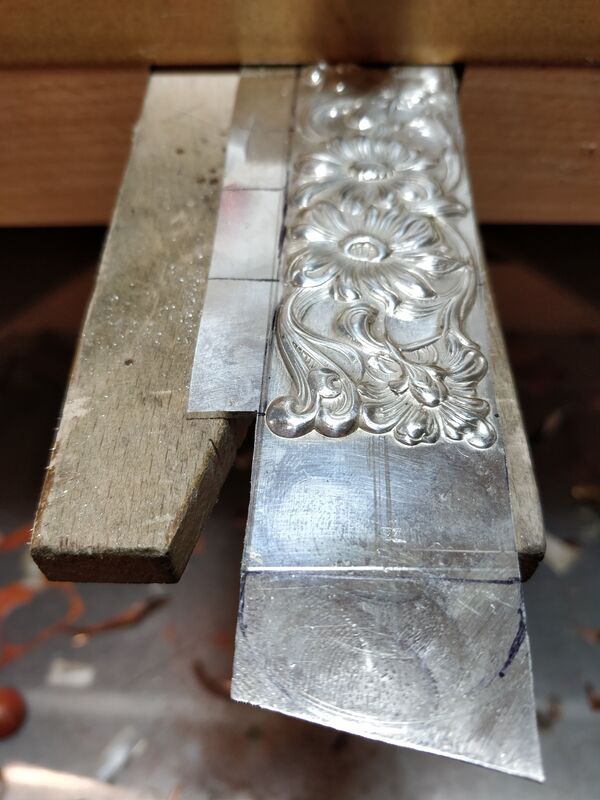
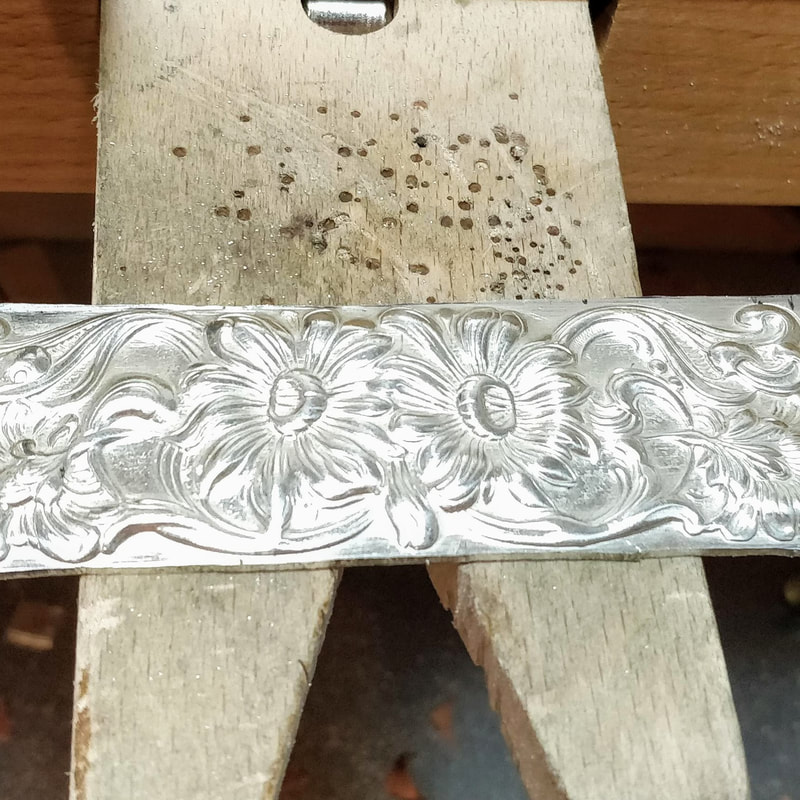
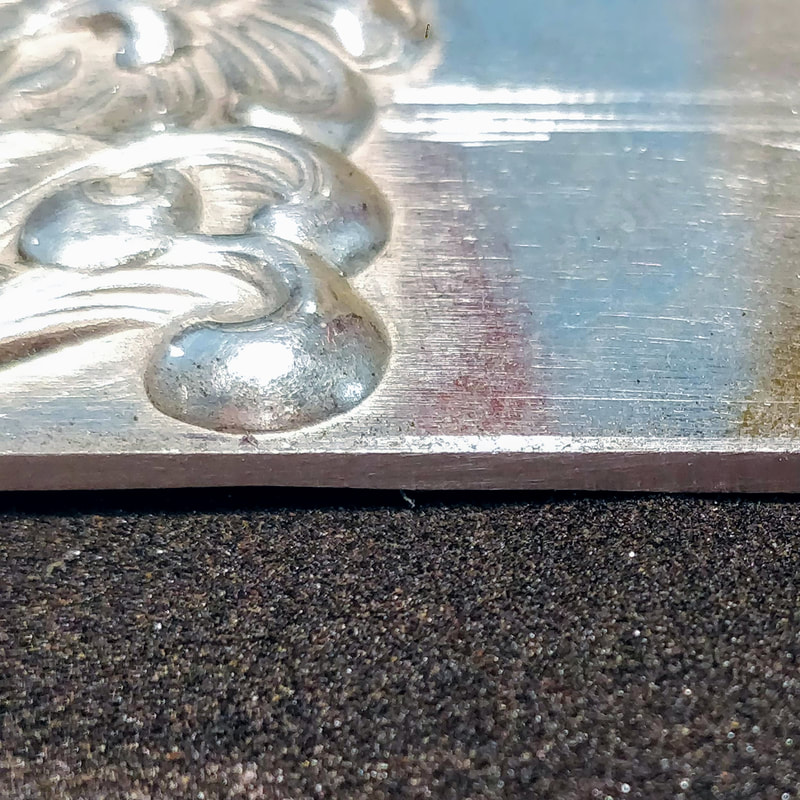
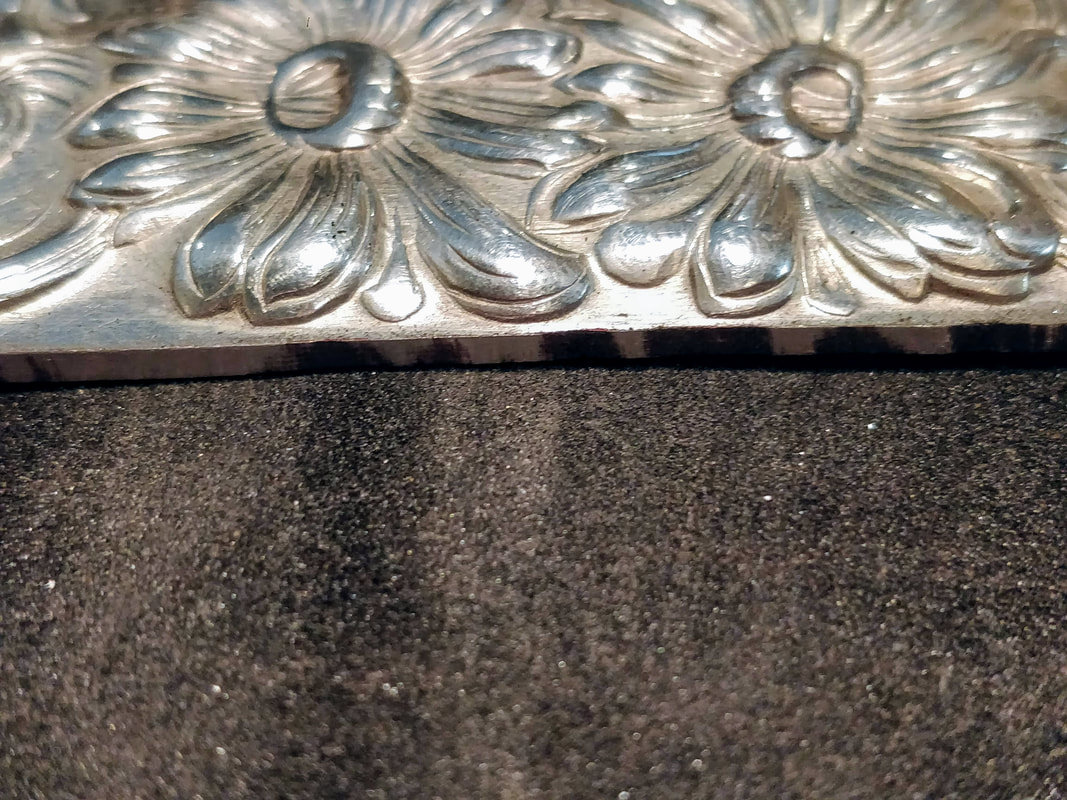
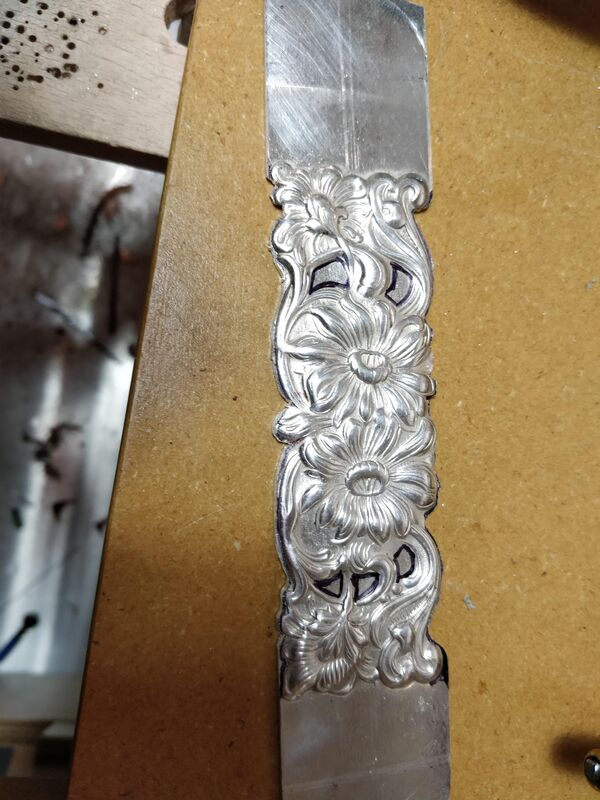
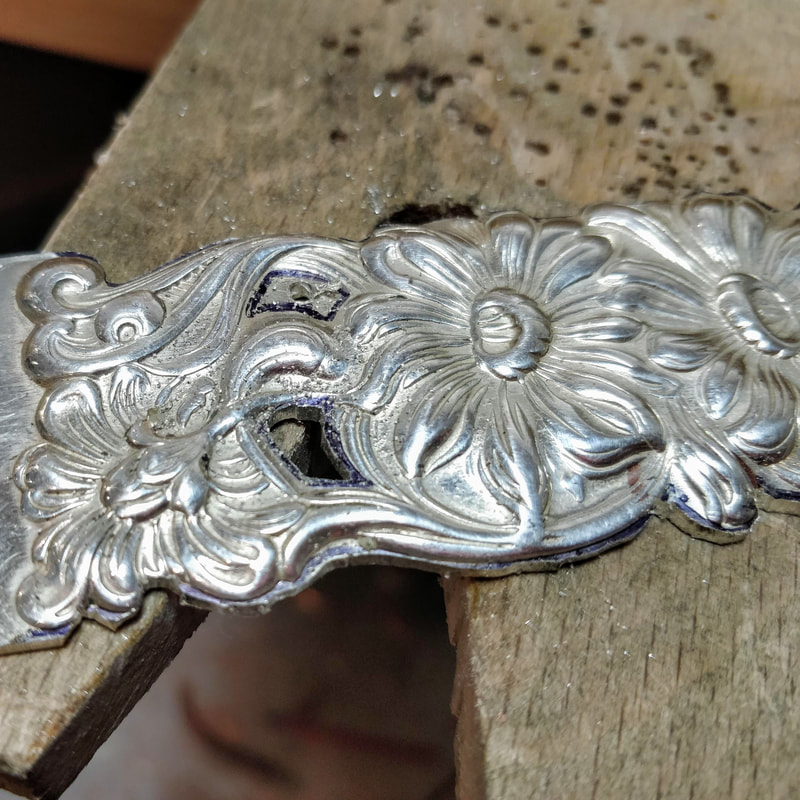
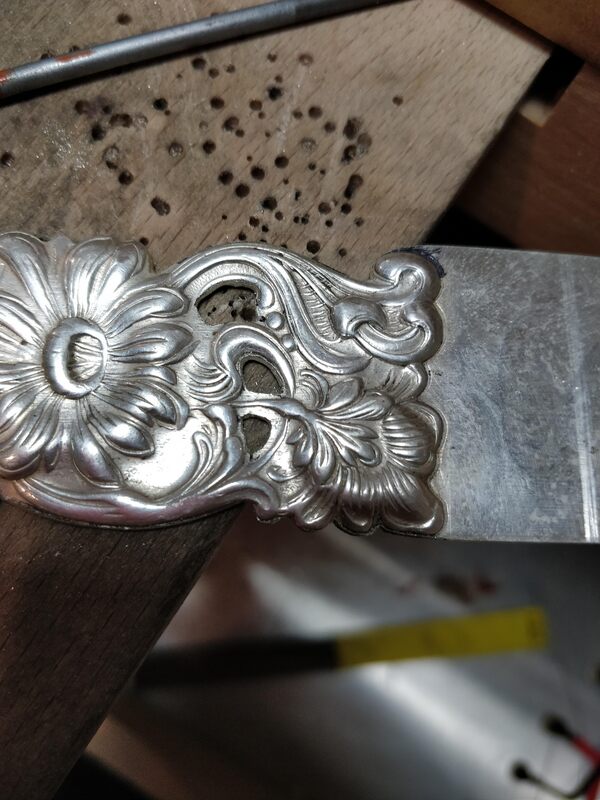
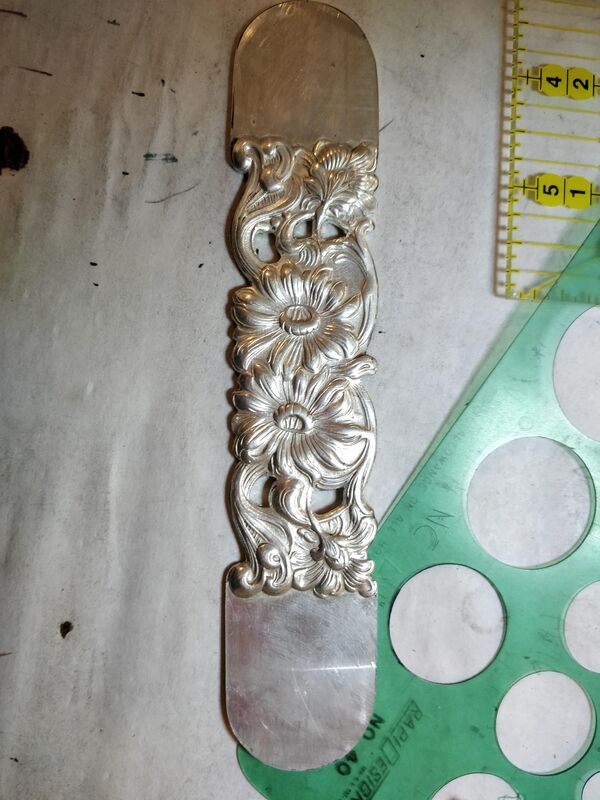
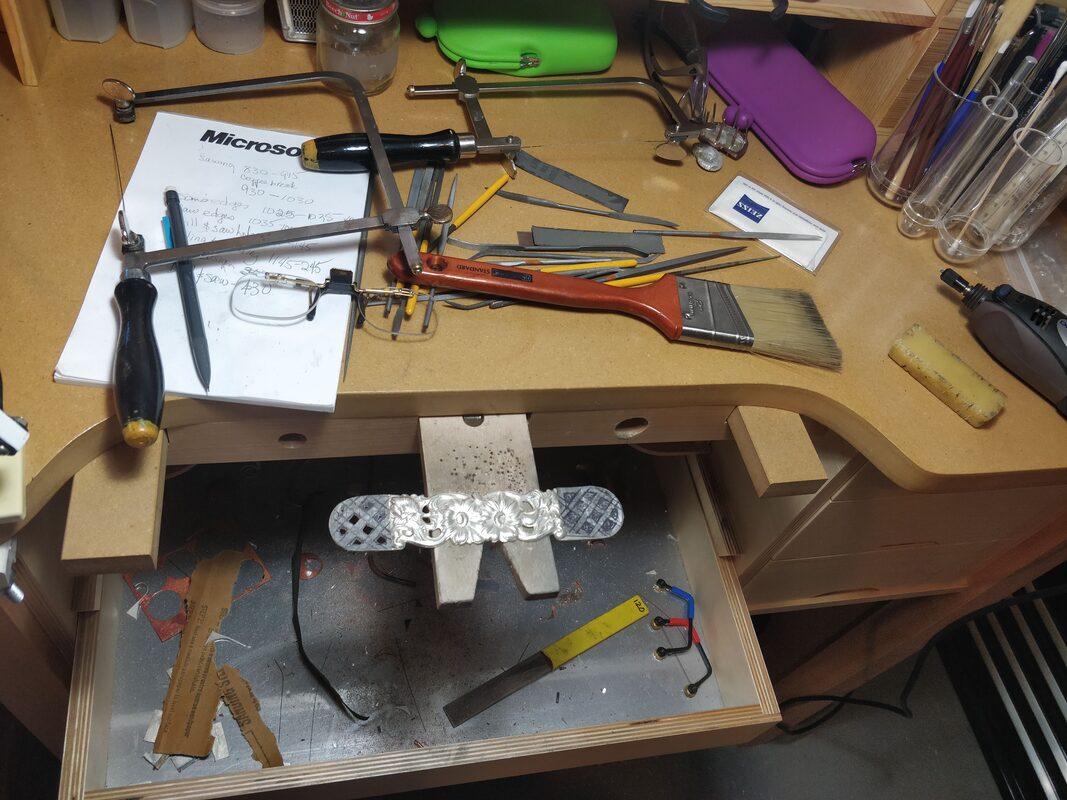
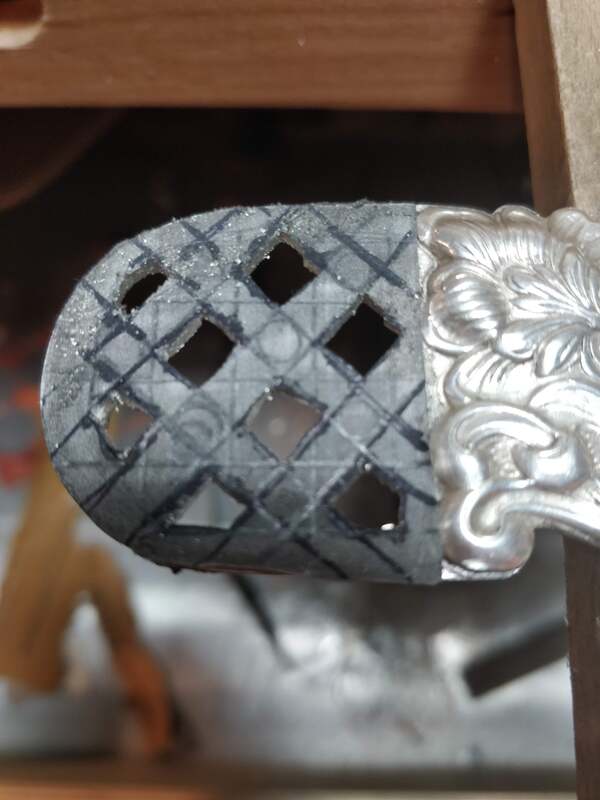
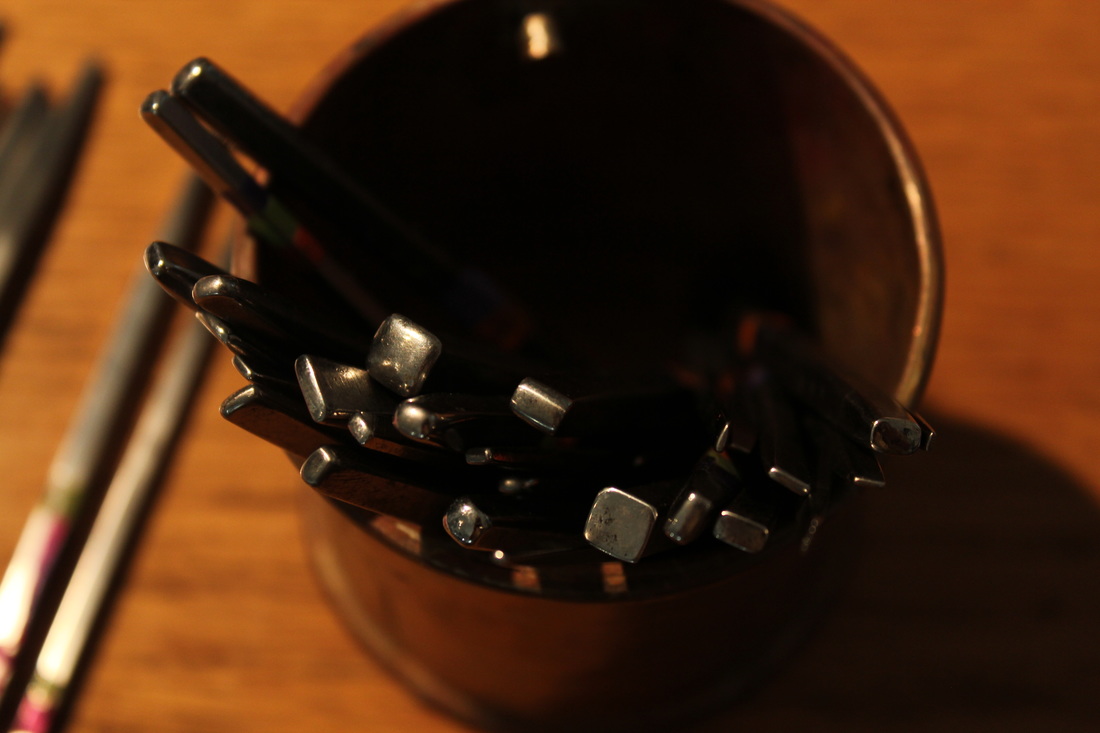
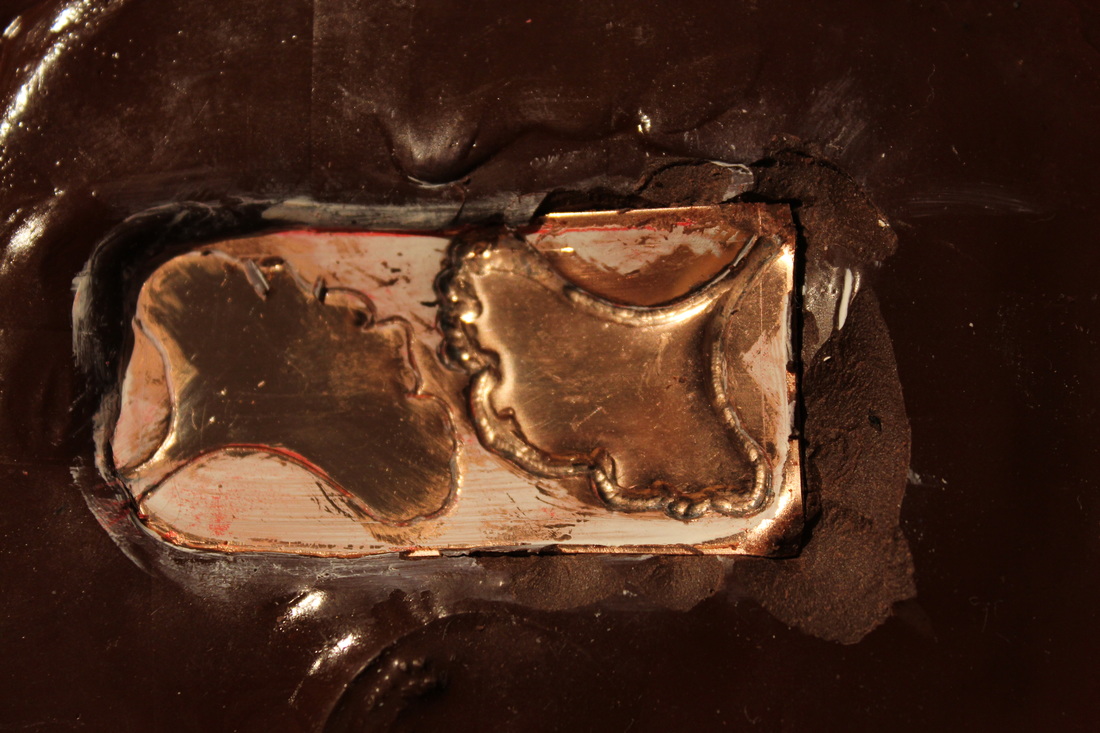
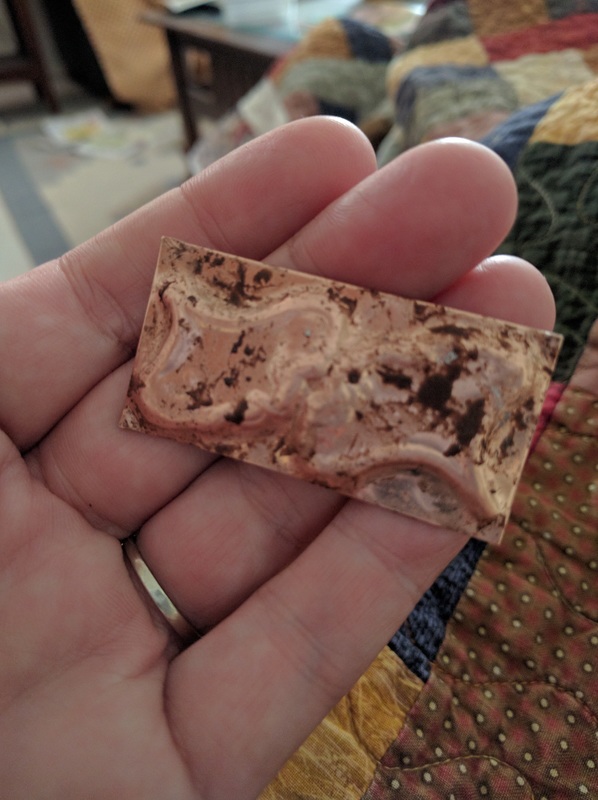
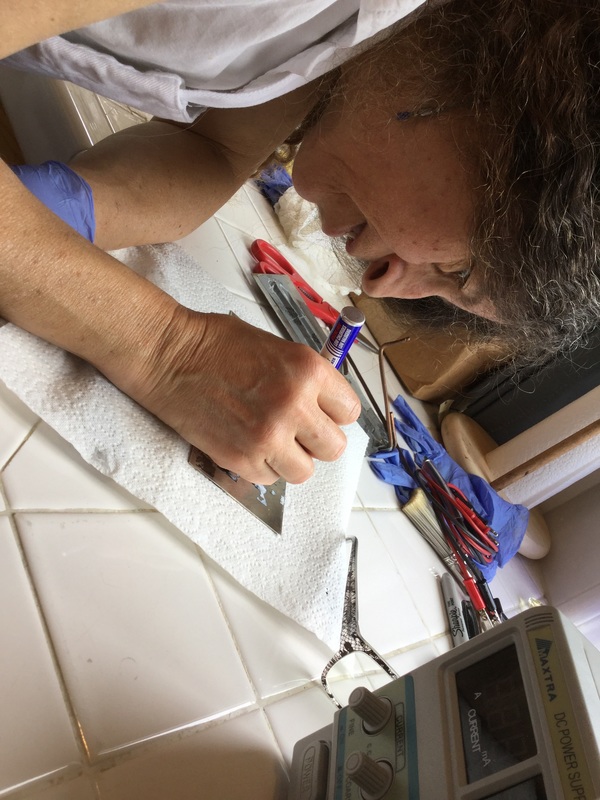
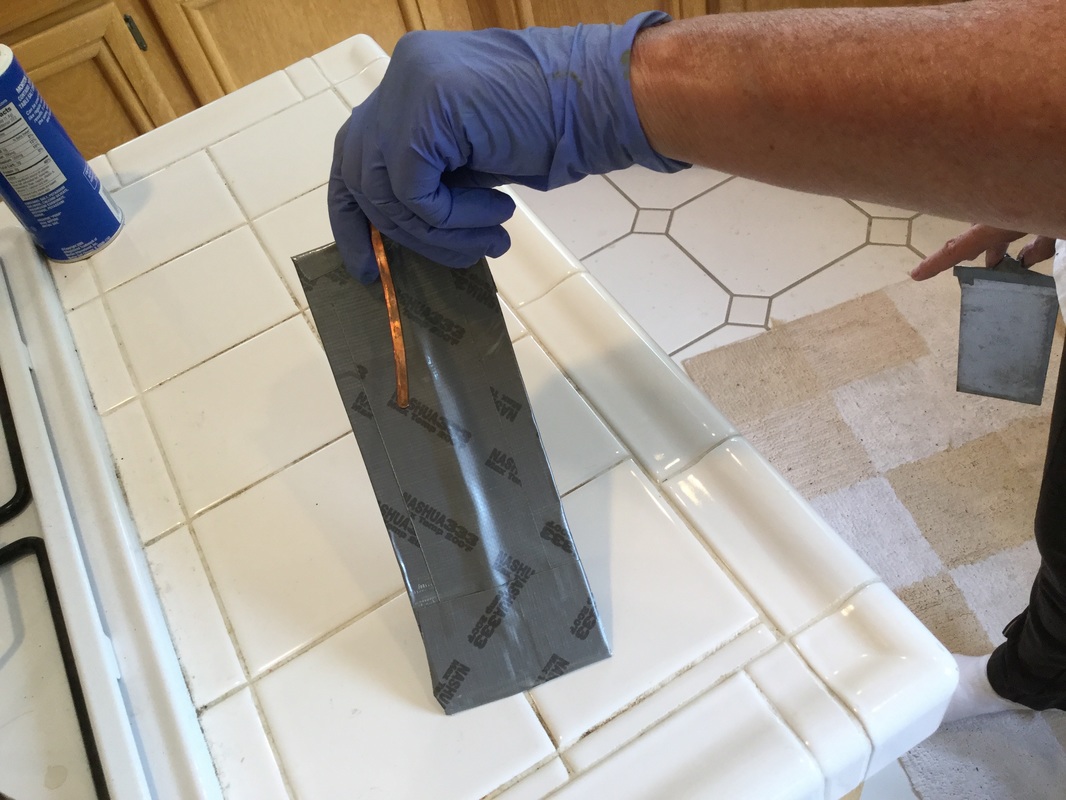
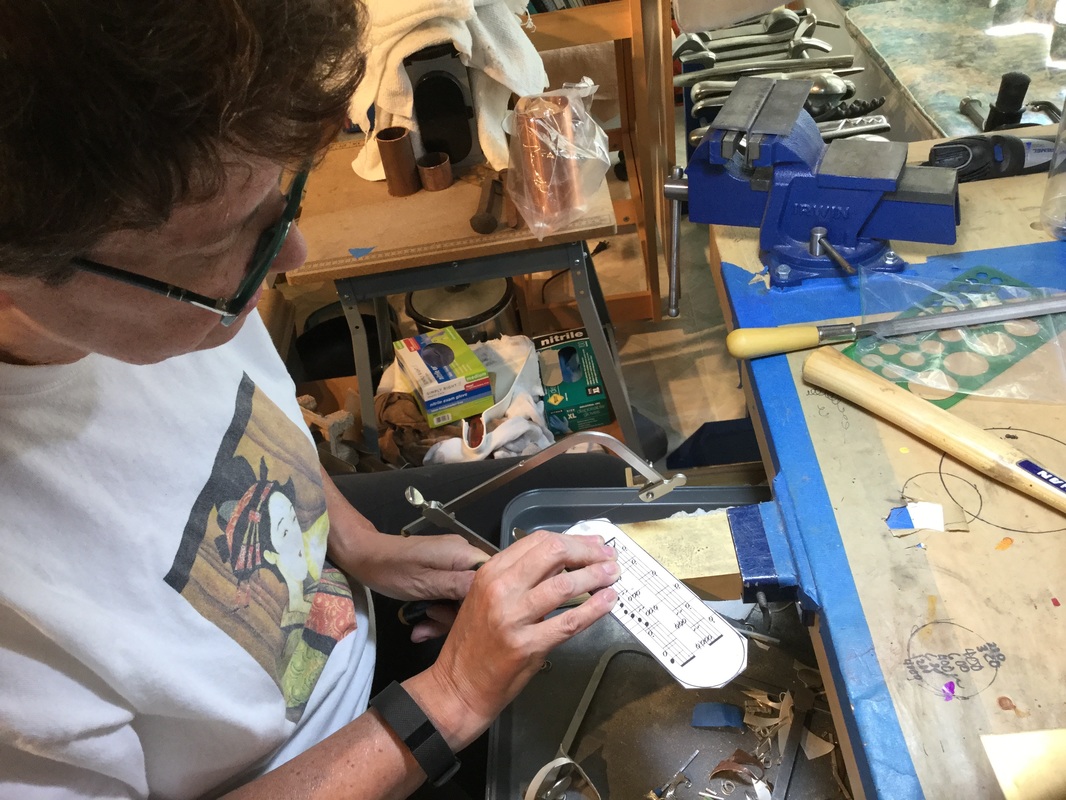
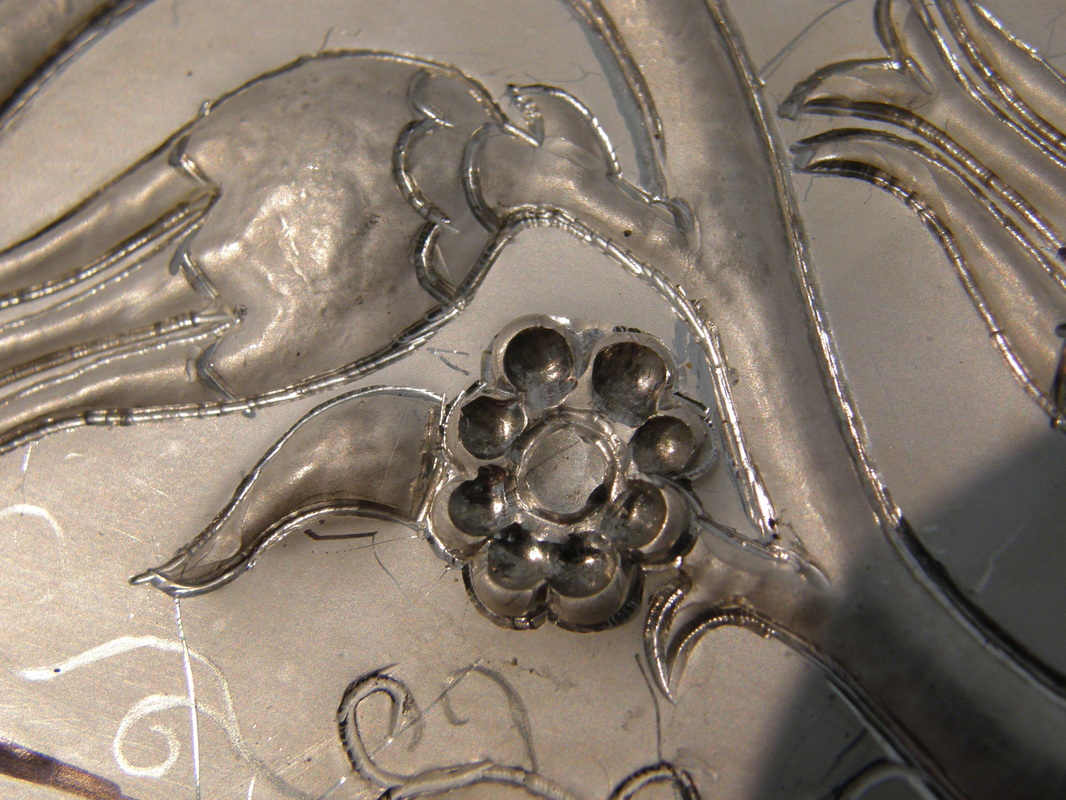
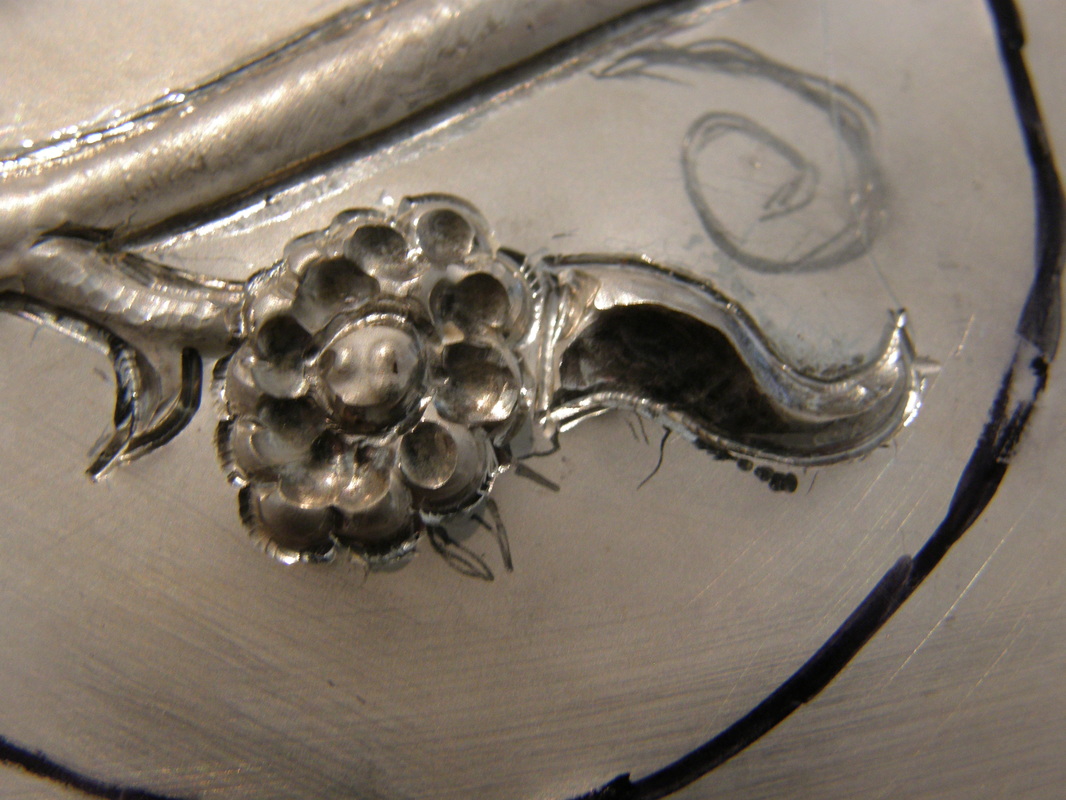
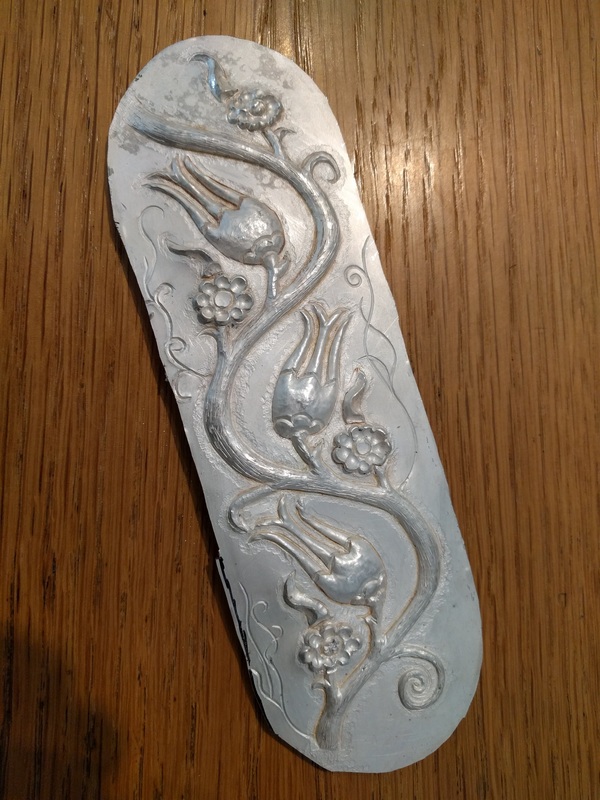
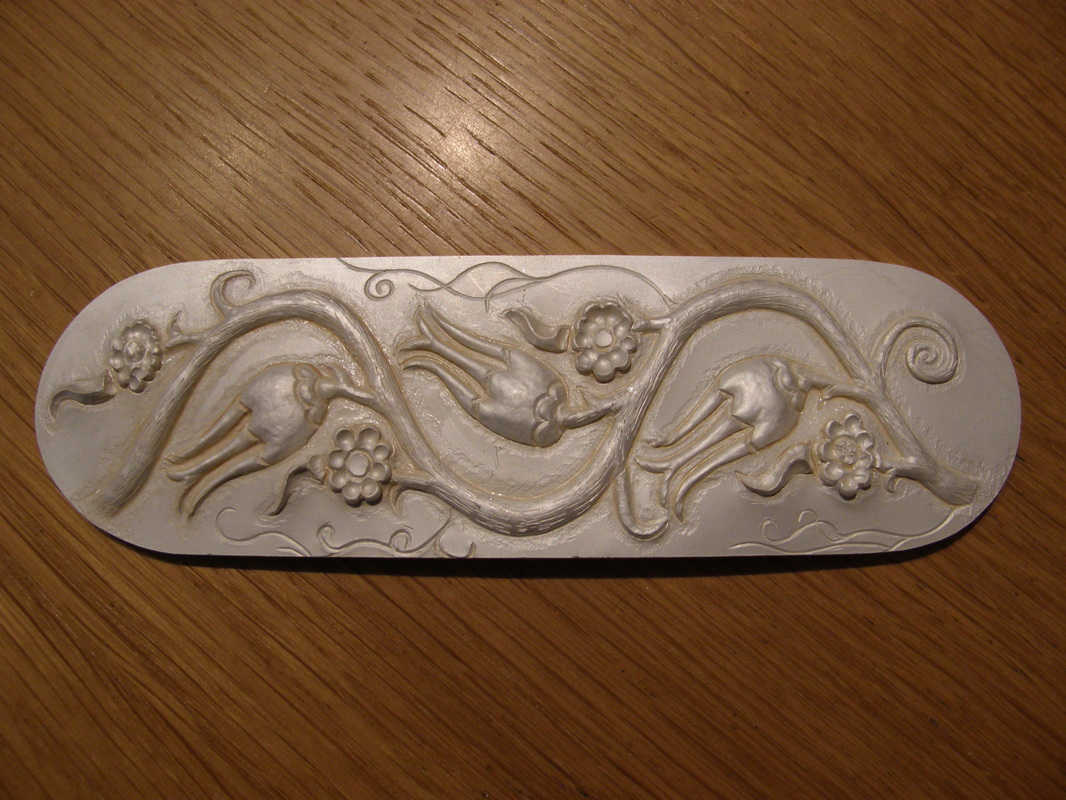
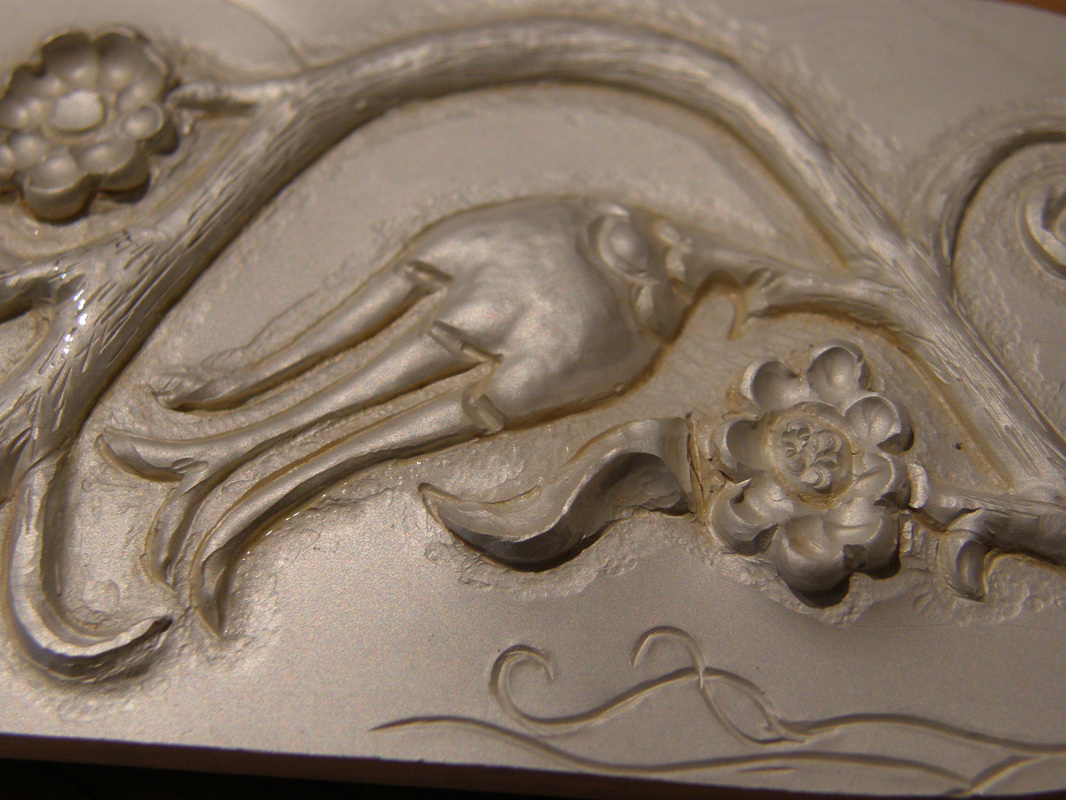
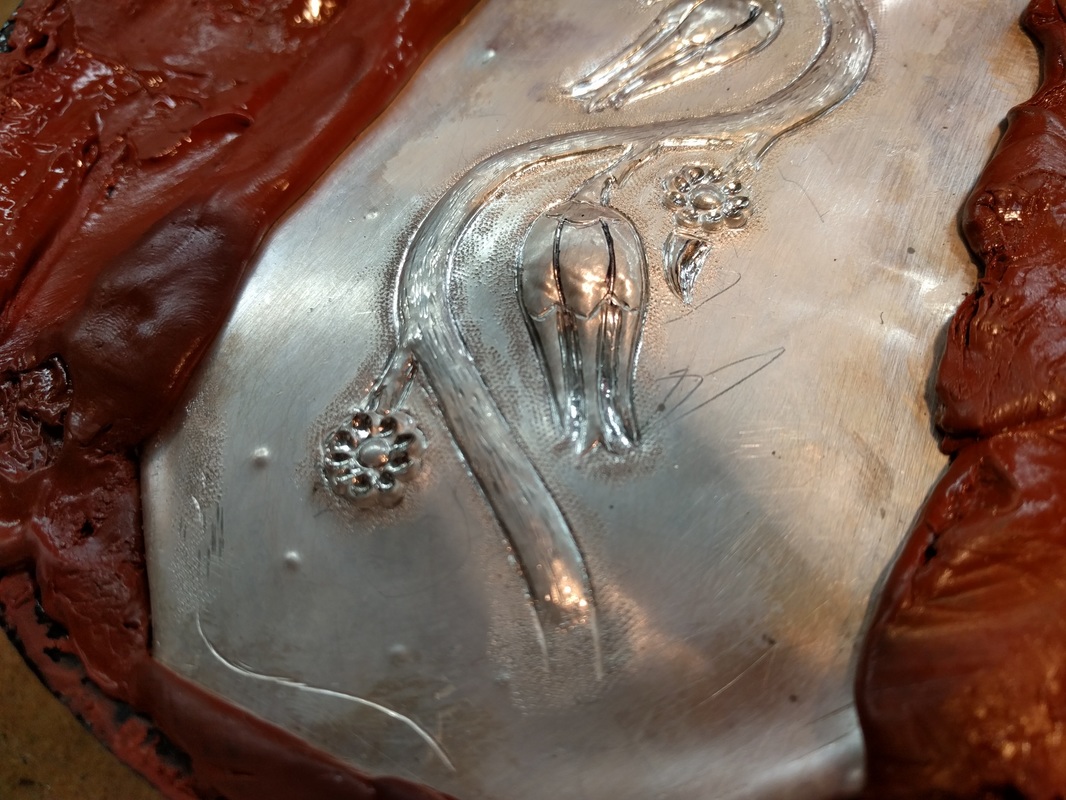
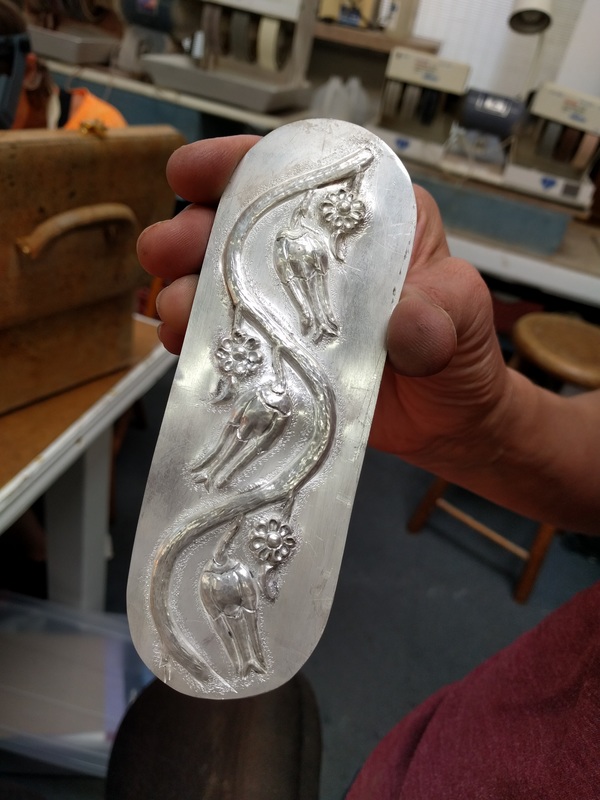
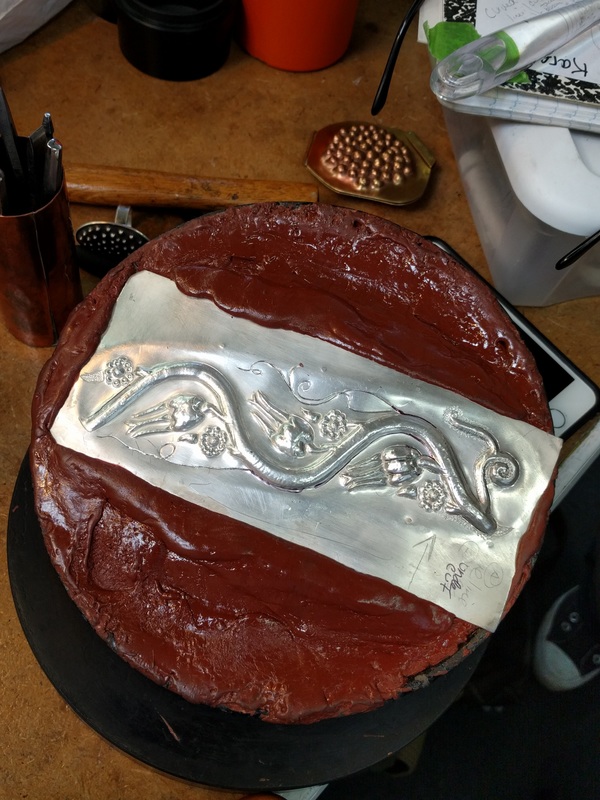
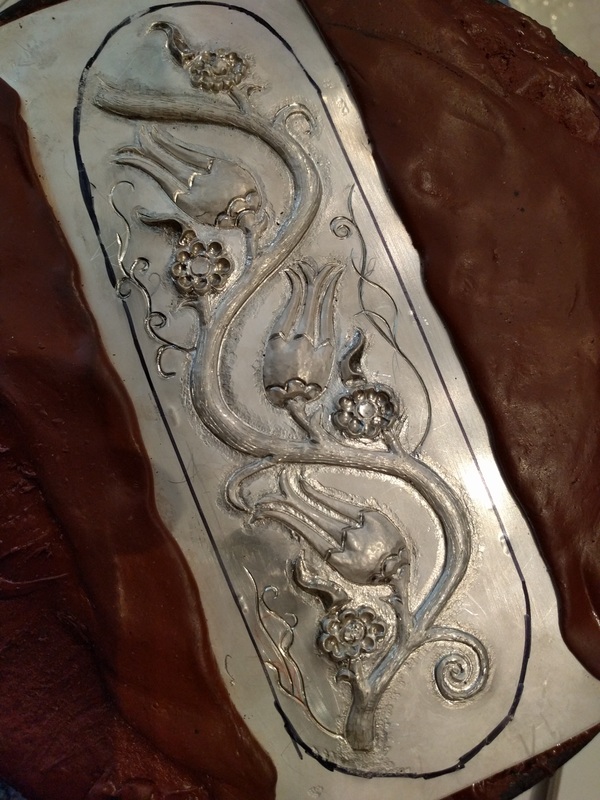
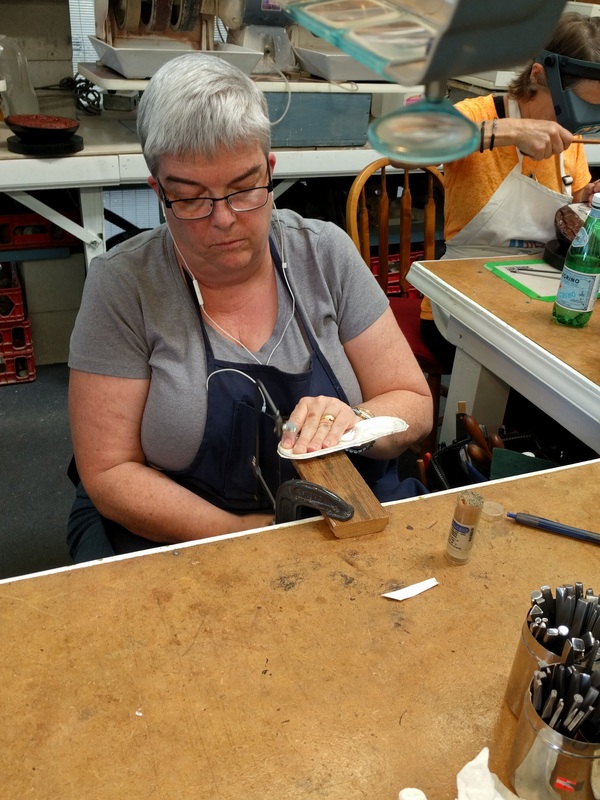
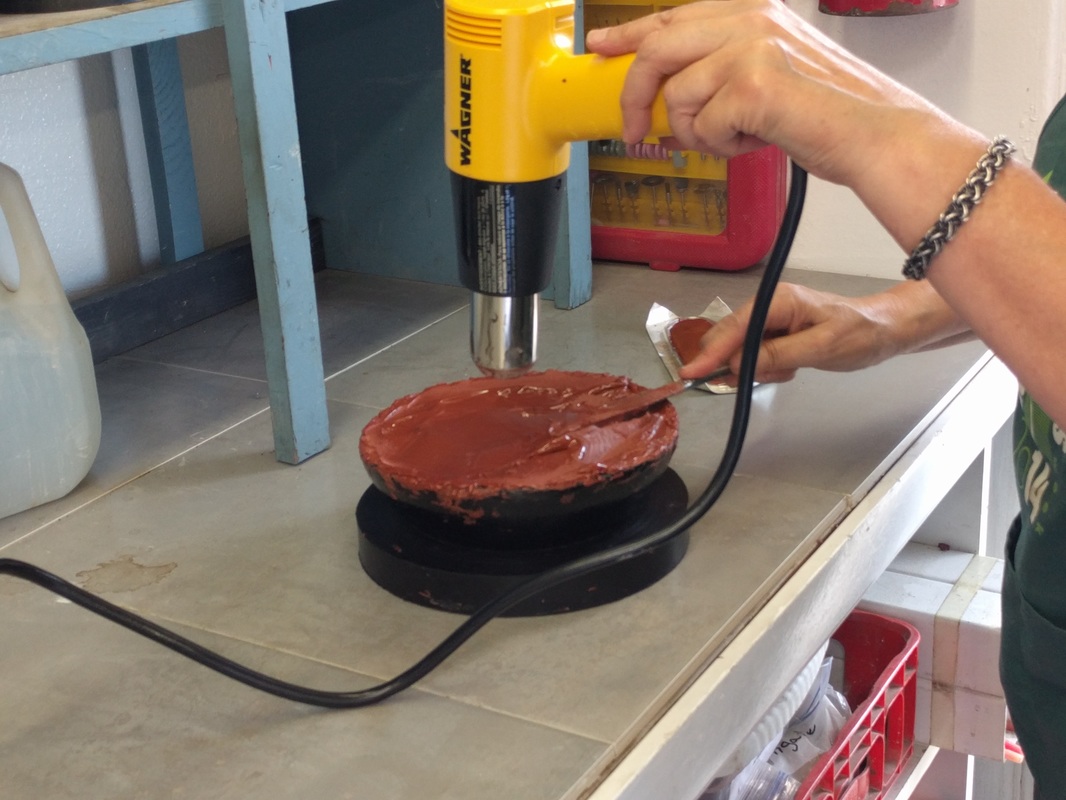
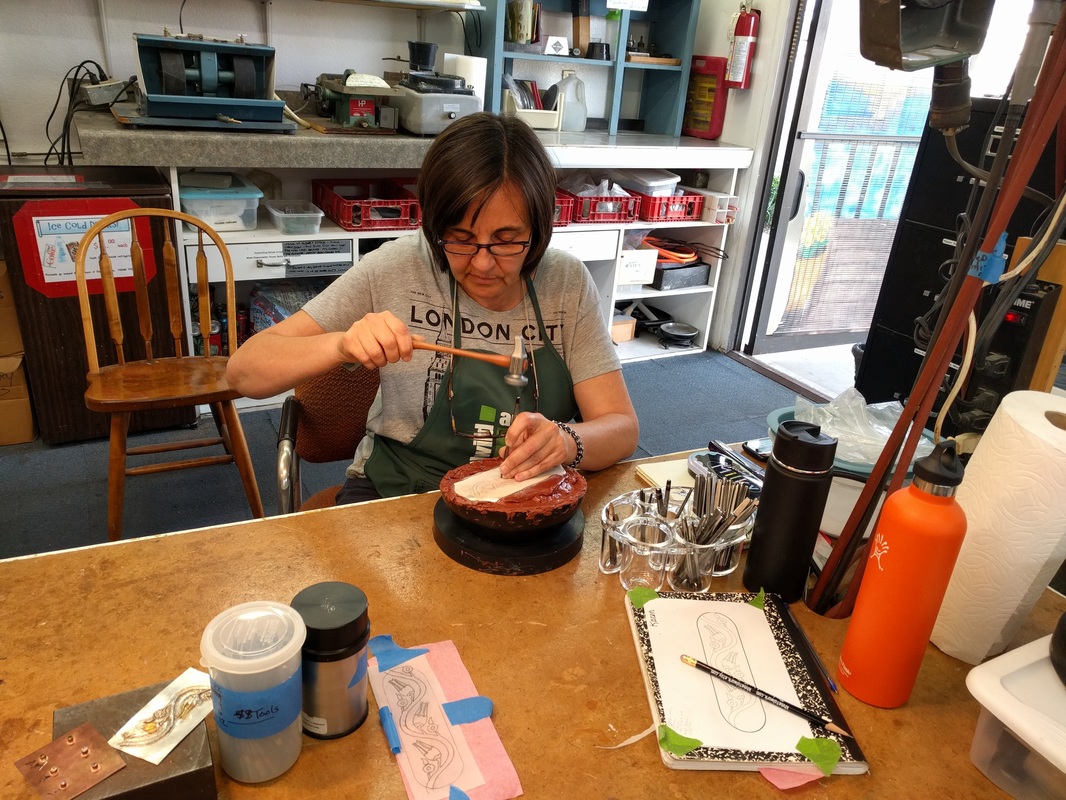
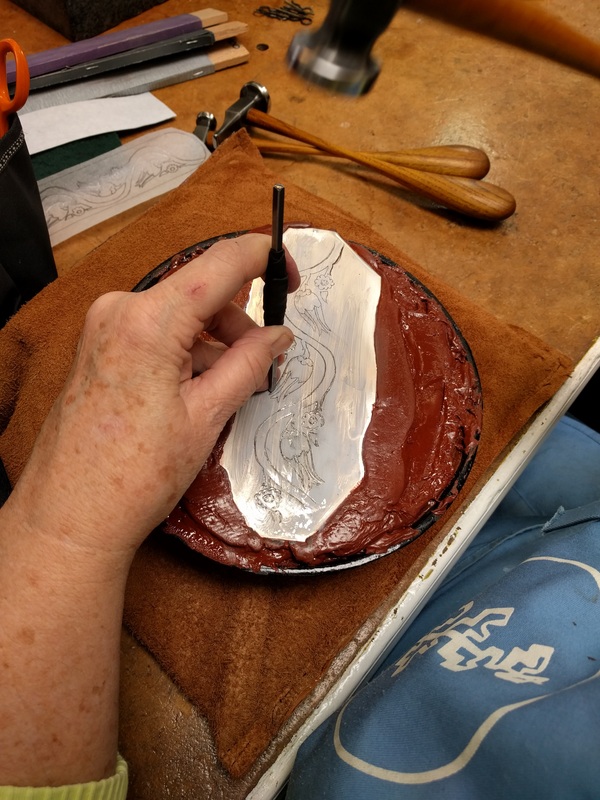
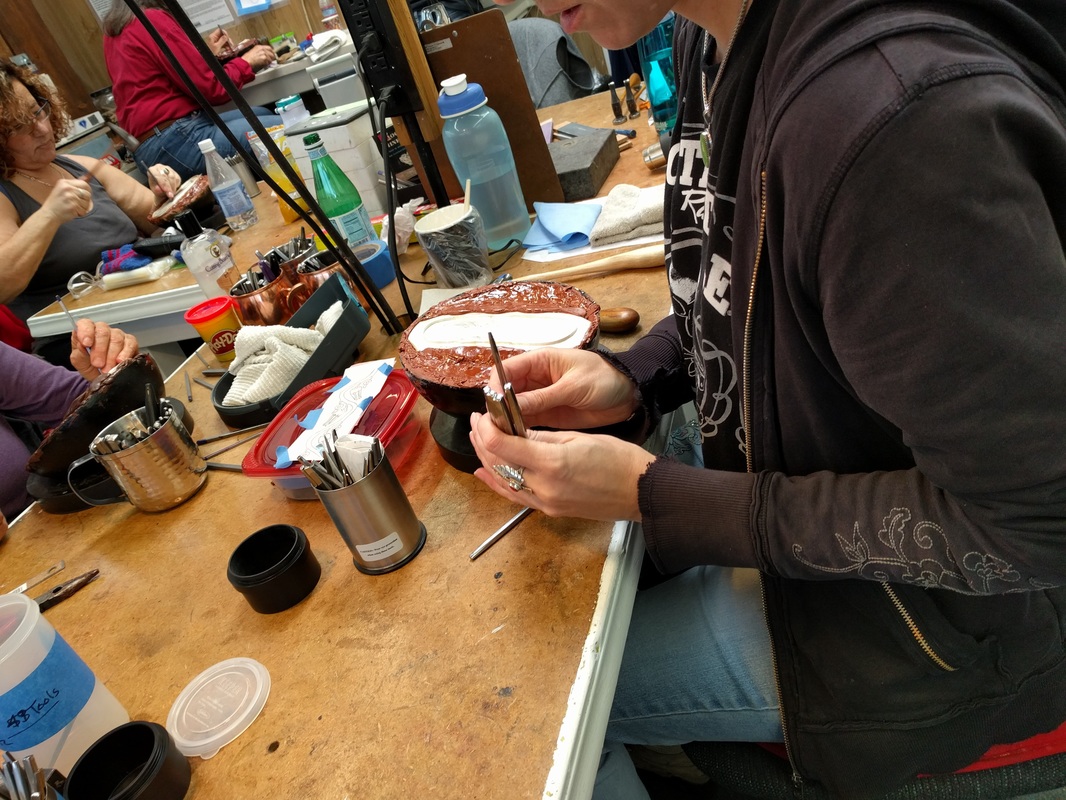
Next up was the filing and sanding - along the outside edges and inside the pierced areas. 
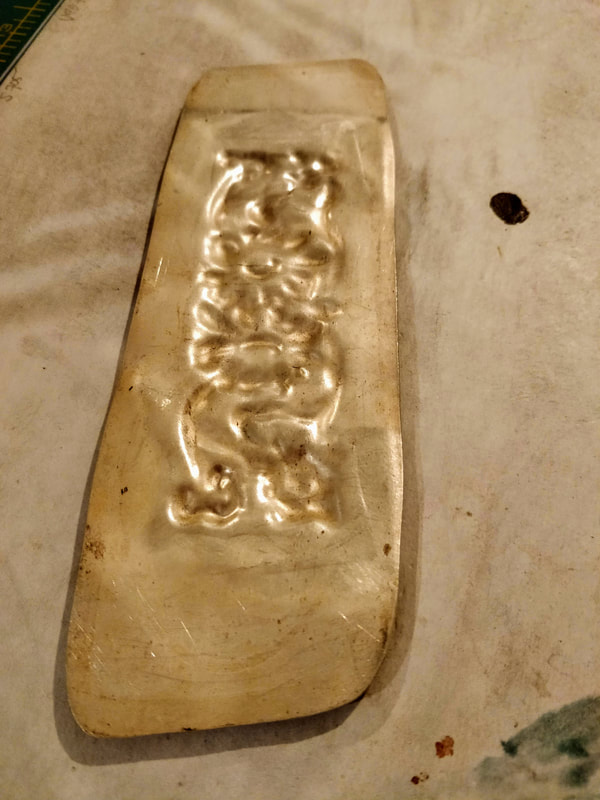
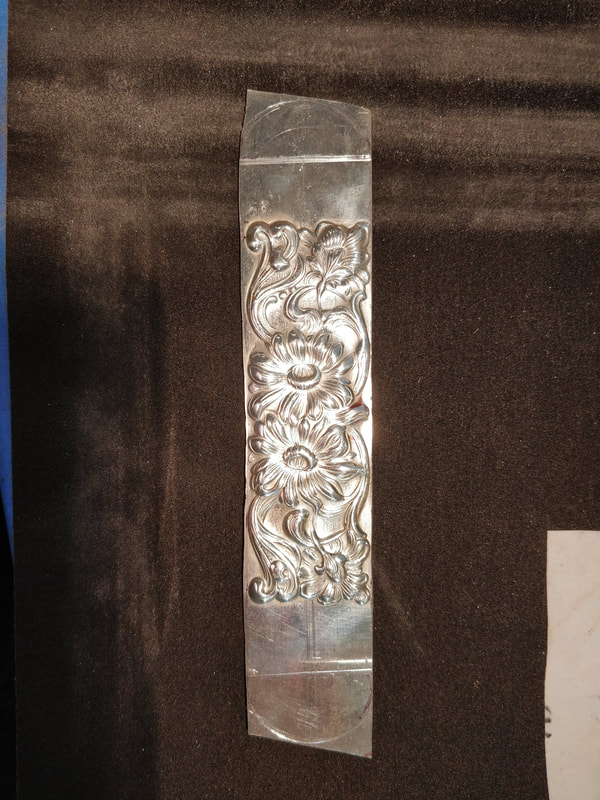
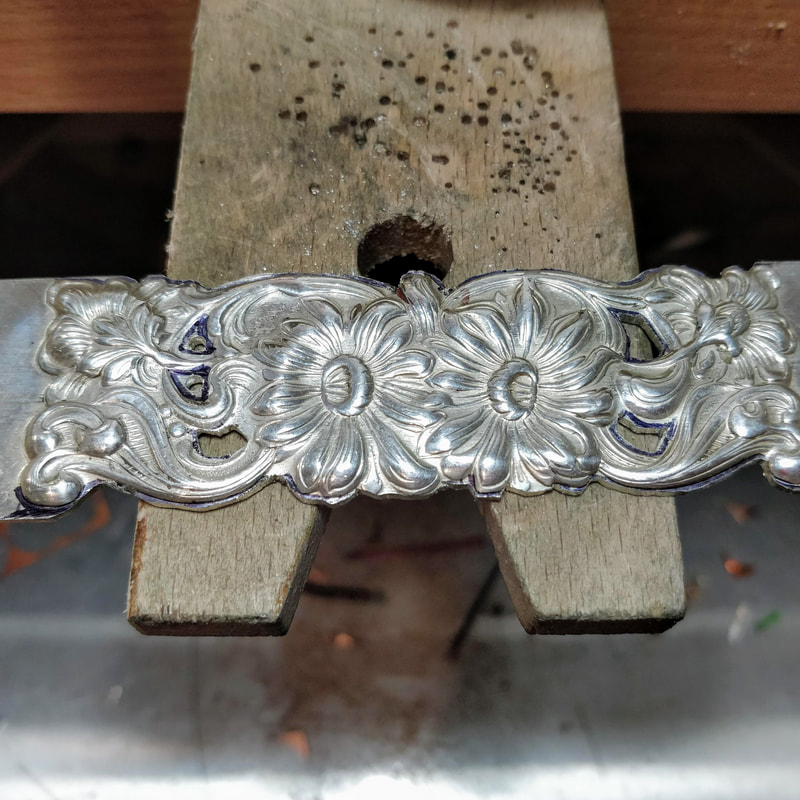
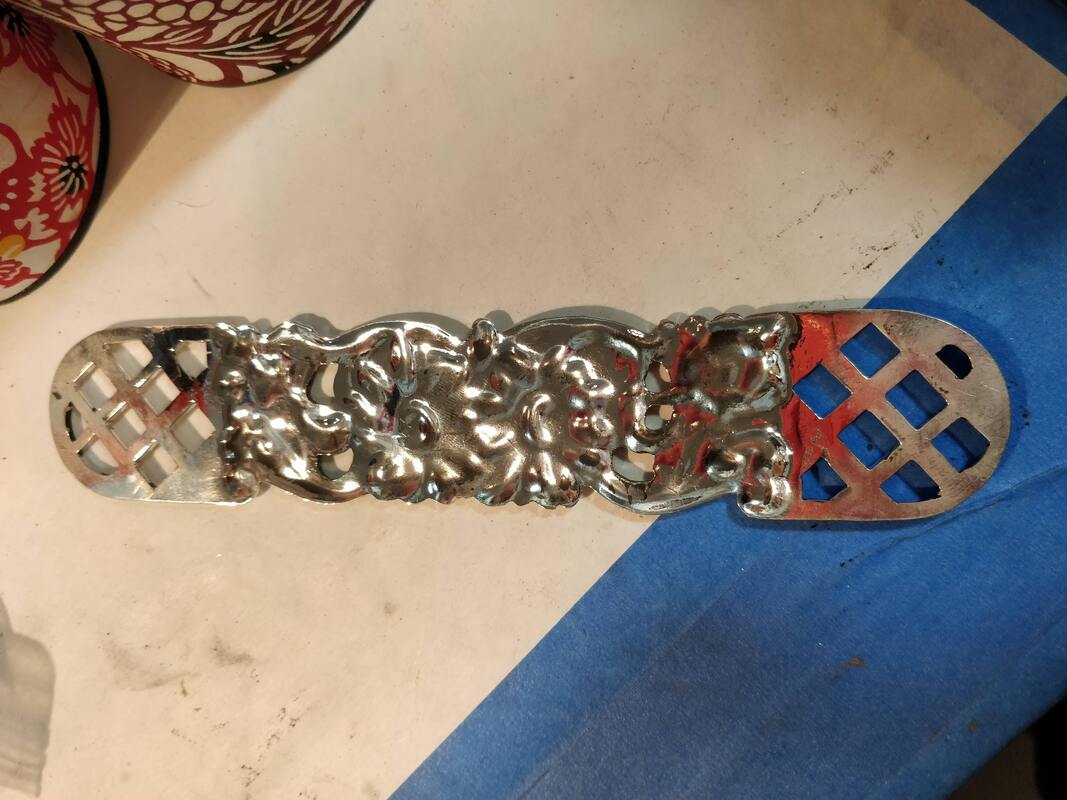
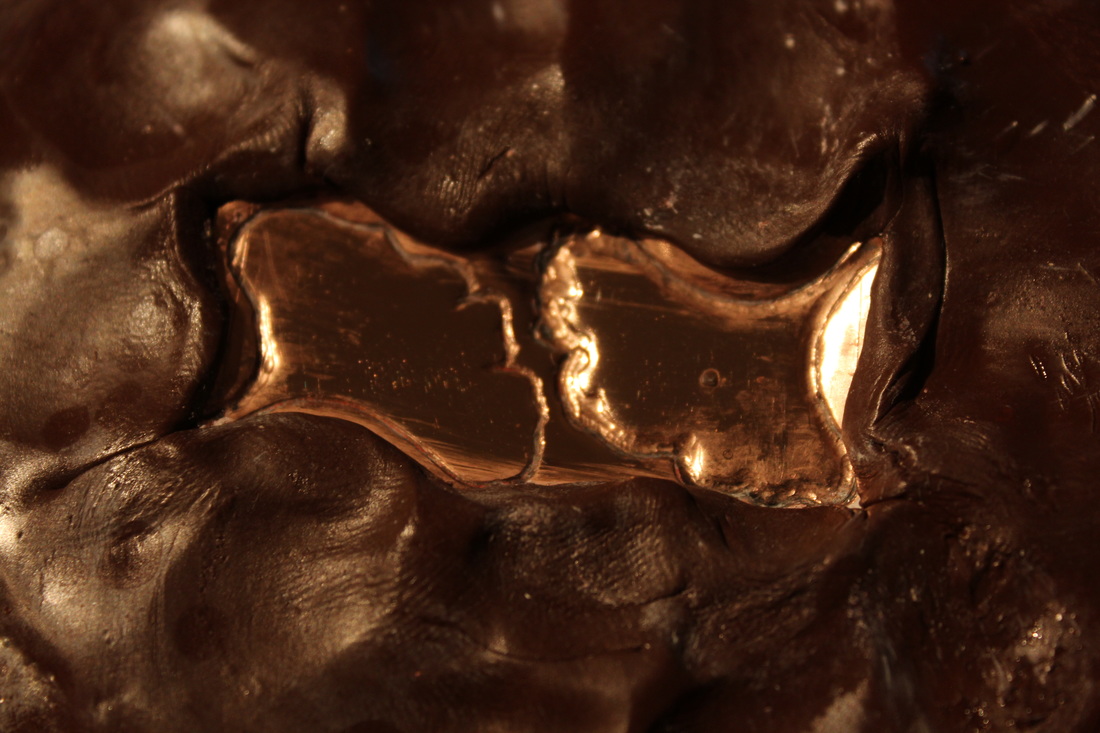
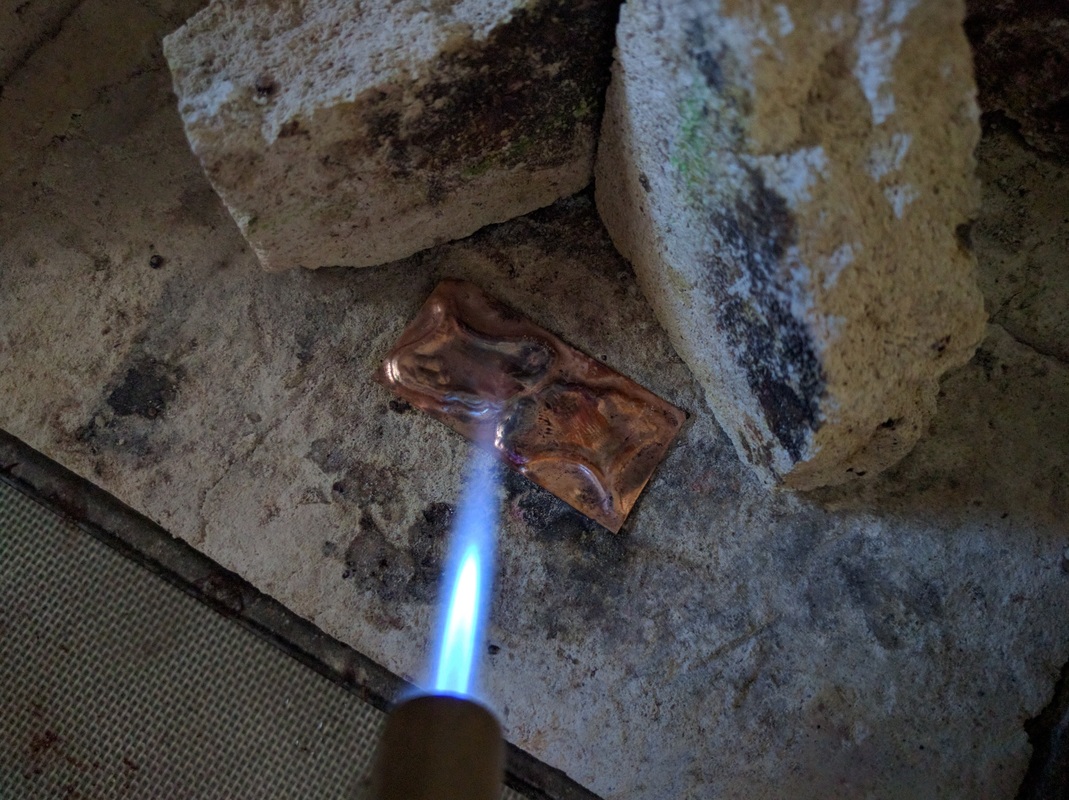
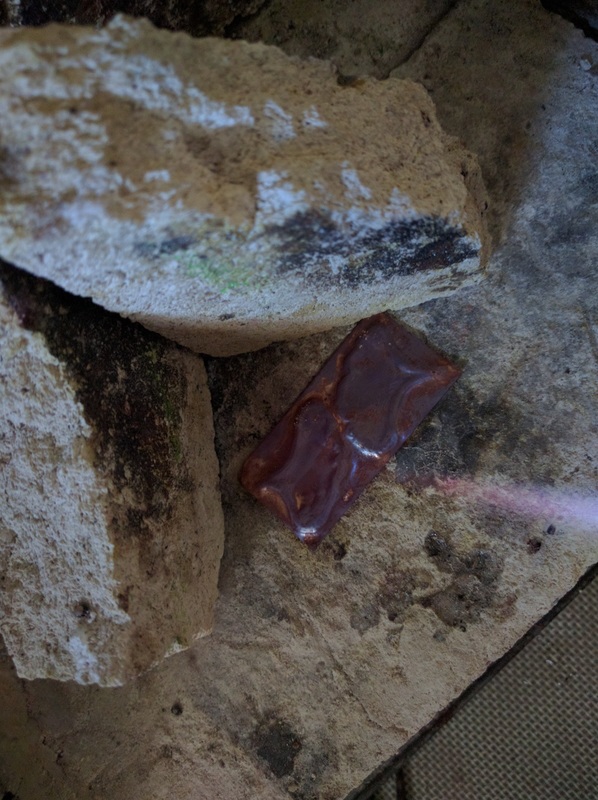
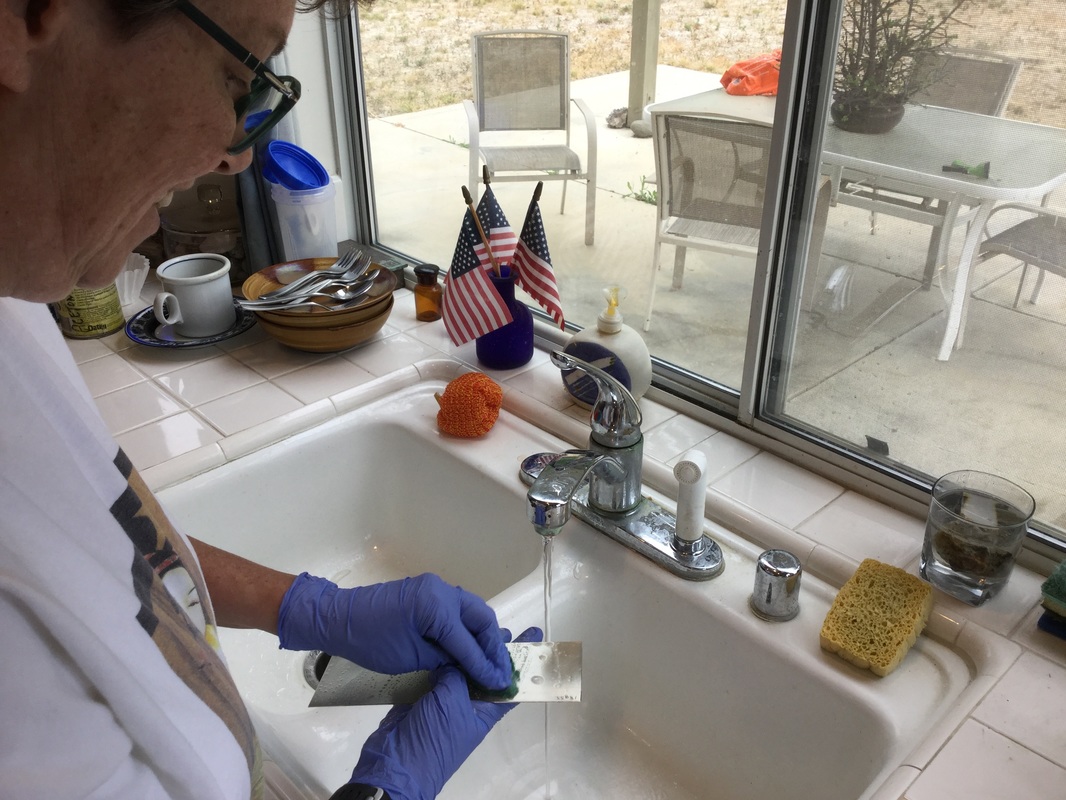
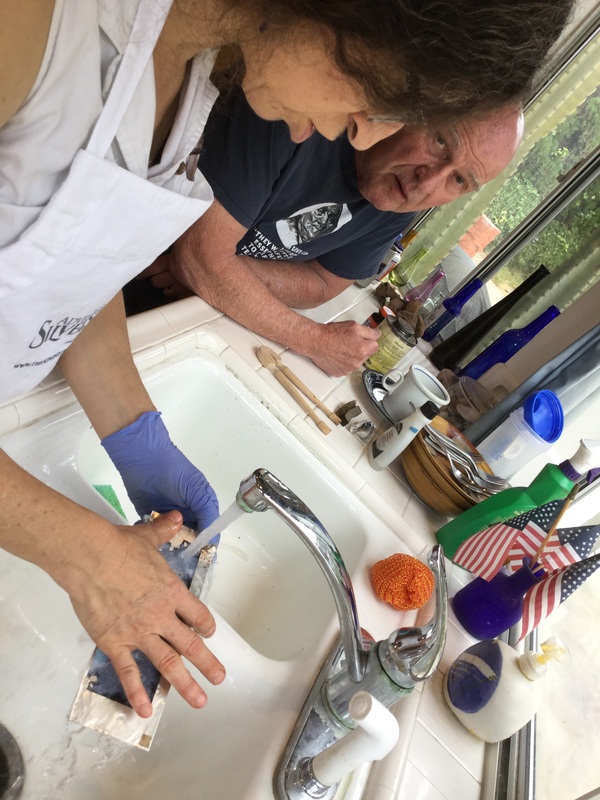
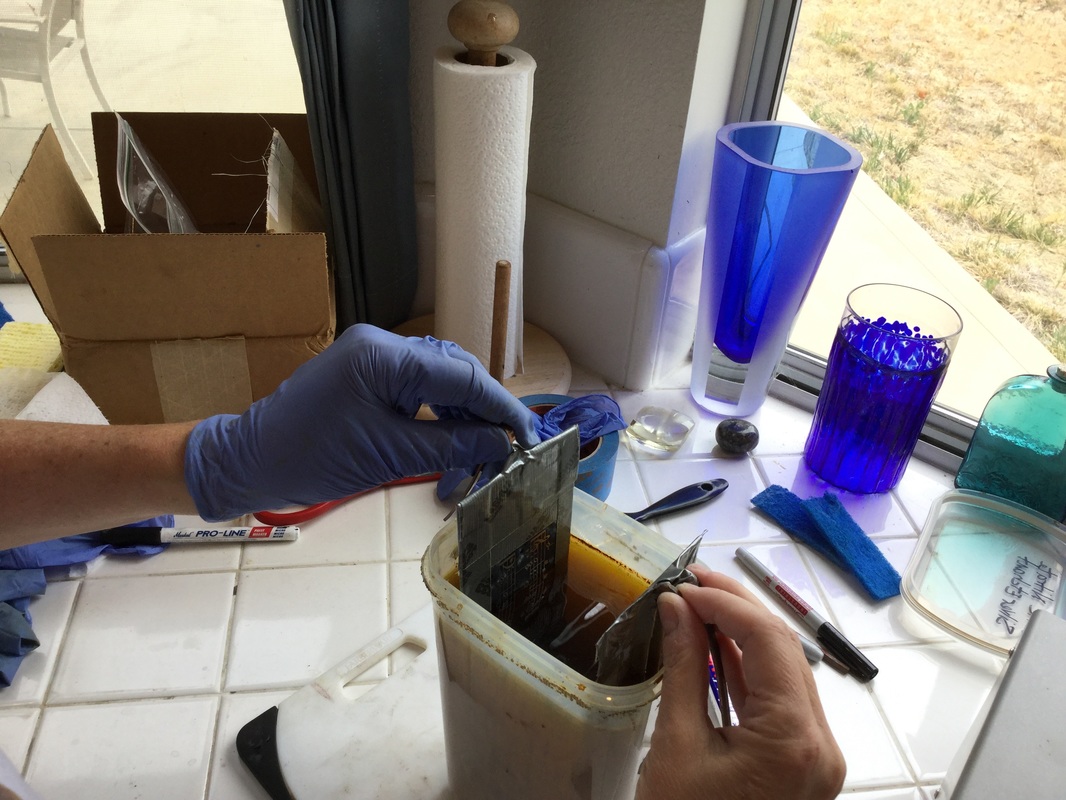
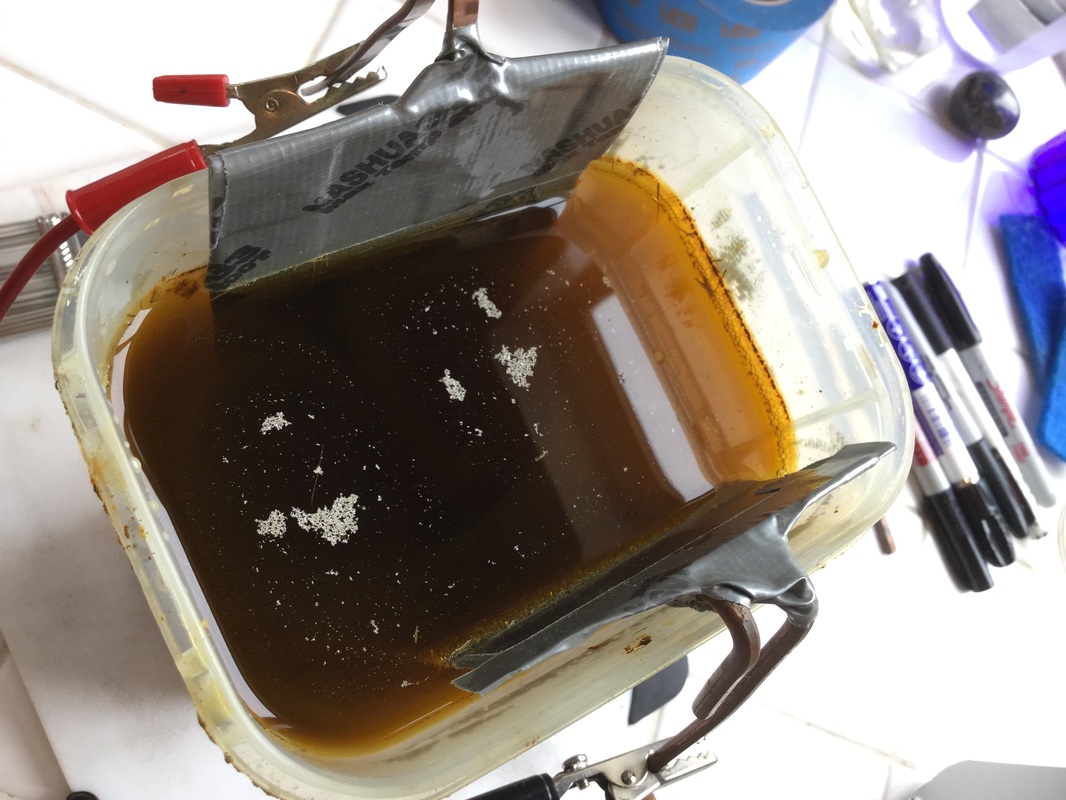
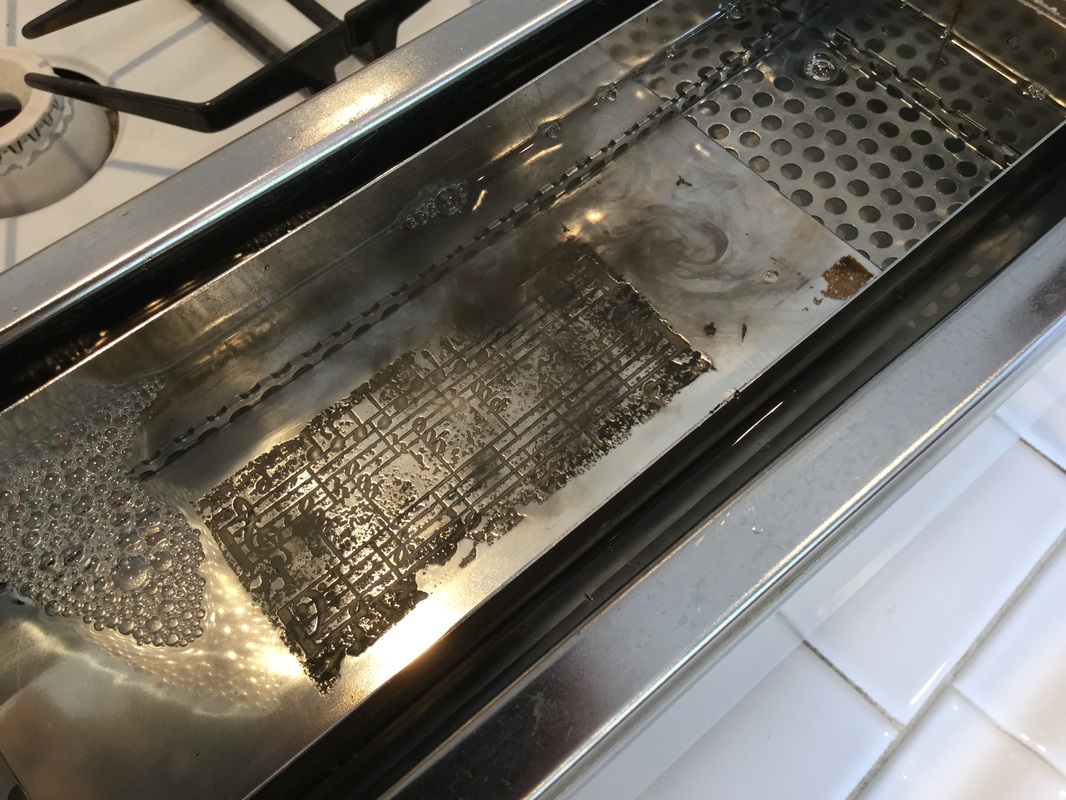
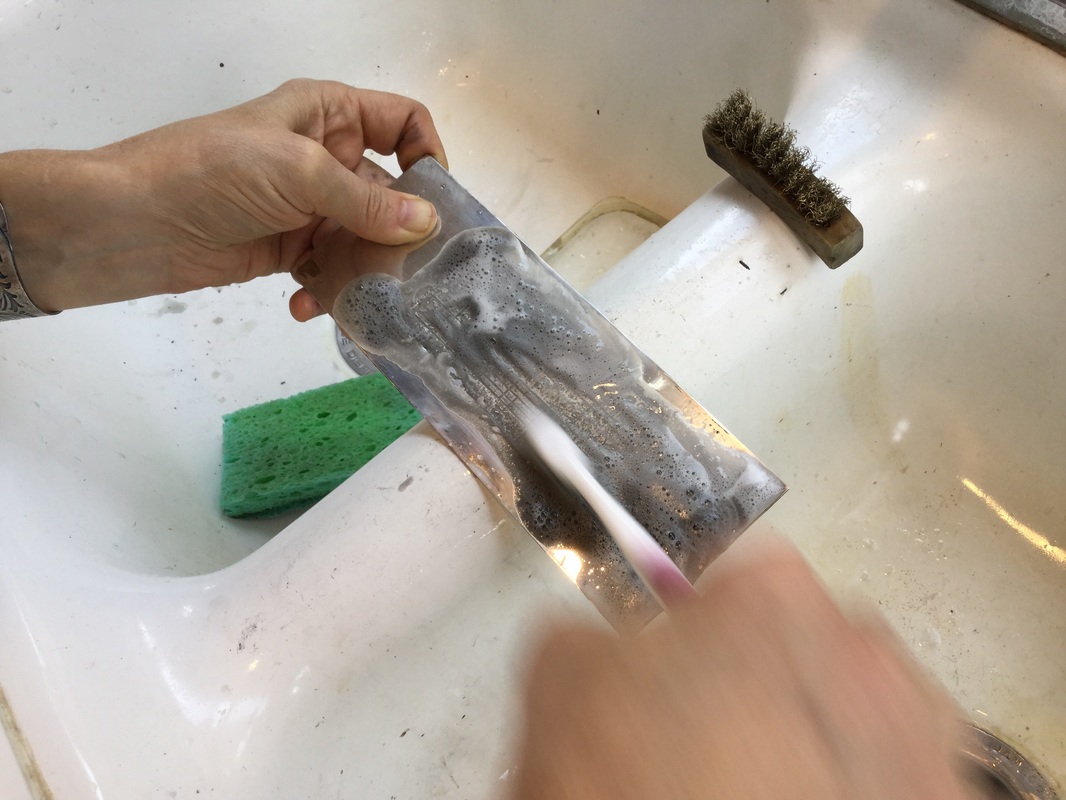
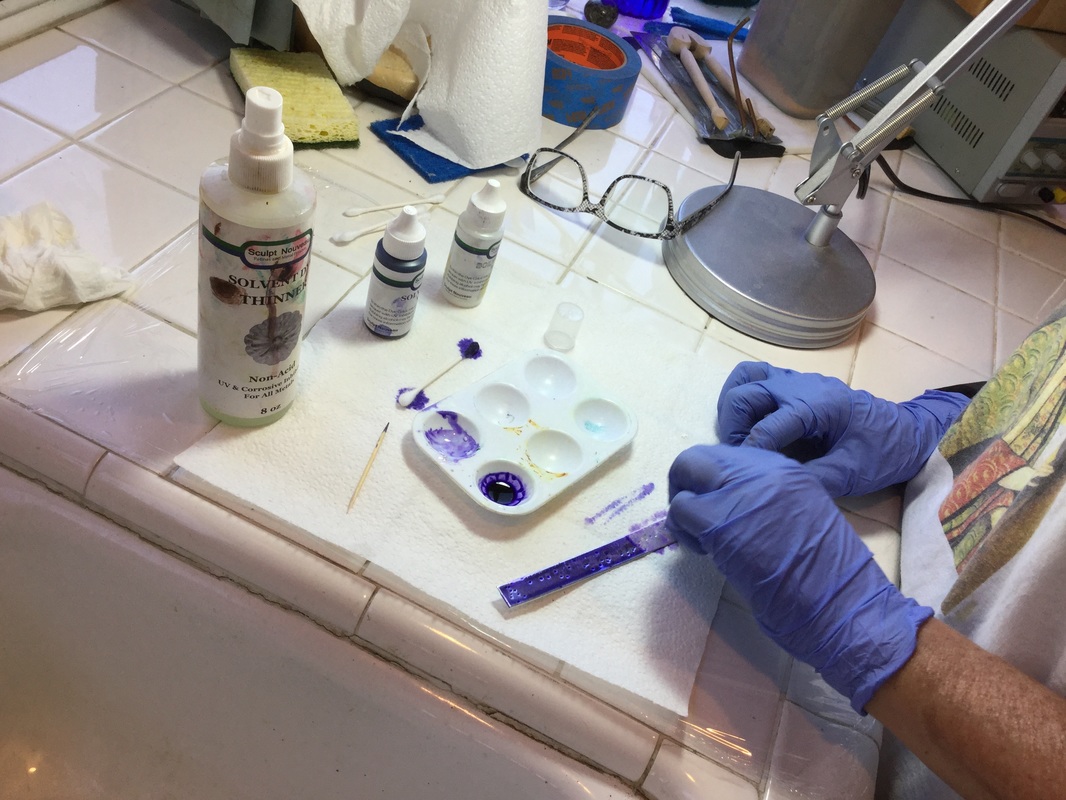
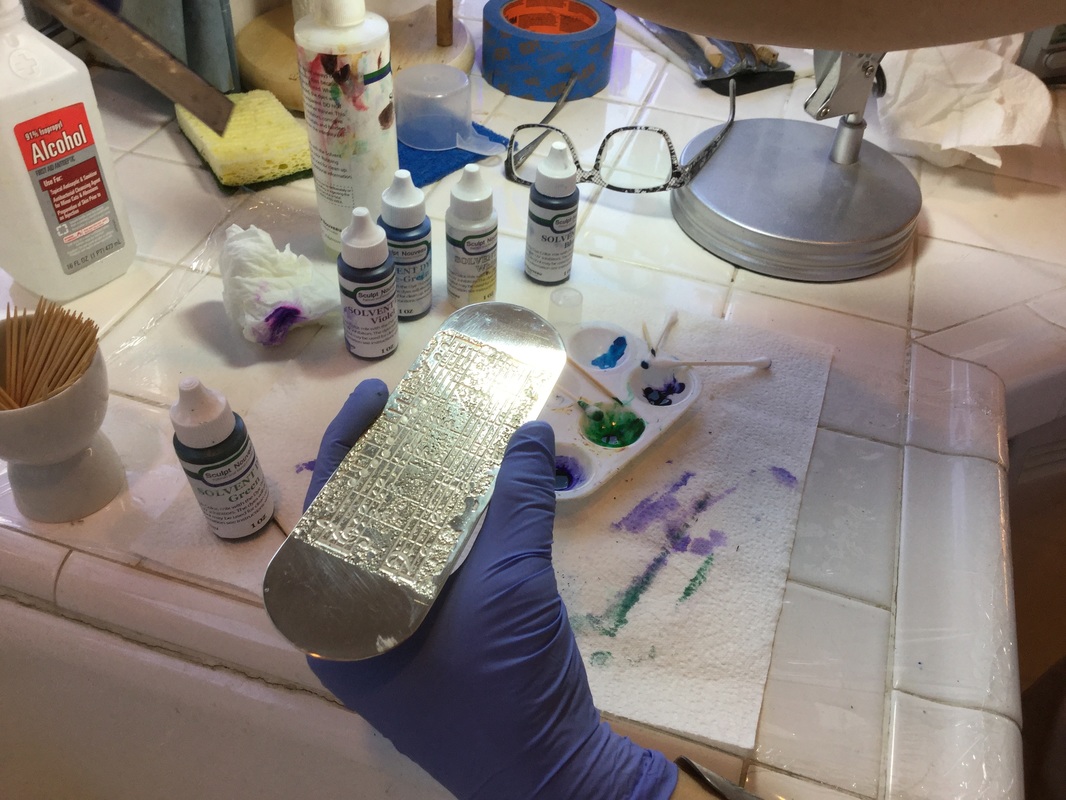
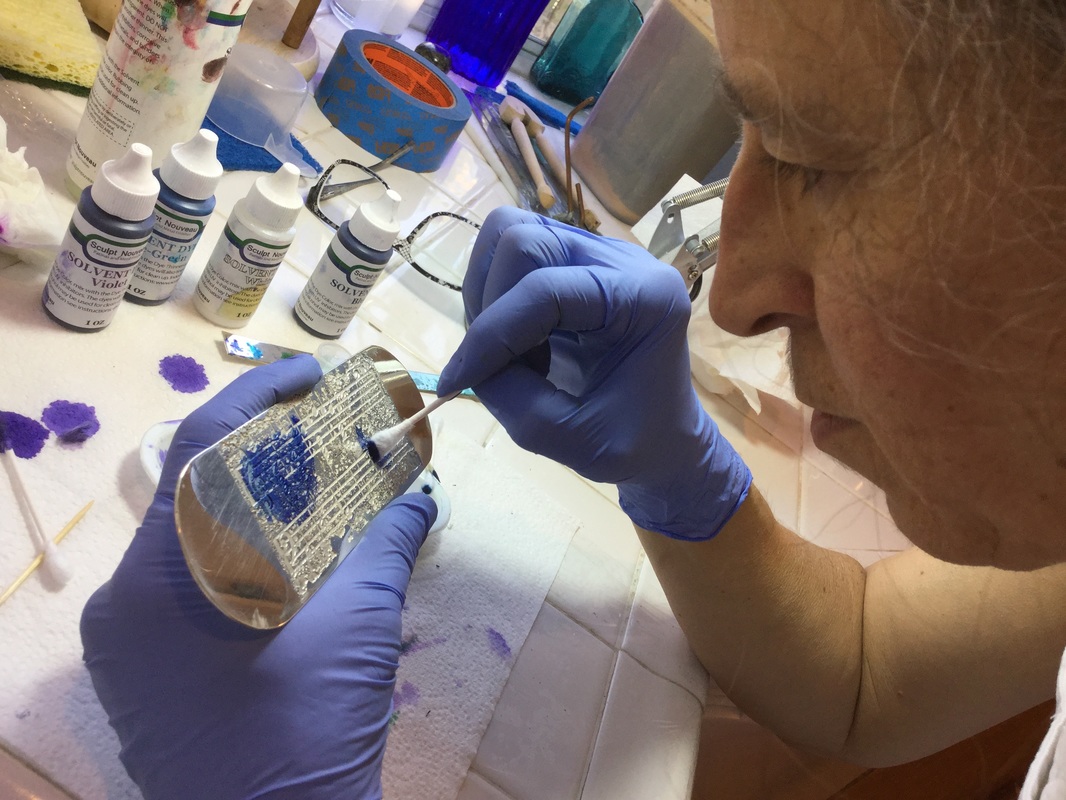
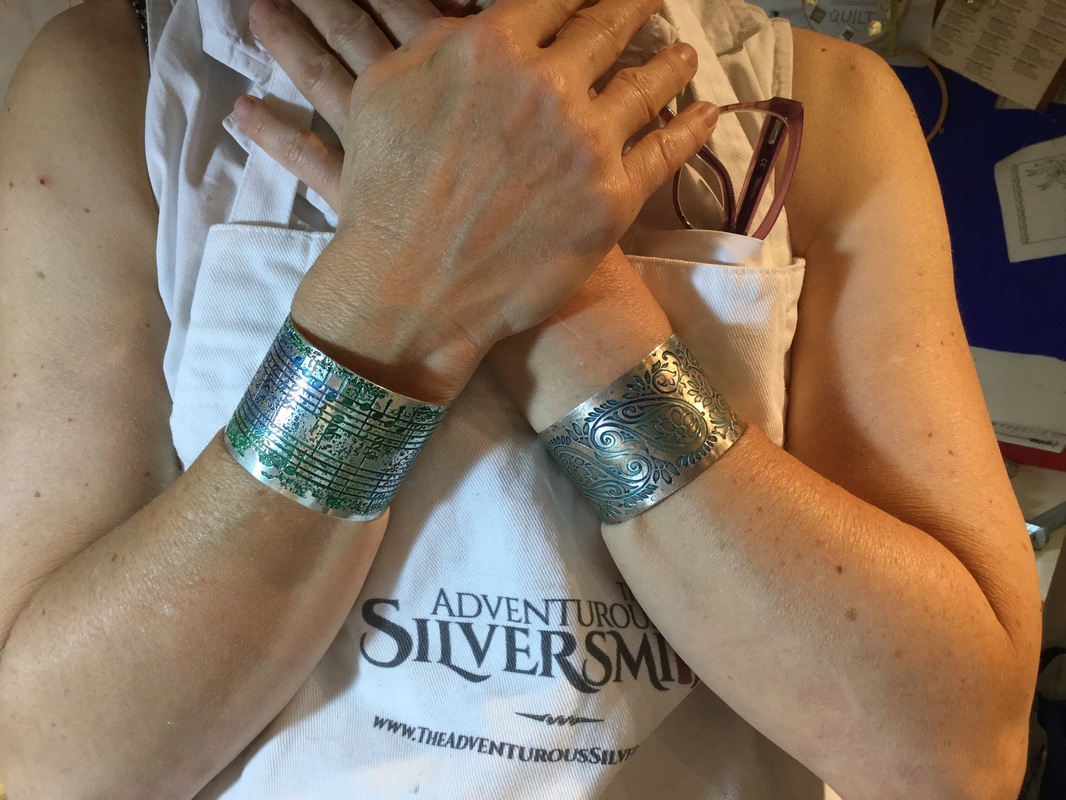
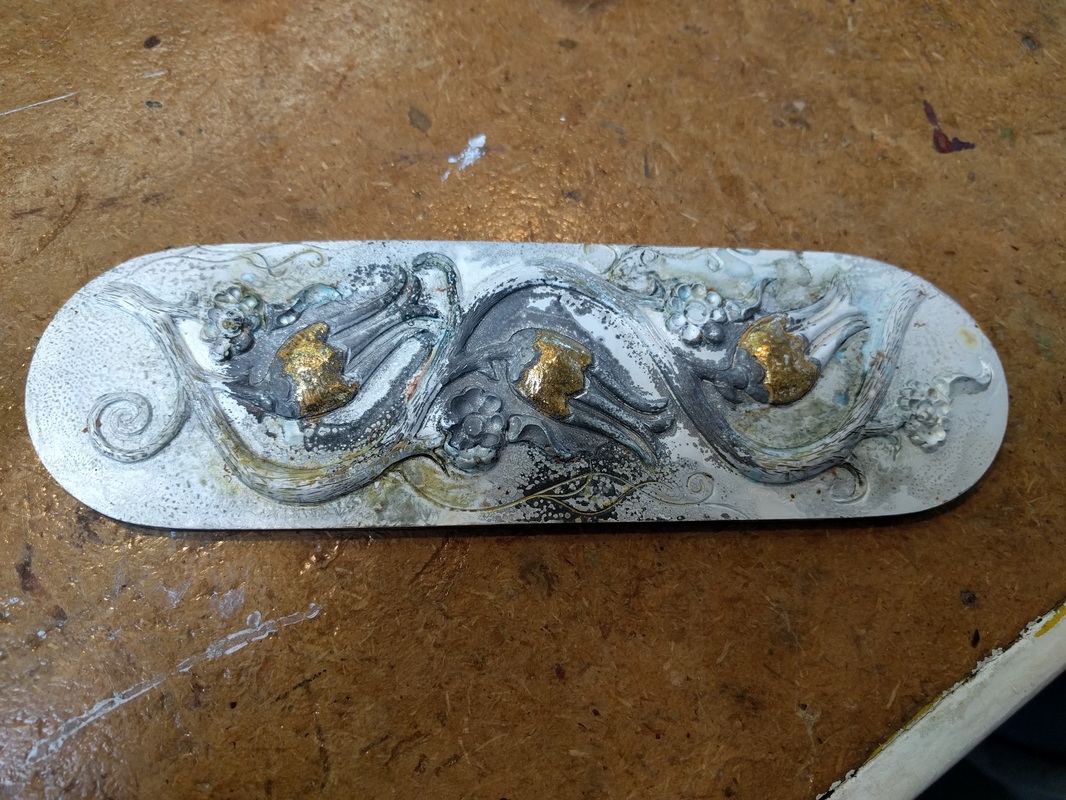
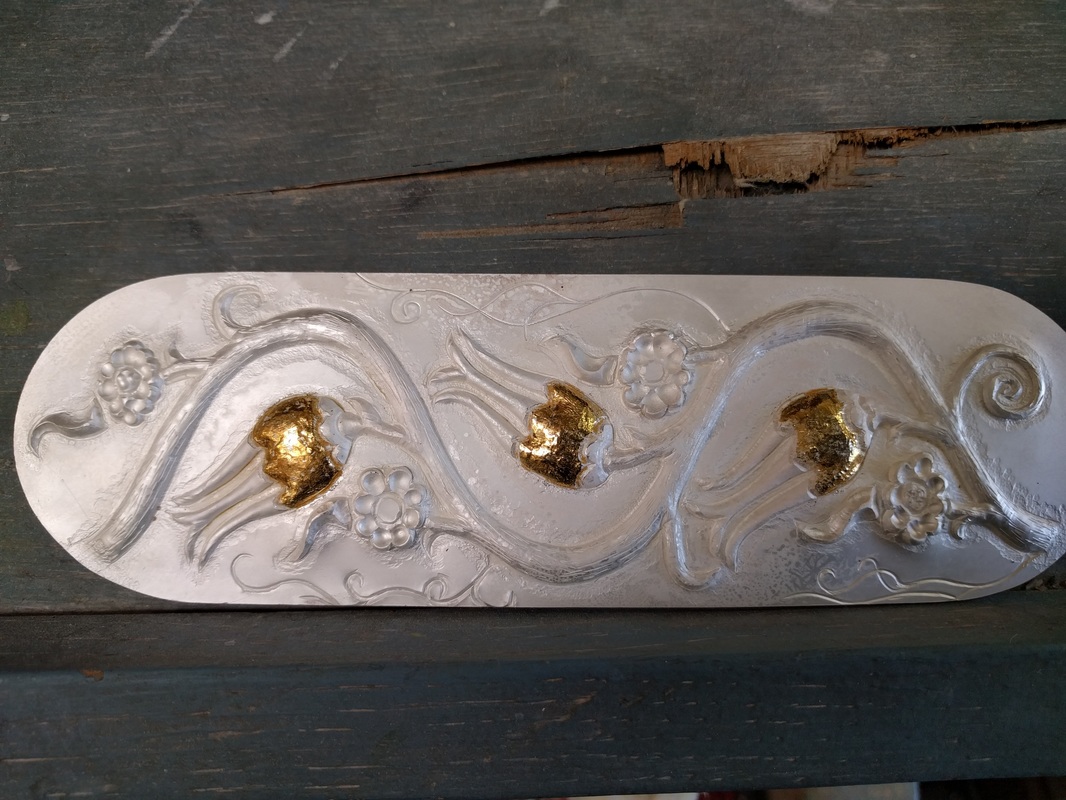
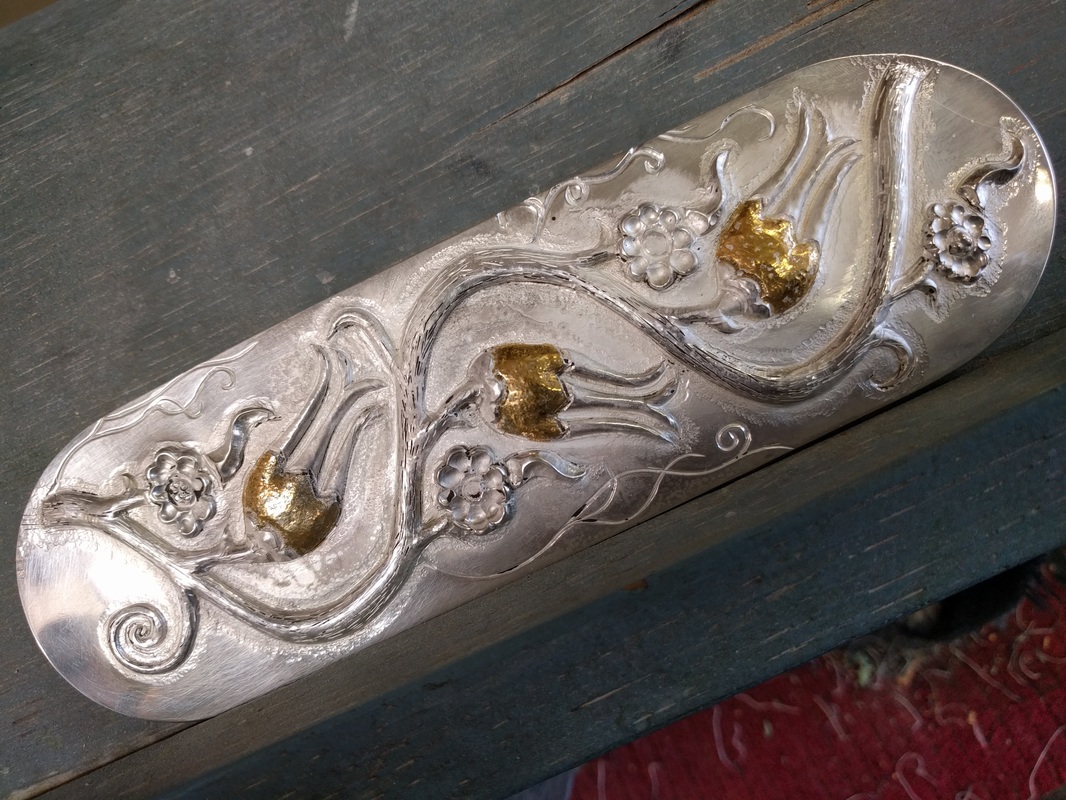
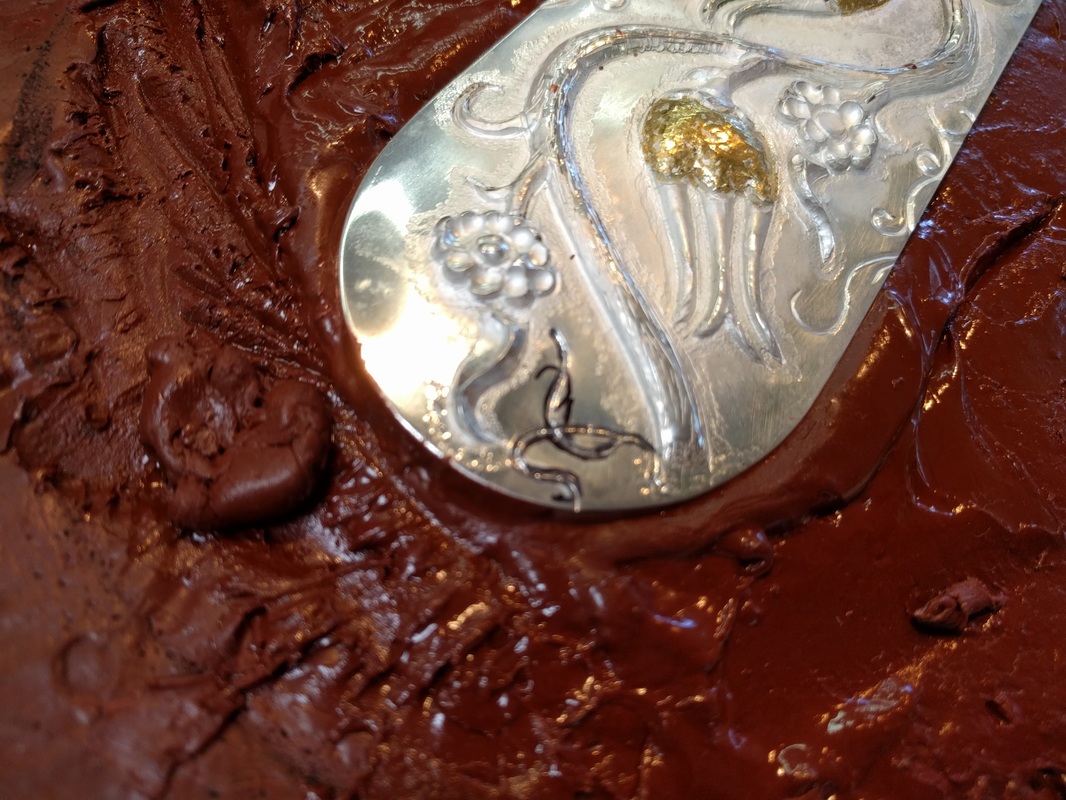
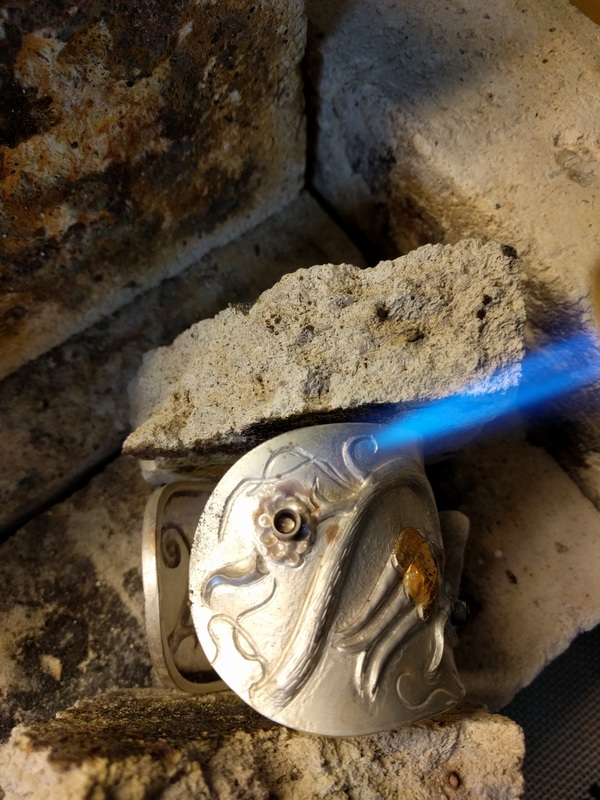
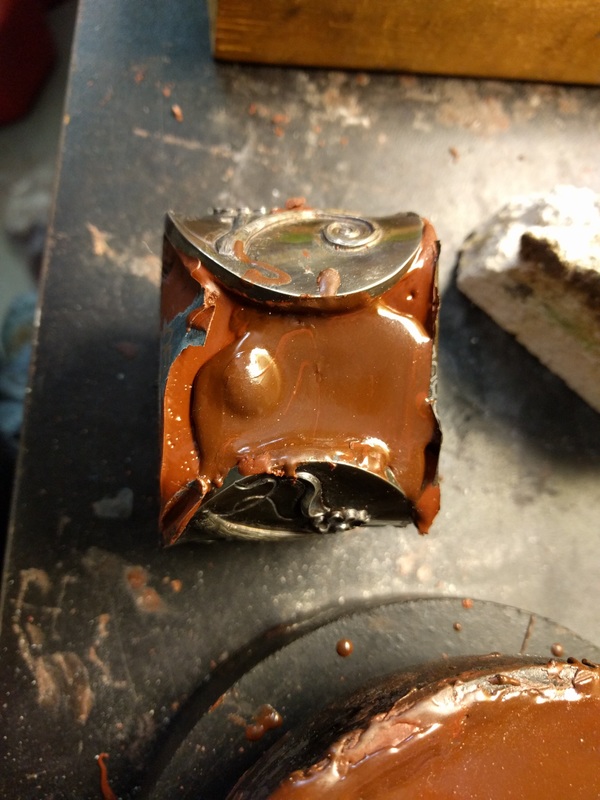
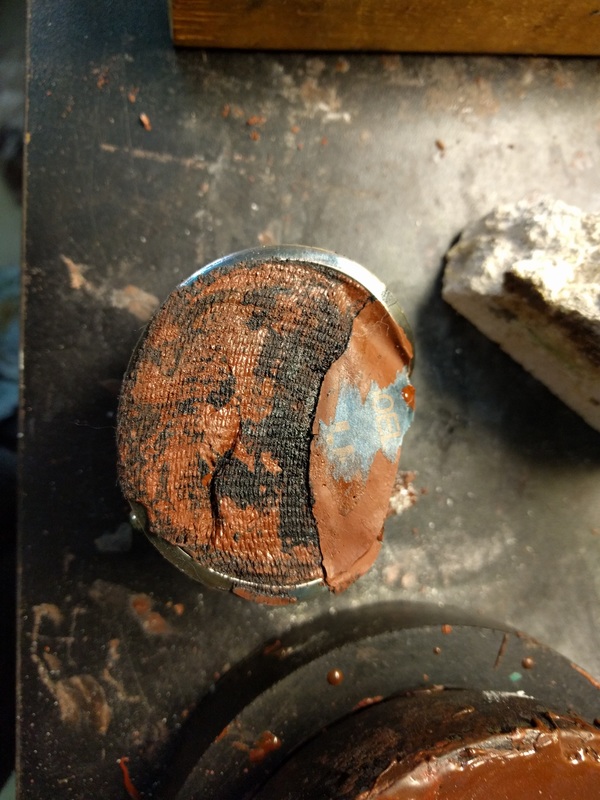
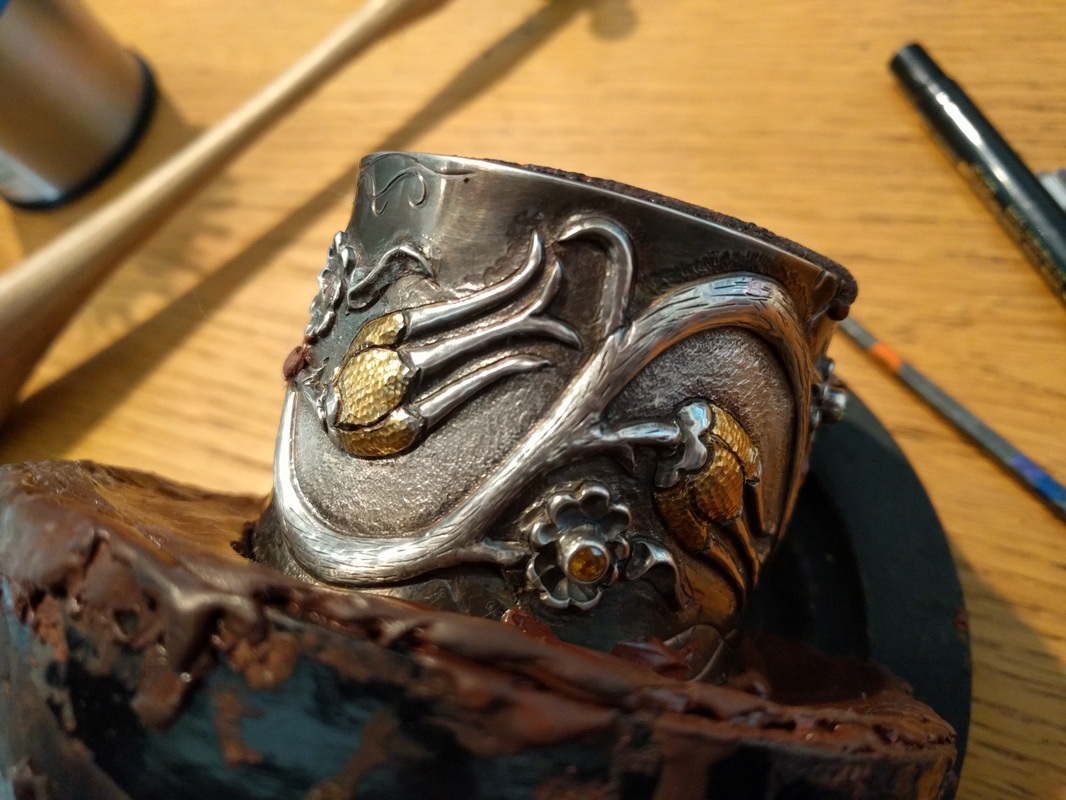
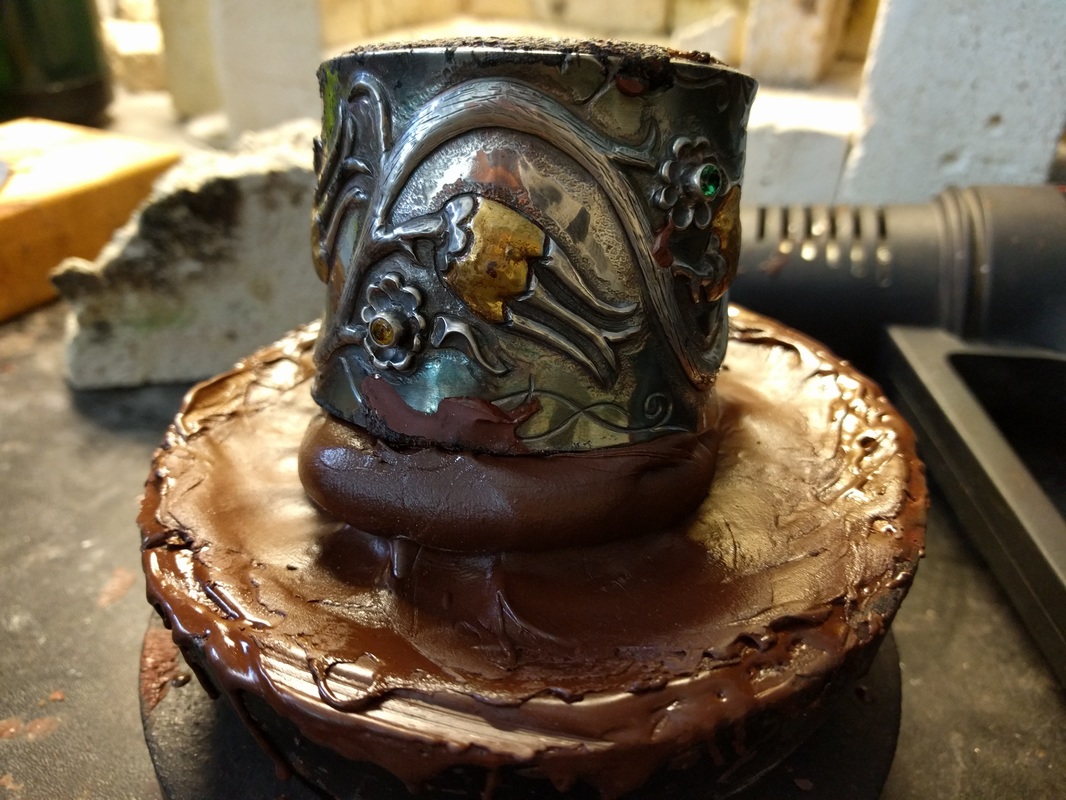
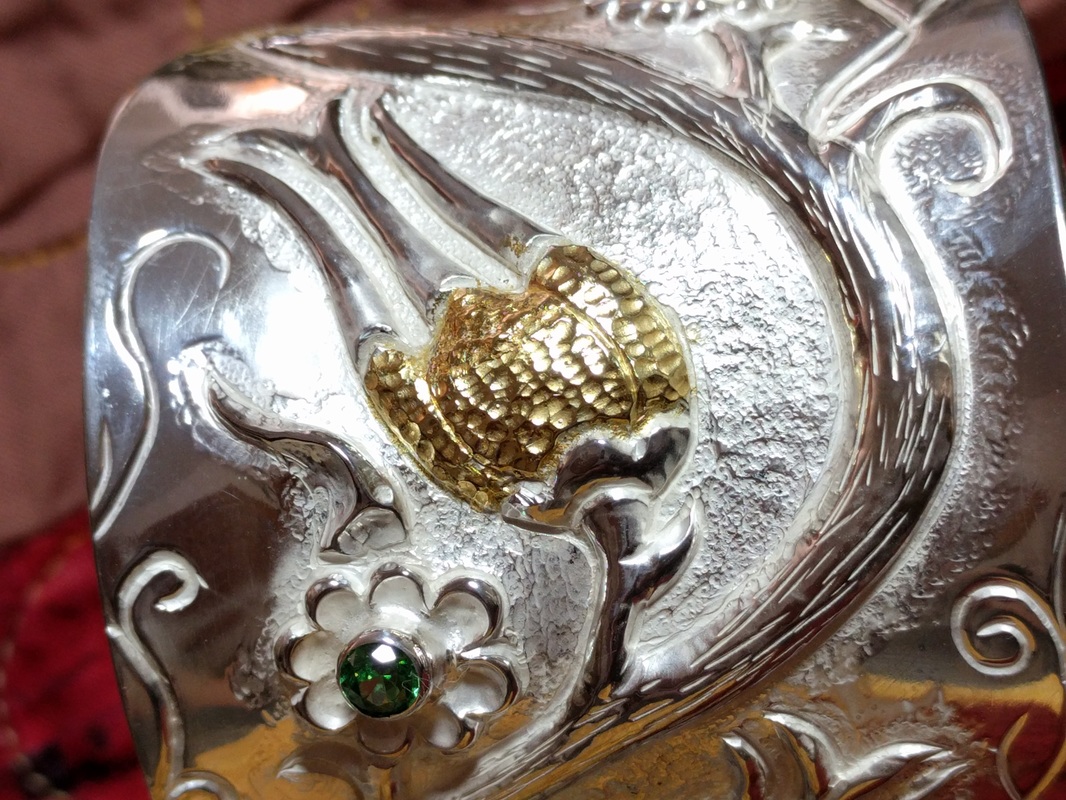
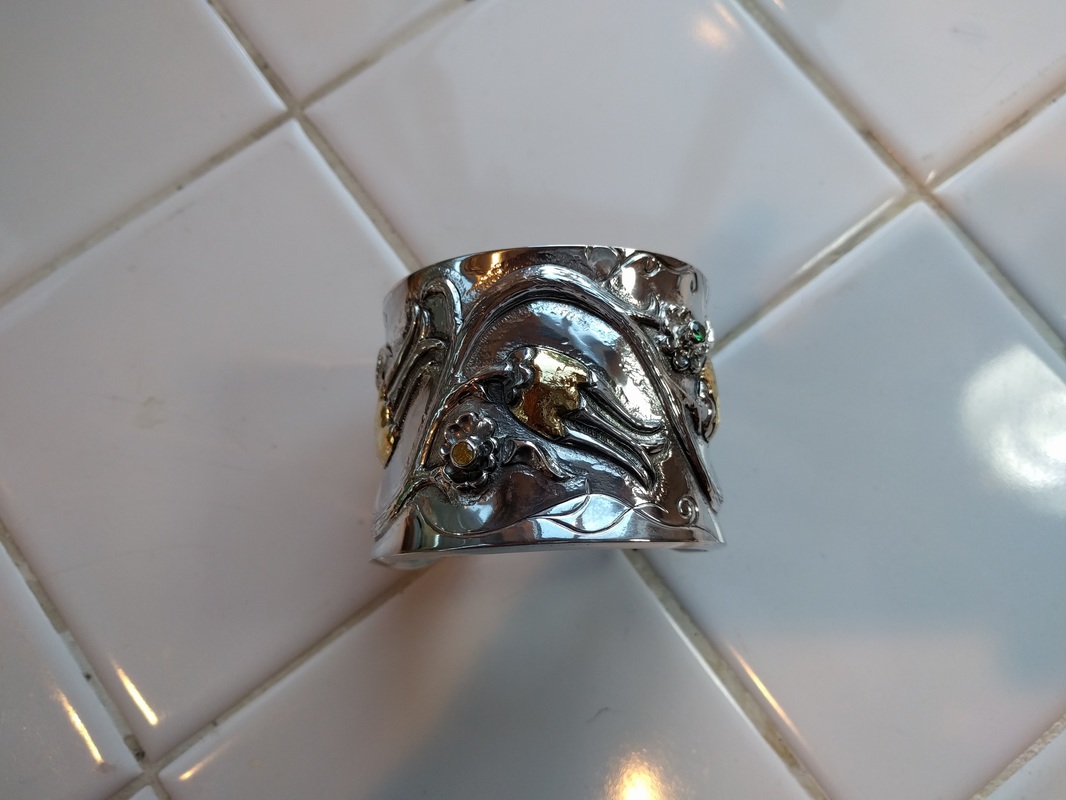
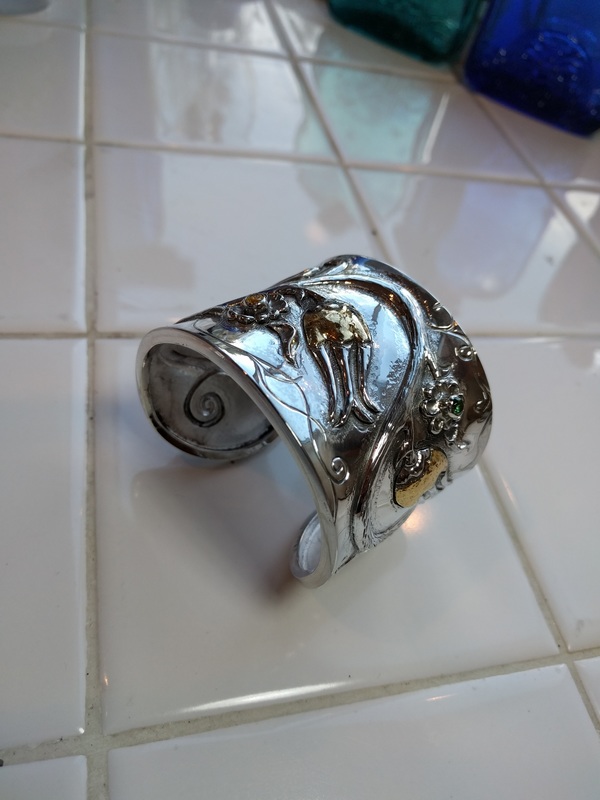
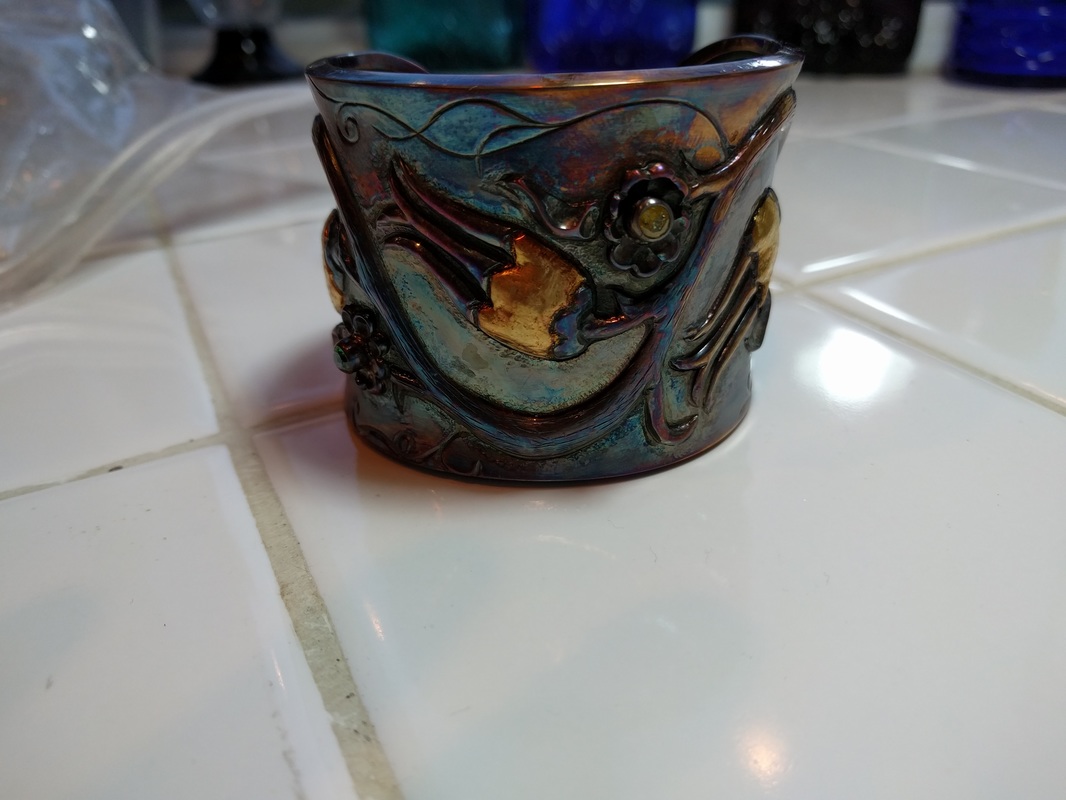
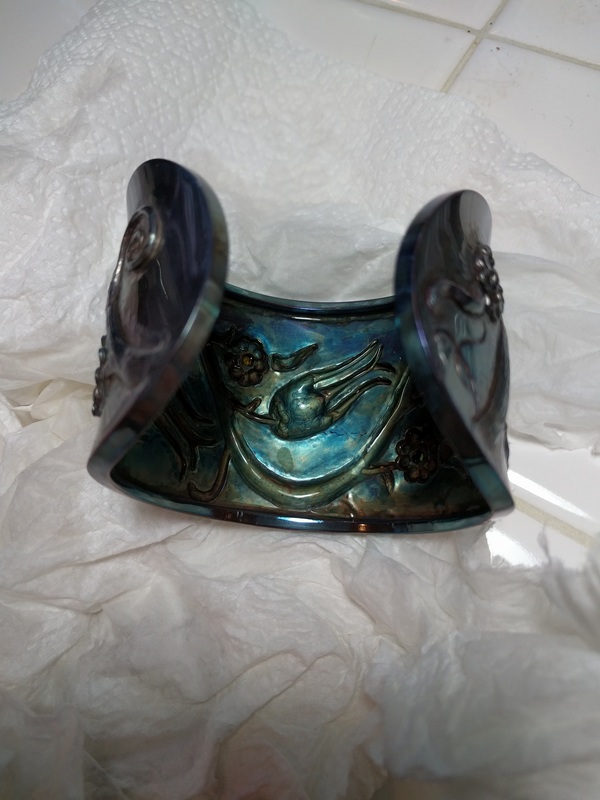
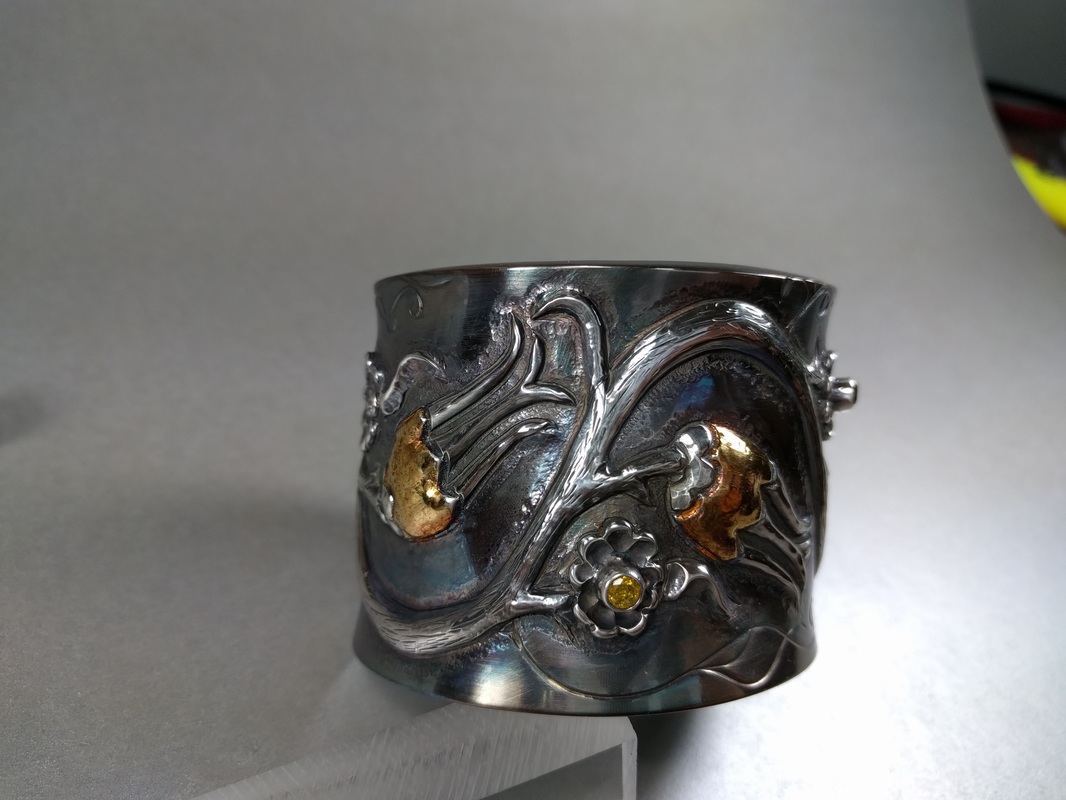
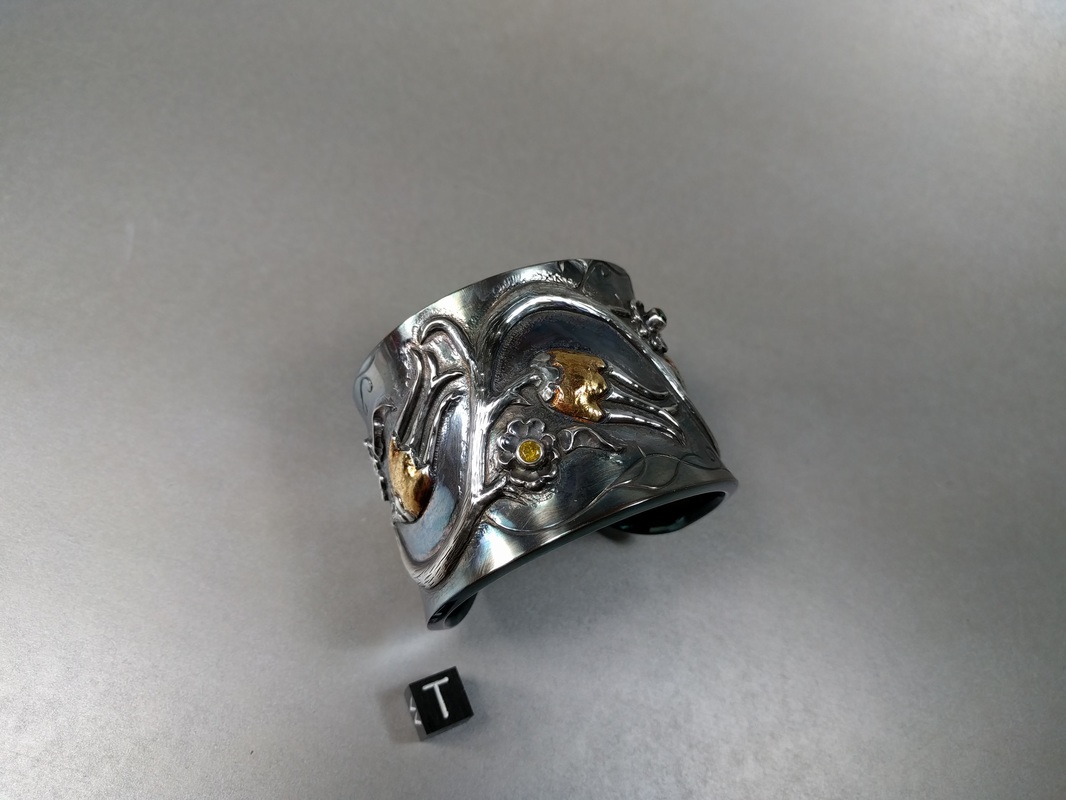
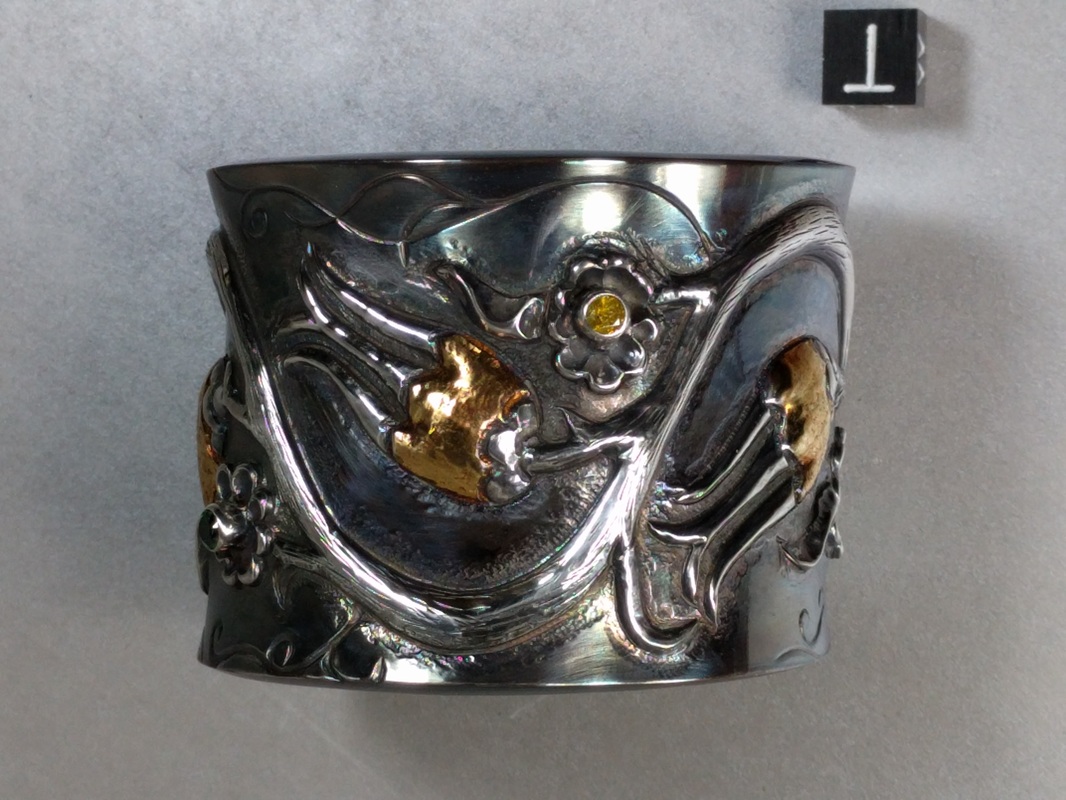
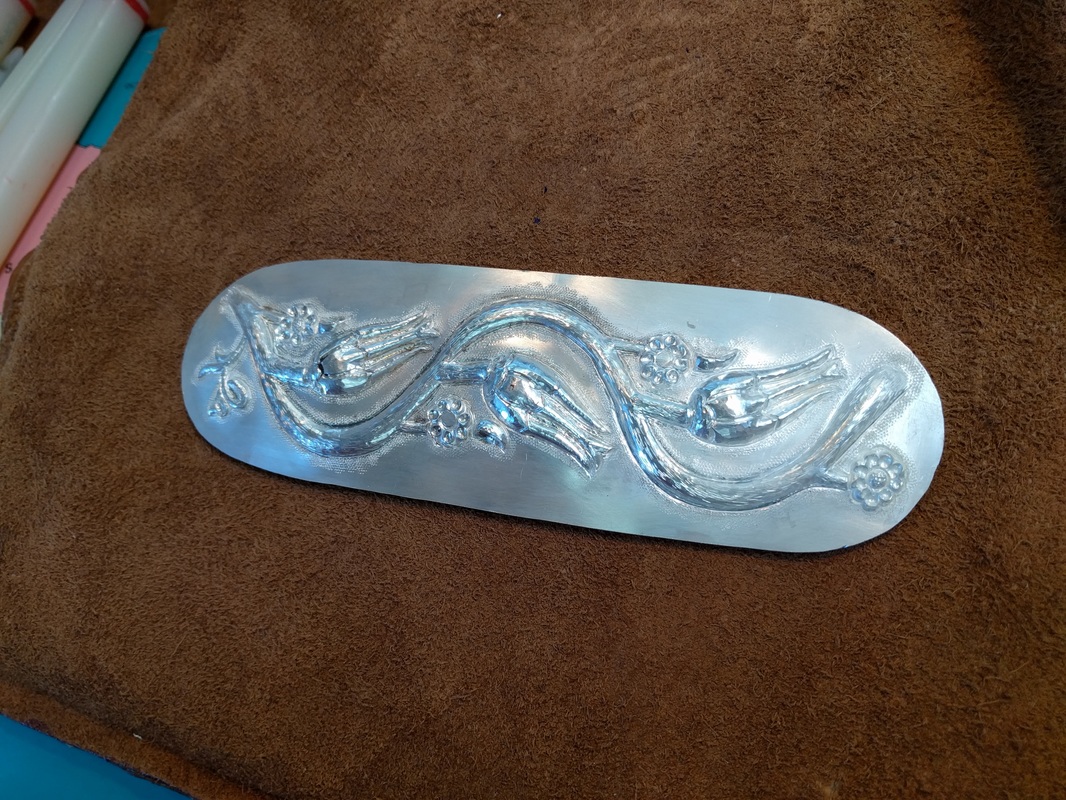
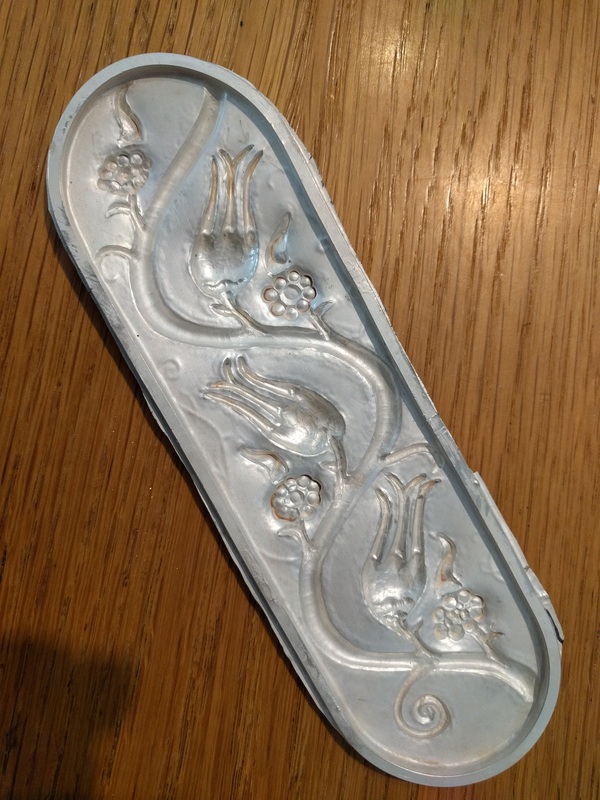
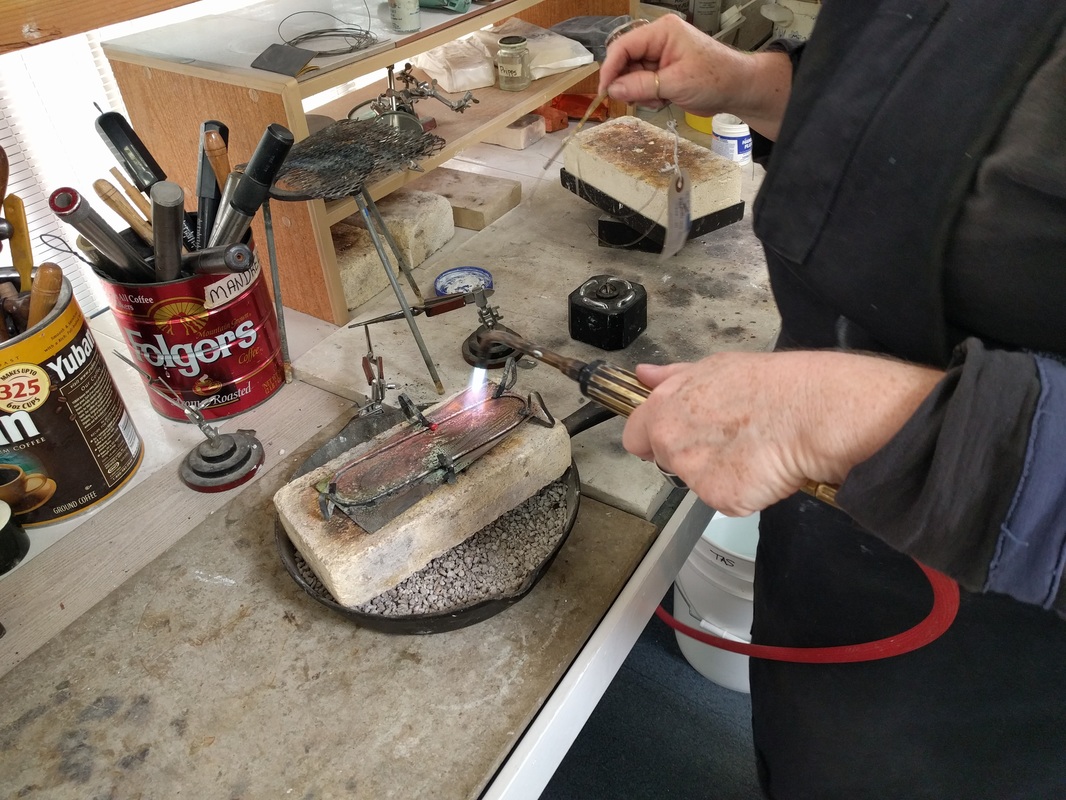
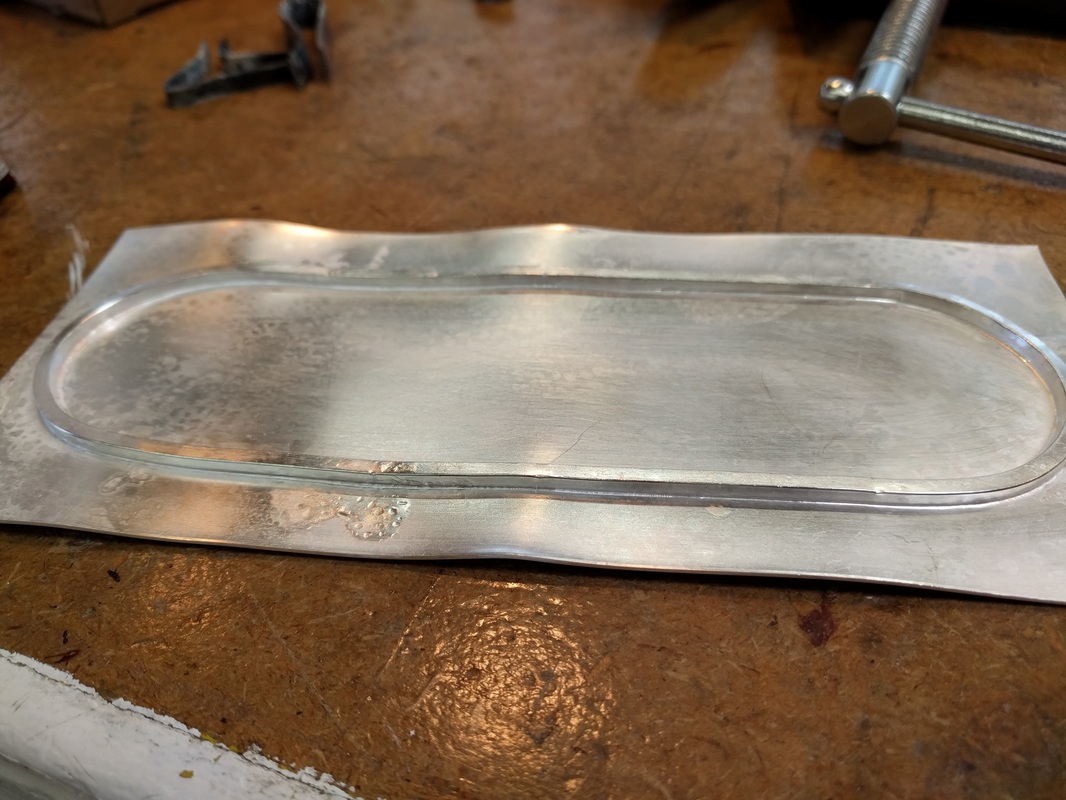
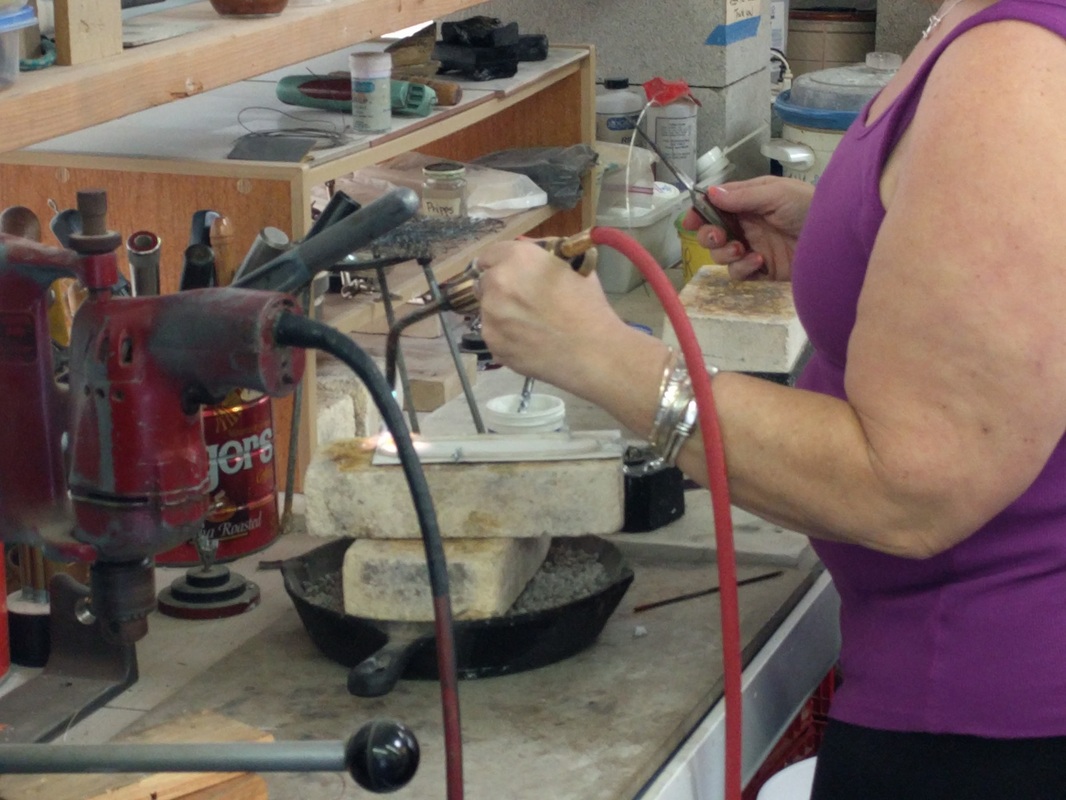
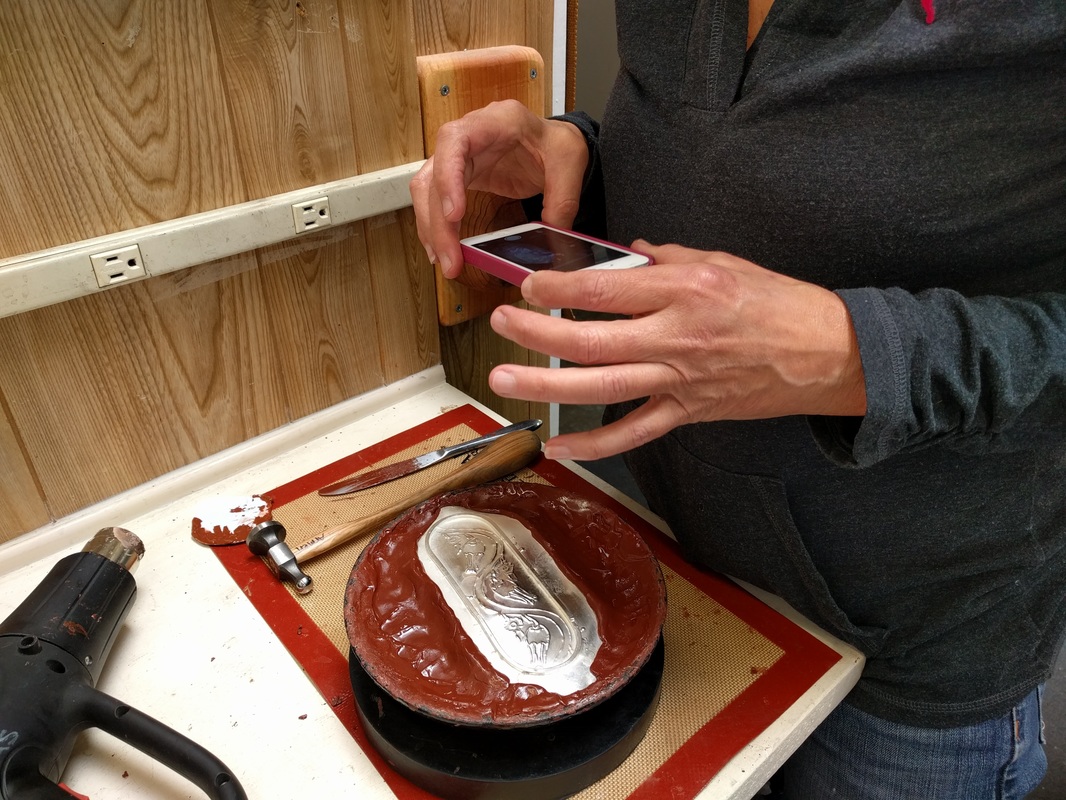
After that it was on to the polishing, forming the cuff, and then patina. Barbara said she wanted a traditional LOS patina which is to get the silver black/gray all over then polishing the high points back so the nooks and crannies are dark; to which I said OK but she was getting a lesson in how to work with LOS which, if you do it MY way, will results in some colors ranging from golds, raspberry, purples, and blues - before you ever get to the gray and black. We mixed up the LOS and started dipping and rinsing. First Barbara got golds and was surprised; then a hint of raspberry, still commenting that it was interesting but would like it to go black - I said "Patience Grasshopper!". The colors then started to darken and she had purples and blues - and she stopped! Barbara was amazed at the color and was now reconsidering. We quickly polished up the high spots, put her cuff on and decided that she was DONE!! Here is a mini movie I made, with music, from pictures I took, of her making her cuff. Several weeks ago I bought a fine silver stamping from PotterUSA, this was made from a die (female) that was made from the vintage hob (male) that was purchased when the Frank Morrow Company closed it's doors last year; the hob is over 100 years old. This stamping is from a die that requires a massive amount of tonnes because the die is so big and deep and to get a good result. Kevin used 5 ounces of silver resulting in the piece being 16 gauge thick!
So what was I going to do with it? Make a cuff, of course; even though I could do something like this via chasing & repousse, it was a challenge for me to take the stamping and turn it into something - so I started to ponder what I would do. I figured I would do some piercing but how much? What would I do to the side sections of the cuff so they weren't plain? Would I screw it up having not done something like this before. I started my ponderings by making a copy/scan of the stamping and drawing on it - where was I going to pierce, how long did I need to make it so the cuff would fit me, how wide would it be. I did 3 or 4 copies with ideas. It was now time to stop pondering and to start the project! So yesterday, was the day to start the project and my goal was to have it finished by this afternoon - which I did, yeah me! I tracked the hours it took - 14 from start to finish. I went through 5 saw blades but having never done this much piercing before, I think that is pretty reasonable. I had to use many needle files to get into all the nooks and crannies from the sawing and I had to stay relaxed by keeping my shoulders down, not using the grip of death on the saw and breathing through my mouth; this prevents you from clamping down on your jaw and that results in overall body tension. What skills did I use that were not ones I normally use because I don't make much jewelry:
When all the sawing and filing was done, I did a pre-polish to smooth all the edges and to see if I needed to get rid of any major scratches, I did not. Then I coated the silver in flux and annealed; the flux goes glassy when the silver gets to annealing temperature. Then I did a real 3 step polish, inside and out - white, green and red to get everywhere nice and bright - plus a good cleaning in between each polish. Once all that was done, it was time to pull out the bracelet mandrel and time to bend the silver into a cuff and my anneal was good enough that I was able to do it with my hands! Lastly I mixed up some Liver of Sulfur thinking that the antique look would add some depth to the flower details but as I am working the piece, I see the patina going gold and I knew that I had to keep this as the patina; I slowly kept swirling the cuff in the LOS solution and knowing that LOS can go dark at a moment's notice, I worked slow and ended up with a great gold color TIME TO STOP! A rinse and dry with a clean cotton cloth and it was done. I also took loads of pictures, as usual so enjoy them. When "we" start learning to do chasing & repousse, the first metal we usually work with is copper. It is easy and cheap. Then after much fear, we will usually move on to sterling and fine silver - harder to move than copper and certainly more expensive than copper. Others move to brass which while cheaper than silver, behaves like sterling silver in the pitch pot. A lot of people stop here and never move into working with gold, yes GOLD that wonderful metal that is very, Very, VERY expensive these days. Gold is not a metal you start with.
Plus, because of the cost, it is intimidating. There is the "Oh, no! what if I f*uck it up!!" thoughts whilst shaking in your shoes and biting your finger nails. Yes, if you start off as a jeweler/goldsmith, you learn to work with gold - annealing, soldering, casting, milling. Yet if you come from the traditional silversmith/hollowware side of things and you don't go to a professional school, the only way to learn to work with gold is to have someone teach you or you go it alone. Which can also add another level of being scared to the process. After my foray into fusing gold to silver on the Squash Blossom & Vine cuff, I knew it was time to get some gold and do the chasing & repousse dance with it. I knew from having spoken to a few other C&R artist that they like 22K gold and that it behaved like sterling silver even at a thinner gauge. So I not only bought some 22K at 20g sheet, I bought some 14K rose gold at 22g. I bought some solder and a bit of wire; I was going to make some ginkgo leaf earrings and the wire would allow me to make the ear wires and some jump rings to solder to the leaves and from there, hang off the ear wires. I also contaced Metalsmith Deb to get a lesson in working with gold - soldering, annealing, etc... This workshop with a few other gold virgins is NEXT weekend. My rose gold arrived yesterday so I decided to get started on the chasing & repousse, why wait. I will admit I went cheap, $350, with the rose gold and only ordered a 1"x2" piece which I now realize is just too small to have any edge held by the pitch and I ordered it easy (annealed) hardness and now I know it wasn't. To cut a long story short, I lined, flipped and started the repousse and that metal just wouldn't move. I asked some questions in the Metalsmith's Coffeehouse on FB and got some great advice on how to anneal which I did this morning and NOW I am moving metal. Many people have a misconception that working in gold is easier than sterling - from a hammering stand point. Trust me, 22g, 14K gold IS HARD and it feels like I am working on 18G hard sterling silver. On the plus side, I am not (as) afraid of working in gold now. I almost have the repousse on one leaf done and will move on to the second leaf later today or tomorrow night. With luck I might get the chasing done by next weekend. The 22K 20g gold sheet is due to arrive this next week and IF I have to redo the ginkgo leave on that sheet, I will and all of this is chalked up to learning. Enjoy the pictures and more will be posted when I have more to show next week. Just a week ago I stumbled upon a juried exhibition here in San Diego, California at The Studio Door. The exhibition is titled ENDANGERED, A celebration of artwork which showcases the beauty of endangered and threatened species or habitats. I read the prospectus which was as follows: ENDANGERED is an exhibition of visual art running from August 5 - 28, 2016 produced by The Studio Door. A celebration of artwork which showcases the beauty of endangered and threatened species or habitats. The exhibit will cultivate an appreciation and understanding of the diversity of art inspired by nature. 10% of the proceeds will be gifted to the San Diego Zoo. CATEGORIES ACCEPTED Painting, drawing, photogaphy, printmaking, assemblage, collage, mixed media, fiber art, artist book, ceramics, stain glass and sculpture. Oversized jewelry that can be defined as fine art is acceptable for this show. This exhibition does not accept jewelry (as defined as craft), video, film, performance art, installation and works requiring an external electrical source. Submissions must be the artist’s original work. I figured that if The Tenacious Tentacle just took First Place in the Art Jewelry category at the fair, when then my cuff was FINE ART and by golly, I was going to enter it. For my artist's statement I wrote the following: The Tenacious Tentacle is a piece of art jewelry that is a cuff. When worn, it looks like the tentacle is wrapped around the wearers arm. On the cuff is also a Sea Star (starfish) and a sand dollar (which is a type of sea urchin). Though all three are not currently classified as an endangered species their environments are being threatened. All require clean sea water, none of these three have fresh water relatives. All three mostly live on the sea floor. With their sea habitats being threatened these amazing creatures are threatened too. The cuff is made from sterling silver using the technique of chasing & repousse. This is an ancient technique where the metal is stretched using small tools and hammers to create volume, texture and detail. Initially the cuff is worked flat. After all the chasing & repousse, it is then bent into the cuff. After polishing the patina is applied, this allows the highlights and lowlights to be accented. AND... Just a few hours ago, I got an email stating that my piece had been accepted - unfortunately it is not going to be in the physical exhibition but it will be in the on-line exhibition and it will be in the published catalog. What I am very happy about it the fact that there were 200 entries and only 60 were selected and I am one of them. This is my second juried exhibition that I applied to and BOTH times I was accepted.
The exhibition runs from August 5, 2016 through August 28, 2016. When I have links to the actual exhibition I will post them. NOTE: I need to make another Sea Urchin cause that would have been perfect to enter; and I could have entered it and marked it NFS only if it was in the on-line exhibition because if they wanted it for the live show, I would be rushing to make it. Thus I did not enter it. This past Saturday, I worked in the Fallbrook Gem & Mineral Society booth at the San Diego County Fair at Del Mar.
I have worked in the booth, for one or two days, over the past 10 years, since I was a member of the club. Though, I am no longer a member of the club I still have many friends in it and so when they called, asking if I could fill in one day, I said yes. I was to work the morning shift with B.J, Orville, and Lester, who I have worked with many times. As we were getting the booth ready for the days visitors, one of the people who work in the Hall of Gems & Minerals came up and congratulated me on my wins; or so I thought. It was not until I took my lunch break and decided to get one more picture of my cuffs that I saw that my Squash Blossom and Vine cuff had won a donated award for excellence. I was shocked, I could not believe it because this honor had not been presented (yet) when I had been at the fair the first week it was open, when I was there for exhibitors night. I had been awarded the Cinderhill Award for the Best Single Piece of Jewelry. I guess you could say I was reeling at the realization. Turns out the independent, donated, awards are presented some time after the fair opens so those who make those decisions can have time to compare and ponder their choices. AND the Cinderhills who presented the award had a booth in the room (but I had never met them), so I went over and introduced myself and while asking what it was about my cuff that they felt had merited this award, I realized every other phrase out of my mouth was either "thank you" and "I am shocked". I then shut up. The Cinderhills explained what their process was for selecting the recipient and then I thanked them again, and again, and again. I then left their booth and went to lunch. Let's just say the rest of the afternoon was a bit of haze. So here it is, a picture of the cuff and the "award". I have also now accepted the realization that I am an "award winning artist". After 2 other cancelled play dates, the etching of the musical cuff finally happened this past weekend. Lisa, the awesome DBA and muscian, drove the LOoOoonnnNnggggG distance to my house (it was a 50 minute drive, and it really isn't that far!) and arrived at 11 am. It should be noted that she should have arrived at 10am but her day job got in the way.
We got started right away. We walked through the design in Illustrator, the export to Photoshop, import to PS and the inverting of the drawing, printing on the paper, cleaning the silver and applying the mask to silver. Oh, trust me I had every thing laid out - silver, iron, hot plate, etching bath, rectifier, gloves, paint pens, tape - all in the kitchen by the sink. The first and the SECOND application of the mask did not work but we got it on the third time and then it was the fixing of the mask, applying the electrodes and applying the power. IT's ALIVE!, IT's ALIVE!!! Every 10 minutes we checked the progress and after 40 minutes, out of the etching bath it came. We rinsed and then found that some of the masking had not taken and had come off during the every 10 minute check when we brushed off the surface with a soft brush. But we moved on to remove the electrode and tape that masked the back. After cleaning it was then into the garage to do a preliminary polish; trim with shear and sanding sticks; and back to the garage to finish the polishing with the soon to be cuff having many baths in the ultrasonic cleaner in-between the various compounds. After all the etching, trimming, and polishing Lisa applied some solvent dye to color the bars and notes and then we shaped it for her wrist. THEN we popped a bottle of champagne, celebrated and went out for dinner. Here are LOTS of pictures but not all of them as we took over 143! Now that the workshop is done, I was able to finish MINE. I was behind on making mine because I was so sick in February.
For my cuff, I added the gold to the blossom bodies and put tube set CZ's in the center of all 4 of the small flowers. I originally only set two and after I bent and formed the cuff I realized that it really need to have 4 set stones. As usual, lots of process pictures for you to look at. Last Sunday was day 3 and yesterday, Saturday was day 4 of the Squash Blossom & Flower cuff. You can read about sessions 1 and 2 here.
Last Saturday we only had 7 of the 8 students attends as one was out sick with that thing that has been going around (and I had in February). But we had to keep moving... we spent more time working on the repousse and most of the students were actually ready to start the chasing on the front. On Friday night, the day before yesterday, we met at the club shop for an open "studio" session from 6 pm - 9 pm. About half the students made it and they were able to continue to work on their cuffs and be ready for yesterday's session which was about finishing their cuffs. This last session allowed the students finish the chasing - texturing, planishing and relining of the design and to start cutting off the extra silver to the outside of their cuffs. The cuff I am making was beyond this point so I could show them how to trim off the metal and then use shears to cut the metal away; use a saw blade to trim close to the frame; use files to get it flush and sanding stick to get it all square. I am applying gold to my squash flowers so I came to the workshop ready to show the students how to fuse and burnish the gold. I also talked about polishing their cuff - the different compounds, different types of wheels, a polishing station and using mini wheels in a hand piece, and then demonstrated the pre-polish so they can then determine if they can move on or have to go back and do more filing and sanding by looking for scratches and such. The 3rd demonstration/discussion was on how to anneal, bend, anneal, bend and form the cuff. And the final discussion was on patina - not just LOS but the various other ways to add color and accent to your piece such as solvent and alcohol dyes and pastes. No one actually finished their cuffs so we will work together over the next few weeks, on Friday nights, to get everyones done. Yes, in the future, this will be a 5 day workshop. Here are pictures from the last two days. |
Archives
October 2025
Categories
All
|
||||||||||||


RSS Feed