Follow Me On:
The Adventurous Silversmith
  • Home
  • Blog
  • Portfolio
    • Metal Work >
      • Chasing & Repousse
      • Holloware
      • Jewelry
      • Other Wonderful Items
    • Fiber Arts >
      • Temari
      • Yubinuki
  • Resources
    • Library
    • Tools & Equipment
    • Links
  • About
    • Artist Statement
    • Curriculum Vitae
    • How it is Made
    • Contact

The Box Project #6b - Making a box to put hinges on

12/24/2019

0 Comments

 
To read about learning to make hinges part a read this first
Monday (Day 3):
As part of learning to make boxes and boxes hinges, one eventually get to the point where you have to put a hinge on a box so obviously you have to make a box first which can be scaring because you want a good box, so will it will be a good one and then once you have made said box, and you put a hinge on it; well will the hinge work and if it does not can it all be saved?  This is how I spent Sunday evening while watching the T.V. and while trying to fall asleep. 

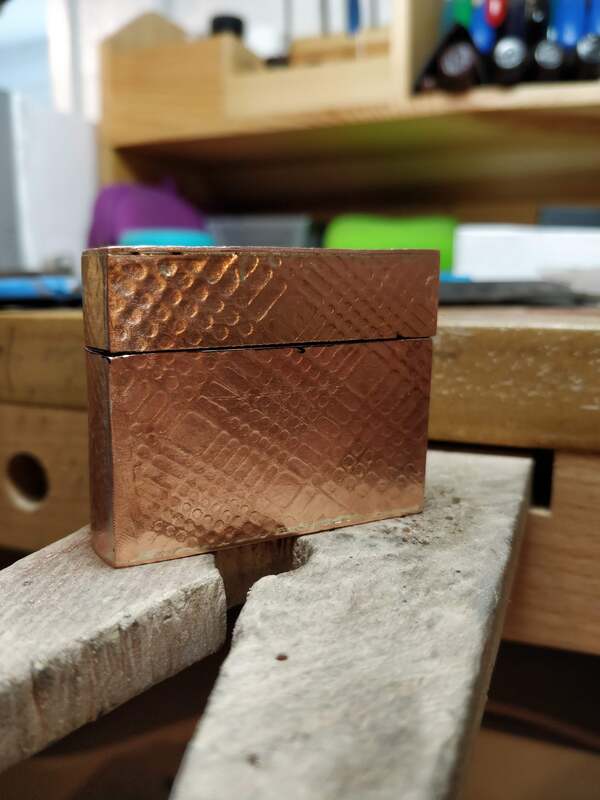
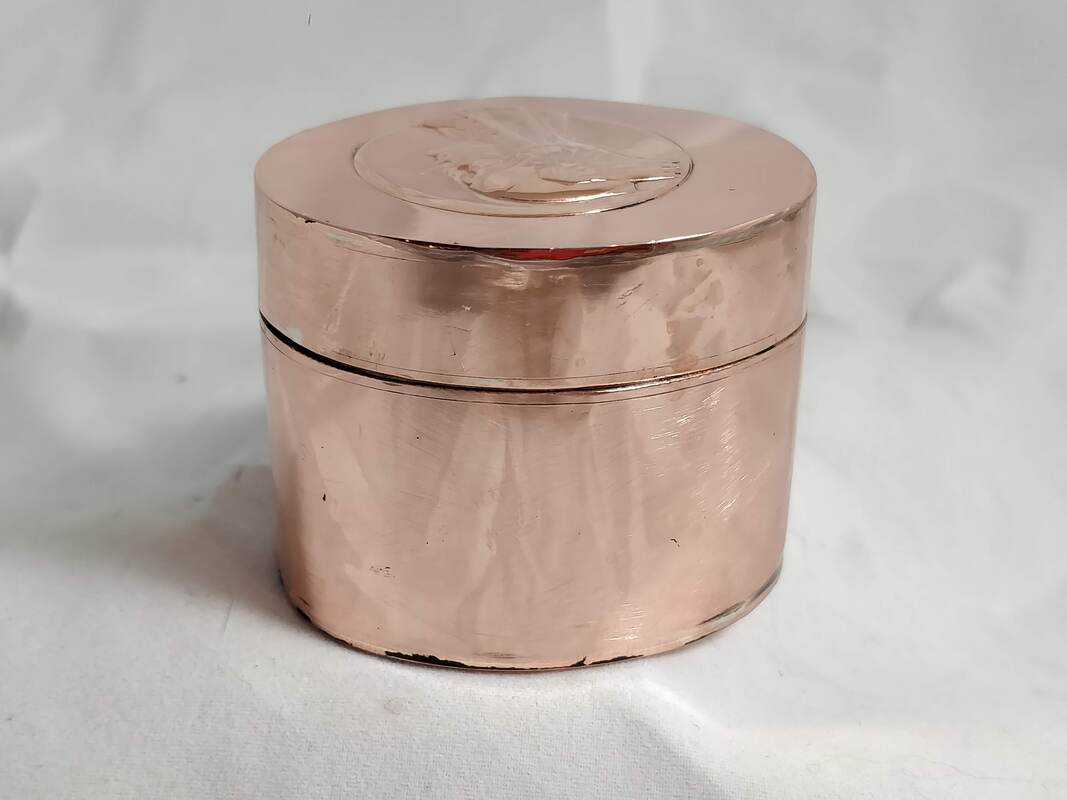
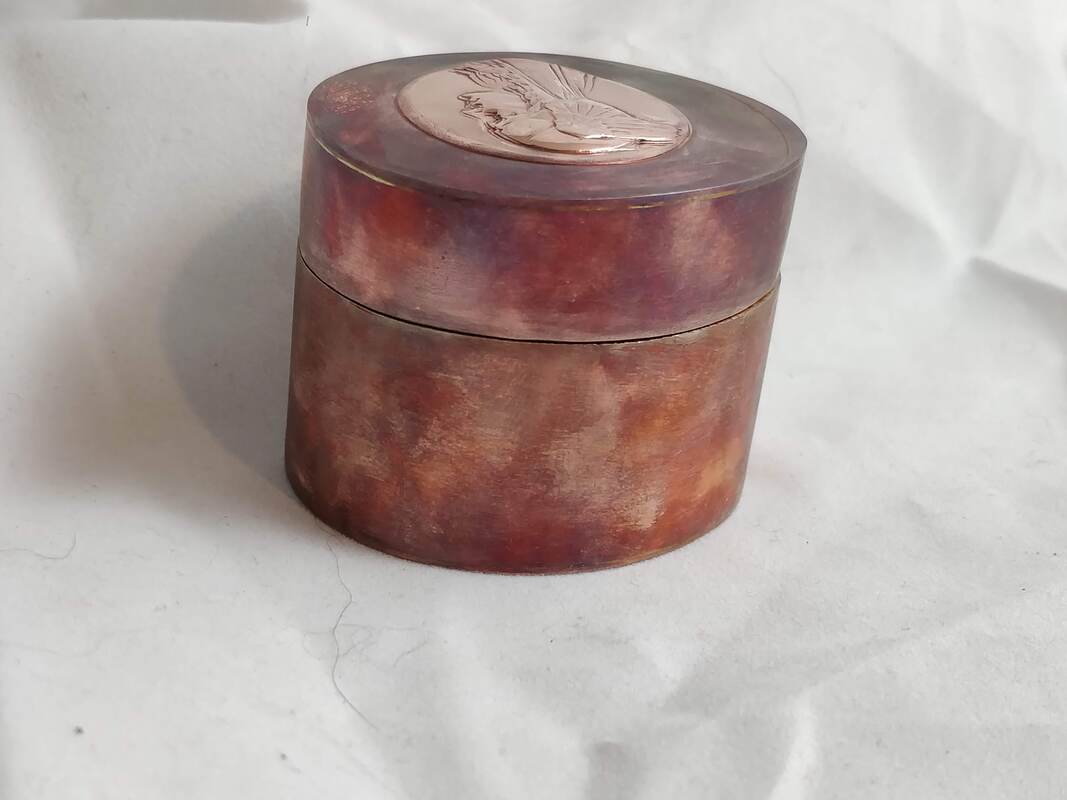
If you have been reading the other box project posts, you will be aware that I have been adding to the seam count with each subsequent box: #1 a round box with one seam; #2 an almond/eye shaped box with two seams; #3 a triangular box with 3 seams and then for #4 a square box with 4 seams. So what should I do for box #5? Ah, I cheated and decided to make a half circle box that had 2 side seams. 

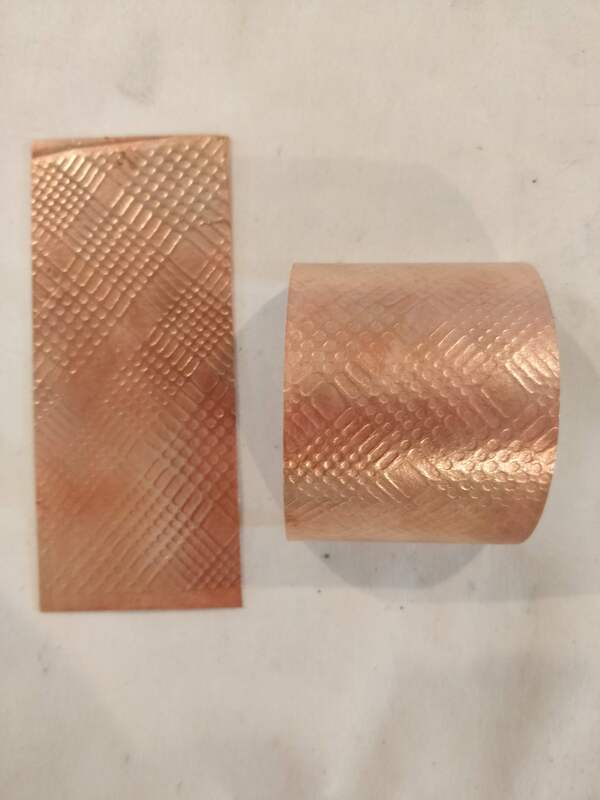
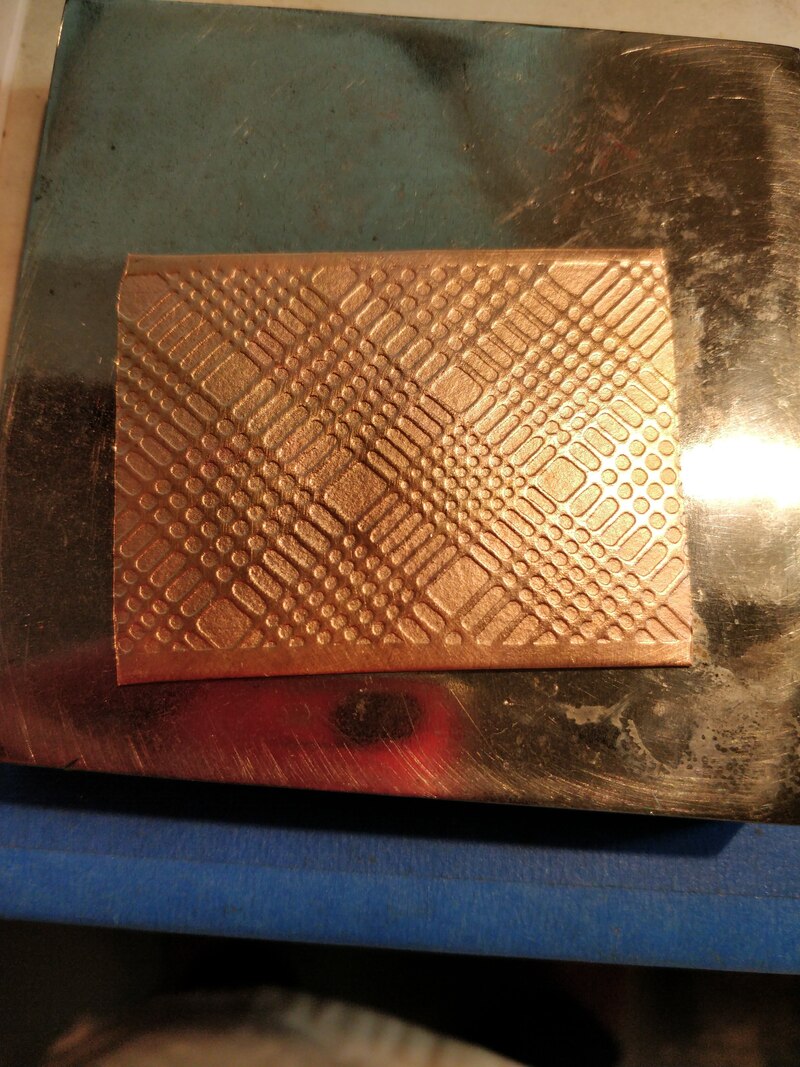
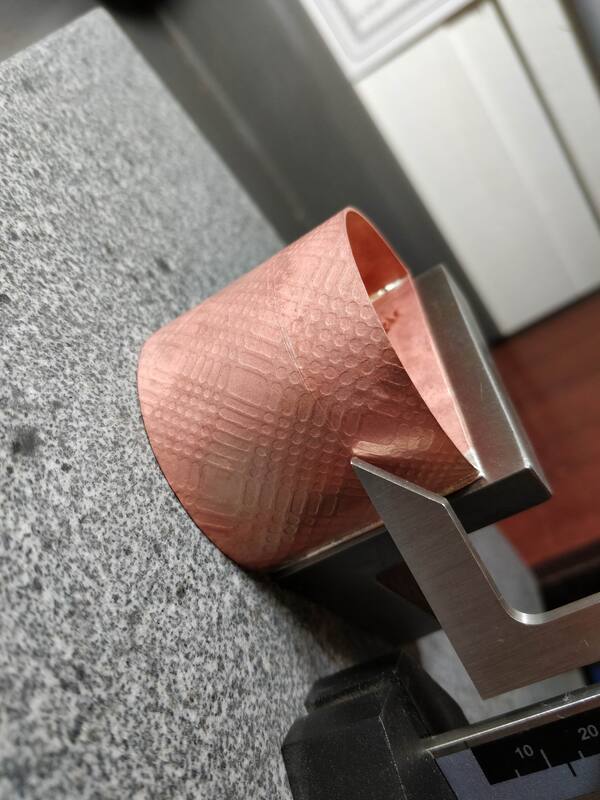
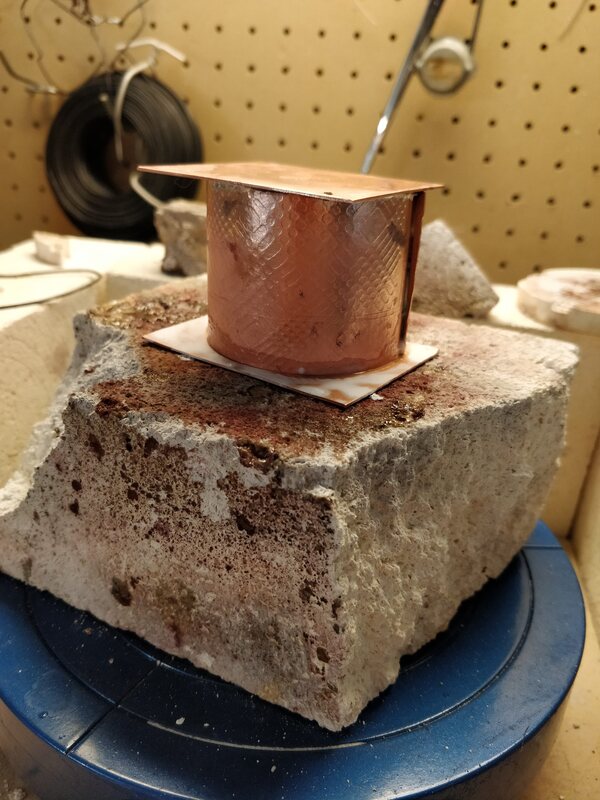
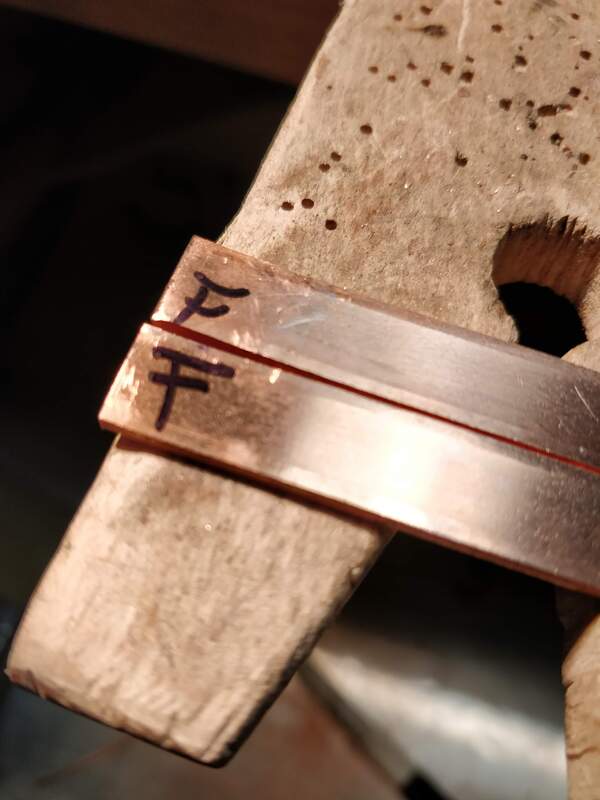
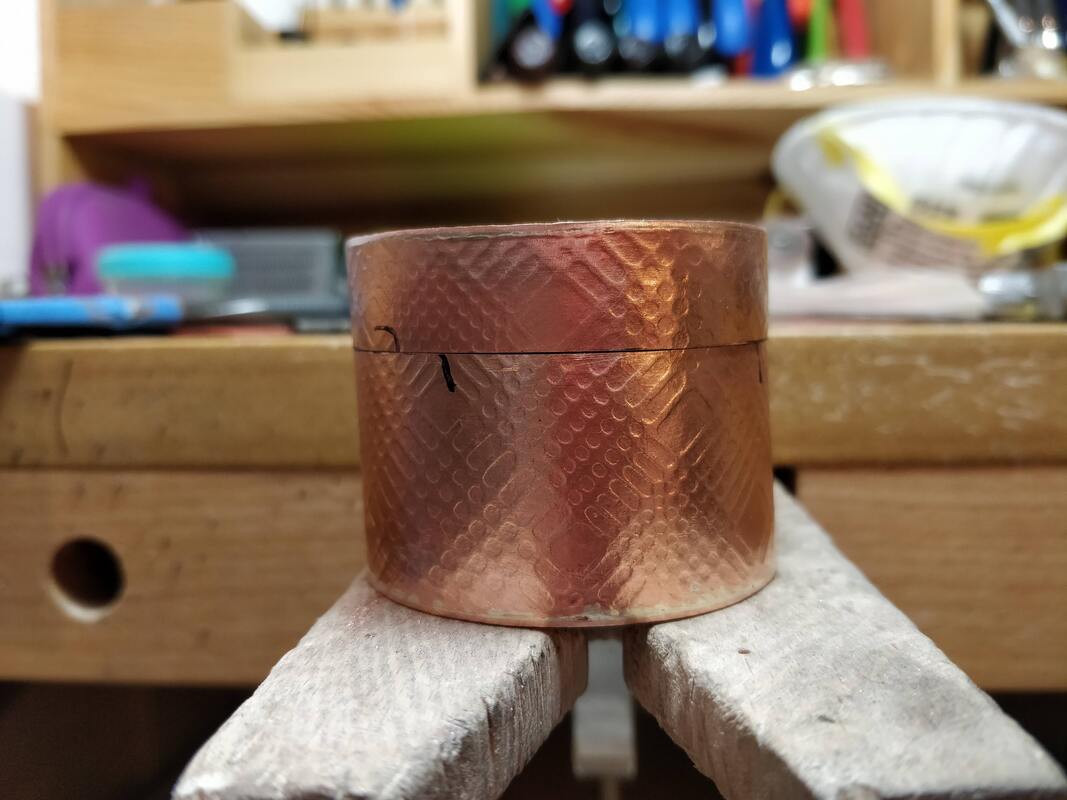
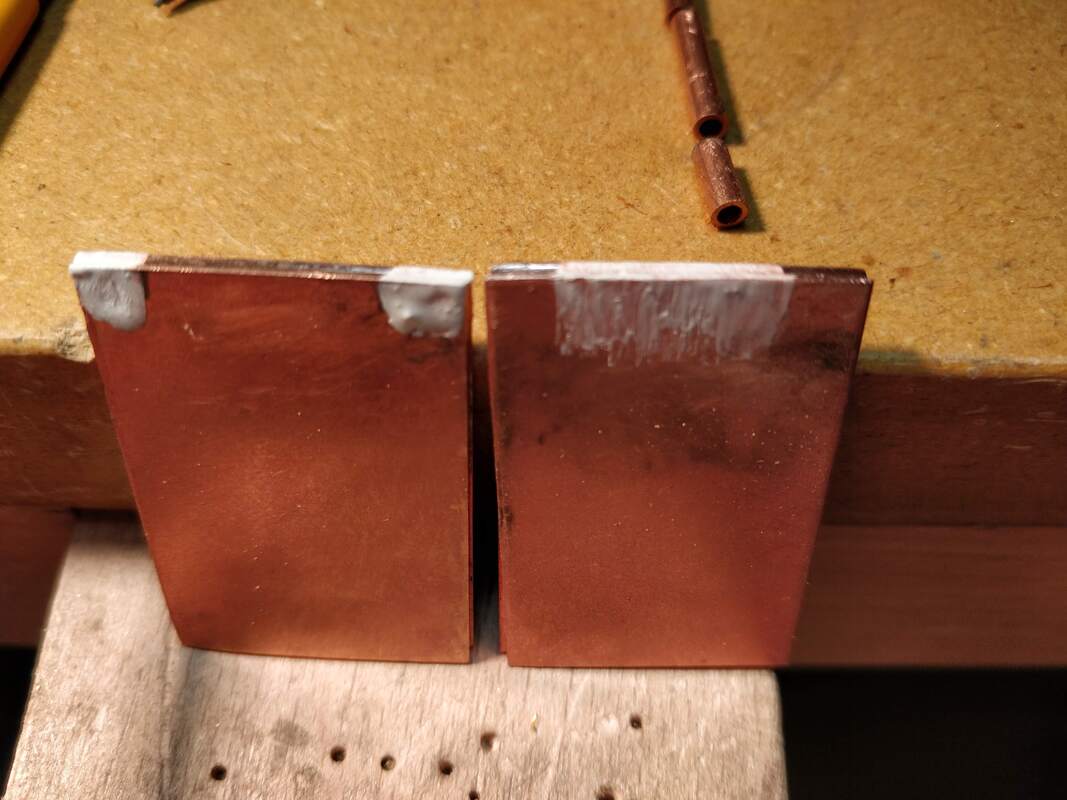
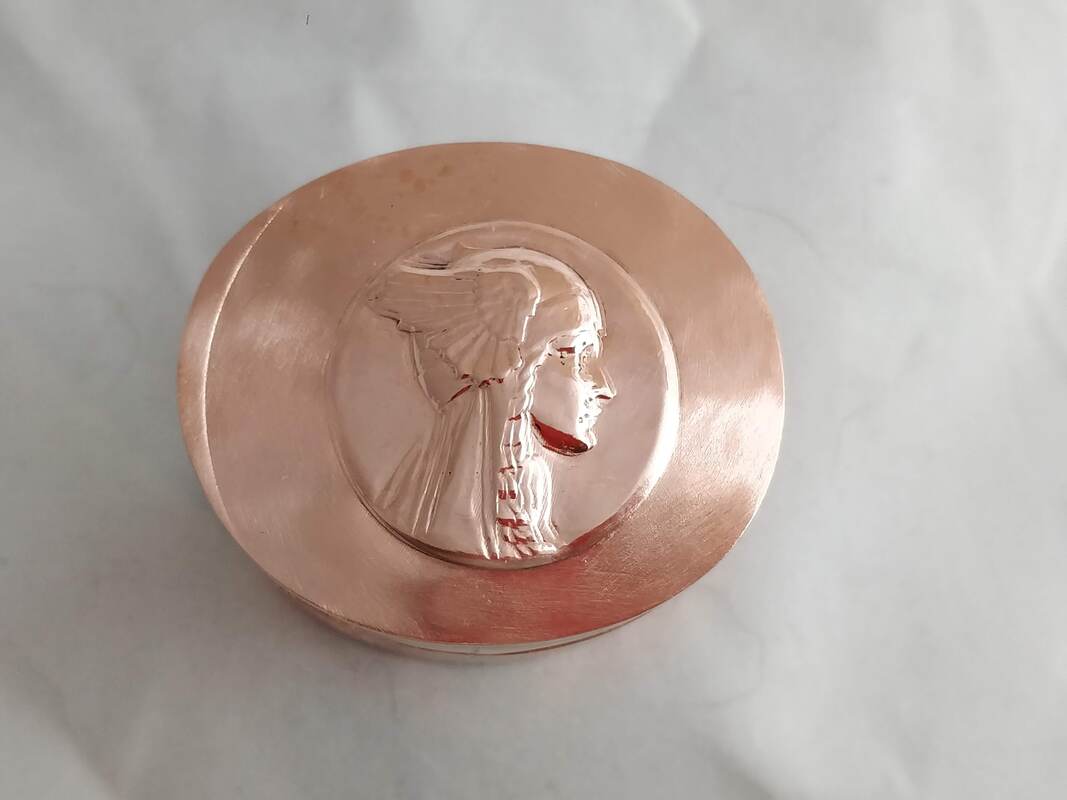
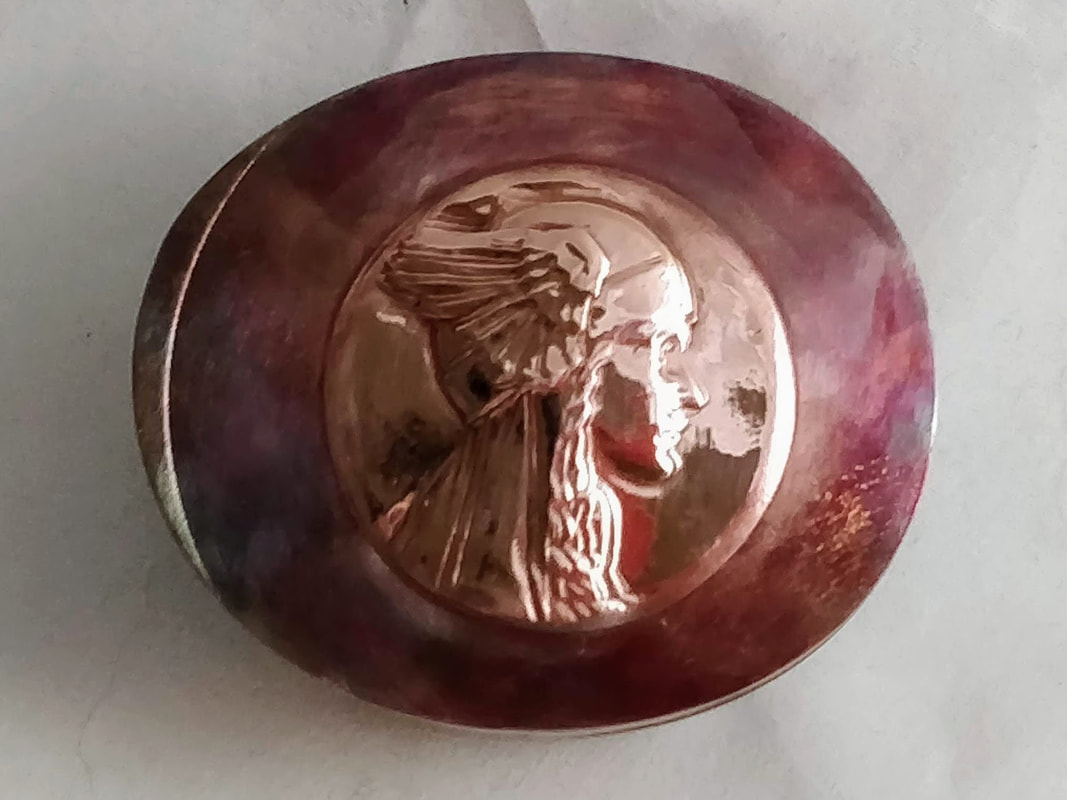
I looked at what 20g copper I had and decided that the box would be about 1" tall and about 2" long on the straight side and the front would be round with a radius of about 1" (if the flat back is 2" wide, that is the diameter).  I went through my rolling mill textures and selected one which I would use for the walls and the lid. 

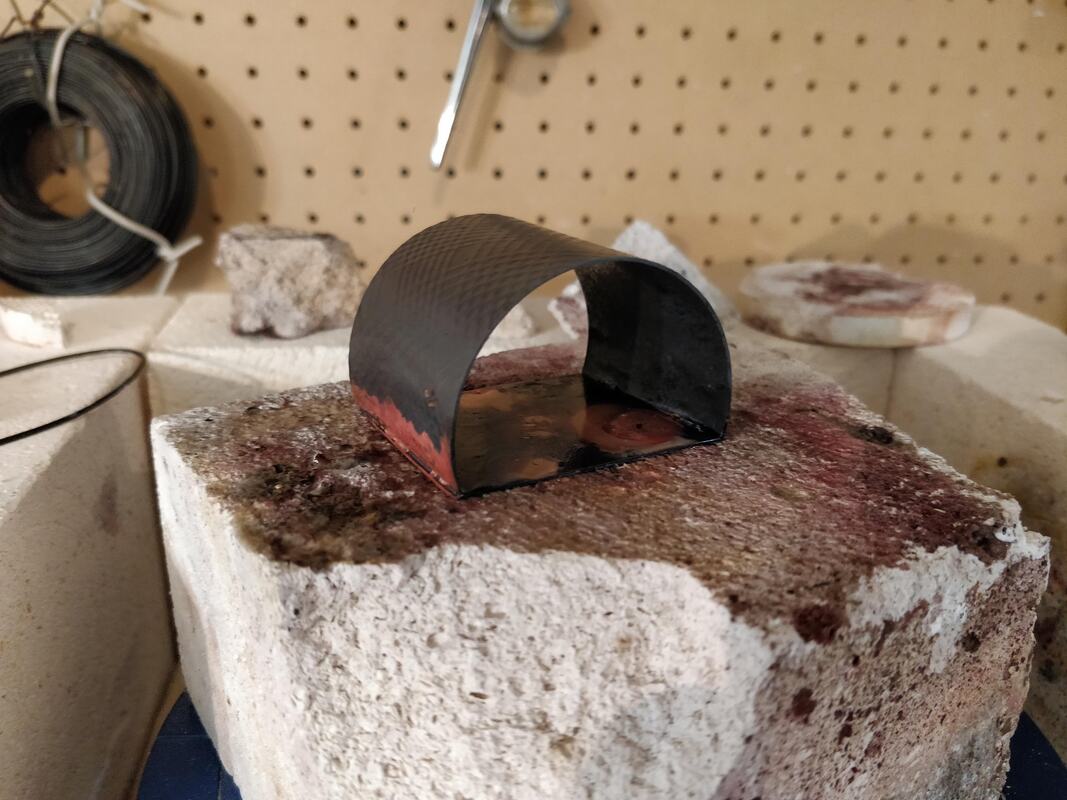
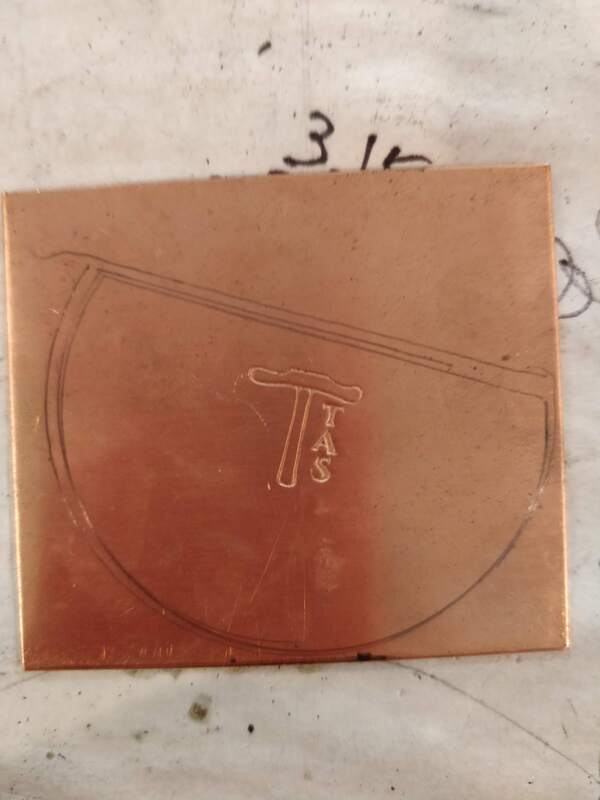
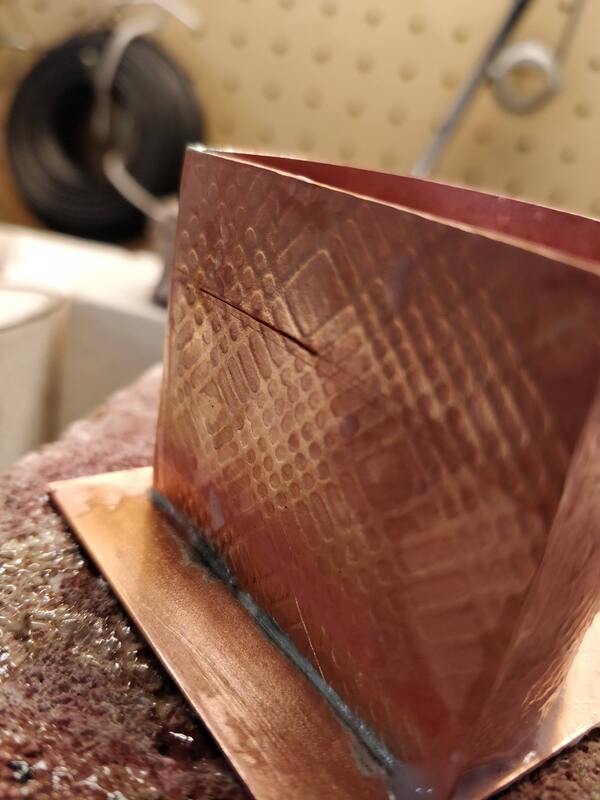
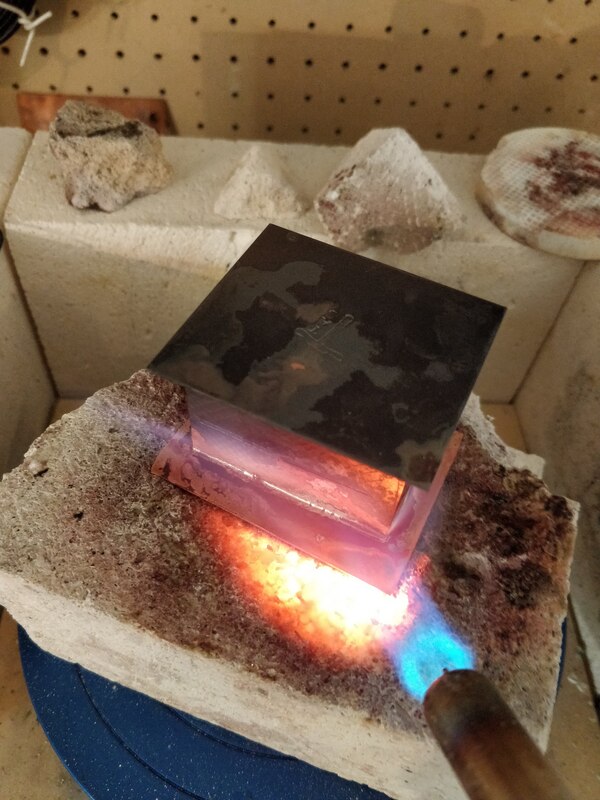
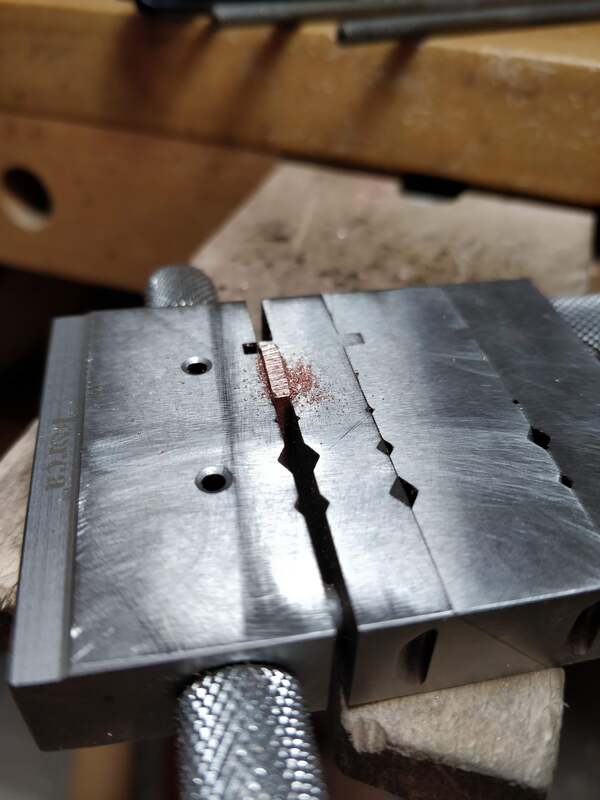
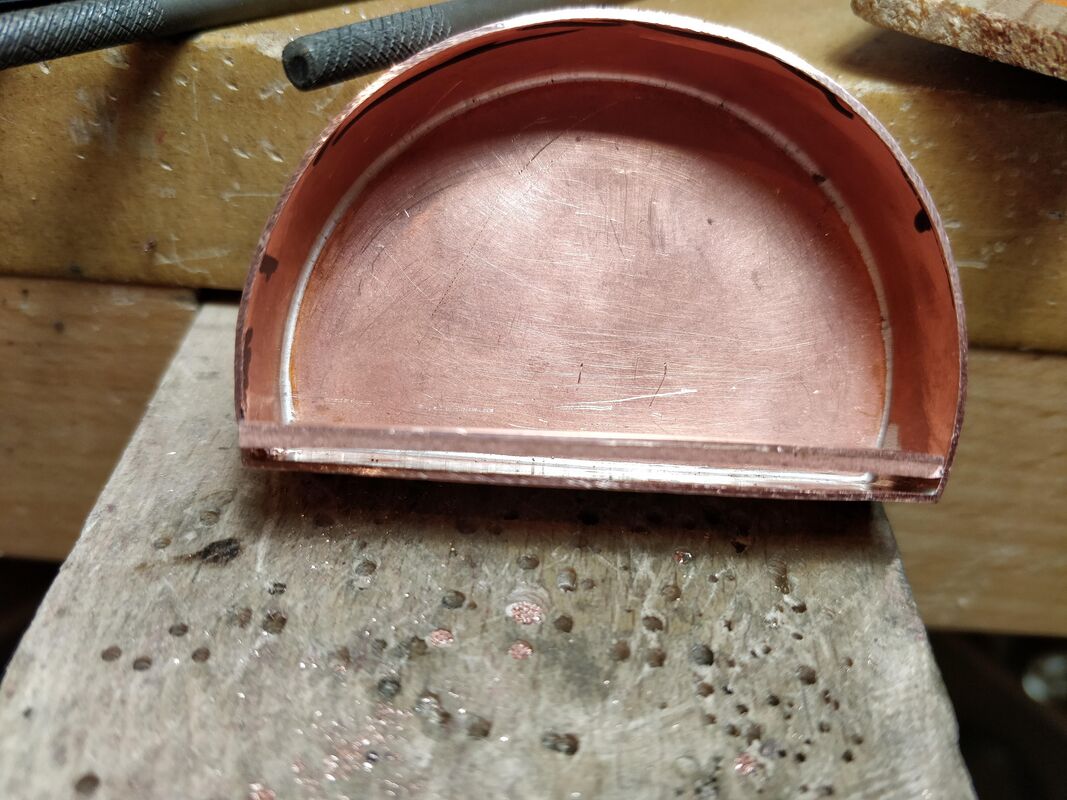
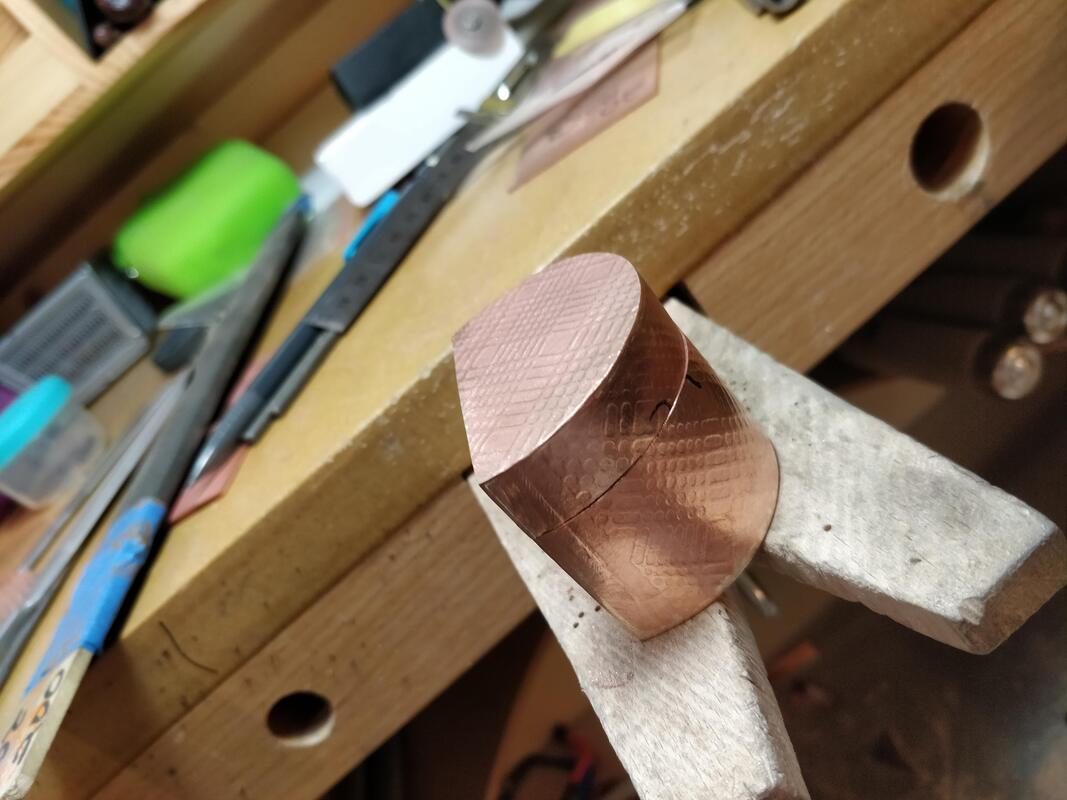
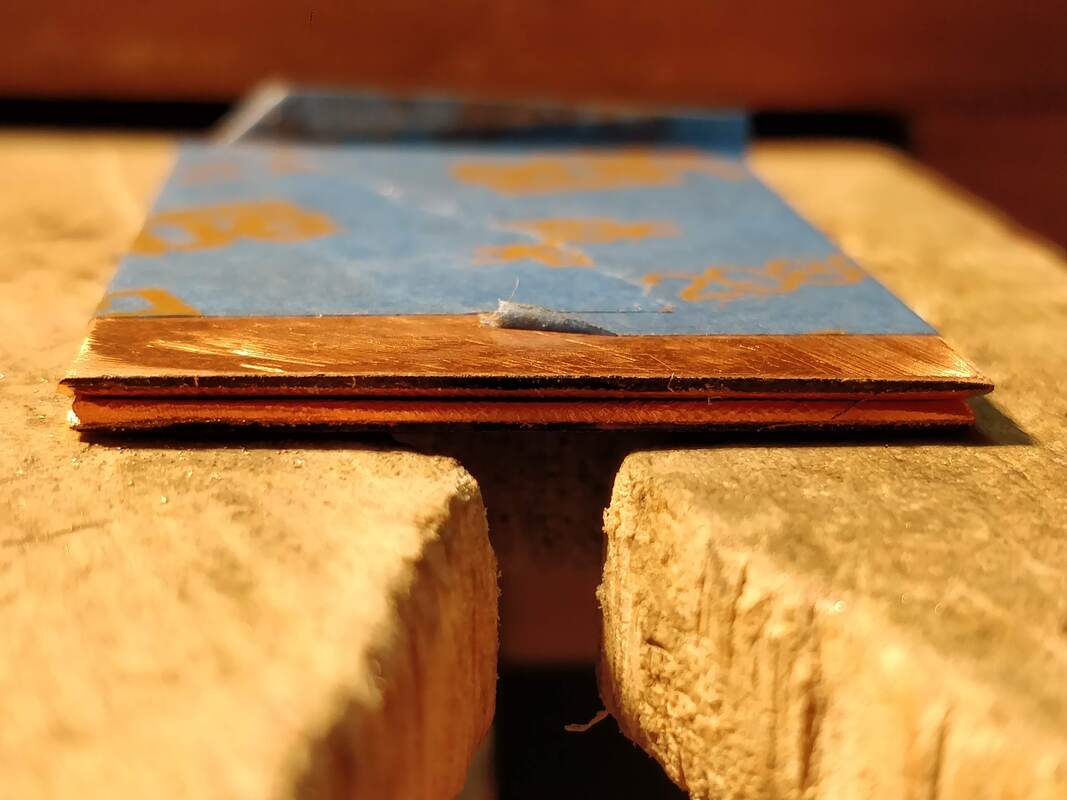
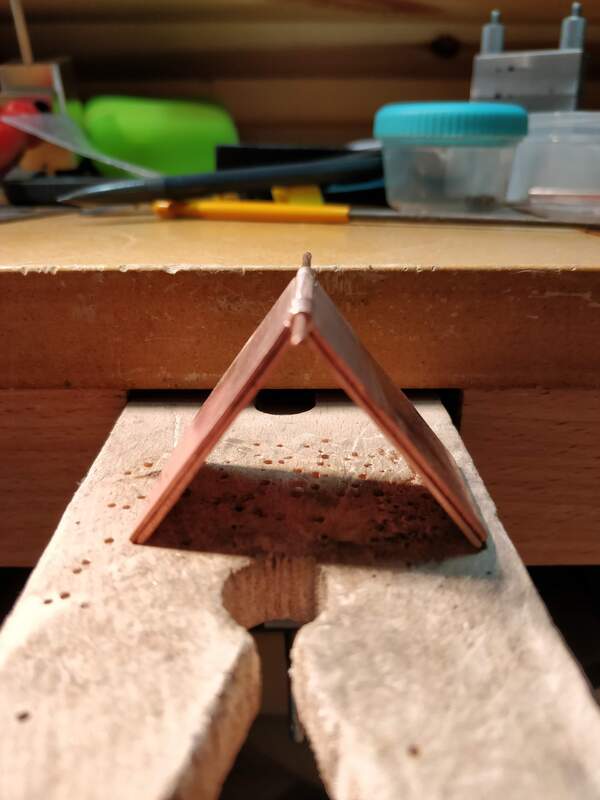
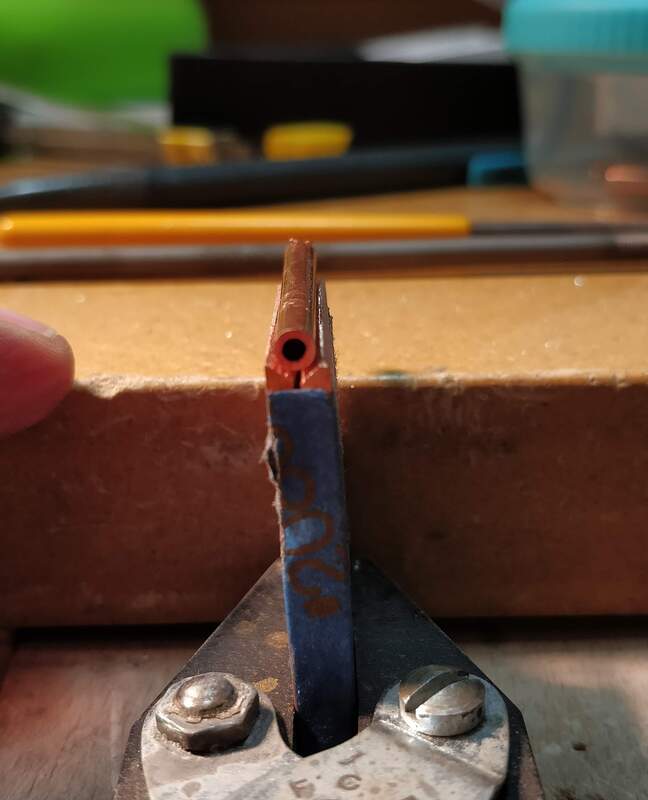
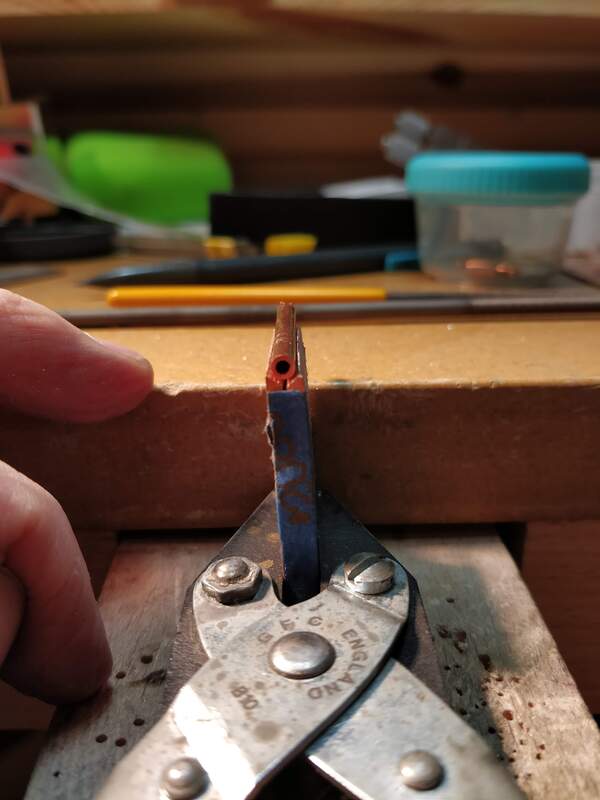
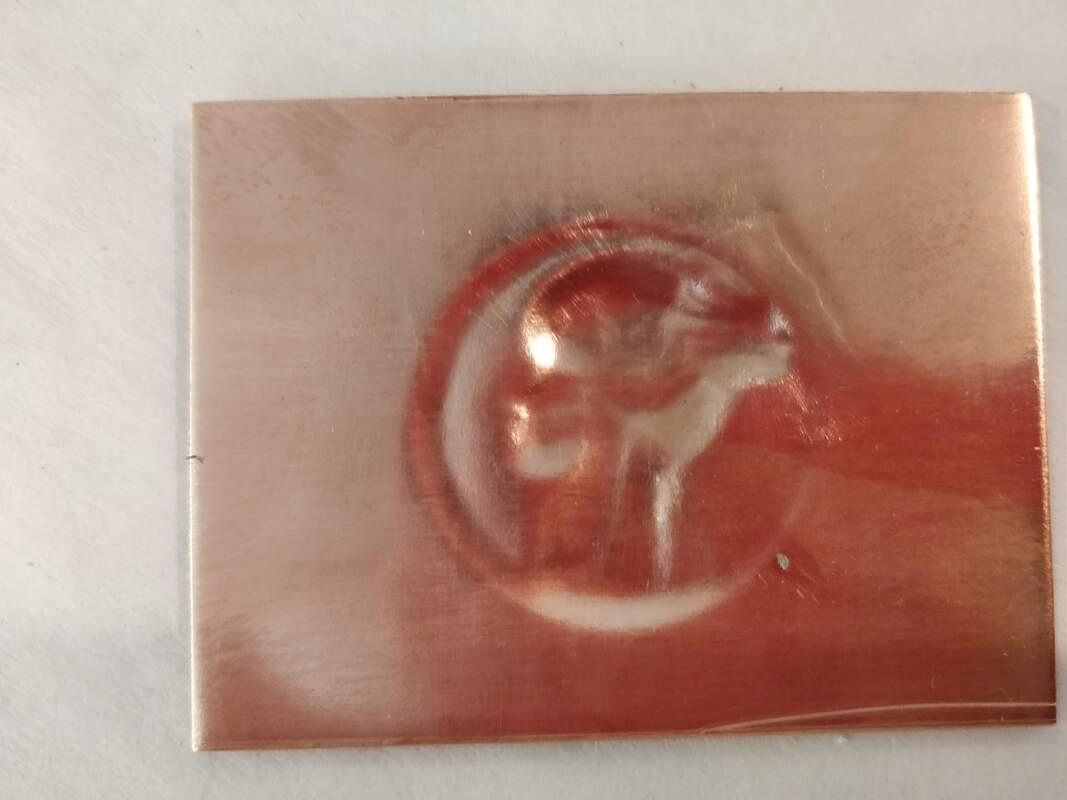
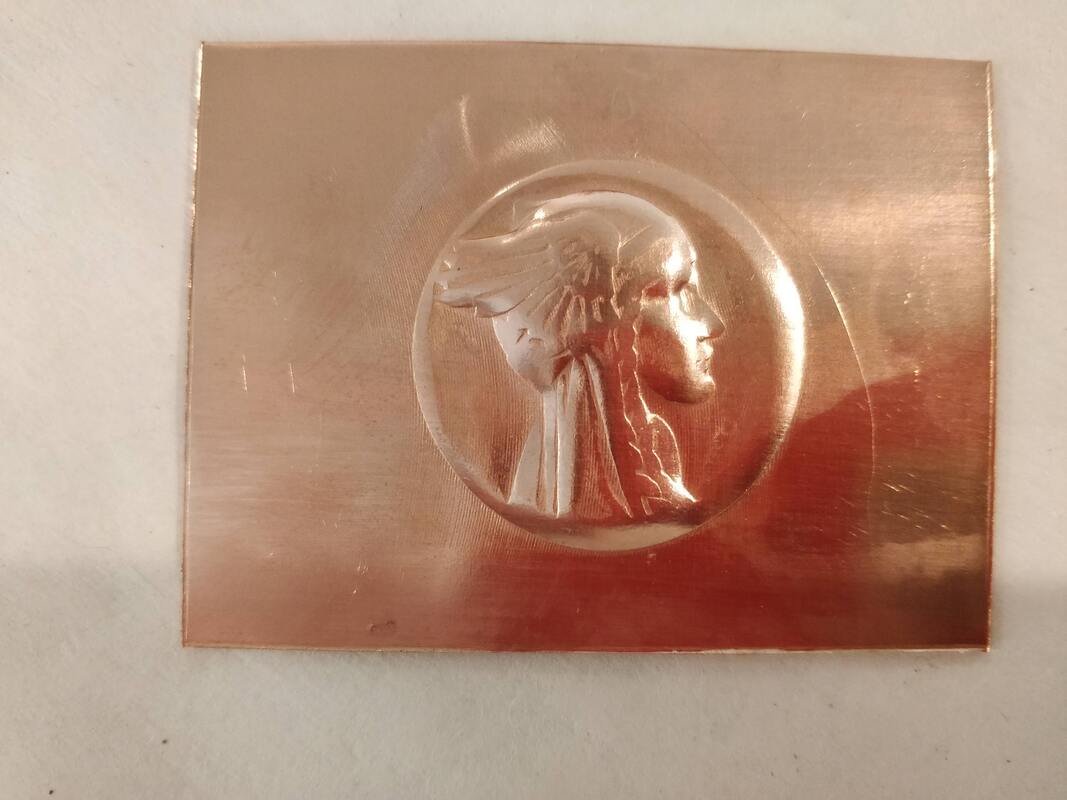
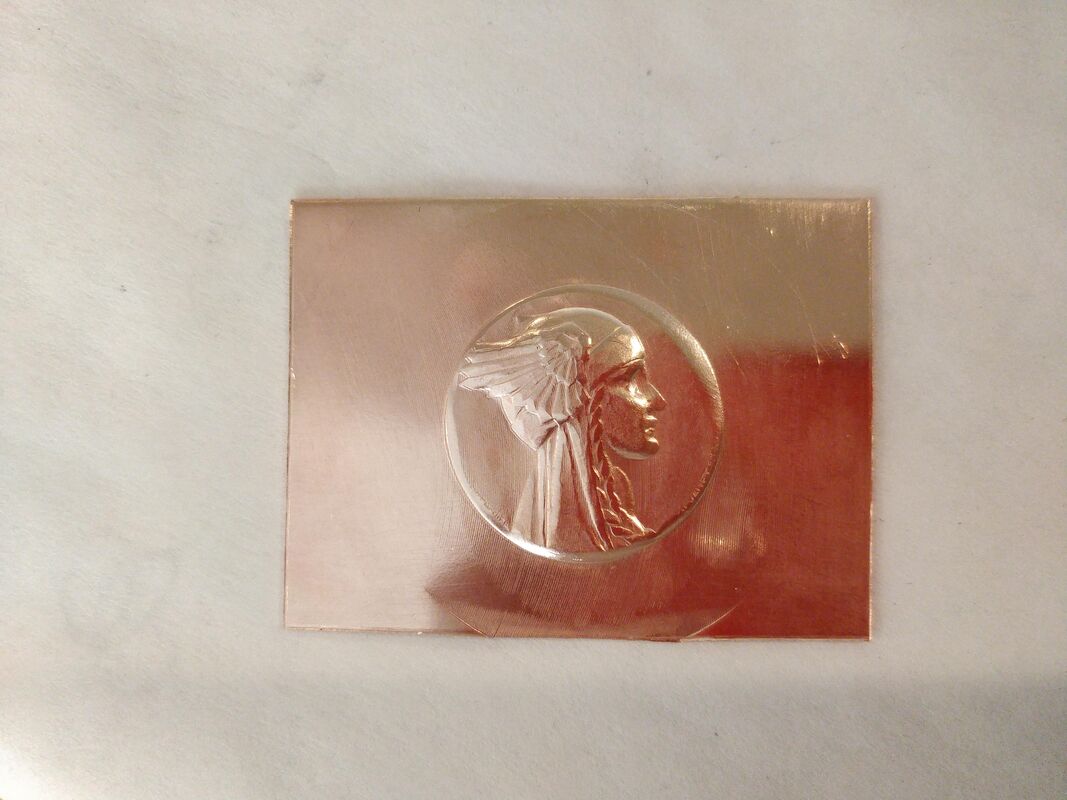
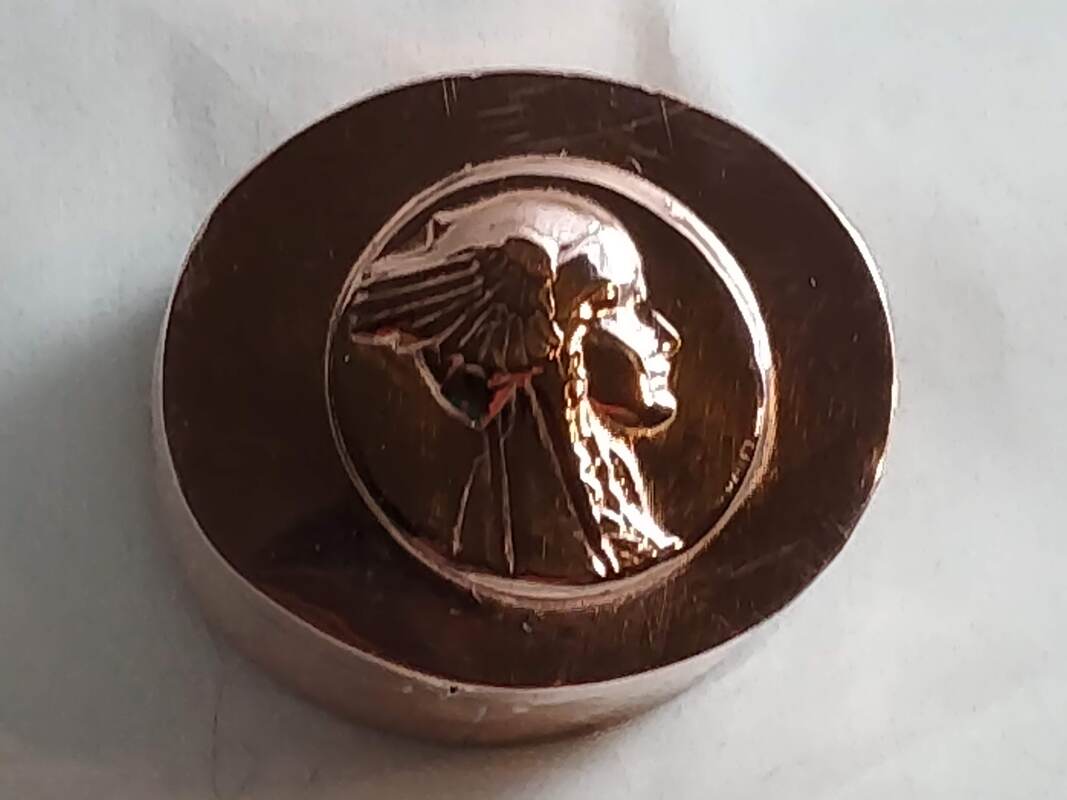
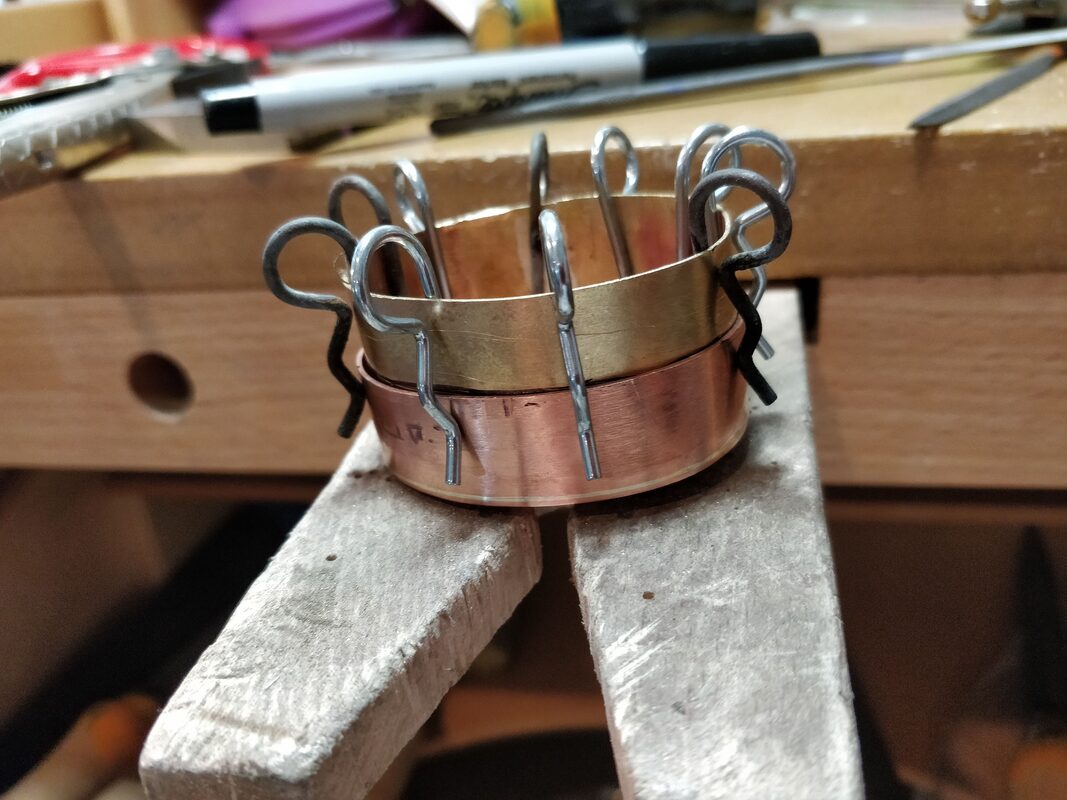
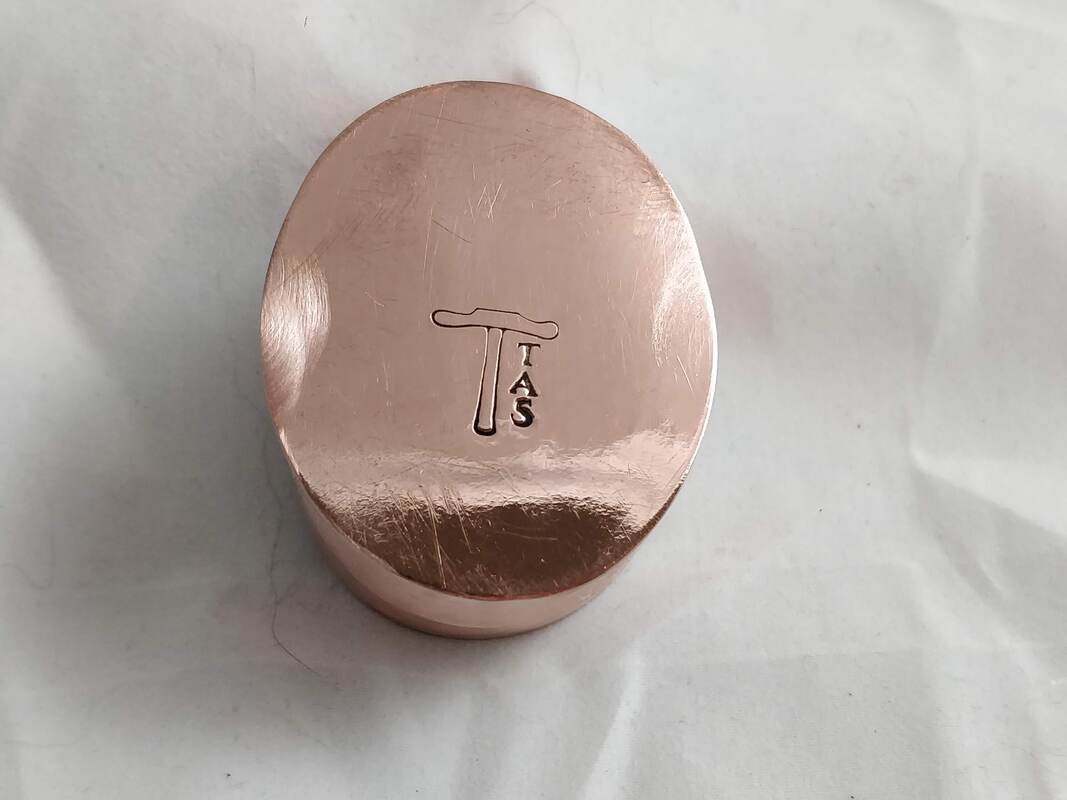
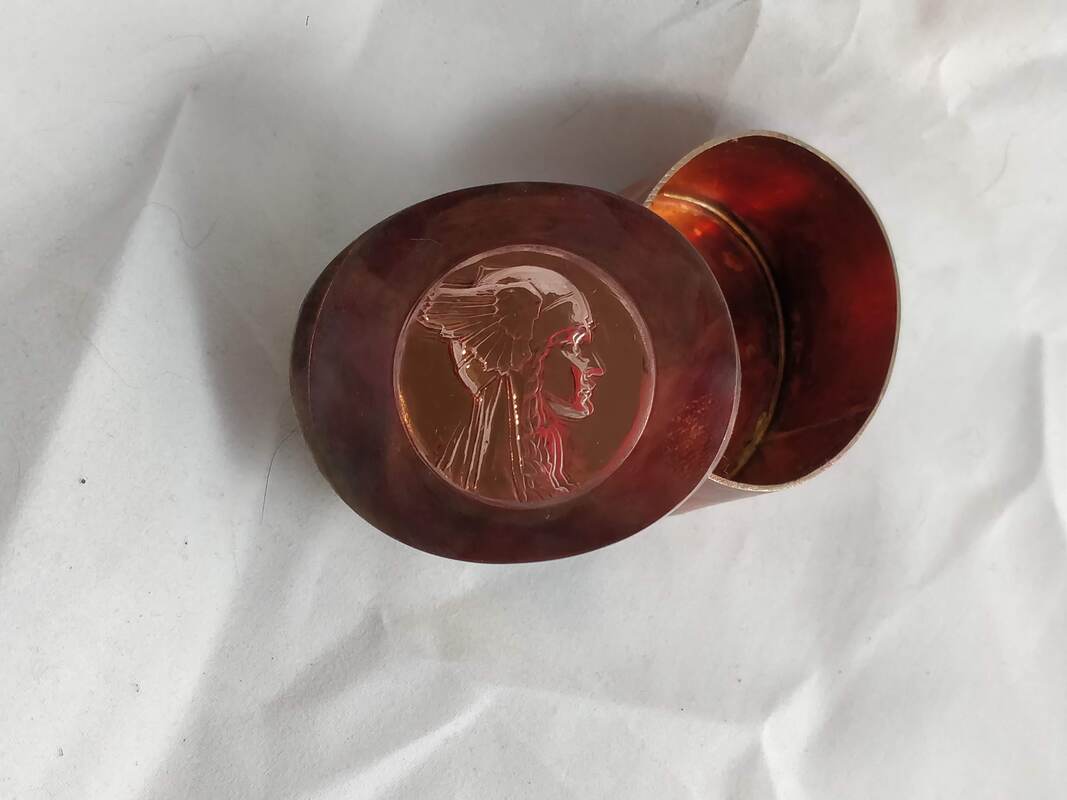
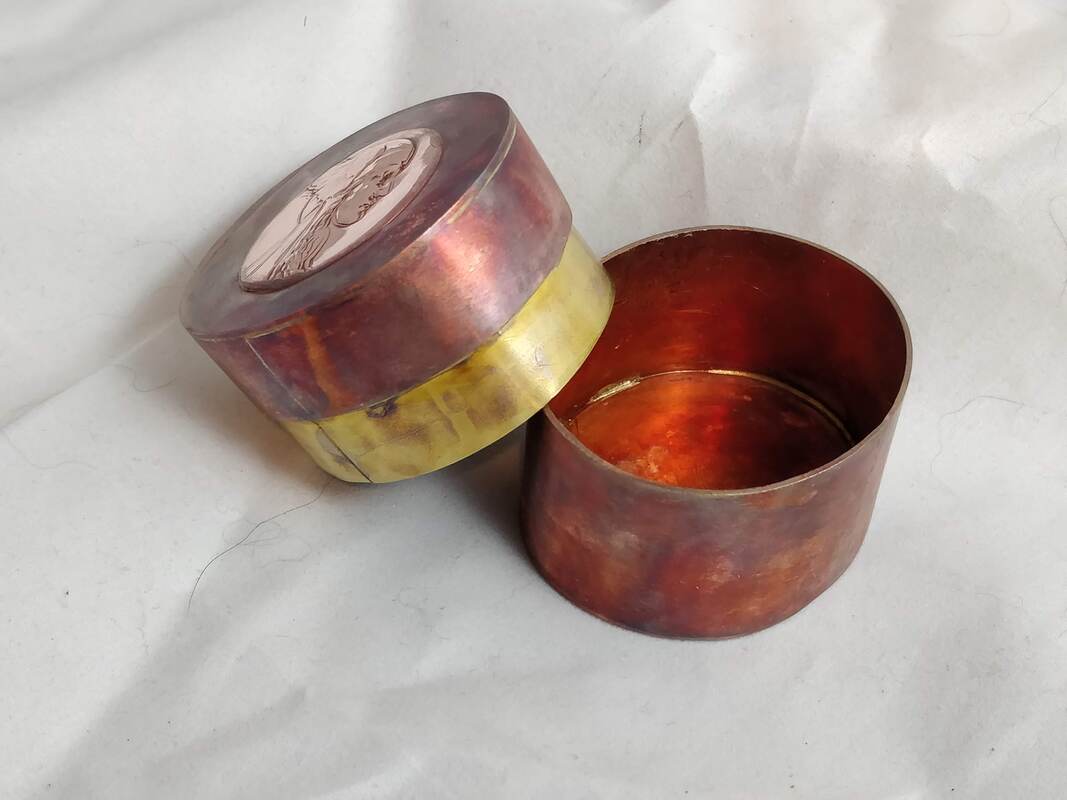
Using my round stepped bracelet mandrel, I formed the half round and then filed the ends flat and using hard solder, attached the front to the back wall. I then stamped my maker's mark on the bottom plate and textured the top plate. I then scribed where I would cut the lid from the bottom and using a separating disk, cut an air slot for when I solder the top and the bottom on. I write inside bottom and inside top on each piece so I don't put them on the wrong end or on "inside out".  Everything was fluxed and using medium solder, I attached the top and the bottom.

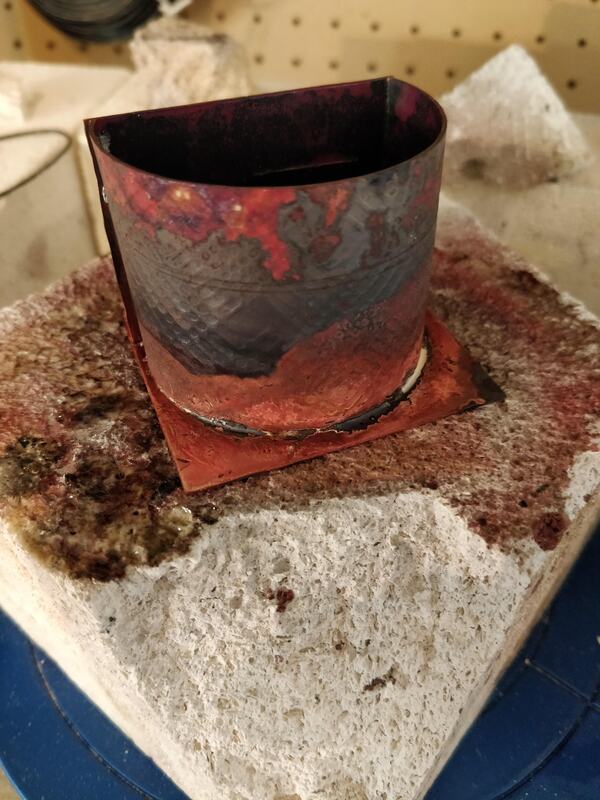
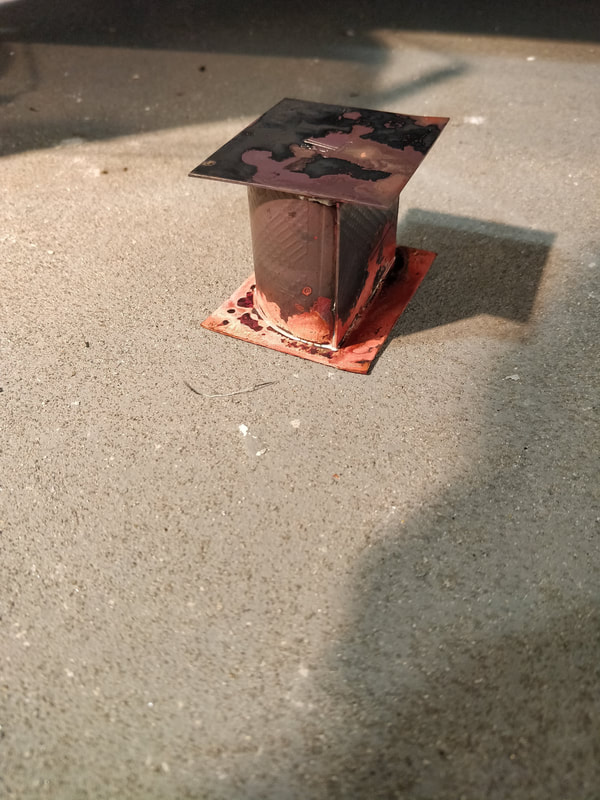
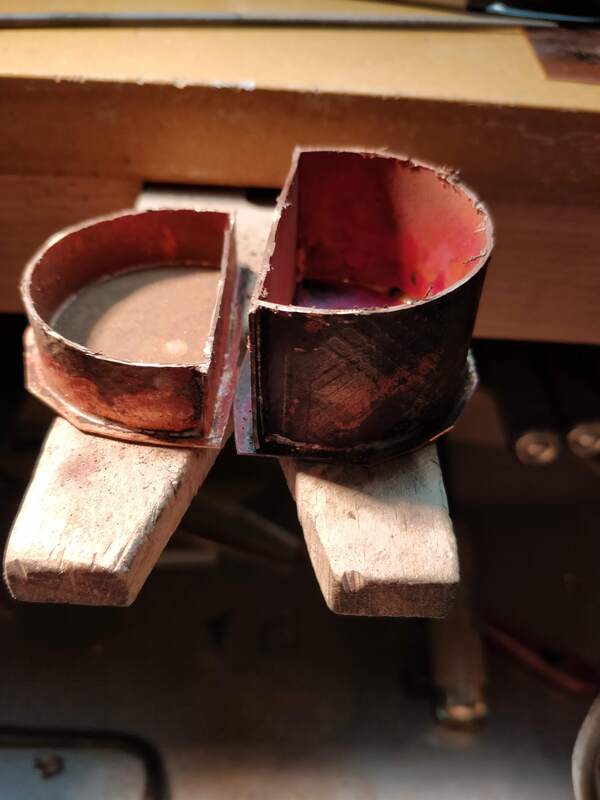
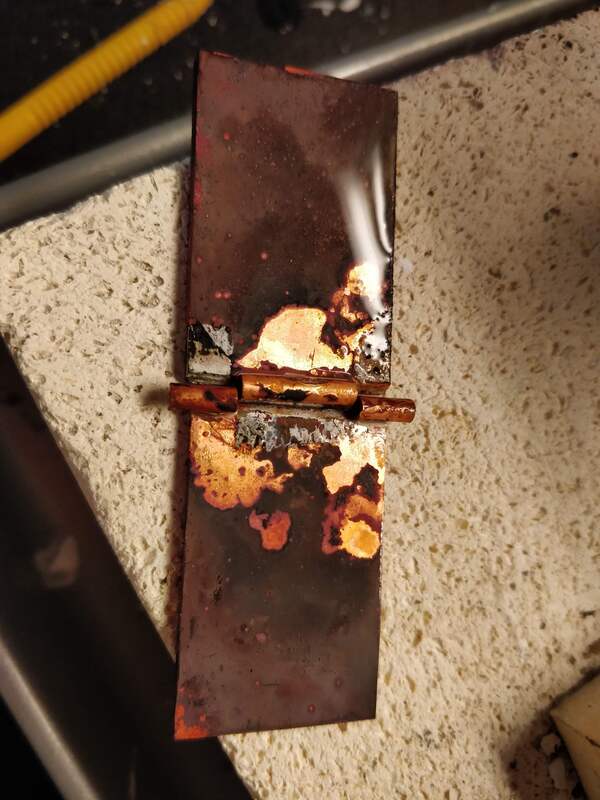
I put the whole assembly on the concrete floor to cool as quenching it can cause it to warp. I also don't put it in the pickle at this point as the that air hole is too small for pickle to get in or out of easily so now is when I cut the box apart and then pickle it. 

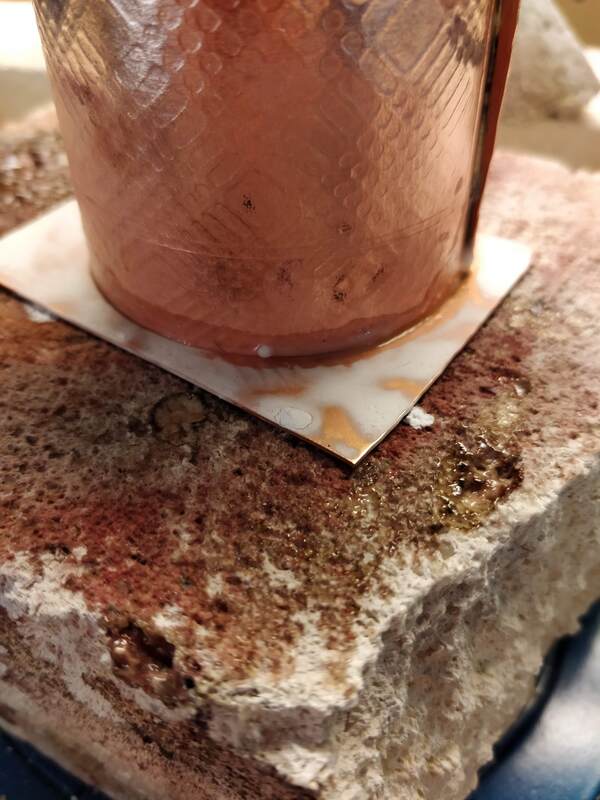
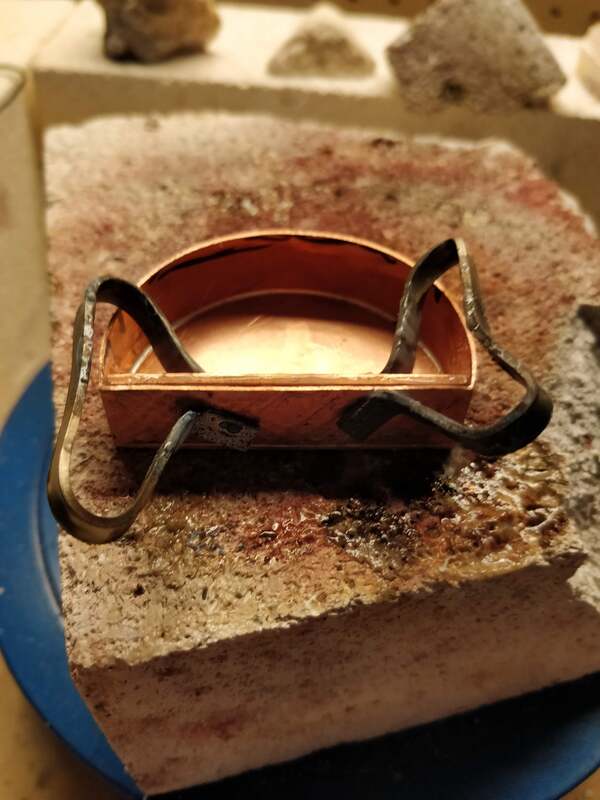
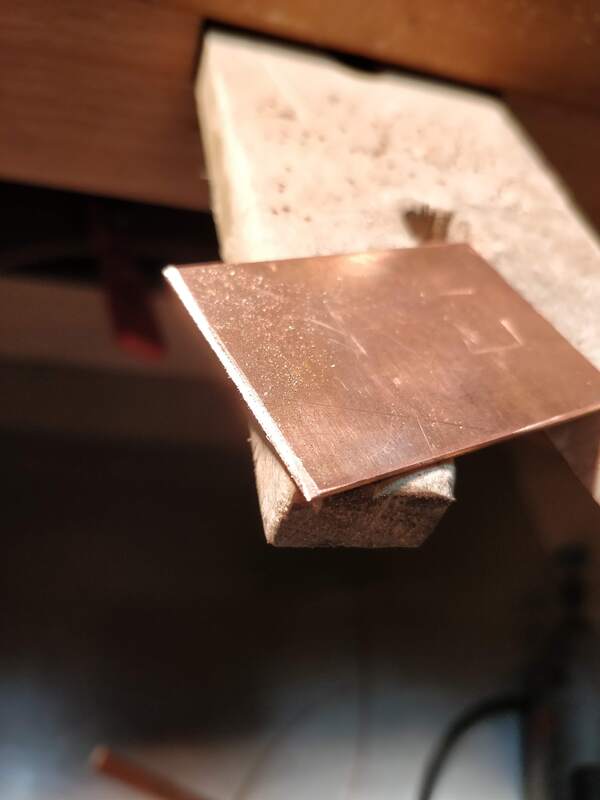
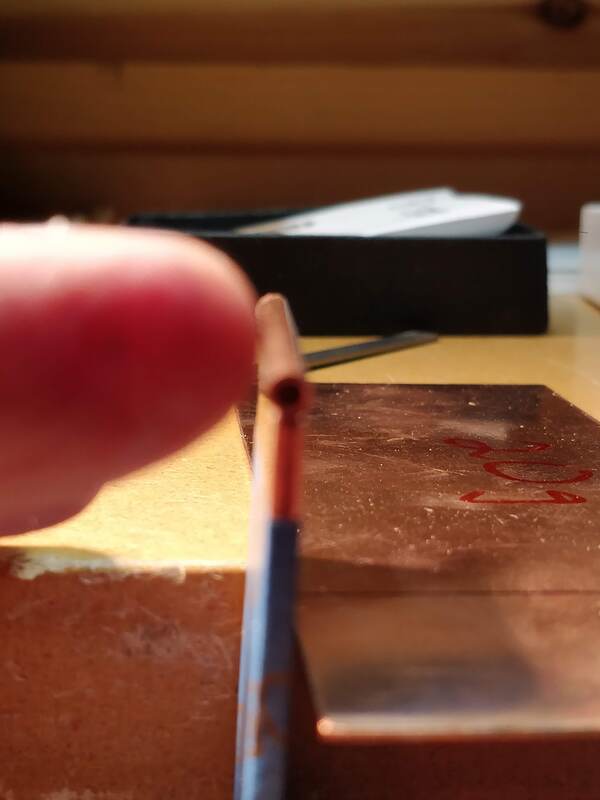
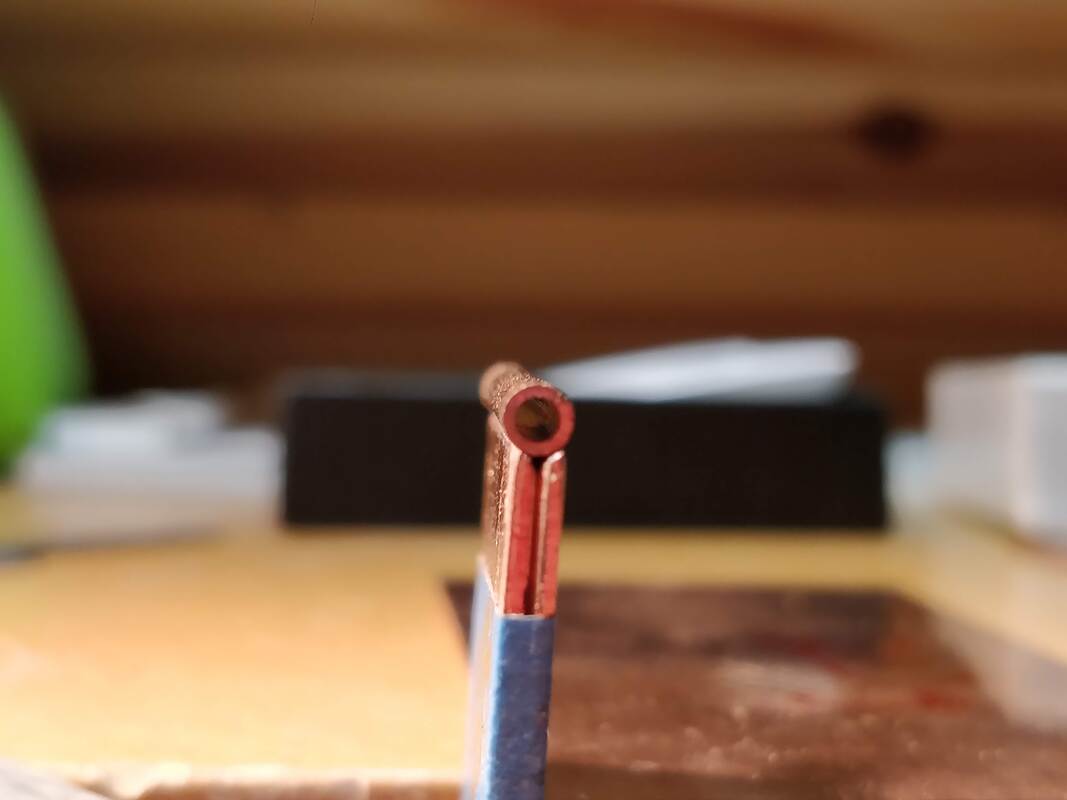
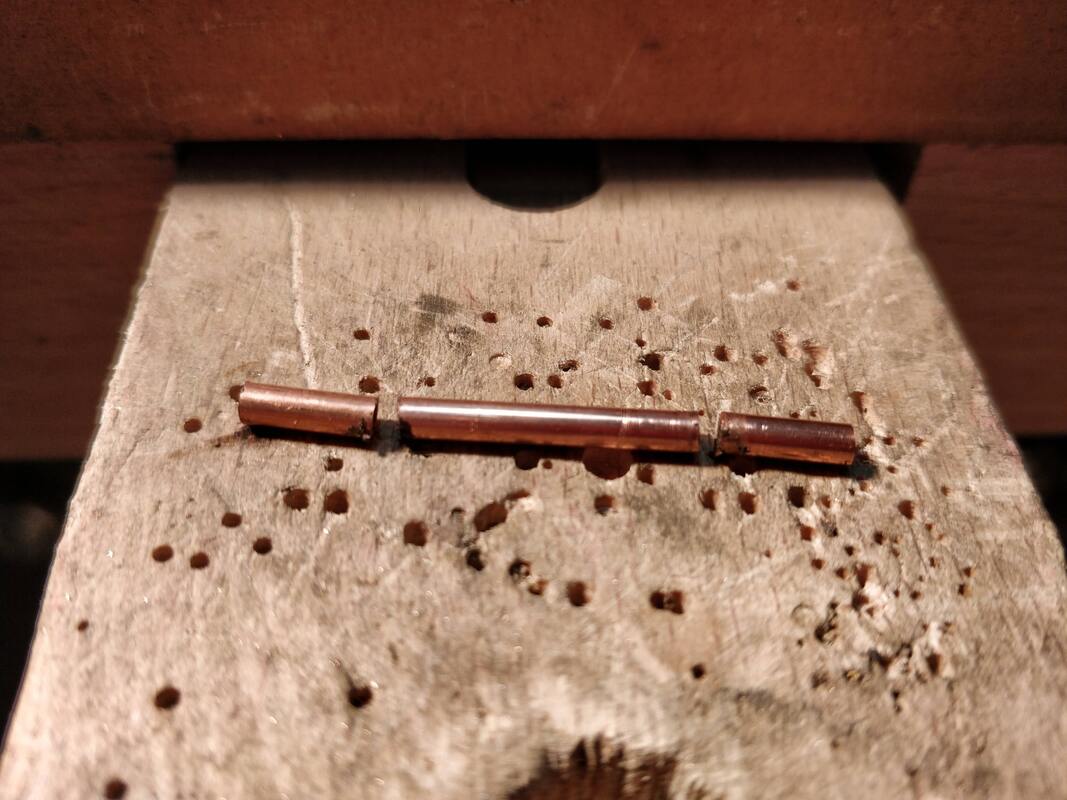
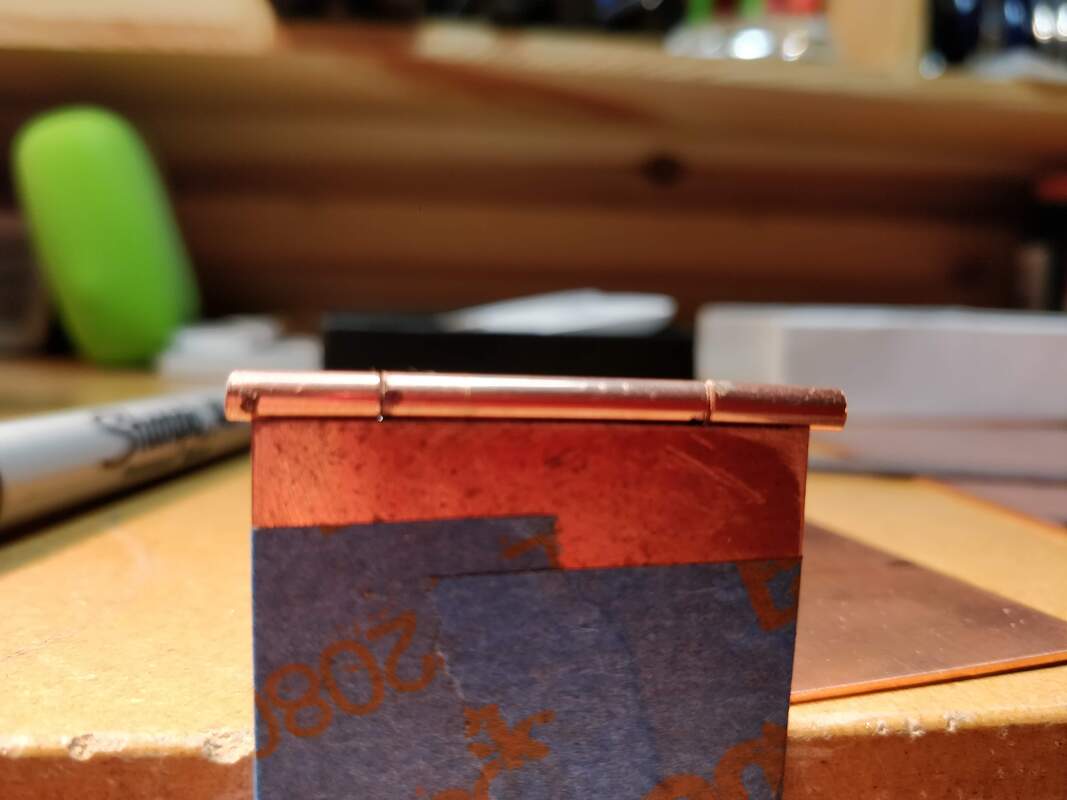
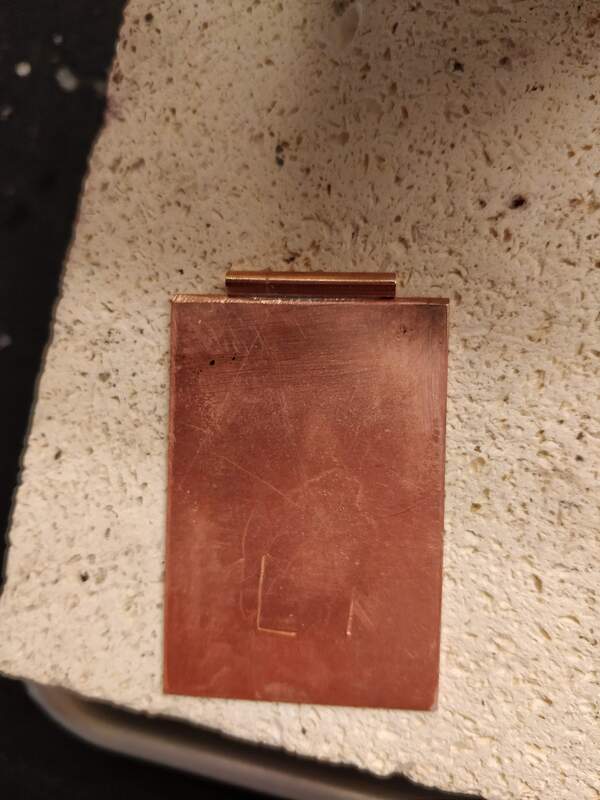
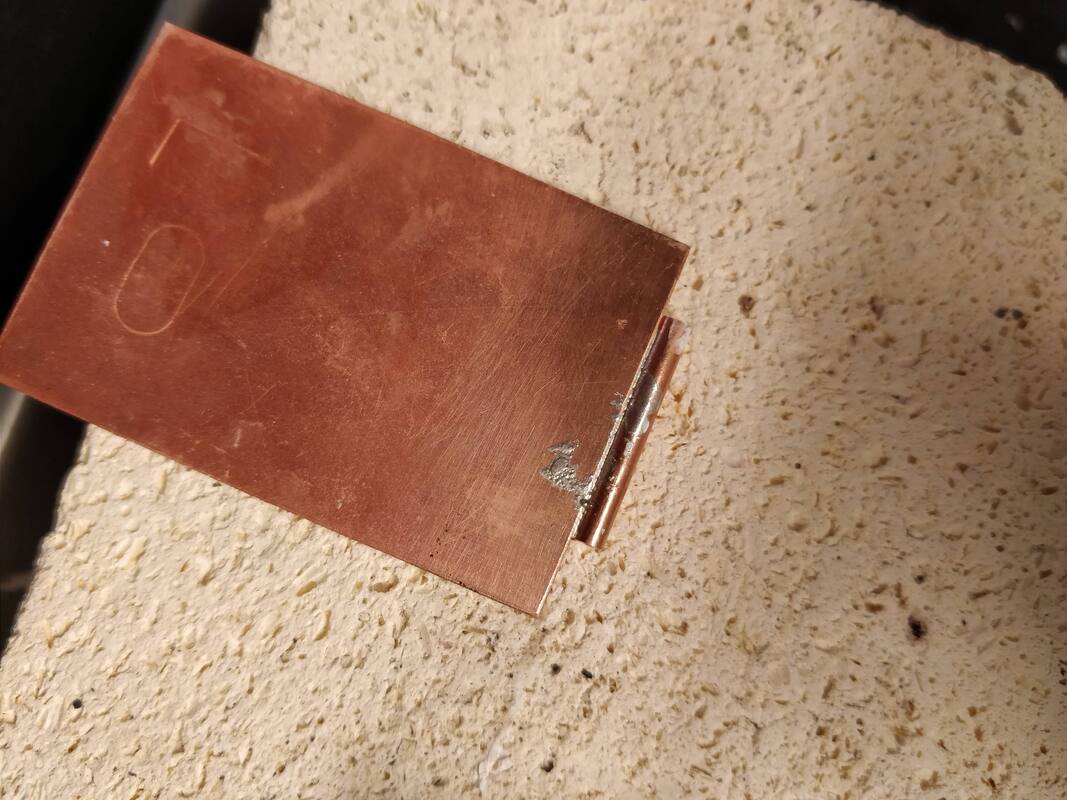
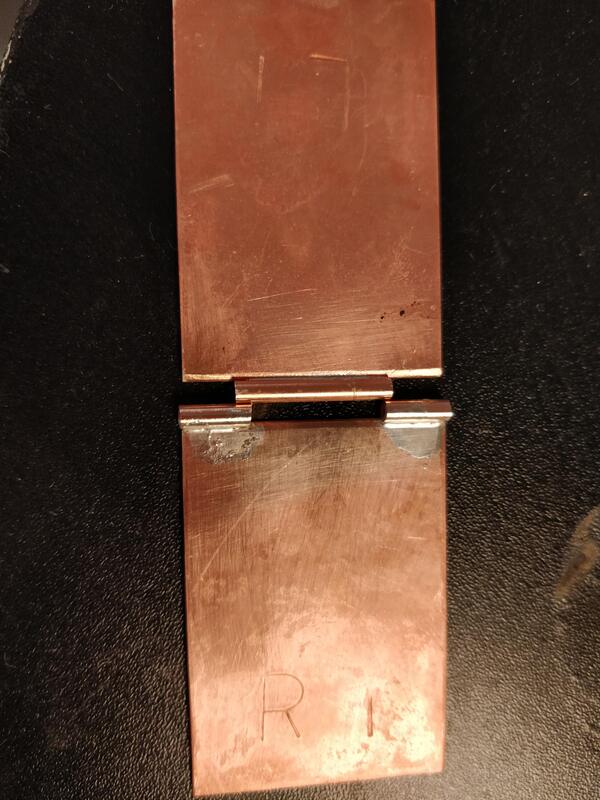
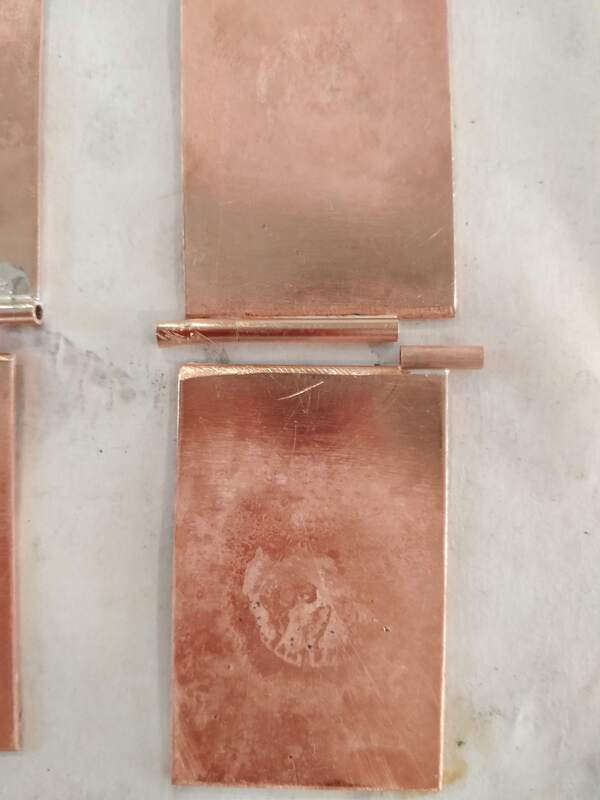
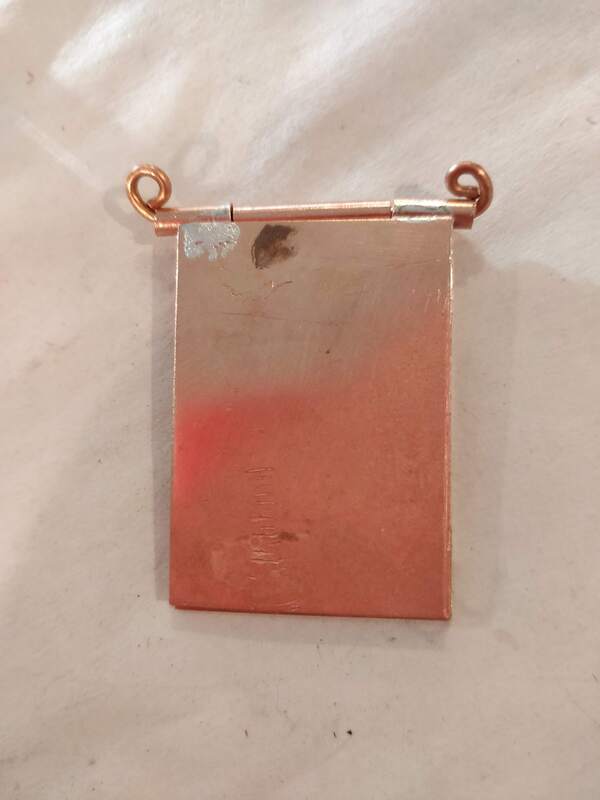
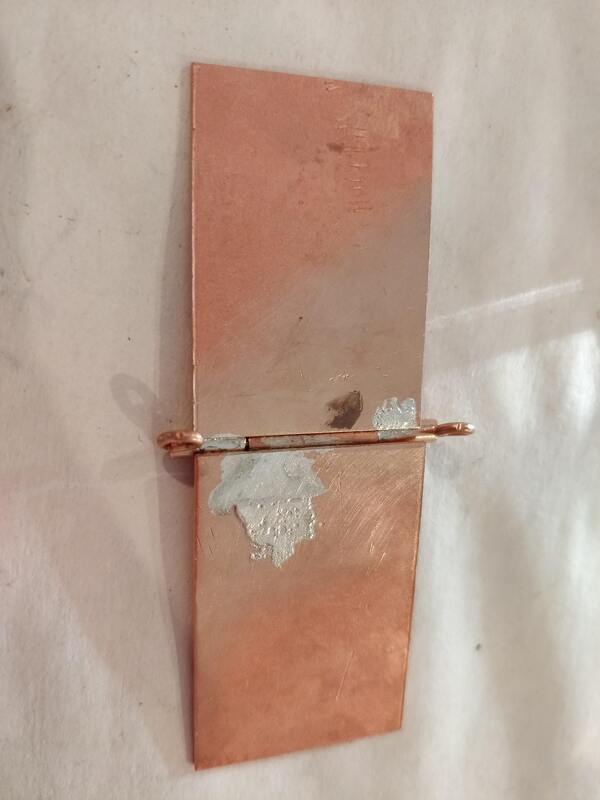
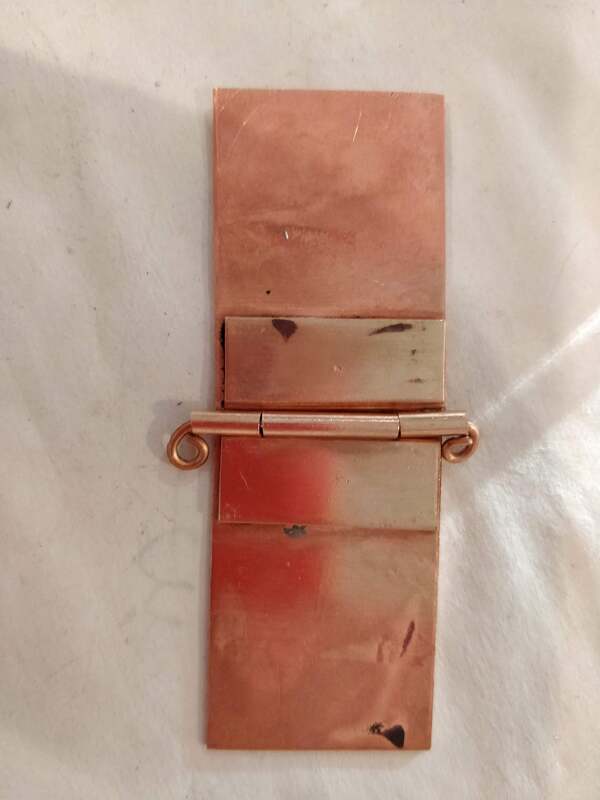
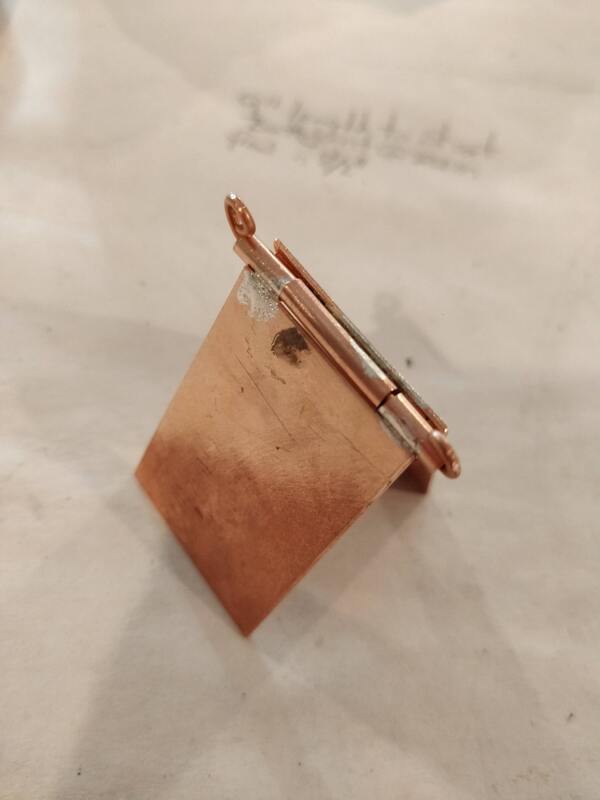
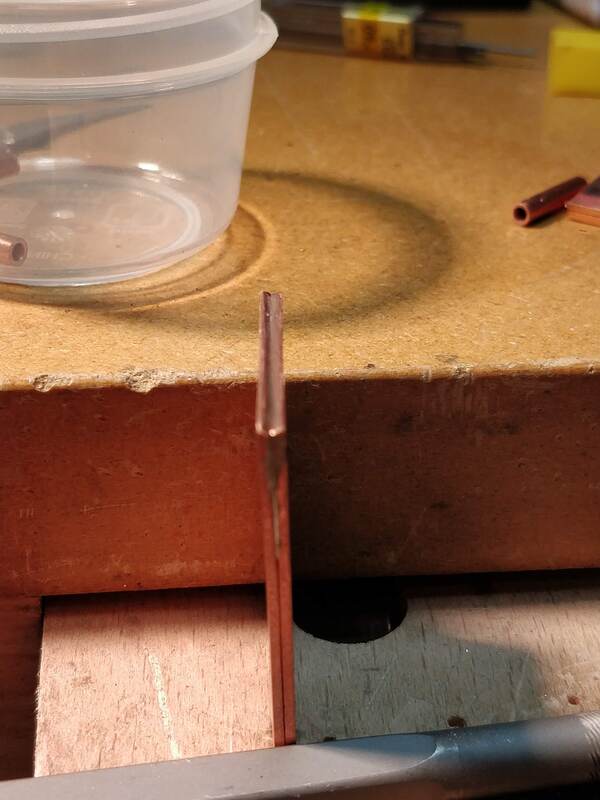
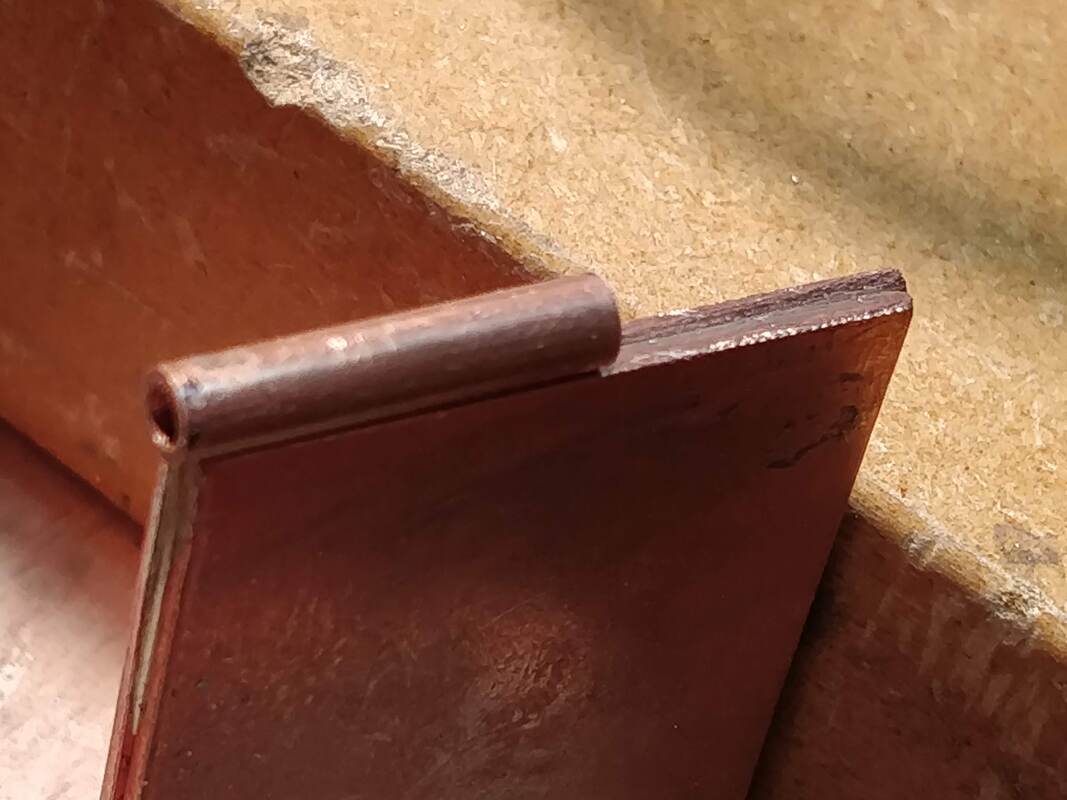
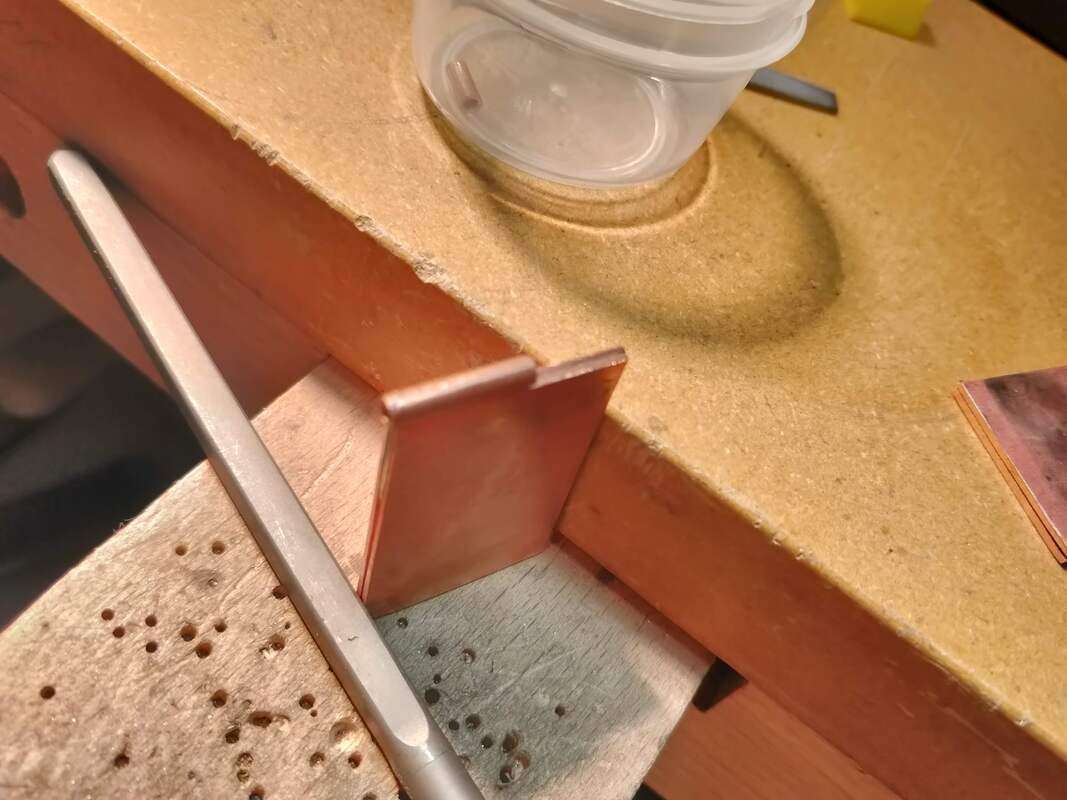
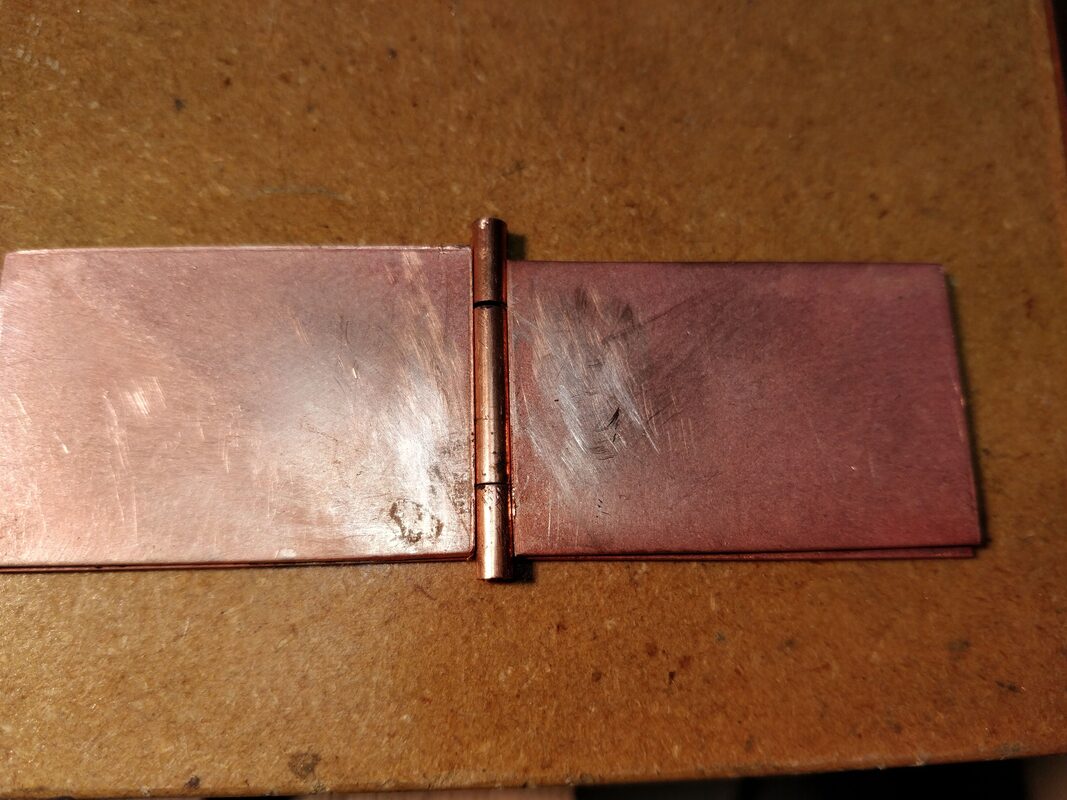
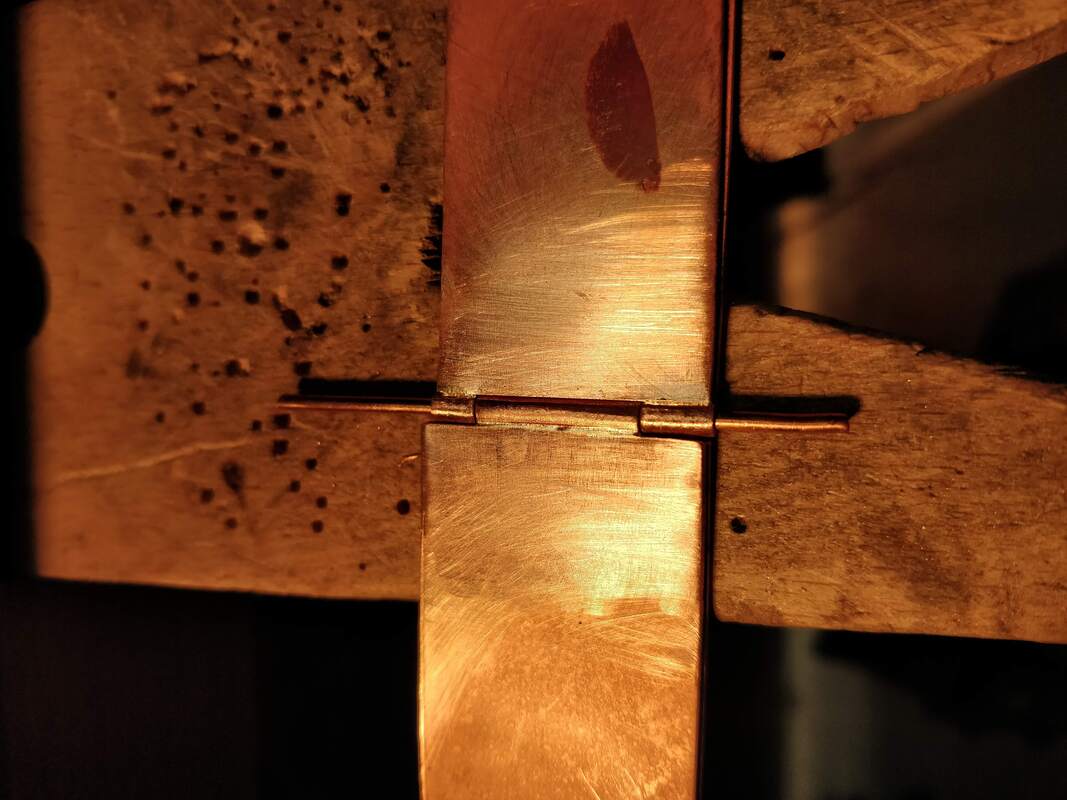
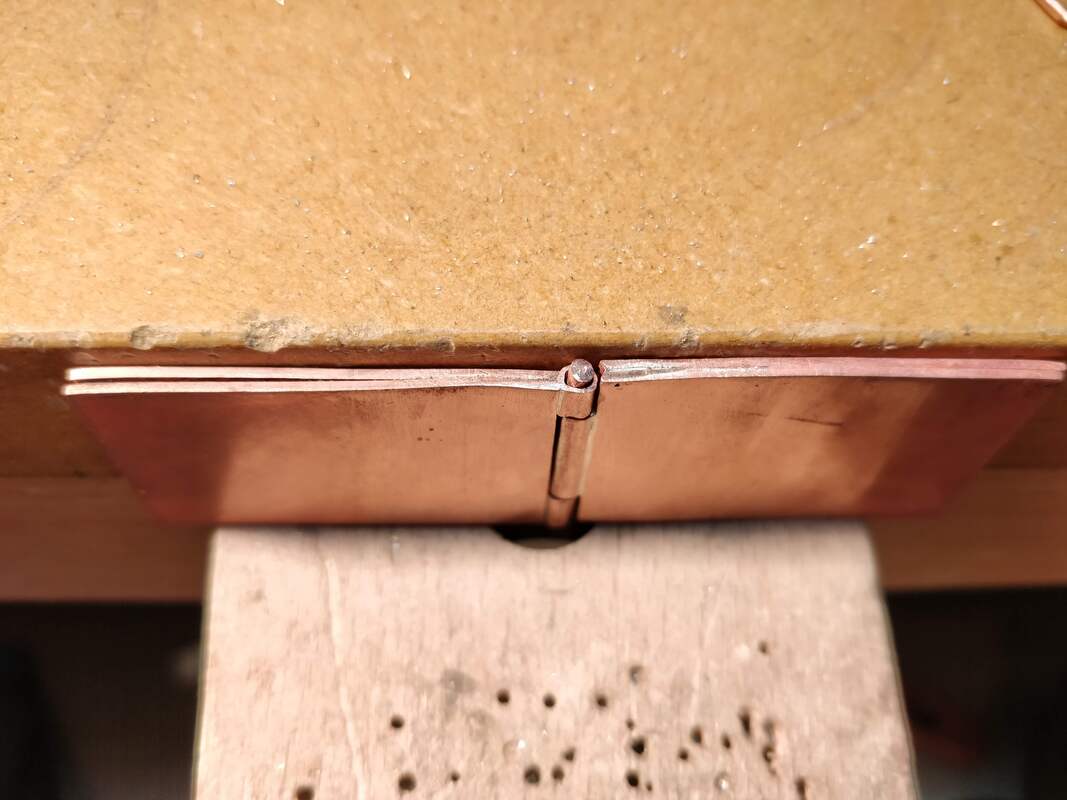
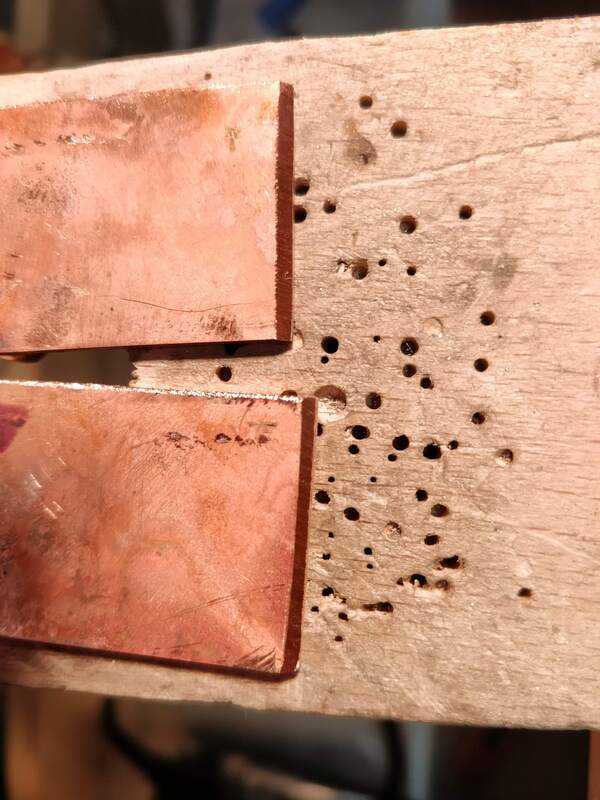
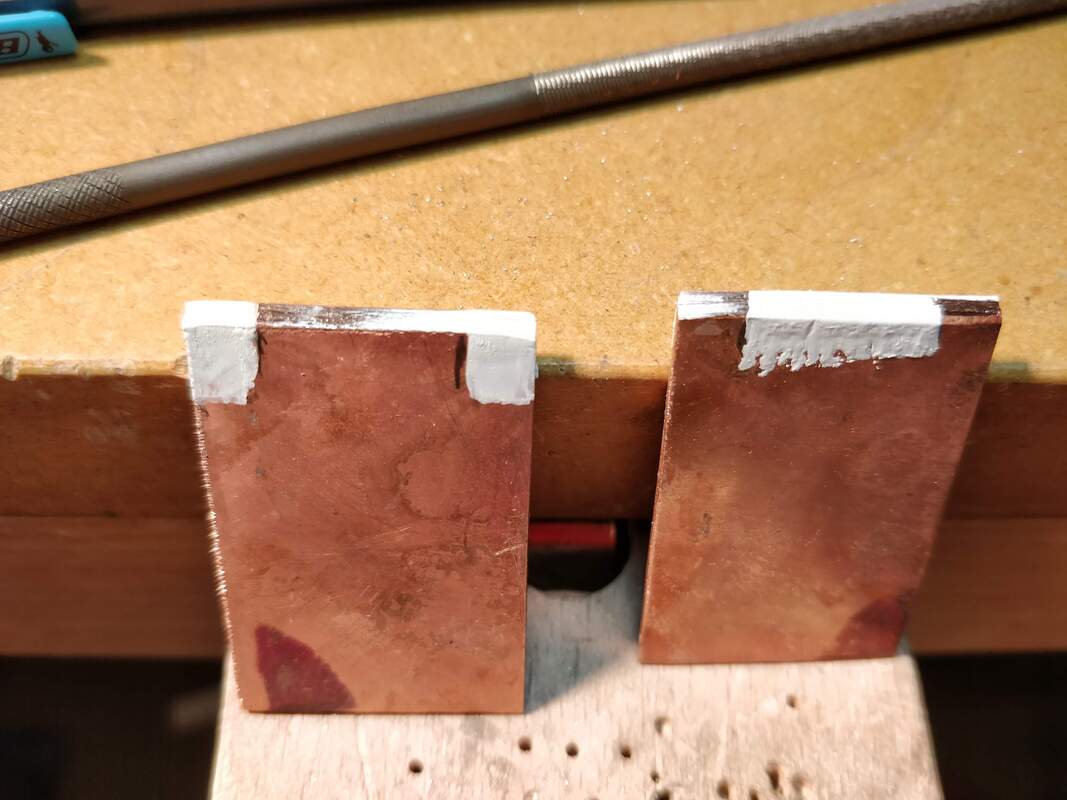
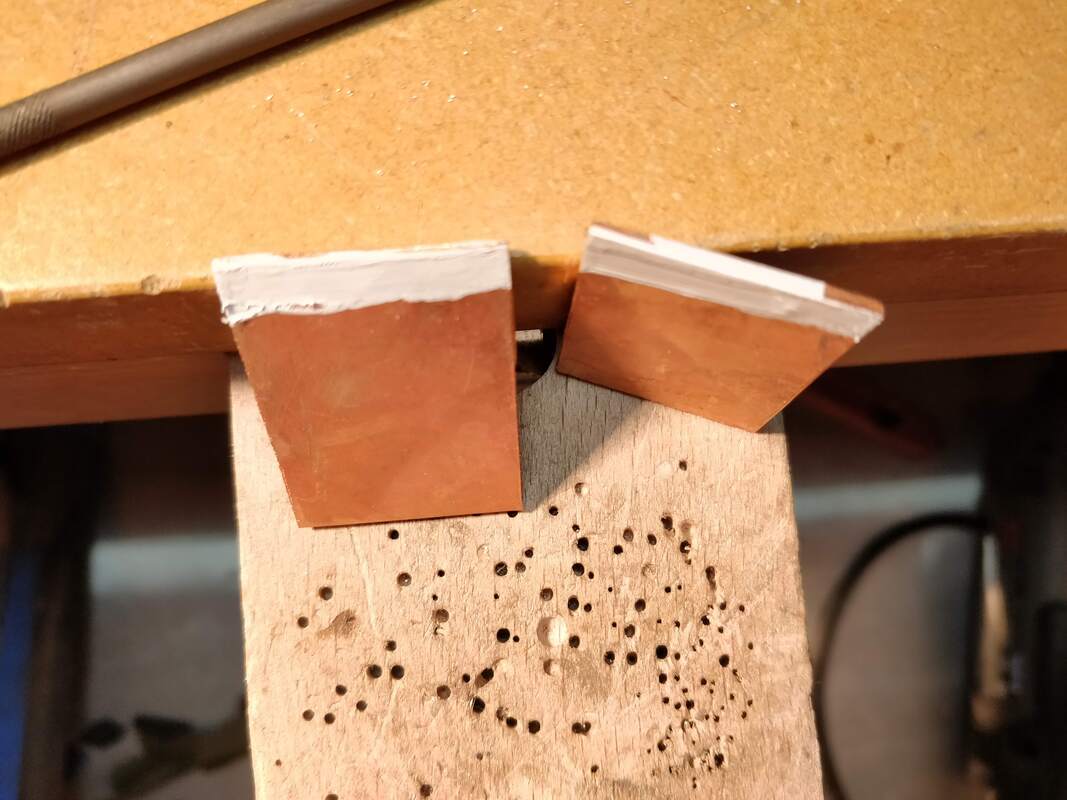
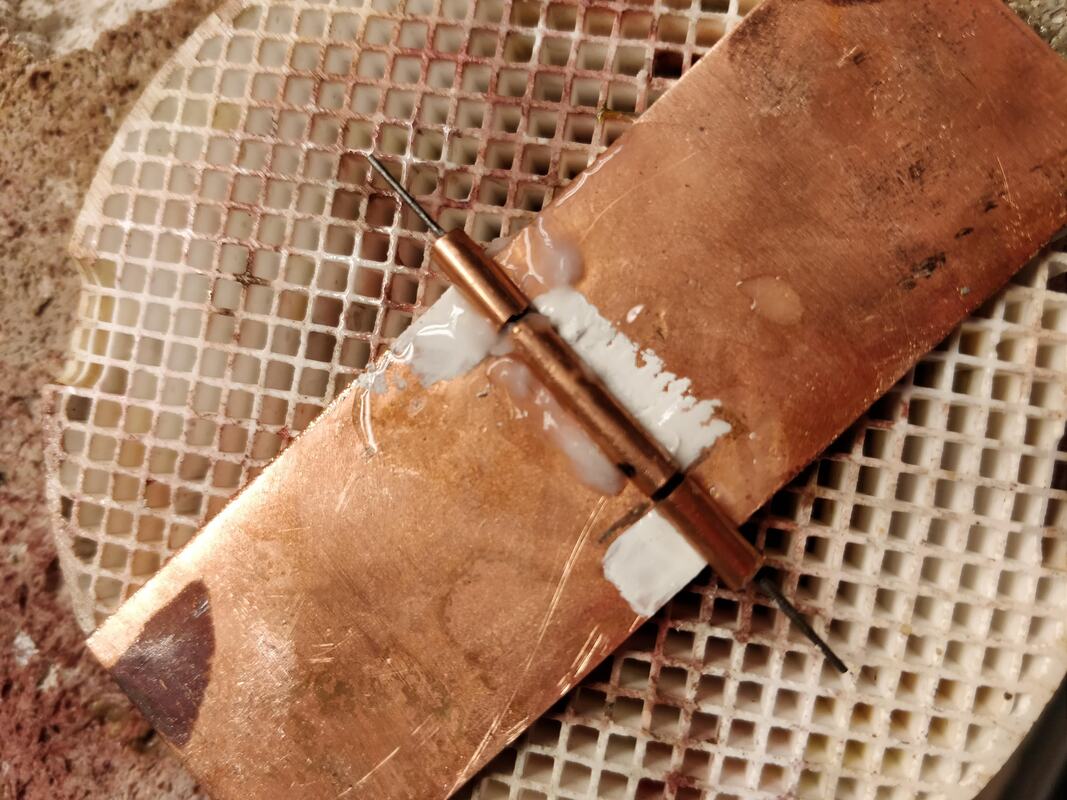
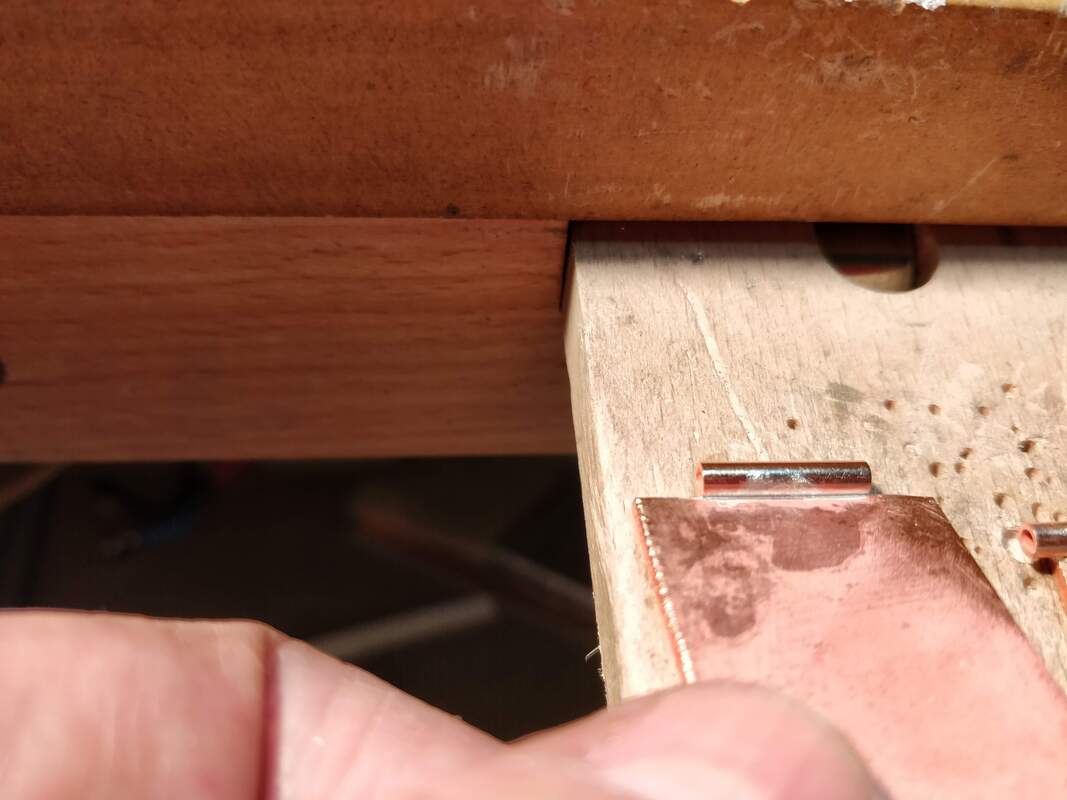
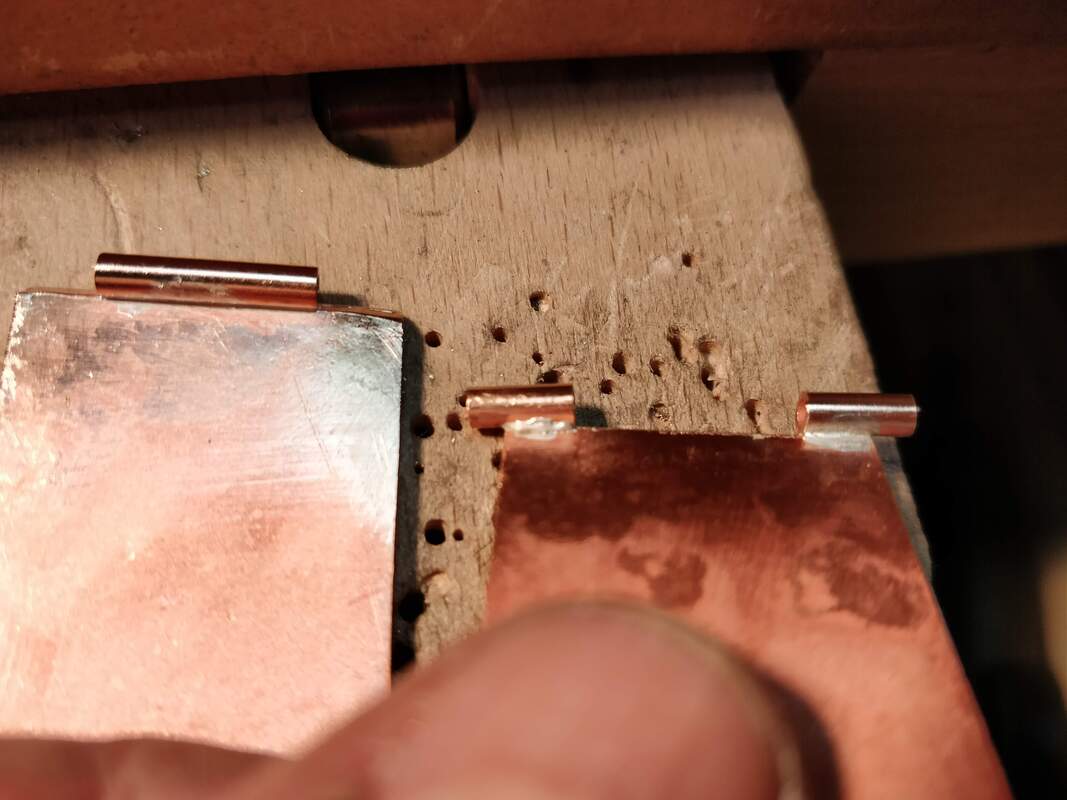
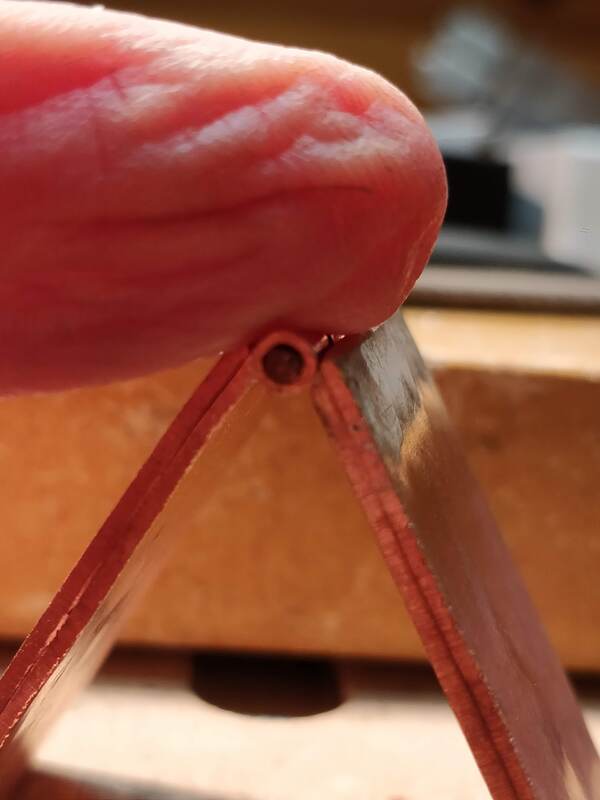
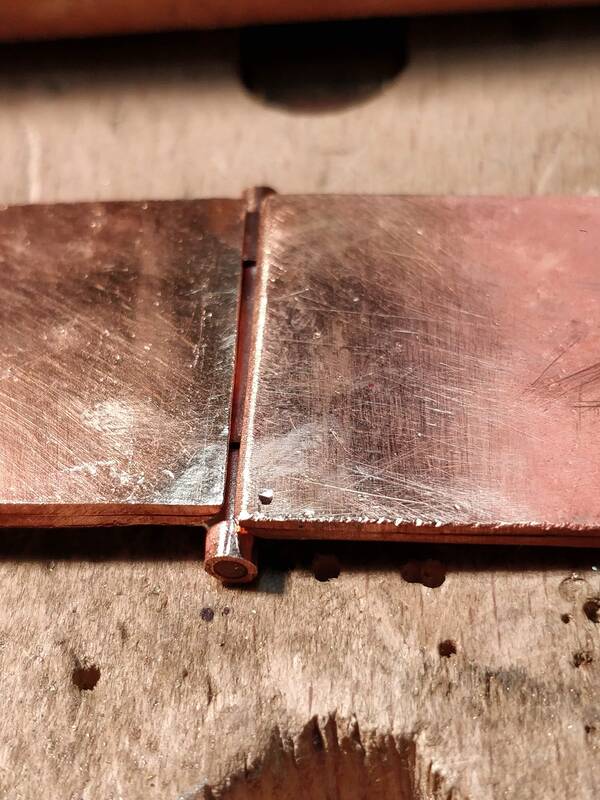
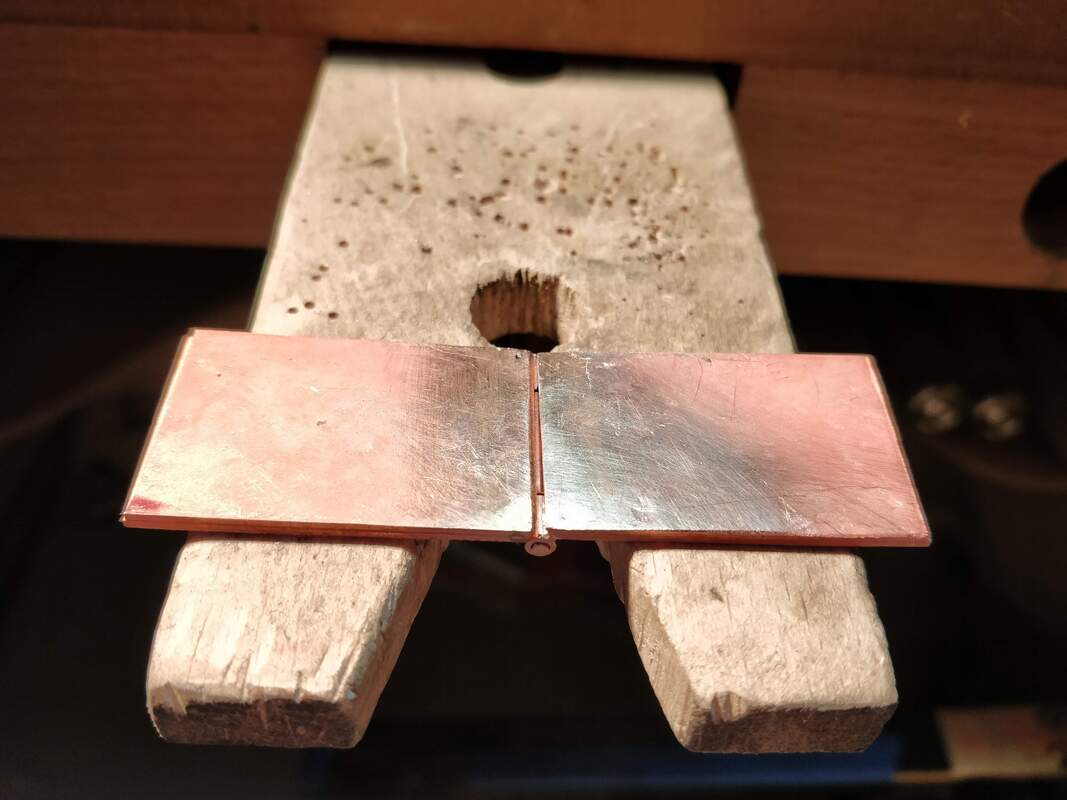
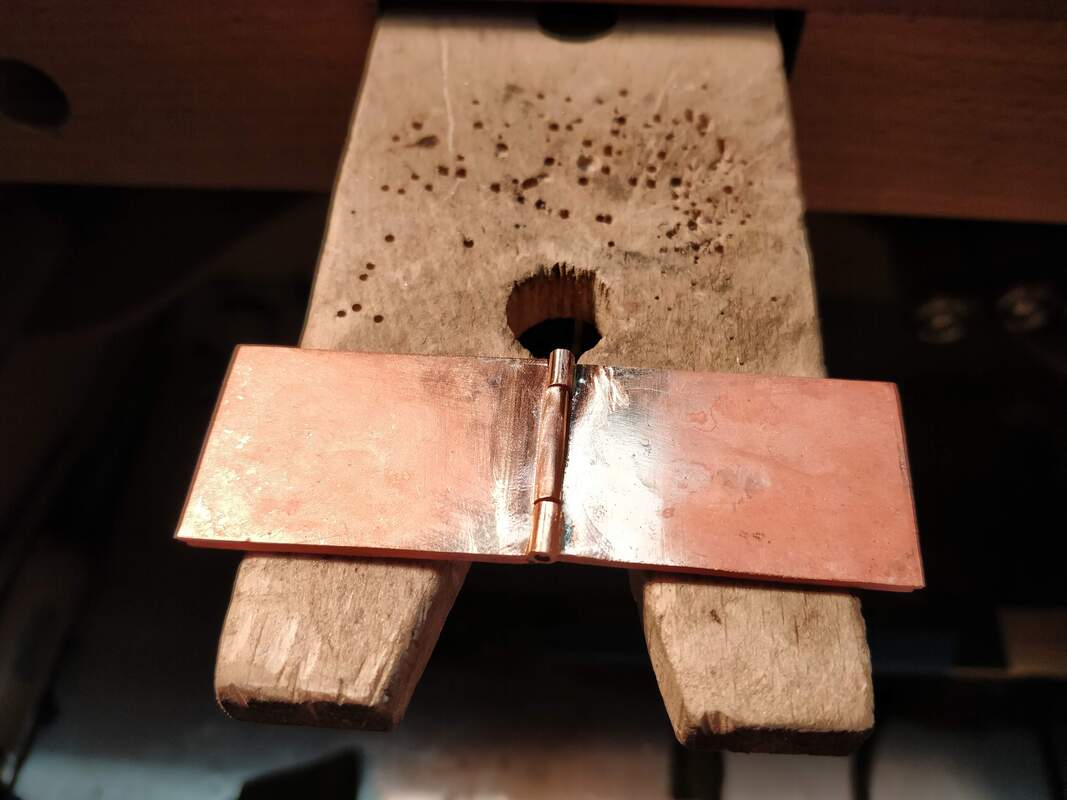
After pickling it is time to trim all the extra copper off the top and bottom and to even up the making surfaces where the lid is cut from the body. This takes time as you want it all even with no gaps.  After that I made bearing plates to fit inside the box. The are soldered to the back wall so there is extra material to support the hinge. 

The box is done and now comes the scary part of making and soldering on the hinge. That's going to be the next post.
0 Comments

The Box Project #6a - Learning Hinges

12/24/2019

0 Comments

 
I was going to work on this two weeks ago but getting the flu put a kink in that idea but with the holiday and an extra day of vacation,  I gave myself 5 days in the studio to learn hinges and to make a box with a hinge. This post is about learning to make a hinge
​
Saturday morning: 
​
I reviewed the 5 silversmithing books that had information on hinges. I would start with a butt joint and then a book joint.  I selected some scrap 18 gauge copper and cut it to be 1" wide and then cut copper tubing 1.25" wide; these would be my joint knuckles.  Per the instructions, I beveled the ends of the copper and then used my chenier file to create the seat for the hinge knuckles. I cut the tube into 3 sections with the largest being half the length, for the center knuckle and the remaining amount in half for the outer two knuckles.  I marked the copper with a lead pencil while placing the center knuckle, I then soldered down the two outer knuckles and when I went to place the center knuckle, I saw that I had pushed the outer knuckles inward thus making the space for the center knuckle too small. 

Hinge #1 was done and wrong. I should have soldered the center knuckle first and then the outside ones. 

For Hinge #2, I started again; bevel and cut tubing. Place the knuckles on a piece of graphite pencil lead to keep the knuckles aligned on the metal and solder. 

Hinge #2 was done and wrong again! I had all three knuckles soldered but now two; a outer and the center knuckle were soldered to one side; I should have used white out to prevent errant solder flow. 

I cut more 18 g copper and tubing. I placed everything flat on the solder block an fluxed and moved the outer knuckles out of the way but kept them on the lead. Then using very tiny solder chips, just to tack the knuckles, I soldered the center knuckle. Then I moved the outer knuckles back into position and soldered them into place.  I let it all cool and put everything into the pickle. 

After removing the sample from the pickle and cleaning the joint, I put the hinge back on the solder block, reinserted the graphite lead, fluxed and finished the soldering of the knuckles. Yes I got  the knuckles fully soldered down but I also got some on the copper along the hinge seat. 

Hinge #3 was done and almost correct -  I need to use smaller solder chips!!!
Hinge #4 was a full repeat and much better but still not perfect.

I inserted some copper wire into the hinges, as a pin, to prove the hinges worked, without trimming the outer knuckles and called it a night as it was now 5pm,  but I decided to reread the chapters on hinges, again, after dinner.
Sunday morning:
Time for Hinge #5 - This one would be a butt hinge and following the instructions EXACTLY, used the chenier files to cut a groove in each half, I cut and filed the ends of my tubes square using my miter jig;  I used white out, in lieu of yellow ochre, to work as a mask on the copper where the knuckles would be placed; I aligned my knuckles on graphite lead.  It was time to solder; I ran the solder wire though my rolling mill to thing it and then cut very, VERY tiny chips. I then fluxed the hinge seat and placed the knuckles on the graphite, in the seat and turned on the torch. Working slowly with the flame, I warmed everything up and when the flux was glassy, I placed the solder chips and used the heat to pull the solder into the seat of the center knuckle. I then focused the heat on the first outer knuckle and proceeded to solder it in place and moved on to the second outer knuckle.  Into the pickle it went. Afterwards I trimmed the outer knuckles and inserted some copper wire for the pin and filed the ends flat.  SUCCESS, I had a good hinge with almost NO solder to clean up. 

 
​Time for Hinge #6 which is a book joint - this is the type of hinge that would be on a box between the lid and the body.  I worked really slowly and carefully; repeating everything I did for #5 - file, sand, place, check and check again, masking with white out, cutting tiny solder chips, fluxing and checking placement again before turning on the torch.  I soldered again in two phases the first being to tack the knuckles and the second fully attach them. And... I had a successful book hinge!!! 

It was now 6pm and I was done for the day having been at hinge making for 6+ hours. 
​
Next up would be to make a box and put a hinge on it, starting tomorrow.
0 Comments

The Box Project #3

11/10/2019

 
This project is from 2 weeks ago, I thought I posted it but I guess not.

This is an oval box (1 seam) but I put a hydraulic pressed stamping on the lid.  I did the stamping twice just to practice getting a good impression. Actually this is the second oval box too; the first was out of 24g copper which is just too soft and this one was made with 20g which is still a bit too thin, for copper but these are all about practice.

I spent a good amount of time working on the bezel for the lid and I am getting better at fitting it and soldering as I am not doing as much clean up.  This box is about 1.25" tall and a 6" circumference resulting in about 1.25" wide on the short axis and 1.5" on the long axis.

​Next up scribing corners, I am starting with a triangular box.

    RSS Feed

    How to Aquire Your Own Shop Elf

    Archives

    October 2020
    August 2020
    March 2020
    December 2019
    November 2019
    October 2019
    September 2019
    August 2019
    July 2019
    June 2019
    May 2019
    March 2019
    February 2019
    January 2019
    December 2018
    November 2018
    October 2018
    September 2018
    August 2018
    July 2018
    May 2018
    April 2018
    February 2018
    January 2018
    November 2017
    October 2017
    September 2017
    July 2017
    June 2017
    May 2017
    April 2017
    March 2017
    February 2017
    January 2017
    December 2016
    November 2016
    October 2016
    September 2016
    August 2016
    July 2016
    June 2016
    May 2016
    April 2016
    March 2016
    February 2016
    January 2016
    December 2015
    November 2015
    October 2015
    September 2015
    August 2015
    July 2015
    June 2015
    May 2015
    April 2015
    March 2015
    February 2015
    January 2015
    December 2014
    November 2014
    October 2014
    September 2014
    August 2014
    July 2014
    June 2014
    May 2014
    April 2014
    March 2014
    February 2014
    January 2014
    December 2013
    November 2013
    October 2013
    September 2013
    August 2013
    July 2013
    June 2013
    May 2013
    April 2013
    March 2013
    February 2013
    January 2013
    December 2012
    November 2012
    October 2012
    September 2012
    August 2012
    July 2012
    June 2012
    May 2012
    April 2012
    March 2012
    February 2012
    January 2012
    November 2011
    August 2011
    July 2011
    June 2011
    May 2011
    April 2011
    March 2011
    February 2011
    January 2011
    December 2010
    November 2010

    Jan - Nov 2010 History
    File Size: 2272 kb
    File Type: pdf
    Download File

    Jan - Dec 2009 History
    File Size: 2332 kb
    File Type: pdf
    Download File

    Categories

    All
    42
    A Year Of Repousse
    Blacksmithing
    Blogoversary
    Box Project
    Business
    Chasing & Repousse
    Commission
    Education
    Embroidery
    Enamel
    Entries
    Entry
    Exhibition
    Facebook
    Filing
    Fold Forming
    Gold
    Holloware
    Hot Forging
    Hydraulic Press
    Jewelry
    Keum-boo
    Learning
    Leather
    Market
    Metal
    Patina
    Photography
    Polishing
    Publications
    Raising
    Sanding
    Santa Fe Symposium
    Shop Elf
    Sinking
    Social Media
    Soldering
    Store
    Studio Visits
    Superbowl Challenge
    Teaching
    Teapot Project
    Technique
    Temari
    Tin
    Tools
    Vessels
    Visiting Workshops
    Weaving
    Website
    Workshop
    Yubinuki

Powered by Create your own unique website with customizable templates.