Follow Me On:
LAURIE KERN
  • Home
  • Blog
  • Portfolio
    • Metal Work >
      • Chasing & Repousse
      • Holloware
      • Jewelry
      • Other Wonderful Items
    • Fiber Arts >
      • Temari
      • Yubinuki
  • Resources
    • Library
    • Tools & Equipment
    • Links
  • About
    • Artist Statement
    • Curriculum Vitae
    • How it is Made
    • Contact

Progress...

11/28/2010

 
Yes, it is hammers, again.
I have now refinished 4 of the 18 hammer heads. Once all of them are done then I will have to sand and clean up the handles and reseat them in the heads. I might have to replace one or two handles are they have a crack and I don't think driving the wedge in further will do any good.

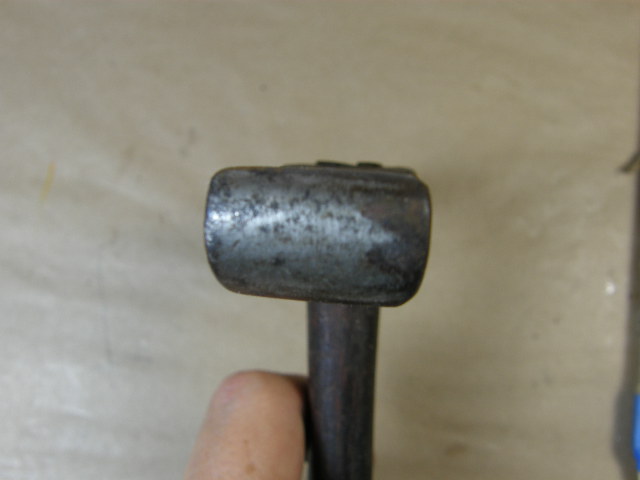
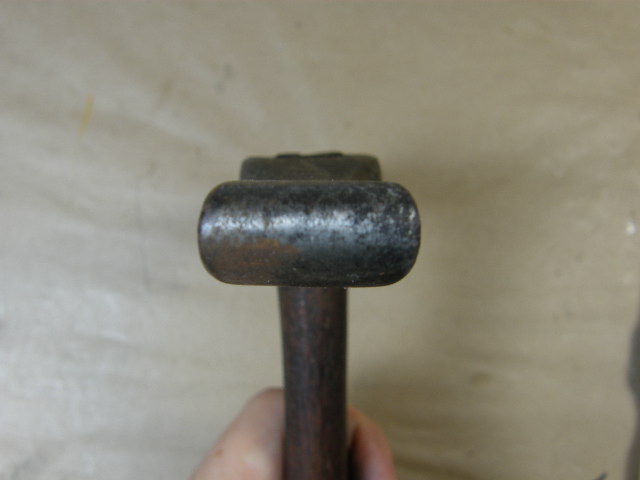
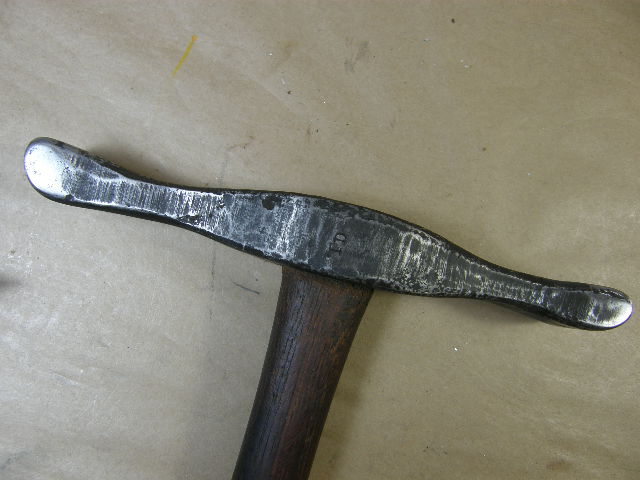
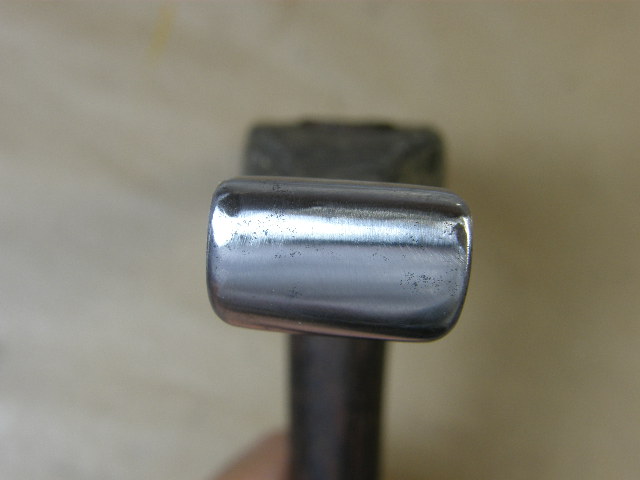
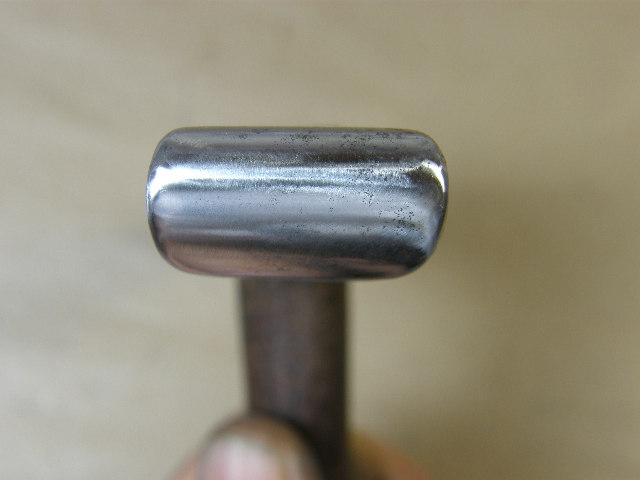
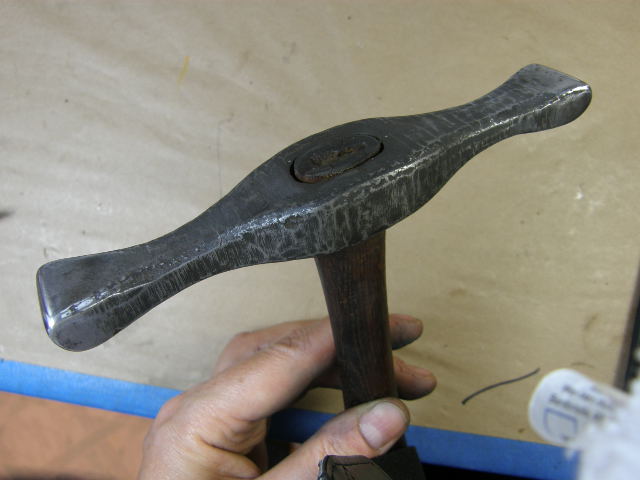
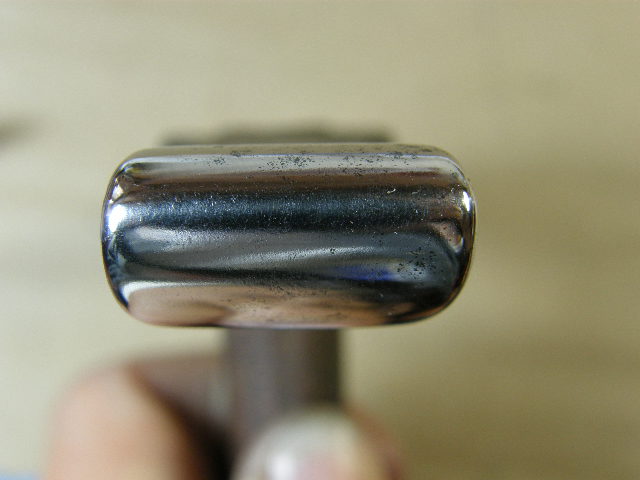
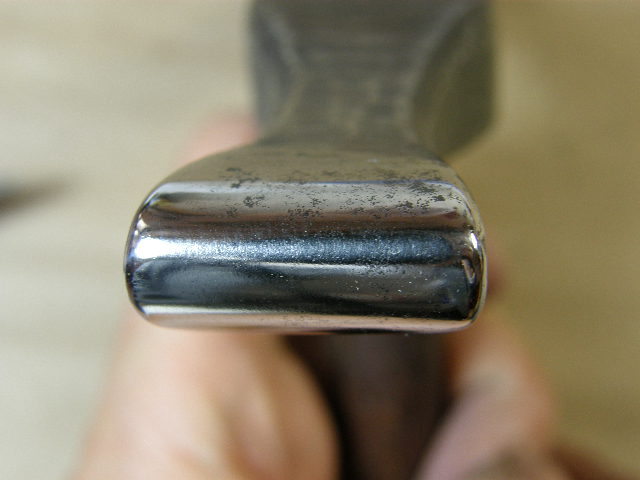
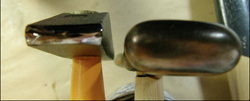
Here are some before, during and after pictures of one of the hammer. You can see they are pretty rusty and full of grime. After taking 280 sand paper to the sides, top and bottom, most of the rust was gone but not in the deep machining grooves - WD-40 will be used to get at that. Then I used 280 to clean up the faces of the hammer. This was difficult as there was some deep pitting and you don't want to ruin the shape (angles and curves) of the faces. After that I took 320, 400 and 600 to the faces as well. This process took 1.5 hours and my hands were red and gray from the sanding. WIth the first phase completed and hands washed, I started with the 9 fine sanding/polishing grits I have to get the faces nice and shiny smooth. This took another 1.5 hours but as you can see in the final pictures, it was worth it.

At this rate, it will take at least another month of weekends to finish all the hammers and the flat planishing hammers will be the hardest. 

Oh, let's beat on this subject a bit more - Hammers

11/26/2010

 
Over on the Tools of the Craft page you will see some pictures of my recent hammer acquisitions. 

I recently purchase 3 original Dixon hammers that were new and never been used.

Next I scored a win on ebay of 18 hammers (3 heads were not on the handles but were included). These will take a bit of time to clean up but there are some nice little hammers in the lot. These may be one-off's because even though there are initials on them, I can't seem to find a manufacturing mark.

Getting my hammering mo-jo back

11/25/2010

 
Despite it being almost a month from the smashing event, I have realized that I was still a bit hammer shy and was avoiding starting a new piece.  This being Thanksgiving day, I am off from work and have no company to cook for, it seemed the perfect time to start something new.  

Over my morning coffee, I pondered the question: "What would be nice to make but not too complicated so I could have a nice feeling of accomplishment?" 

First Answer: Make a silver version of the Dish-J. 
Second Answer: Raise a simple silver cylindrical form.

For both, I started with a 3" square of 20 gauge sterling silver. One is made via sinking, the other via raising.  

I have the sinking on the Dish-J completed but I have to order some 12 gauge wire for the base which means I can't really finish it until next weekend.  I am part way "up" with the cylindrical form too. 

When I have completed them, they will be up for sale.

I have just put the potatoes in the over to bake;  I have poured myself a wee dram of Scotch and I shall resume tomorrow (it is 4:30 pm)

Here is an in-process pictures of each. 

My view of LOS on Silver has changed.

11/21/2010

 
Yesterday, I made a "scrunched fabric" cuff bracelet out of silver. The body of the cuff is made from fine silver and the frame is sterling.

Using fine silver allow the folds to happen without the work hardening and potential cracking to occur. The sterling silver frame adds some rigidity - you could use fine silver too but to prevent the cuff from bending out of shape too easily, so using sterling and its work hardening propensity, keeps the cuff in shape.

I was going to allow the white tarnish from heating and pickling to stay in the folds to give these deeper spots a matt look; and then using a buffing cloth, I was going to polish the frame and hight spots on the fold.  


Part of the reason behind this matt/shiny look was that I don't like the 'normal' gray patina look which you get with LOS on silver. Having used LOS on copper, I love the various colors that can be obtained yet on silver you only see gray to black tones. 

There has to be something else that can be done! 

Doing some reading from my patina book; I came across a recipe that indicated that you can get golds, pink/purples, and blues on silver just like i do on copper.  Coooool but how hard was it going to be?

To get this effect, the first thing I had to do was scrub the cuff and remove all the oxides and finger oils.  Then set up the LOS bath with the dipping station, running water, steel wool, gloves and safety glasses. I also turned on all the lights so I could see the patina develop.  

I went at it very slowly and wow, what amazing results. My view of LOS on silver has just changed.  After using the LOS, I went back with my steel wool and rubbed the patina off the frame and the high spots on the folds since wearing the bracelet over the time would wear away the patina on these spots. Secondly doing this allows the white of the silver to shine through and add a great contrast to the colors from the patina 

 The first picture below is before LOS and the second is after the patina process is over.

And I love my bracelet, it is really, really, really amazing. I have to finish up one more as I promised it to Elisa of Scotland.  

Picture
Picture
Picture

Back to the Stake... and a prototype

11/14/2010

 
A few weeks ago I was demoing sinking on a scrap piece of copper that was square. I ended up with what I thought was a pretty nice little dish.  

Today I got back to that design and I made my prototype, I made the dish, planished it, and then added a ring base. I had to go back a planish again since the soldering annealed the piece again (note to self: invent way to solder a base onto a vessel and NOT have the piece get annealed). 

My solder job was only so-so, I was afraid of too much solder and ended up not using enough and now I have some gaps. I have to work on this more but for my sample I am ok with there being some gaps in the solder joint between the ring and the bowl. 

After a good cleaning I added a patina.  

Now I have to make a production piece out of silver and copper and in many sizes...I am calling it 'Dish-J'
Picture
Picture

And Even More Hammers...

11/11/2010

 
Last weekend I took a drive to Studio DeLucca - I went for a couple of reasons.

First, Khobe and I had sent a few emails back and forth because she was interested in how to make a fire brick forge, that I learned to make while up at metals week. We had discussed me bringing the forge to her studio and showing her how to carve the fire bricks, bind them together and then set up a torch as the heat source.  But we never set an actual date to get together and so that leads to the second reason...

Secondly, I was hoping to take the 2 day workshop given by NC Black, at Studio DeLucca, but due to scheduling and dollars I could not. Then Khobe told me there was going to be a demo on Friday night, prior to the workshop. I planned to get to work early on Friday so I could leave early and have more than enought time to drive to Long Beach. I had put the forge in the car because I figured, after the demo, I could meet with Khobe and pass on the informaiton. Sure enough there were too many things to be done and I ended up working late and could not get to the Studio on Friday night. I emailed Khobe asking if it was ok, with her, for me to come by on Sunday, see what was being taught and show her the forge, and she said yes and that leads to the third reason....

Thirdly , I had wanted to take the class with NC Black because I was interested in their hammers (which ties in with the title of this post). If I am raising small scale hollow ware, you need small scale tools - stakes and hammers; I have the stakes [The Fretz Miniatures] and I am now gathering the hammers.  Khobe said that NCB would have hammers to purchase. Since I did not take the class, attending the demo would be my chance to see these hammers and get them into my hands. As you can see, my plans were not working out to this point.

Sunday I got up early (despite the time change) made coffee, did the email and then got ready to drive to Long Beach; and I was out of the house by 10:00 am and I arrived at the Studio by 11:30 am.

Meeting Khobe was great and I was able to pull up a chair and watch everyone work. After about 45 minutes, I met with Andrea and we talked hammers: how she makes them; current suppliers; finding old ones; and how many she has, which is a lot. I ended up purchasing 4 hammers: The C (140 gram head) , mini-C (68 gram head) , K (15 gram head)  and special K (uncertain of head weight but less than 15, maybe around 10 grams).

I also spent some time talking to Les who liked my shoes (hey Les, I have those orange shoes on today!!!) we chatted about various things: his path to learning engraving; my path to learning raising; how he and Andrea travel around the country with their hammers and teach classes.

After lunch, I opened up the box with forge and talked Khobe, Andrea, and Les through the process of making the forge - which they wanted to make in the next few days so they could make some tools. I hung out for a while longer and then headed home around 3:30 pm, having had a great day.

Head over to the Pictures area and on the Tools of the Craft page, you can see pictures of my new hammers.

Yes, I now have a hammer fetish! I think it was always there but now it is really visible.

Hammers (again)

11/6/2010

 
None were thrown or used to smash any works in progress.  

Today I decided it was time to modify a few hammer heads and do a few tweaks on the head I modified during Metals Week back in June/July.

The first hammer I worked on is a riveting hammer. I bought this for about 12.00 on line and it is not very heavy or by any - I took the flat round end and made it into  a tiny planishing hammer. The other end I just rounded all the sharp edges and corners. I mostly will use it as a planishing hammer.

The second hammer was this little cheap thing I bought at Harbor Freight. It comes with four screw on heads - 3  cylindrical flat heads - brass, metal and plastic and one metal cross-pien.  I only modified two of the heads. I turned the brass head into a shallow dome so I can use it as another tiny planishing hammer and the cross-pien I rounded and softened, like I did with the riveting hammer,  to a tiny forging hammer.

Then on the hammer I modified this past summer, I found the handle too long and when I used it, had some corner marks from the underside - which I had issues working on originally since I had not removed the handle. I sawed off the handle, popped out the wood with wedge and went to work on my further refinements.  

After grinding, filing and sanding with 220, 400, 600, 800, 1500, 1800, 3200, 4000, 6000 and yes even 8000 sand paper - I am now filthy but all the heads have a mirror finish. 

Oh. and I found the perfect hammer handle at ACE Hardware for SEVEN DOLLARS - it is the perfect size and made in the USA. I ended up buying 5 of them, as you never know when might need another hammer handle.

Use this link to my Tools of the Craft page to see some pretty pictures. 
As for me, I am hitting the shower..

Put the hammer down and walk away...

11/3/2010

 
I have been working on the hearth pot since September - there have been starts, stops,  side trips and other projects along the way,  but the pot and I were making progress. The pot was moving closer to completion and I was making strides in adding curves and necking the walls inward.

I did not do much work, on the pot, these past two weeks because I have been experiencing low energy, lack of focus, and there were other commitments. There was also the problem that I could not get the bowl onto the stake I had been using (a loaner from Deb). I needed a different stake to finish the final part of the curve and to create the final vertical neck.
On Saturday I drove down to Deb's and I gave her back the stake she had lent me and she then gave me a Dixon #13 stake to use.  Since I was making this trip down to the San Diego area, I ran other errands and thus I did not do any work on Saturday.


Sunday morning, I woke up early (for me, on a weekend) around 8:00 am; started the coffee; read my email; and then brought Erich a cuppa and woke him up. I am nice and I won't start banging on metal if he is still asleep. 

Somewhere around 10-ish I trimmed about a quarter inch off the "rim" - it was uneven and thinning and was adding to the issue of getting the pot on the stake at the correct angle. Why? - this was because the rim on the opposite side of the bowl was running up against the underside of the stake as well as the tang. Once the trimming was done, I decided to use my new stake as it was similar to the stake I had returned to Deb.  The pot fit on my new stake - not just because I had trimmed the rim, but I realized that the new stake had straight t-joint between the underside and the tang. The Dixon stake(s) have a stepped tang, and that was preventing me from getting the bowl positioned the way I wanted.  Having figured this out, I decided to do the next course of raising in my new stake and that I might not need the Dixon #13 until later.  I also decided to change from my big raising hammer which has a head of 400 grams and is rather large to my newest ebay win - a 175gram head hammer. This new hammer has the same weight as another Peddihaus hammer I have but the new one has a broader face than the same weighted Peddihaus hammer - see picture below.  There is no manufacturer's name on the head but it was the perfect shape for bringing the walls in toward a neck.

I completed two rounds and then went back to planish more of the body because when I brought in and up the neck, I would not be able to get inside even with the other stake.


And that is when my problems started...
My new stake, even though modeled on the Dixion #3 and Dixion #10 stakes, was not the same size as either of those, which is what I had been using at Deb's. I had requested that Kevin should make the two ends about 1/4" smaller than the dixions. And because of that size difference, the area I was going to planish, having been formed on that other stake, did not match the radius/curves and so I ended up re-shaping and eventually denting the body.


Did I stop then and there and think about it? Nooooooooooooooooooo
Did I put down the hammer and walk away? Nooooooooooooooooooooo
Was I mad at myself and feeling frustrated? Yessssssssssssssss

Did I think about what did next? Nooooooooooooooooooooooooooo

And then I lost it. I actually lost it (my mind) -
I picked up that big honk'n 400 gram hammer and smashed it.
Yup, you can go back and read it again but the result with be the same.

                           I SMASHED MY WORK, 
                                                I think I hit it 3 or 4 times.

I could go on for several more thousands of words explaining how I felt during this event and even how I felt for the next FIVE hours but I won't.  Despite all of that, I know my skills have progressed so as opposed to trying to salvage the bowl, I wil keep it on my workbench as a reminder - When you are feeling fuzzy brained and have an attack of the crazies.... Just remember -  
Don't go near the hammers.
BTW, I feel better now. You can see the just before and the after picture below.


Picture
Two Hammer Heads
Before
Just Before the Crazies Hit
After
The Aftermath

New Photos - Tools of the Craft

11/3/2010

 
I have just put up a new section for photographs and the first pictures to be put up are about my newest hammer (head) which I snagged from eBay a few weeks ago.

    RSS Feed

    How to Aquire Your Own Shop Elf

    Archives

    April 2025
    March 2025
    February 2025
    January 2025
    December 2024
    November 2024
    October 2024
    September 2024
    August 2024
    July 2024
    June 2024
    January 2024
    November 2023
    October 2023
    September 2023
    October 2020
    August 2020
    March 2020
    December 2019
    November 2019
    October 2019
    September 2019
    August 2019
    July 2019
    June 2019
    May 2019
    March 2019
    February 2019
    January 2019
    December 2018
    November 2018
    October 2018
    September 2018
    August 2018
    July 2018
    May 2018
    April 2018
    February 2018
    January 2018
    November 2017
    October 2017
    September 2017
    July 2017
    June 2017
    May 2017
    April 2017
    March 2017
    February 2017
    January 2017
    December 2016
    November 2016
    October 2016
    September 2016
    August 2016
    July 2016
    June 2016
    May 2016
    April 2016
    March 2016
    February 2016
    January 2016
    December 2015
    November 2015
    October 2015
    September 2015
    August 2015
    July 2015
    June 2015
    May 2015
    April 2015
    March 2015
    February 2015
    January 2015
    December 2014
    November 2014
    October 2014
    September 2014
    August 2014
    July 2014
    June 2014
    May 2014
    April 2014
    March 2014
    February 2014
    January 2014
    December 2013
    November 2013
    October 2013
    September 2013
    August 2013
    July 2013
    June 2013
    May 2013
    April 2013
    March 2013
    February 2013
    January 2013
    December 2012
    November 2012
    October 2012
    September 2012
    August 2012
    July 2012
    June 2012
    May 2012
    April 2012
    March 2012
    February 2012
    January 2012
    November 2011
    August 2011
    July 2011
    June 2011
    May 2011
    April 2011
    March 2011
    February 2011
    January 2011
    December 2010
    November 2010

    Jan - Nov 2010 History
    File Size: 2272 kb
    File Type: pdf
    Download File

    Jan - Dec 2009 History
    File Size: 2332 kb
    File Type: pdf
    Download File

    Categories

    All
    42
    Art
    A Year Of Repousse
    BFA
    Blacksmithing
    Blogoversary
    Box Project
    Business
    Chasing & Repousse
    Commission
    Education
    Embroidery
    Enamel
    Entries
    Entry
    Exhibition
    Facebook
    Filing
    Fold Forming
    Gold
    Holloware
    Hot Forging
    Hydraulic Press
    Jewelry
    Keum-boo
    Knitting
    Learning
    Leather
    Market
    Metal
    Patina
    Photography
    Polishing
    Publications
    Quilt
    Raising
    Sanding
    Santa Fe Symposium
    Shop Elf
    Sinking
    Social Media
    Soldering
    Store
    Studio Visits
    Superbowl Challenge
    Teaching
    Teapot Project
    Technique
    Temari
    Tin
    Tools
    Vessels
    Visiting Workshops
    Weaving
    Website
    Workshop
    Yubinuki

Powered by Create your own unique website with customizable templates.