Follow Me On:
The Adventurous Silversmith
  • Home
  • Blog
  • Portfolio
    • Metal Work >
      • Chasing & Repousse
      • Holloware
      • Jewelry
      • Other Wonderful Items
    • Fiber Arts >
      • Temari
      • Yubinuki
  • Resources
    • Library
    • Tools & Equipment
    • Links
  • About
    • Artist Statement
    • Curriculum Vitae
    • How it is Made
    • Contact

3-Day Weekend Projects

5/24/2015

0 Comments

 
Here in the USofA, Monday is our Memorial Day so I have 3 days at home to play in the studio.  

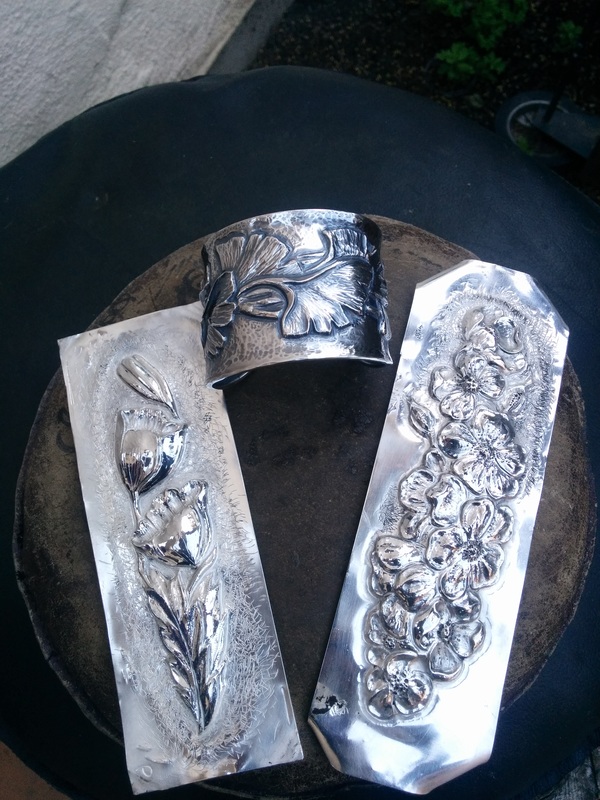
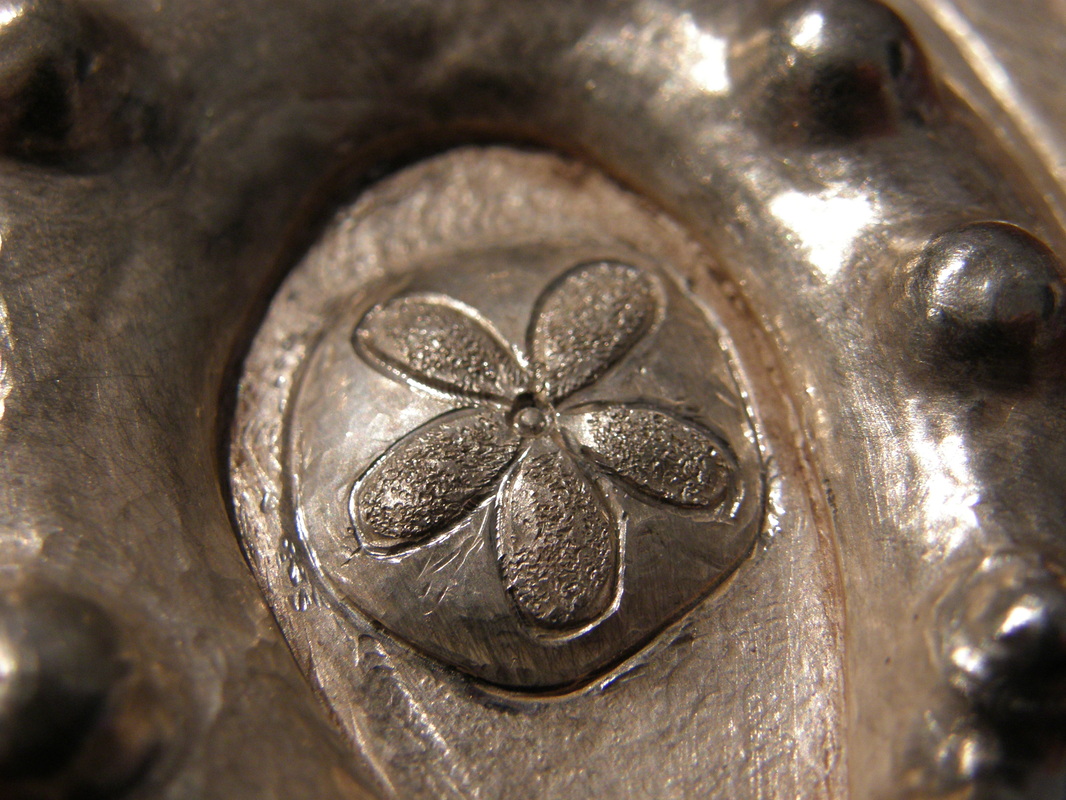
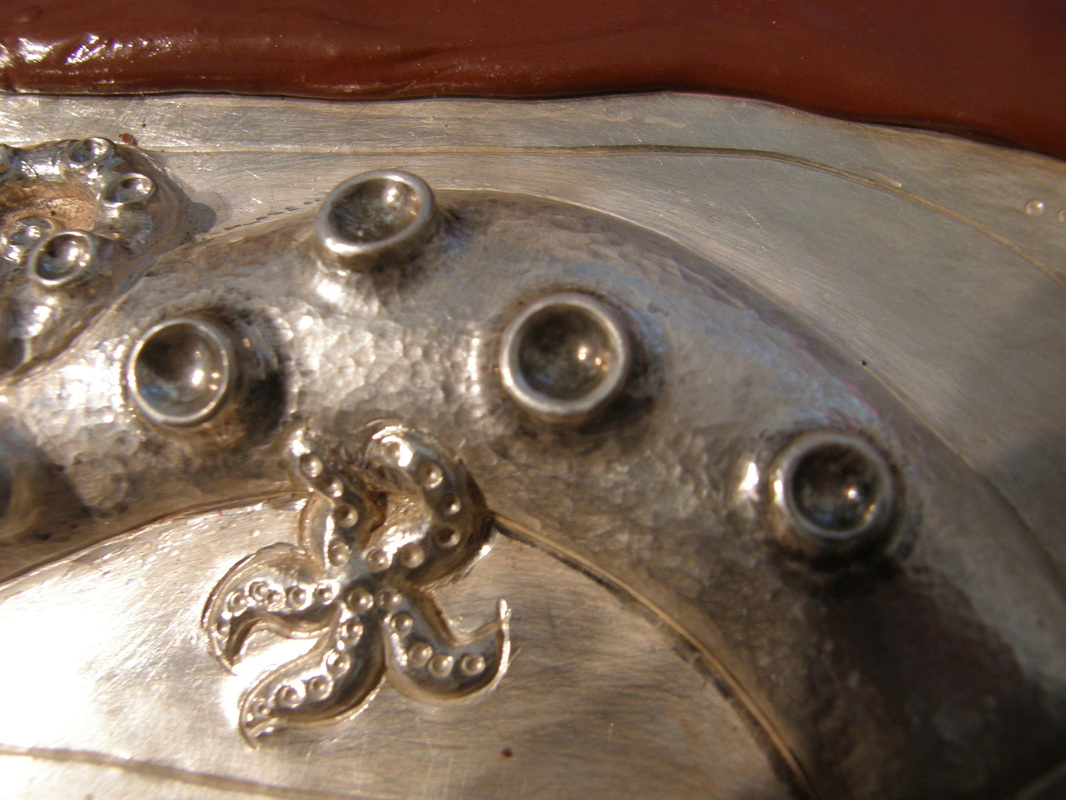
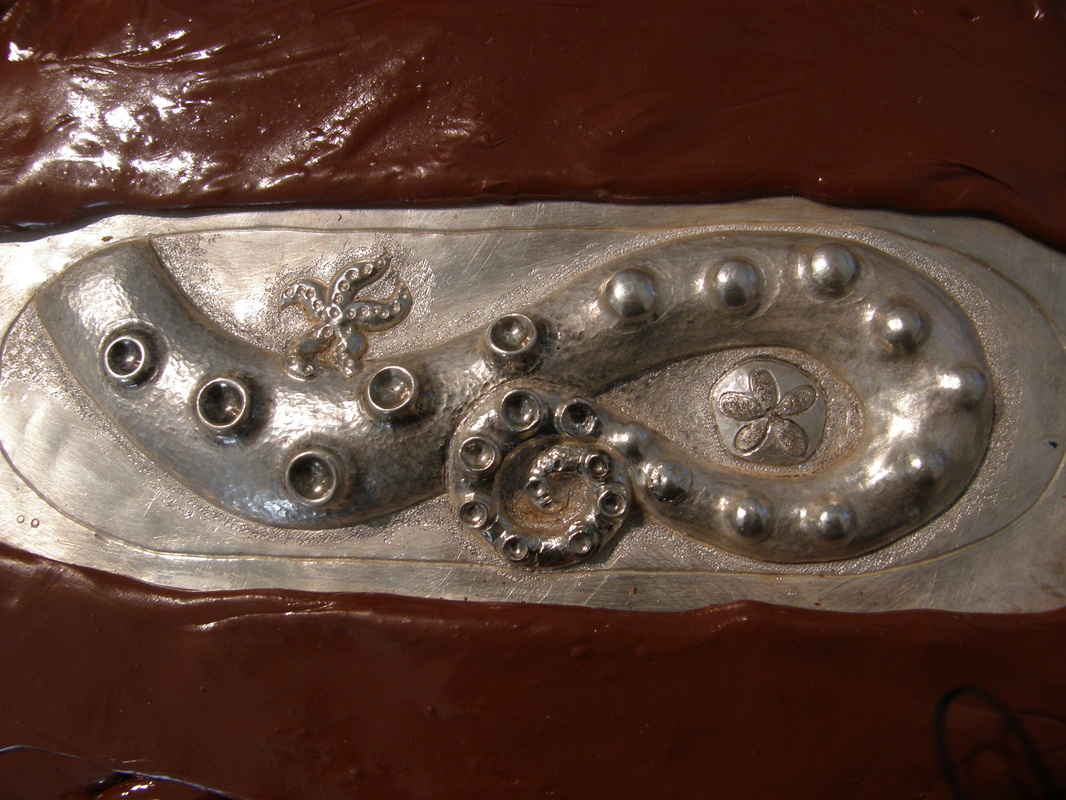
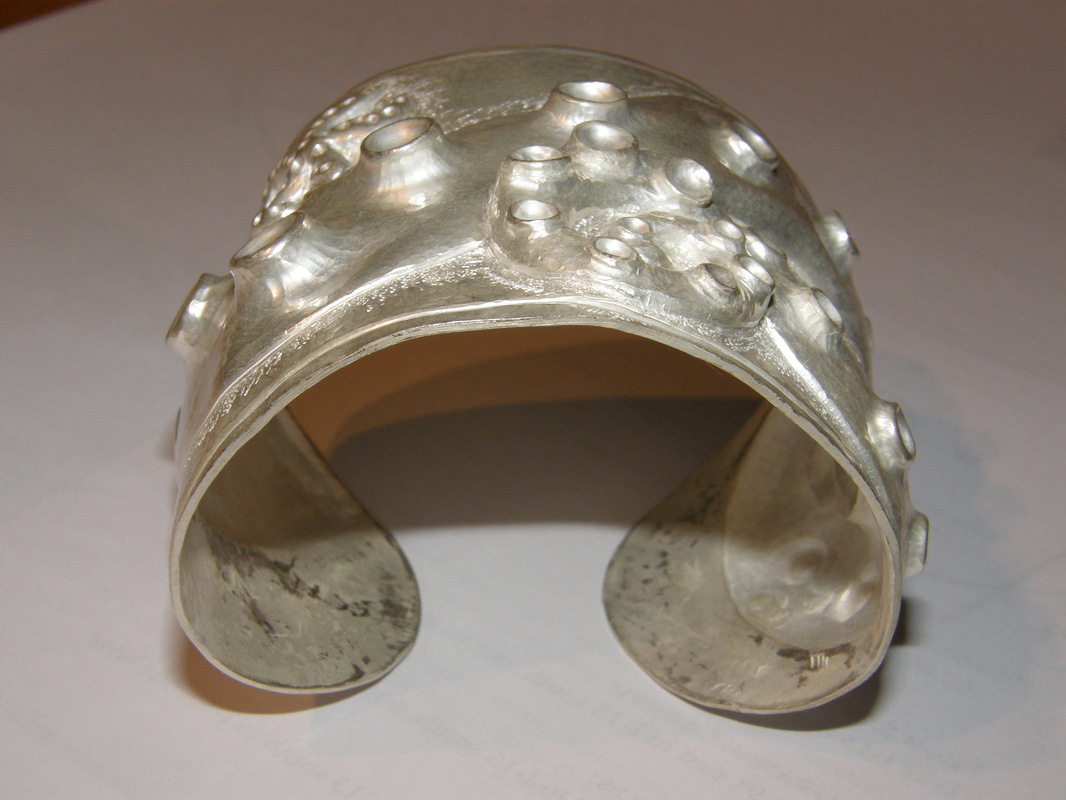
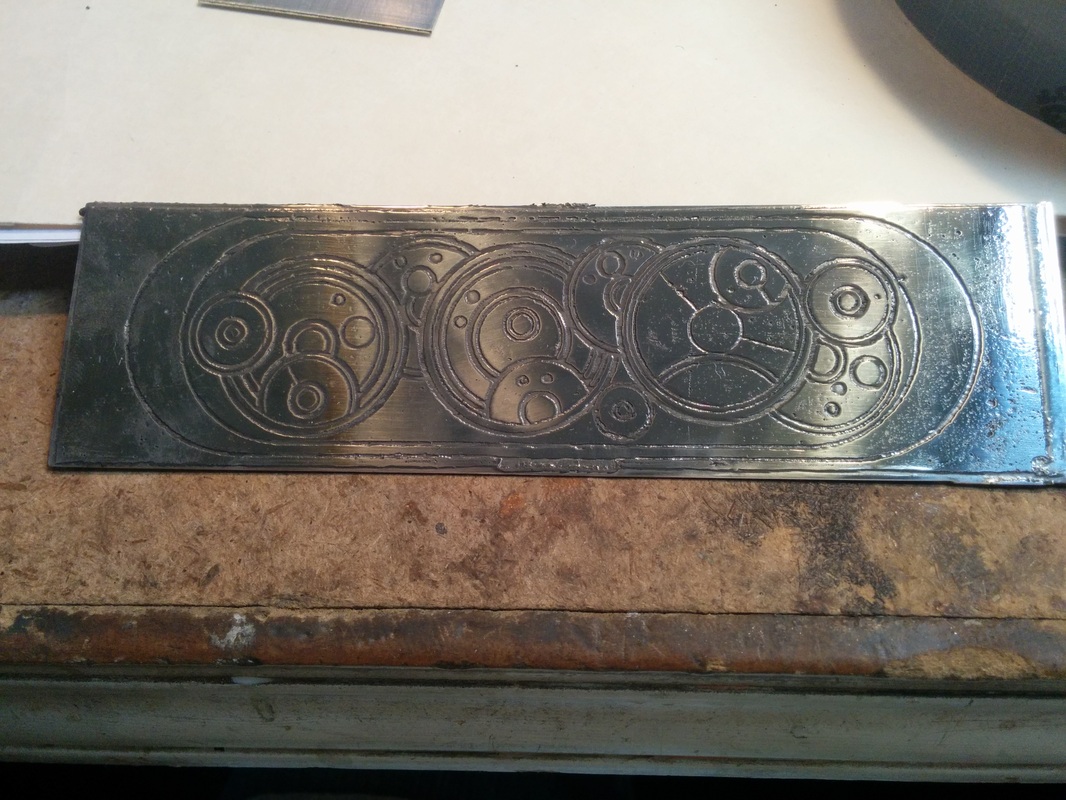
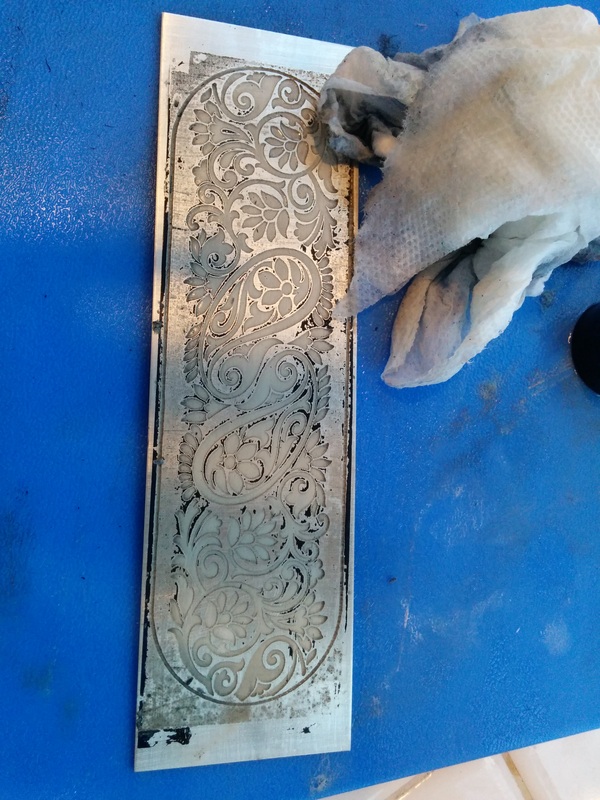
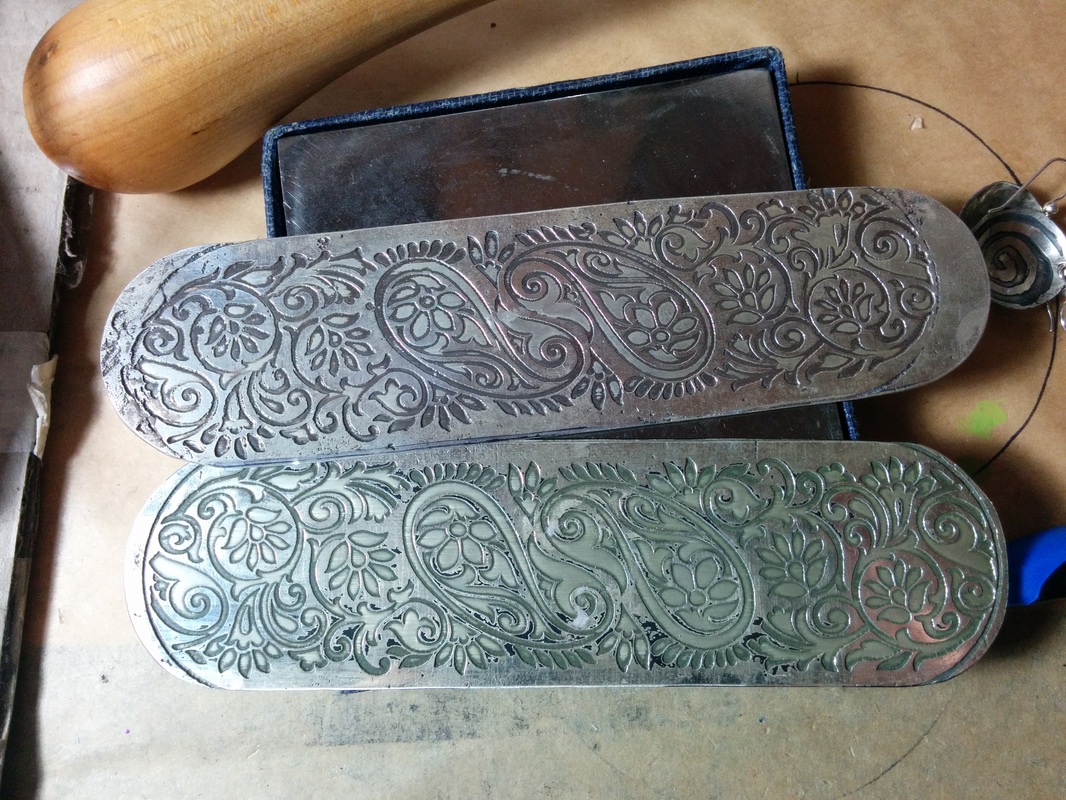
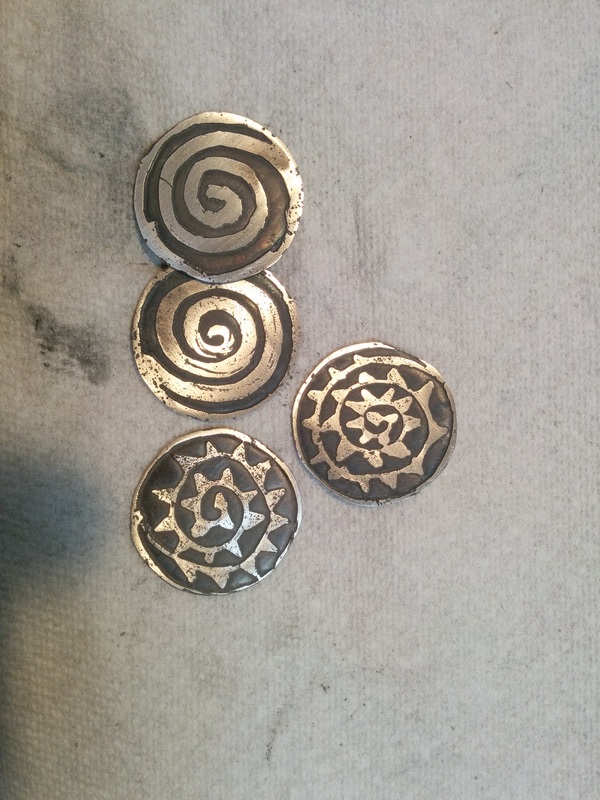
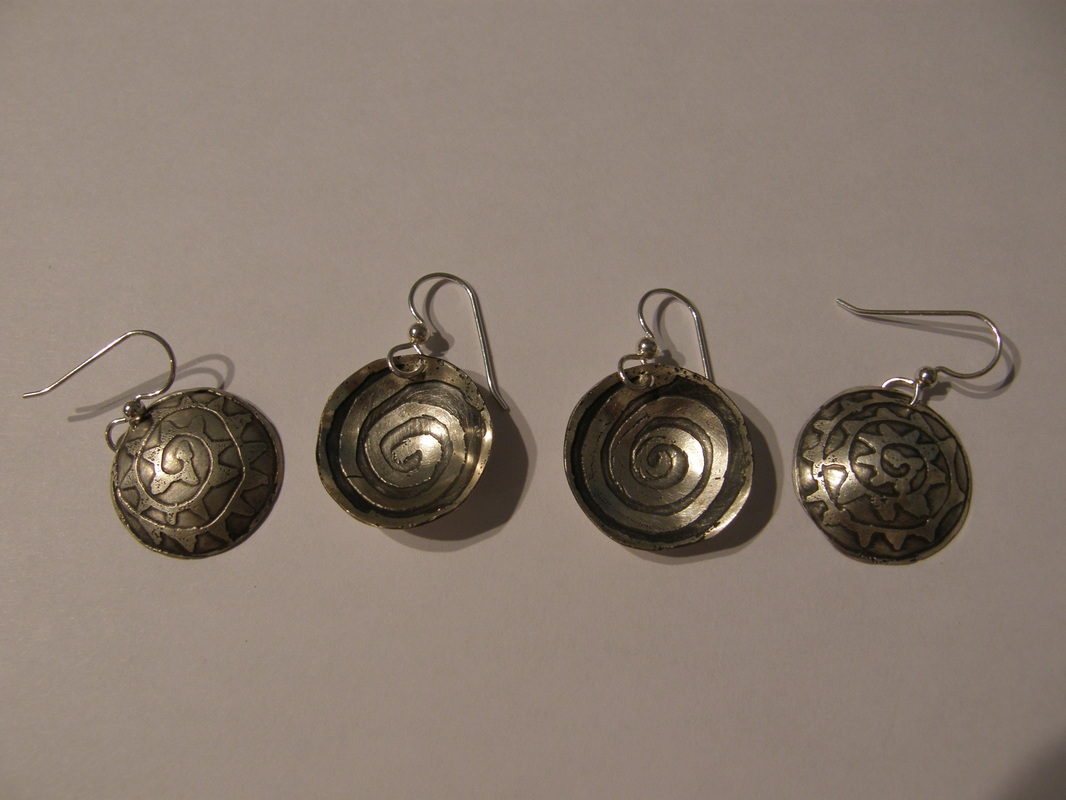
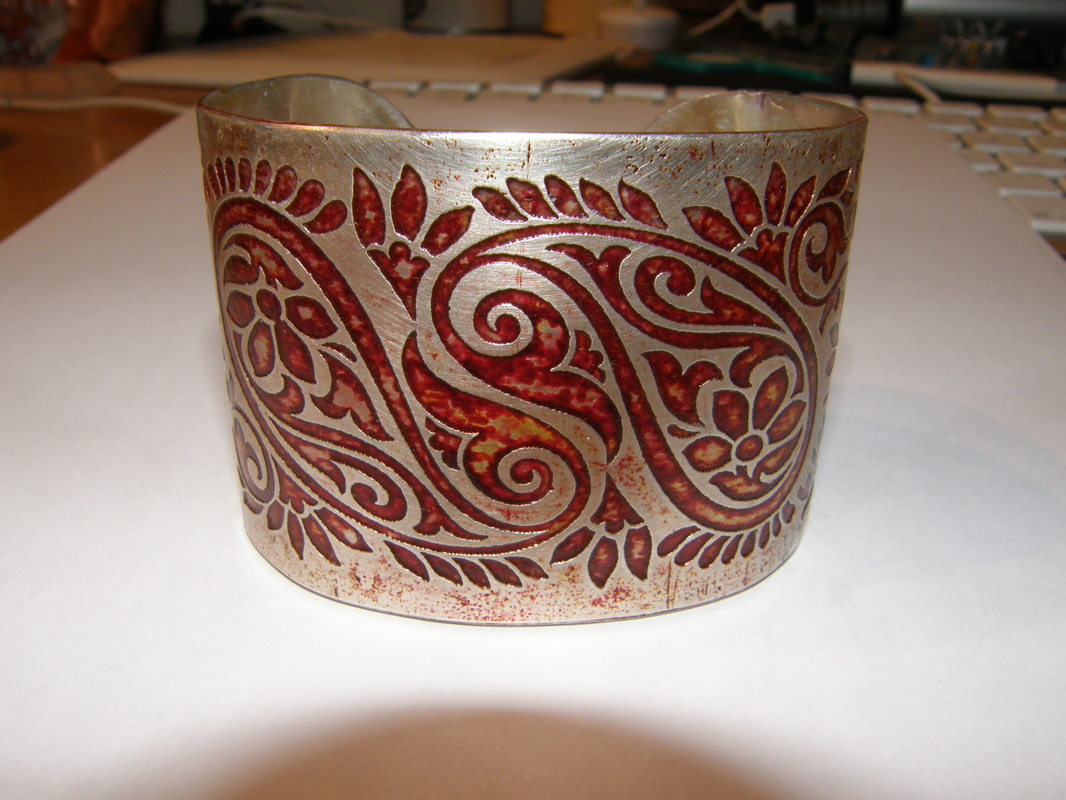
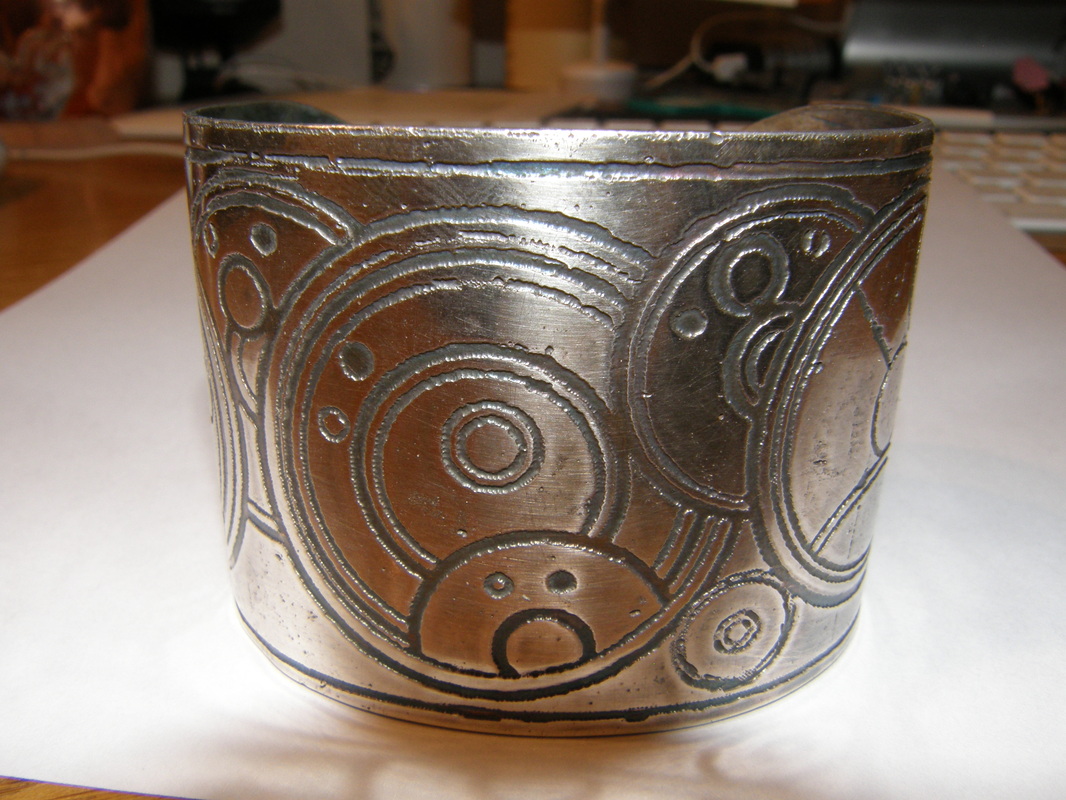
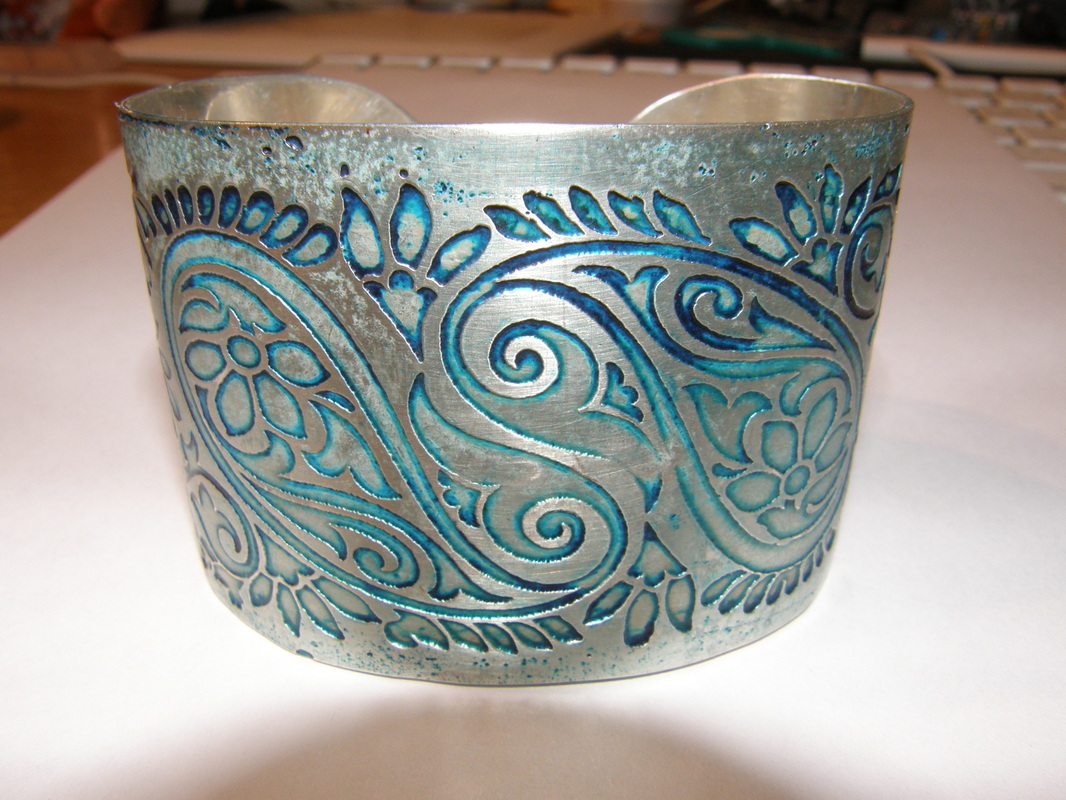
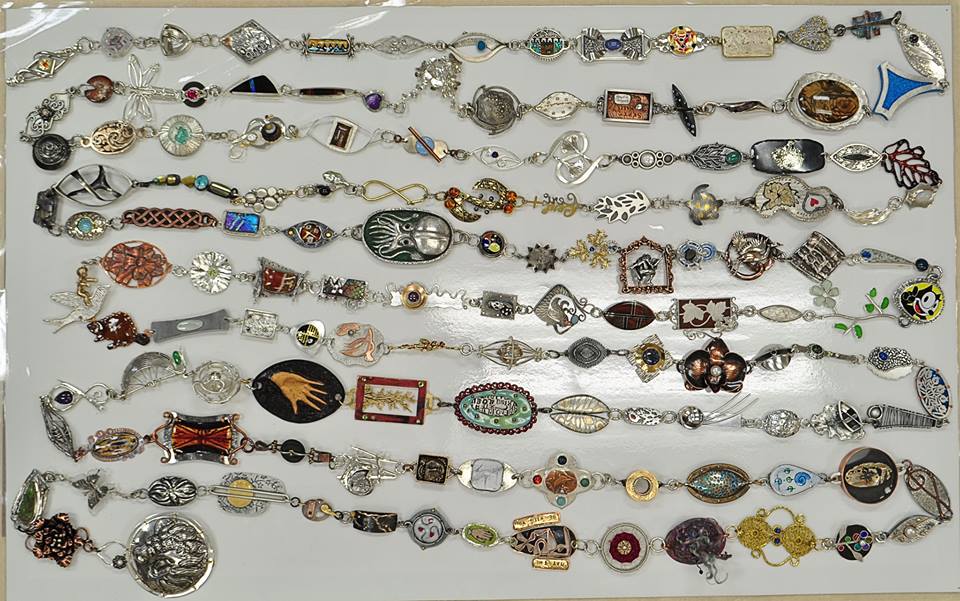
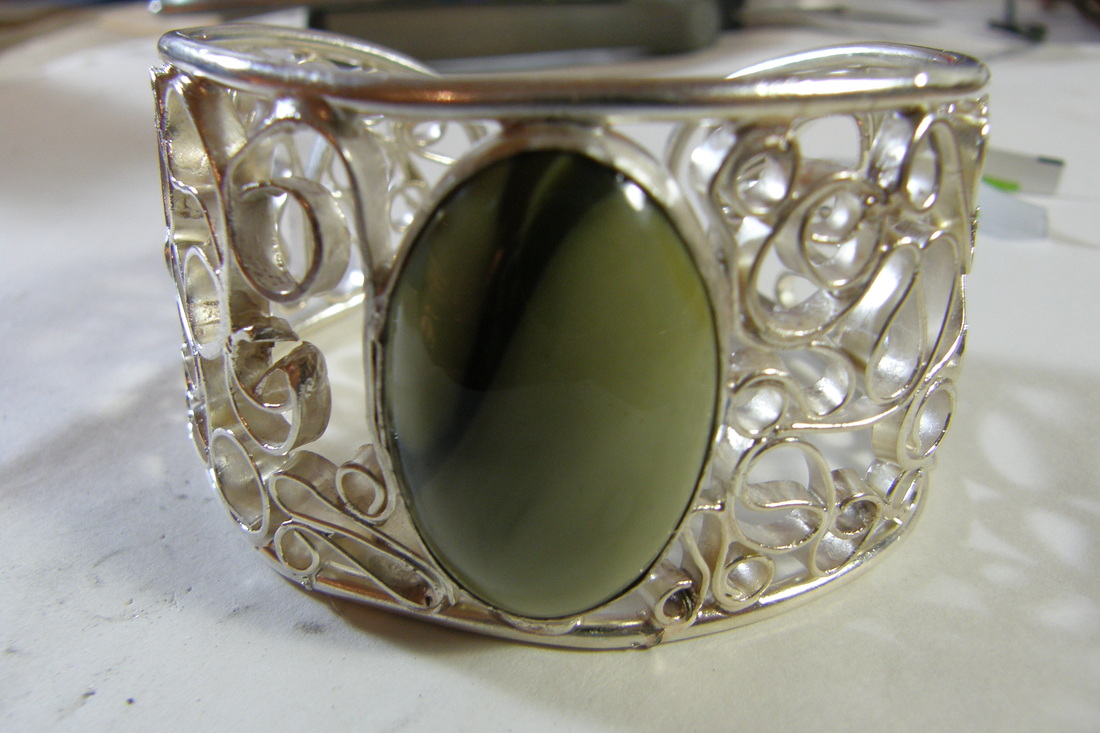
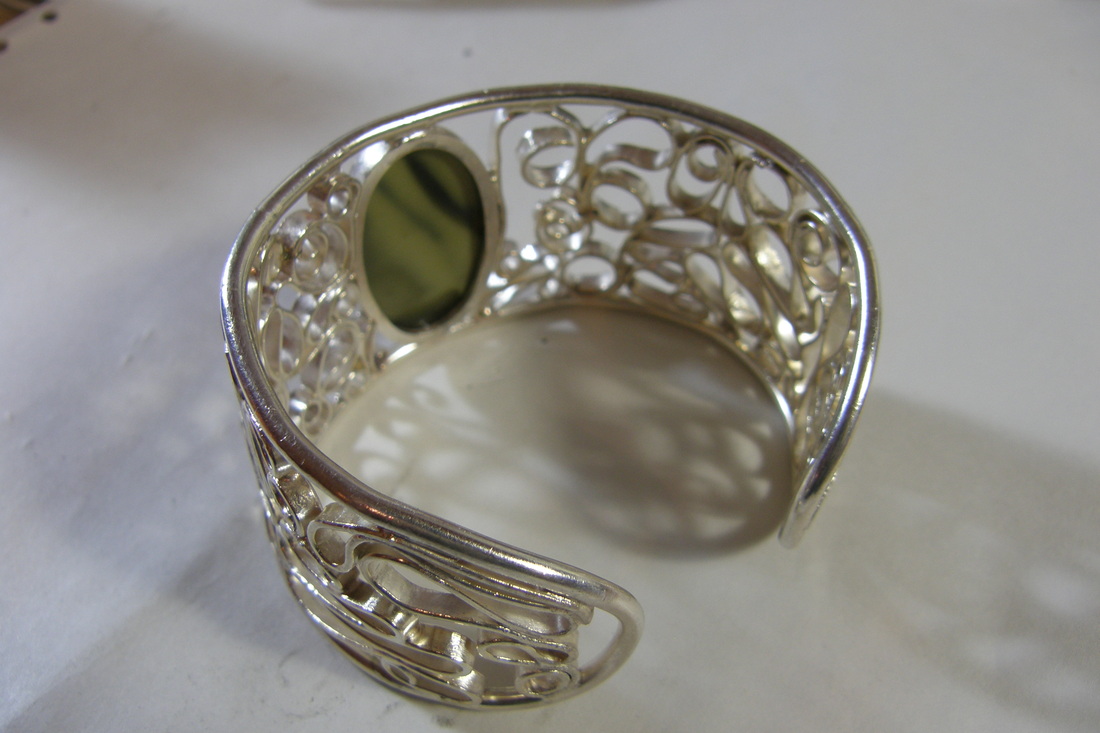
But yesterday I did not stay home, I went to Diane's where with Sandy; the three of us started another cuff. I am doing a ginkgo cuff, Sandy is doing spirals and Diane is doing the dogwood flowers - all designs from Davide Bigazzi.  Diane did the ginkgo and I did the dogwood while at his studio last month. None of us did the spiral but we are helping each other so they will be easier than if we have no help!  Here is a photo of the cuff's from that workshop, in progress.
Picture
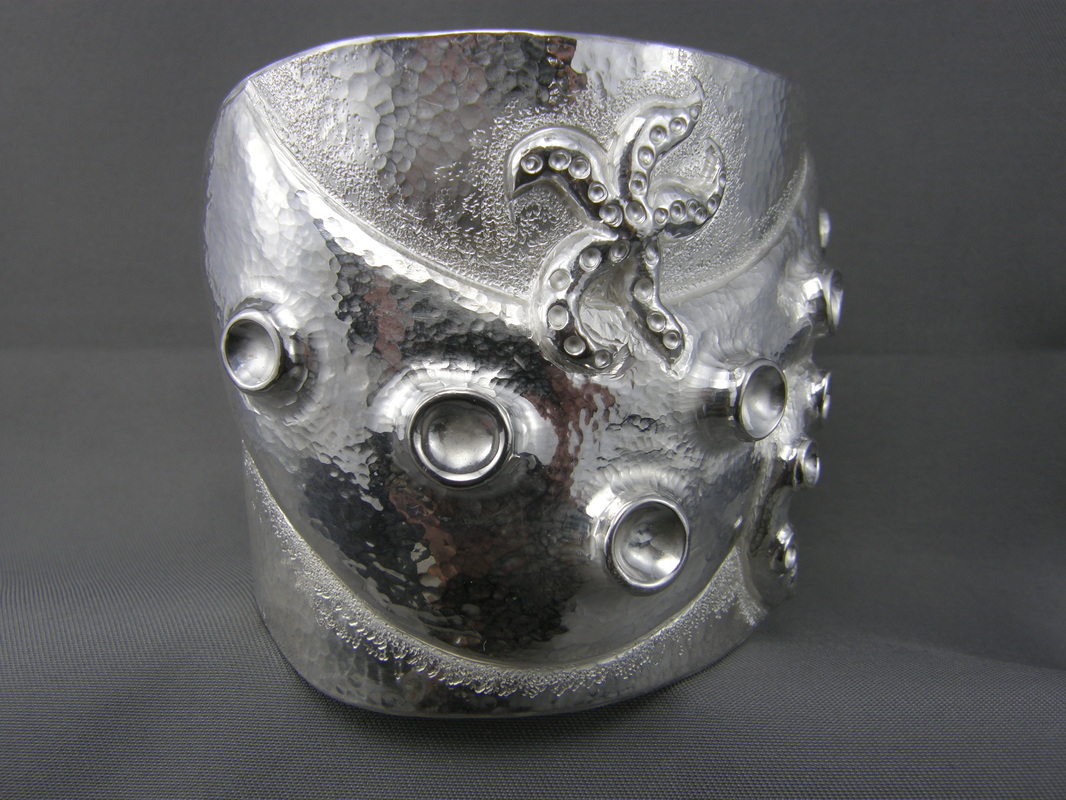
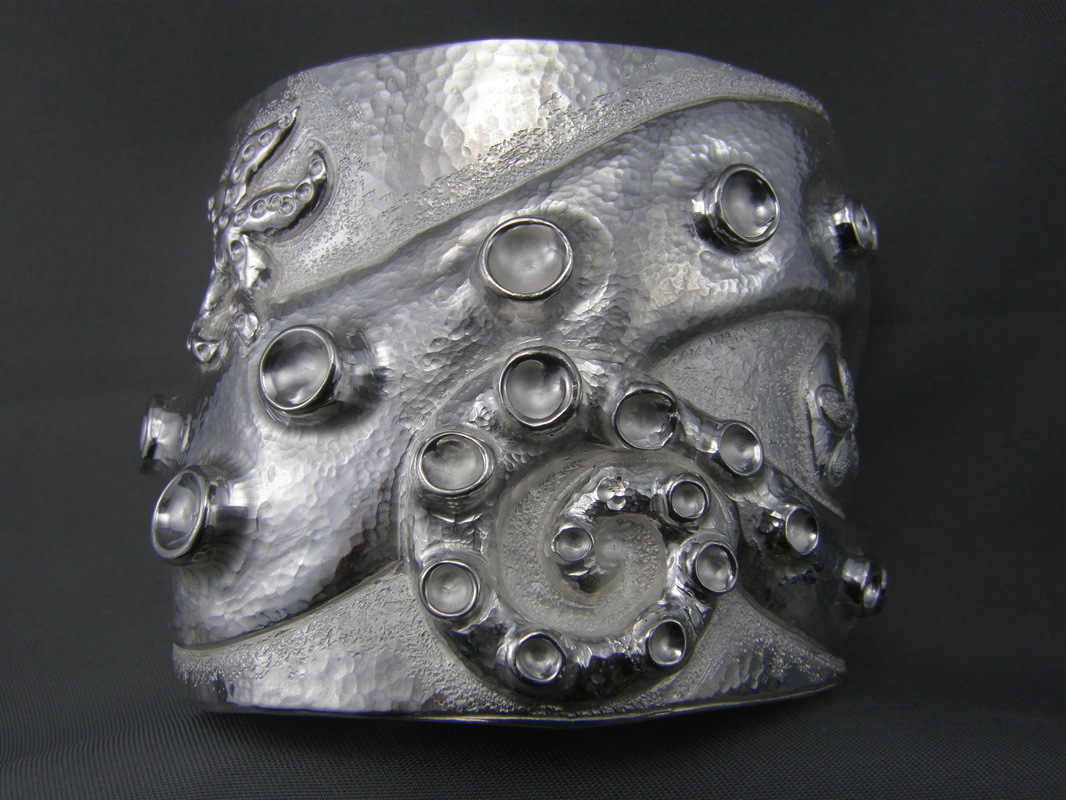
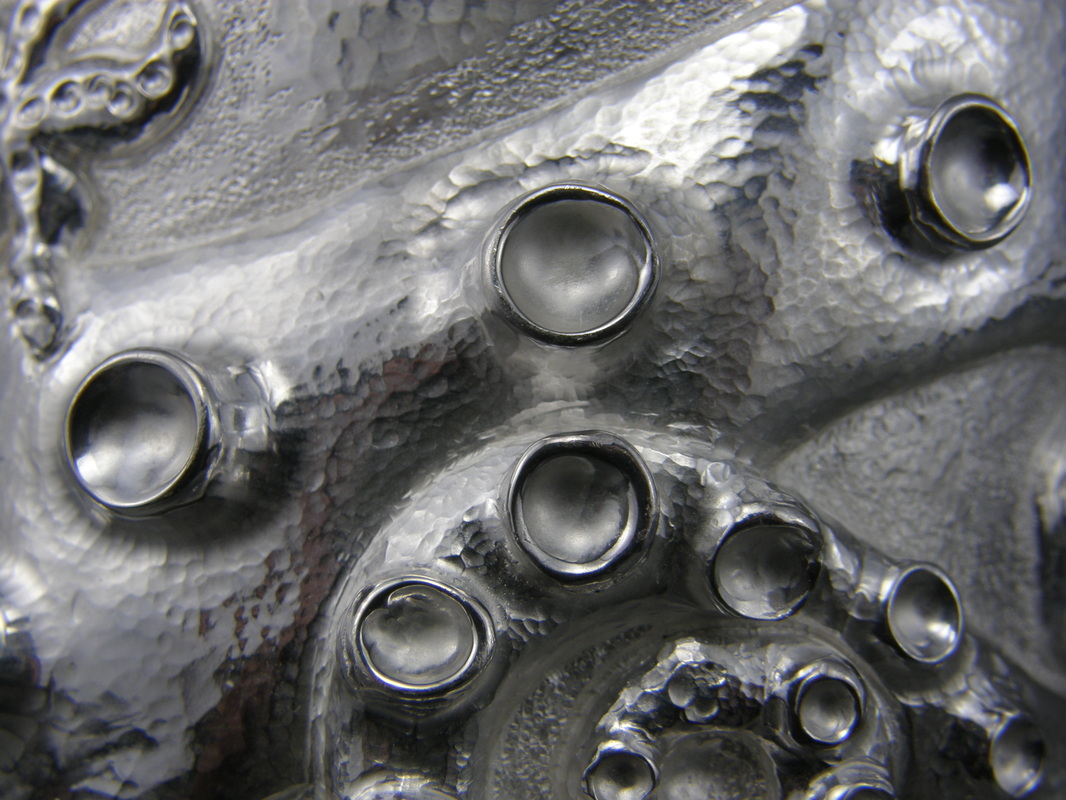
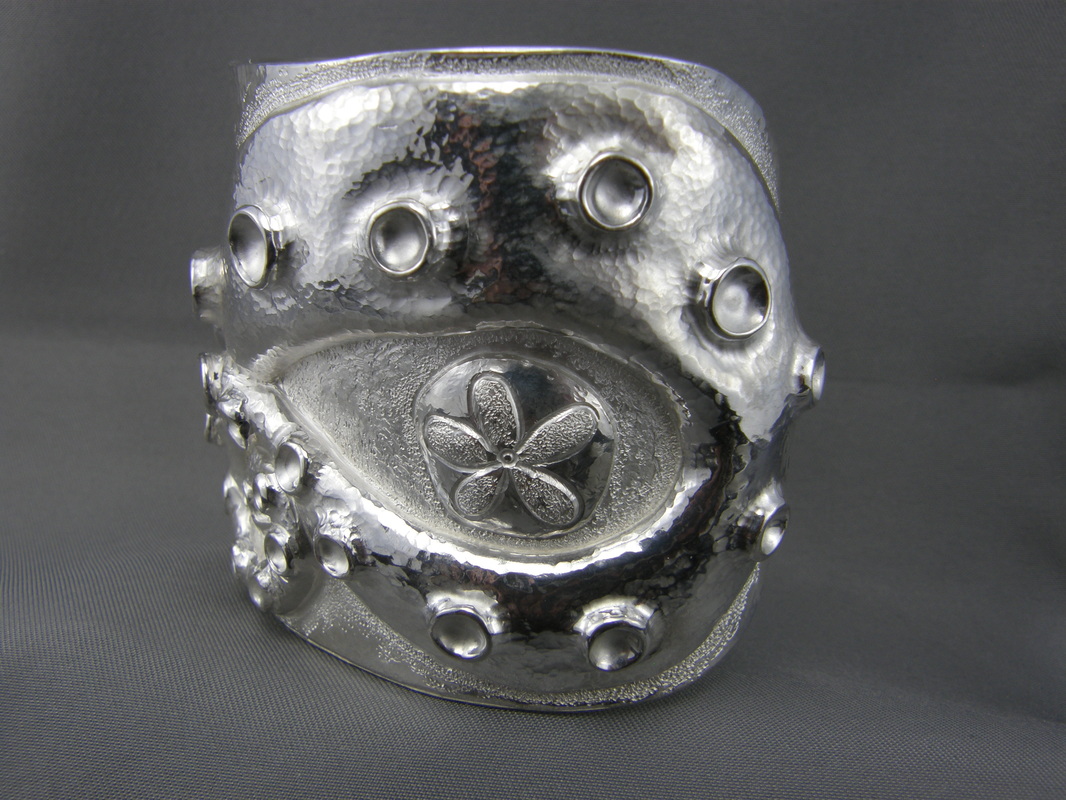
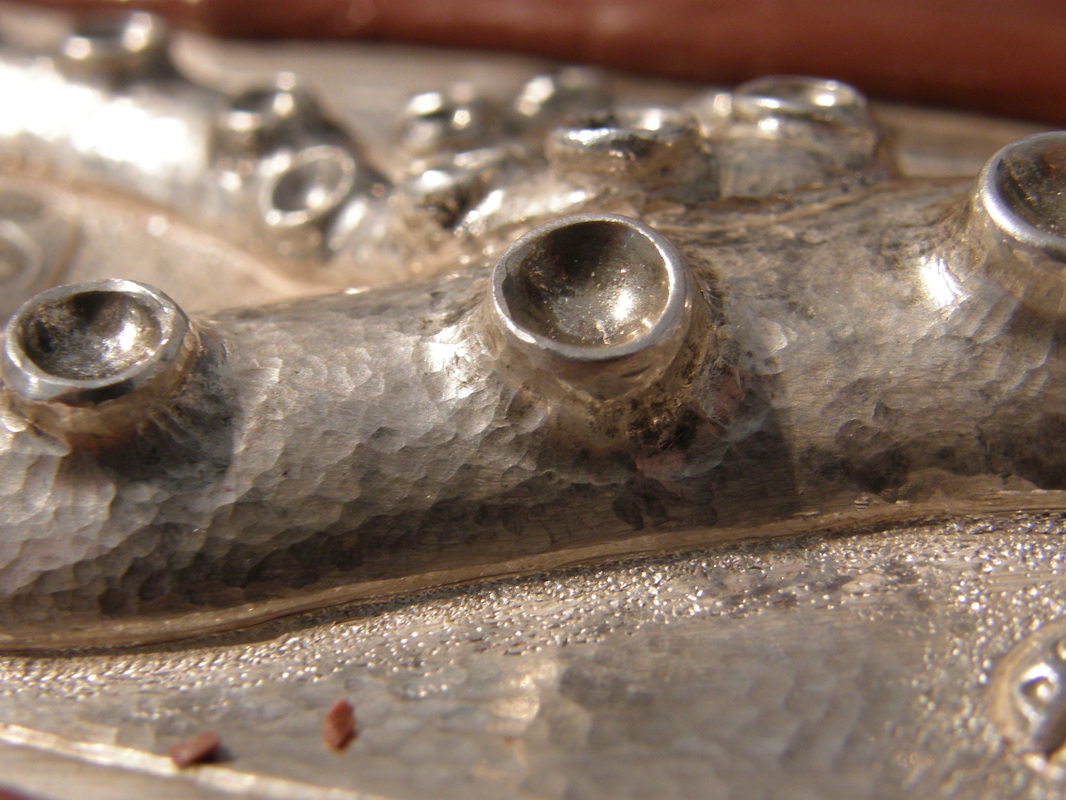
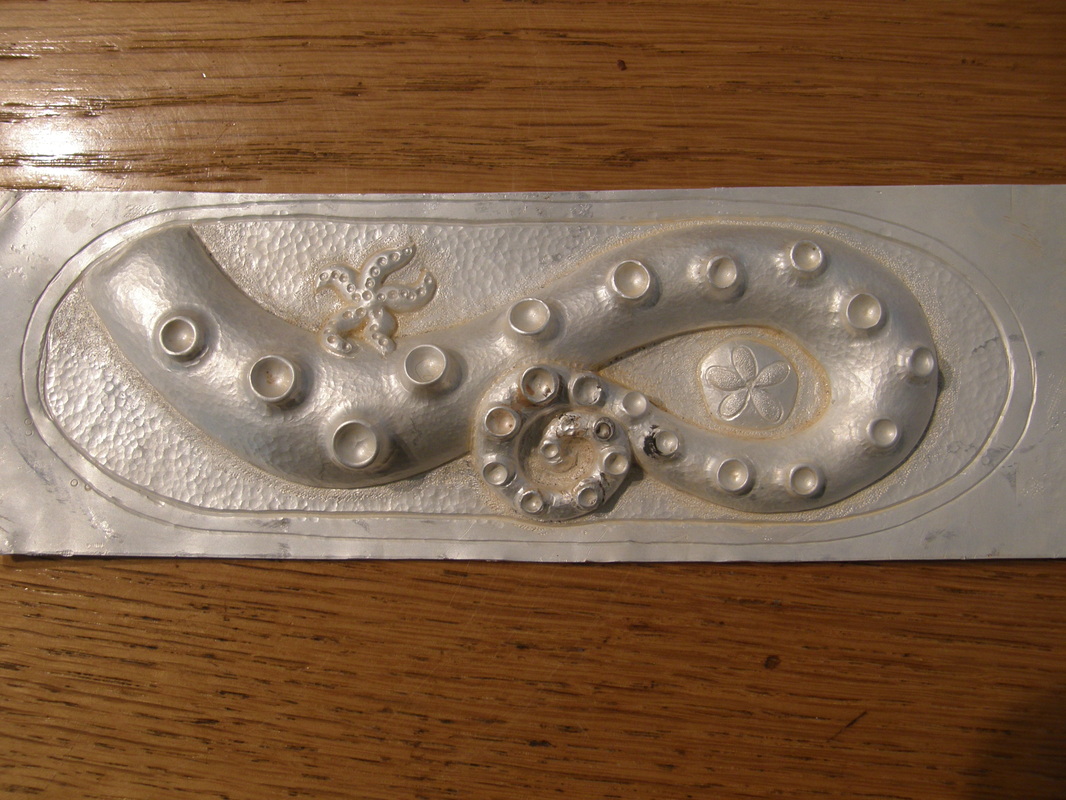
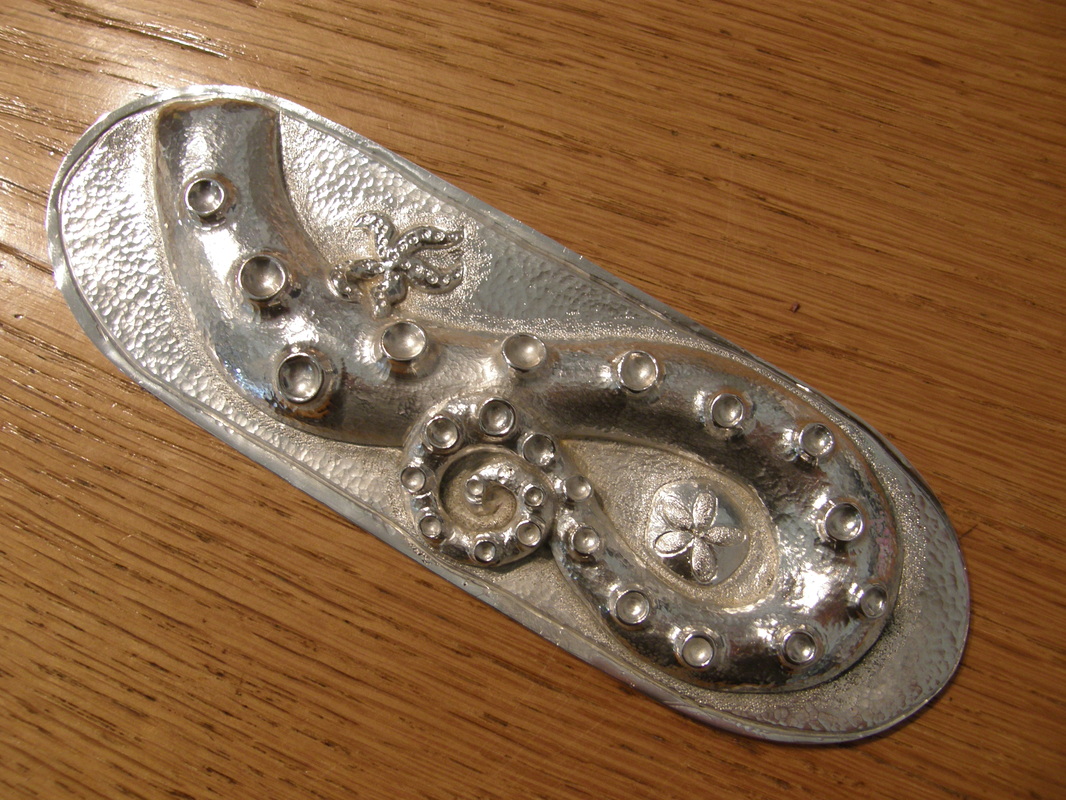
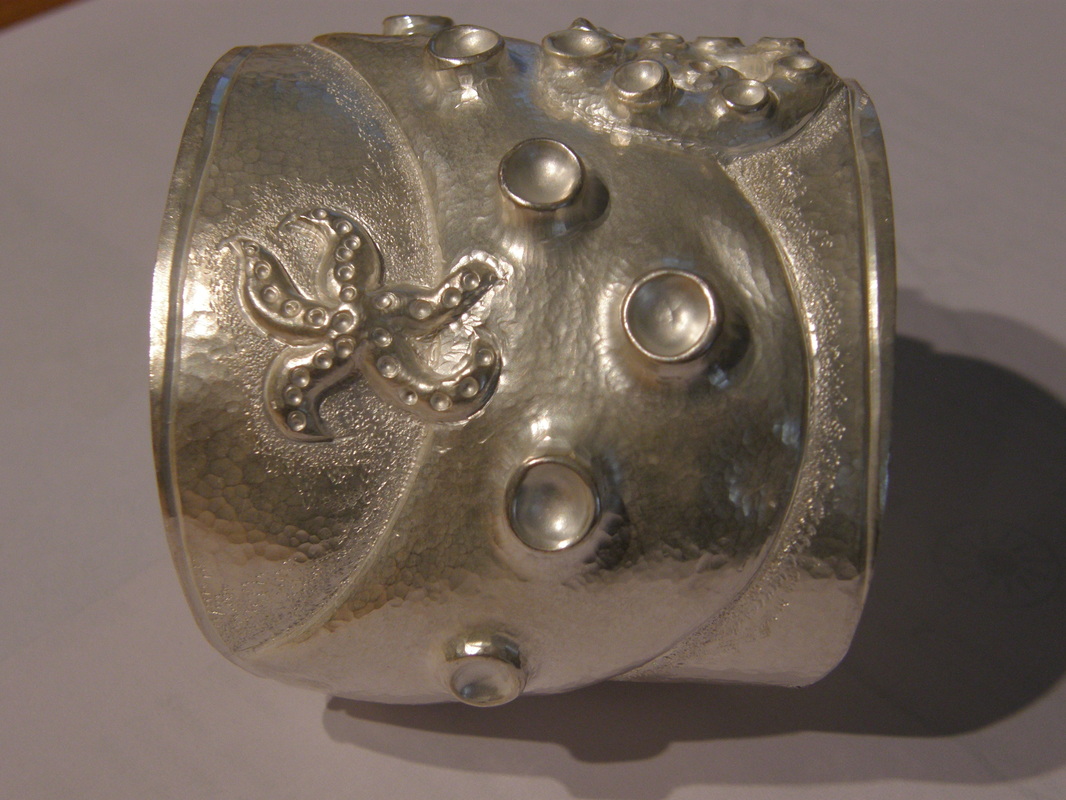
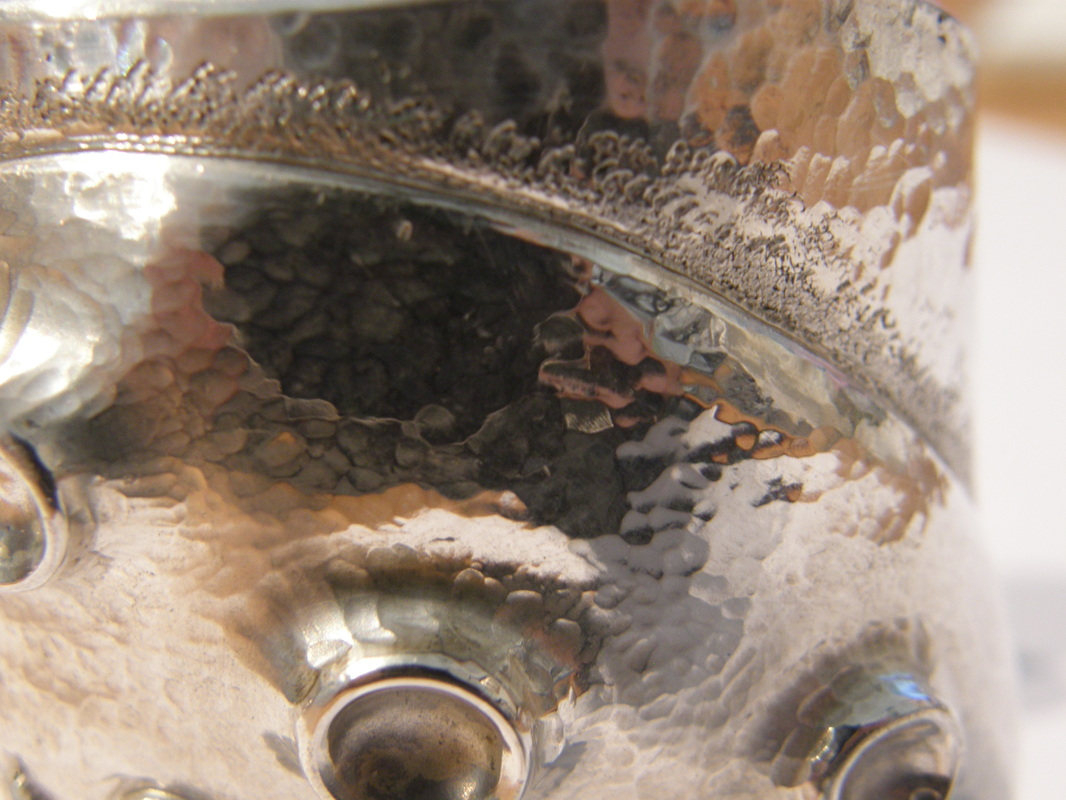
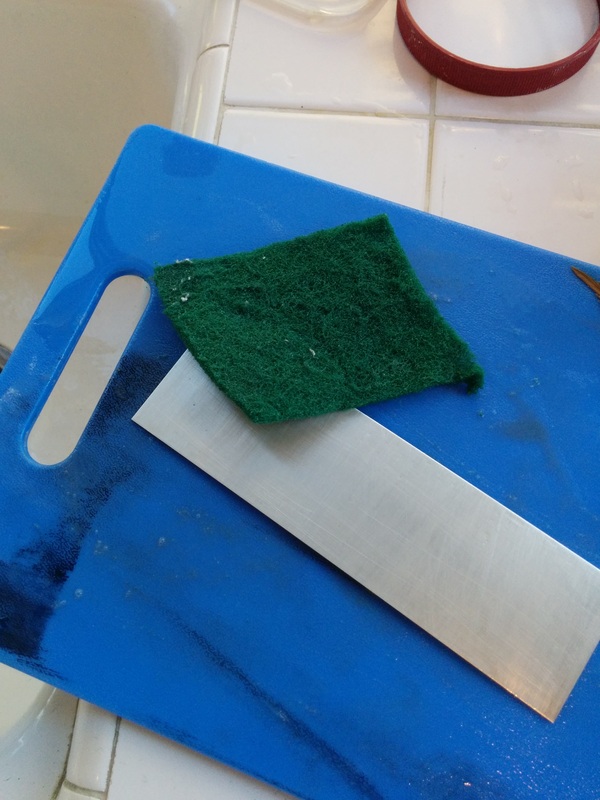
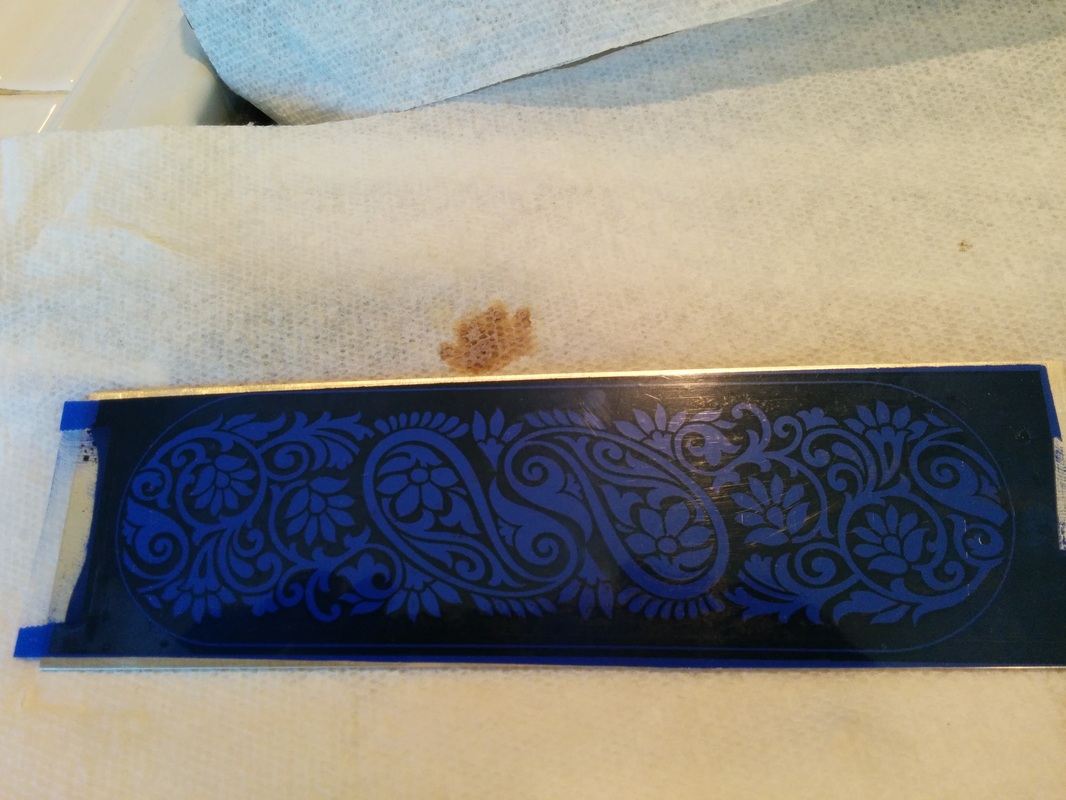
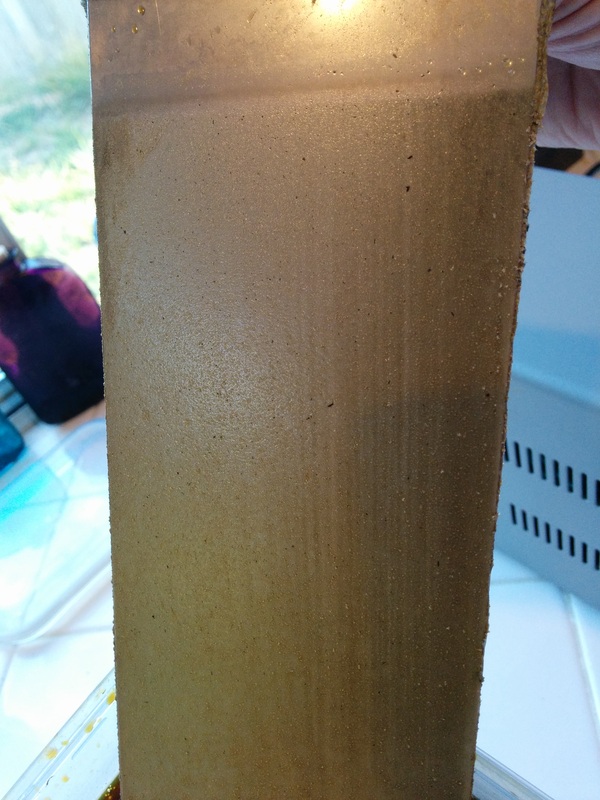
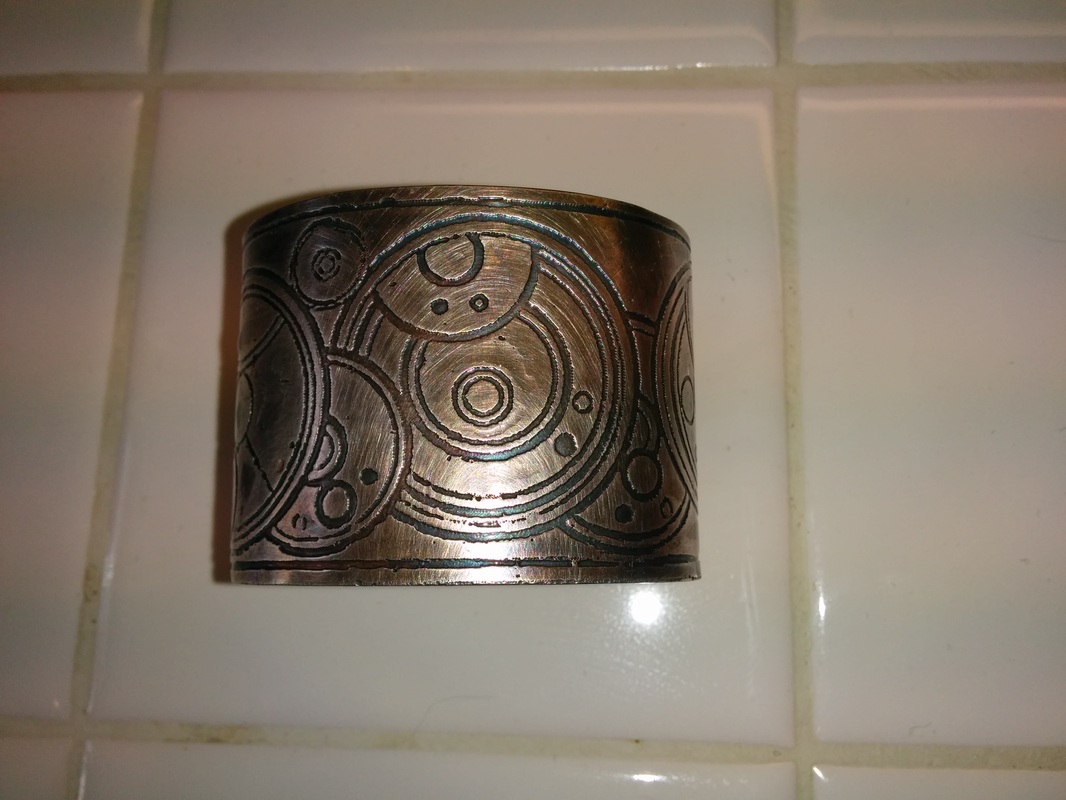
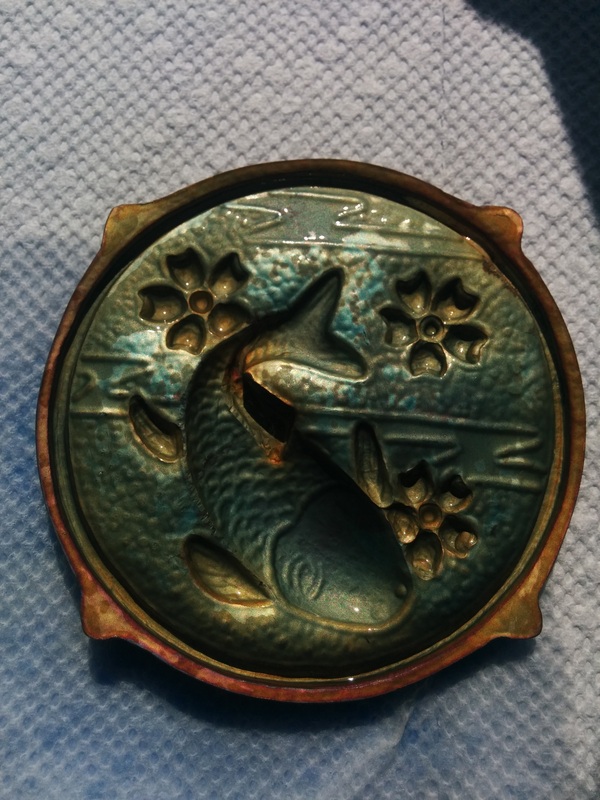
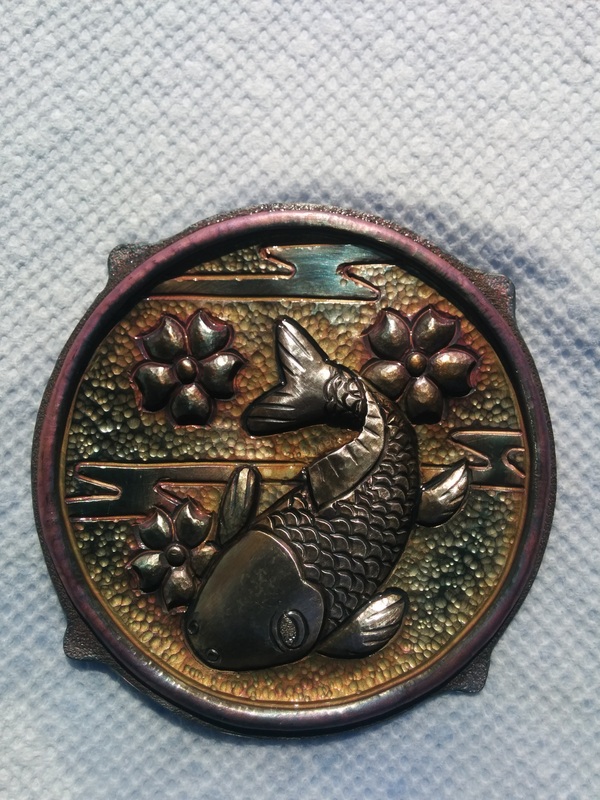
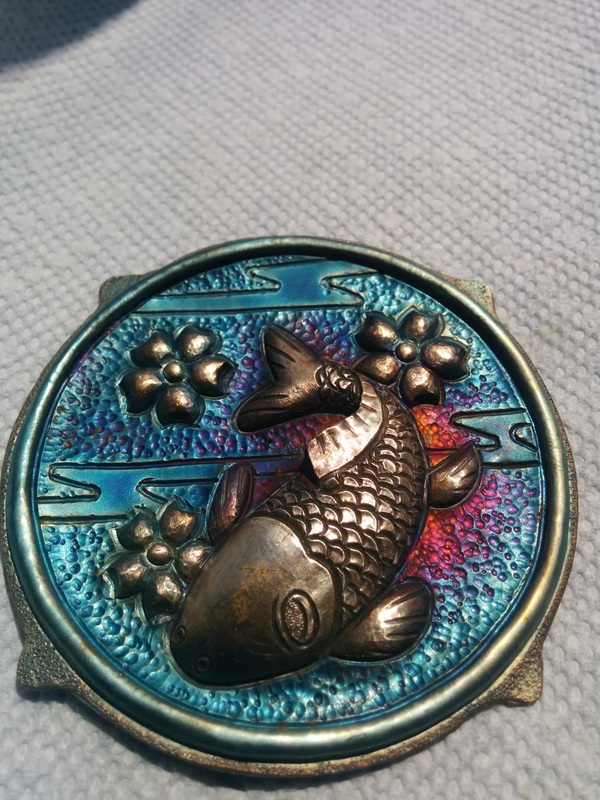
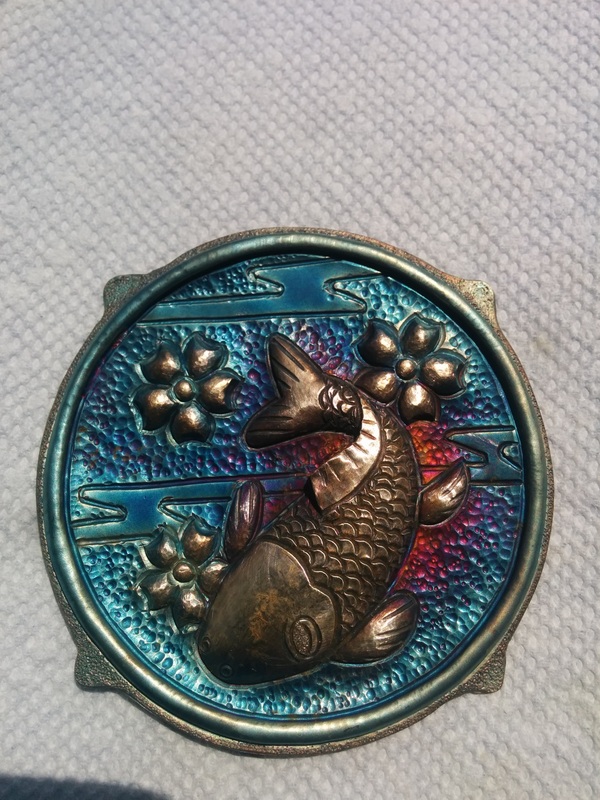
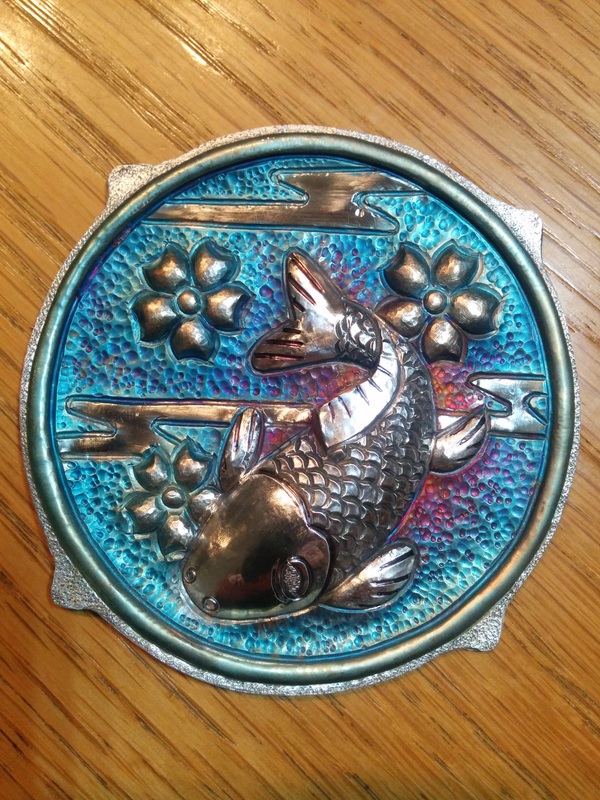
Today I am working on the last of the repousse for the ginkgo's and I am just about to start the chasing. I am also depletion gilding a sterling silver cuff that I will add some keum-boo to. I have also repositioned the Sea Urchin II in the pitch pot so I can finish up that repousse.

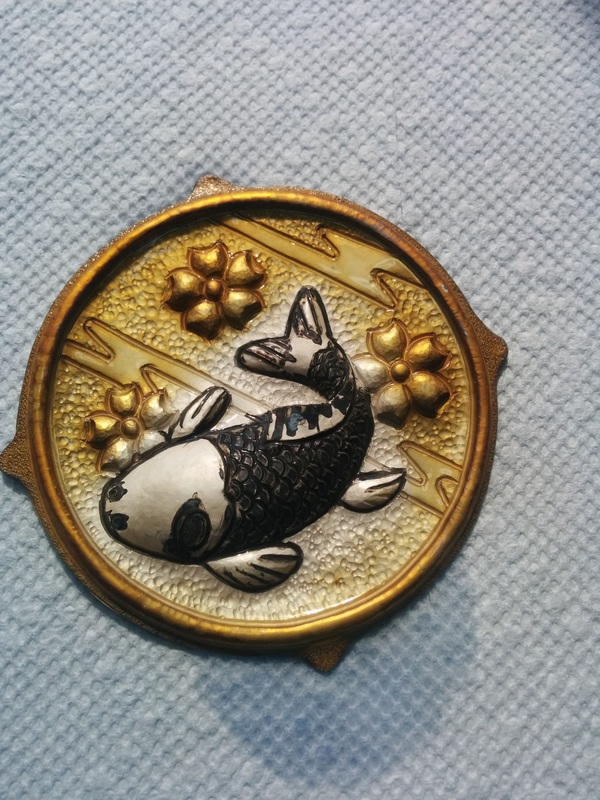
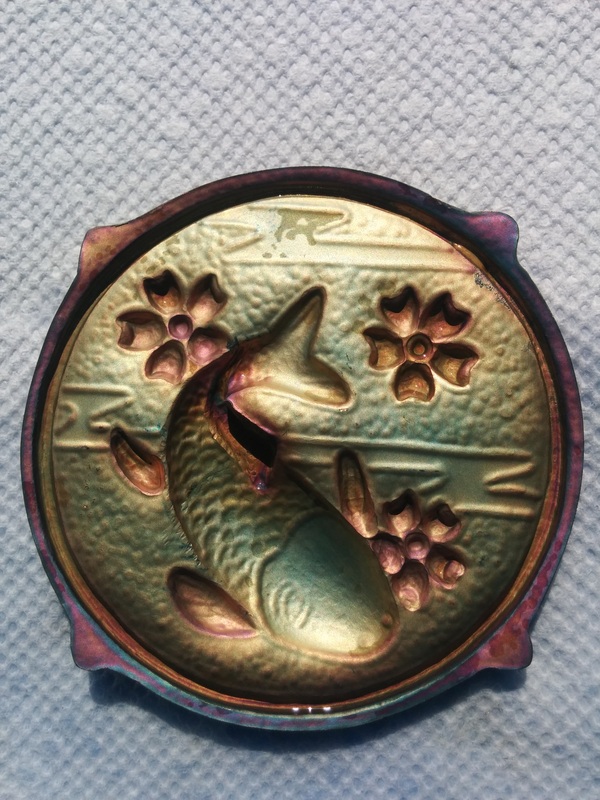
Tomorrow I hope to finish the keum-boo cuff - polishing, forming and patina; and maybe the chasing on the ginkgo cuff. 

Pictures tomorrow of progress or finished work!
0 Comments

More Ring Bling

4/18/2015

0 Comments

 
YUP, I made another ring. This is a banded agate that I bought at the same time as the druzy quartz (and there are more that are waiting). I started the setting along with the druzy's and today I finished it. 

But before I did, I cleaned up my workbench from yesterday cause I could not the setting or the stone under it all. 

I took some of the scrap bezel and made some silver balls which I soldered to the 4 points of this bezel, then soldered the shank on and polished it up. I placed the setting in my ring clamp which I then positioned in my vice. then using a small Japanese chasing hammer and 2 different sized planishing tools I set the bezel. 

Voila, it is now on my hand and it is BIG and BLING!
0 Comments

I Made A Ring

4/17/2015

0 Comments

 
Two years ago when I was in Tuscon for the Gem & Mineral Show AND a workshop with Valentin, I found this druzy quartz that had been vapor coated with titanium. The color is this great blue green and I had to get it despite not really liking making regular jewelry. 

And there, in my stash, the stone has sat for two years. 

With the stress of work and life, I decided a few weeks ago to make a ring with the stone.  The only issue was the bottom of the stone is NOT flat.   I finally decided to do a stepped bezel that would still be soldered to a flat sheet, so attaching the shank would be easier. 

I have not made a ring in 4 years and as a result I created a bit of scrap getting the bezel and step just right.  I also had to grind the bezel down a bit since one end it taller than the other. 

But who cares I now have the ring!!  

Here are two pictures of the stone - you can see how the bottom is rounded. Then some pictures of the stone in the ring before I pushed the bezel in and lastly two of it on my finger with good light so you can see the colors. 
0 Comments

The Tenacious Tentacle - AYoR #8

12/28/2014

2 Comments

 
This is the last project for my Year of Repousse personal challenge.  I knew that attempting 12 projects would not be possible and my goal was to complete 6 and with this final piece, I have completed eight.

This was started as part of the FB group (Chasing & Repousse) Challenge #1 - Octopus. 

For this months project, I decided to do an altoid tin as a present for a friend.   I used a palmette which is a palm leaf design that go back to the early Greek and Egyptian civilizations. 
  
This project was completed over the course of 2.5 days.  The lining was done Thursday night, Saturday I started the repousse. Today I finished the repousse, a bit of re-lining and the texturing around the design. 

Project Name:  Tenacious Tentacle 
Material: 18 g (0.40") Sterling Silver

Related Posts:  Take that Sucker!, Disaster, Panic, Call 4 Help, Plan of Action and 2 Diversions, How to Transplant an Octopus Sucker, 
Back to the Octopus, Finishing the Octopus Tentacle

Major Points:
The design was hand drawn and figuring out how to form the suckers was a good practice point. The members of the Facebook group were wonderful in providing ideas, suggestions and support during the set backs and moving forward.  This project was completed over the course of 7 months - it sat for almost 3 months due to other priorities, but I never gave up. I knew I would finish it and holiday weekends are just the time to regain focus. 

Lessons Learned: 
  • High relief cuffs are hard to bend and form!
  • How to solder to repair.
  • 18 gauge cuffs are hard to form,  anneal as needed.
  • If a challenge presents itself, it is ok to step away and to let the project sit for a while until you are ready to finish it. 
2 Comments

Finishing the Octopus Tentacle

12/28/2014

0 Comments

 
Last weekend I finally got back to the tentacle and on Thursday (Christmas Day) I was able to finish over half the remaining suckers and the planishing and some of the texturing. That left only 6 more suckers to do on Friday. 

I finished up the suckers around 2pm and then removed the cuff from the pitched and cleaned it up. I then did a bit of trimming of the metal around the cuff and at 4pm the shop elf and I went to the vise with the bracelet mandrel to start the forming (which is bending).  The shop elf would hold the metal against the mandrel and I would use a nylon tool i made, to hammer the cuff down and on to the curve of the mandrel. 

TWO hours later and several annealing, the cuff was formed.  

I still had some (cuff) forming to do and some more trimming of excess metal but I decided to leave that until today. Yesterday I took a break and went wine tasting with my metal friend Lisa Kim - we both needed a day of fun. 

Today I have completed forming the cuff, the final trim of the metal, pre and final polish. 

Currently the cuff is in the ultrasonic cleaner.  I am off to take the pretty pictures and they will be in the gallery soon

Enjoy the process pictures below, as usual
0 Comments

Would you like to see my etchings??

10/26/2014

0 Comments

 
Almost two years ago, I took a class on etching silver, brass and copper. And then it all sat since I was focusing on Chasing & Repousse. 

This weekend I returned to the technique to have fun with the ladies at the Palomar Gem & Mineral club.  There were 6 of us most everyone etched copper with a salt solution since I think it was their first time etching. 

I decided to etch sterling silver and because Annie is allergic to base metals she wanted to etch fine silver and that was what the two of us did with my power supply. 

When I was at the club I etched the design in the second picture for myself on 18 gauge silver. I also did two pair of free form painted earrings. Annie was able to get several small designs etched which I gather she will work into other pieces of jewelry. 

When I got home, I etched two more pieces of 18 gauge silver. One should have been some music but the notes and bars of the music were so fine that PnP resist would not work. It was then that I decided a paisley pattern would work wonderfully.  

Since the shop elf  had been an electronics tech and worked with circuit boards before, he never seen this done with silver he did enjoy seeing the etching up close. 

After all of that I trimmed the silver, applied some patina; I domed the earrings and formed the cuffs. 

And here we are.  You know what comes next - Enjoy the pictures 
0 Comments

Patina Plight

9/8/2014

1 Comment

 
Picture
I spent this weekend finishing the silver Koi Kuff and that entailed patina, bending, cutting out the leather for the cuff, adding the snaps and then riveting the medallion to the leather.

But this blog post is about patina.

Producing a Liver of Sulfur (LOS) patina is alchemy. Especially with Fine or Sterling (I don’t use Argentum so I don’t know about that)

If the metal is not clean, you will have areas with no color

Too much LOS and the metal will go grey and black almost instantly.

If the water is too hot the colors will change really fast and again you can get a grey or black patina.

If everything is JUST right – water temp, clean metal, amount of LOS – it is a Goldilocks moment. The colors you can get will be perfect.  The only thing you may not like is where you get the colors.

Here is the picture of the first patina I had on the Koi. It really is perfect and I should have stopped there.
Picture
But I saw blues. I wanted blue and I so I went back to the LOS and dipped some more.r. And the blues that appeared were amazing.  

Picture
But after I cleaned the koi and water I realized that the deep blues were also in the fish, around the scales and I saw that the koi was getting lost. It was no longer the focus of the piece, the BLUE was. 

I then used Jax Blackening solution to darken the areas around the scales (sorry no picture) but the liquid dropped on the water in two places and the back ground patina was ruined.   At this point I had to remove it ALL and start over. 

This time I decided to add the black, around the fish,  first as then the LOS on top of the back would not make a difference. 

I mixed up my LOS and started dipping and I realized that the LOS was too strong as the gold was developing too fast and it moved past blue to the blue gray. 
It was time to start over AGAIN. 

I made a very weak LOS solution with cooler water and started to dip.  The colors started to develop and slowly the gold appeared and then blues around the rim. I rinsed and let it dry and then I knew I should stop. 

I then sealed it; which will darken the colors but if you go slow, and not flood the piece, the colors will stay.  Then it was bending and riveting.

Here are the picture of the final time .
The medallion has been bent and riveted to the leather cuff. 
1 Comment

A Hundred For One (more)

2/15/2014

0 Comments

 
As I wrote in my last post  I had joined a project called "A Hundred For One" which is a project to benefit CERF+ 

A LOT HAS HAPPENED SINCE THEN

What is important is the project suddenly hit critical mass.  When I signed up, I was #81 on the list and the number of links was going to be limited to 100. Just before I left for Tucson (I went to Tucson for another chasing & repousse workshop but that will be another post when I put the finishing touches on the project. ) I mailed the link off to the organizer Peter D'Enbeau and soon after I arrived I found out my link was #60 on the chain.

And thanks to Peter's idea and people talking about it in the Facebook group, suddenly we had people from all over the world asking how to participate and could they still send a link and it looked like there would be over 100 links. 

Then Peter headed out to Tucson too and while he was gone, I think the postie went on strike and just gave up trying to deliver all the packages to Peter's shop.  It was two trips to the post office to pick up all the bins. (UPDATE: According to Peter there were 70+ waiting for him when he got home)

Now we have people who have volunteered to find out about crowd funding the printing of books and posters so more money can be raised for CERF+ plus some other ideas that are being tossed about. 

Here is a link to the public group, on Facebook if you want to find out more.  This should work for those of you who don't have a FB account.

And the work is amazing.
Here is a photo of the chain so far - this does not have all the links that arrived last week and links are still arriving. The number of links so far (on and off the chain) is over 140!

Picture
0 Comments

Massive Filigree

10/20/2013

 
This project has been sitting on my workbench since before the summer. I had made the frame and the bezel setting and there it sat and then got buried under the papers, tools, files and other stuff that piles up as we work on other projects and then never put the stuff away. 

Last Sunday, I did spend the day putting all that stuff away and finally exposed folder with the project. Don't get me wrong, I did not loose it under there; I knew it was there but first it was avoidance and then other projects took priority.

It was time to finish it. 

Forming and fitting the filigree takes time and I was uncertain if I would really FINISH it but my goal was to at least have all the filigree done as I could do the soldering another day if need be. 

I started bending and scrolling and wiring in place around 10:00 am.  I started to solder around 3:30pm; that took several rounds of solder, pickle and cleaning to get all the joints done. I then soldered the bezel in and had the stone set by 6 pm. 

Once again, here are some process pictures. As usual, click an image to see a larger version and read the caption

Montana Agate Ring

3/10/2013

 
Now a days, I don't make jewelry very often but when I do, I make stuff like this!
Picture
The agate was purchased while I was in Tuscon, I just had to have it since the scene just called out to me.  

I had been playing with which way to orient the stone it since I got back - vertical, horizontal, around and around but it had horizontal BECAUSE of the scene.  


Then, because of the translucent nature of the agate, the bezel setting is opened backed.  And to further aid in light getting behind the stone, connection between the bezel and the shank is formed such that it raises the bezel off the (my hand) .

Here are a few more pictures showing the setting and how the shank was formed such that it raises the setting off of my hand.
<<Previous
Forward>>

    RSS Feed

    How to Aquire Your Own Shop Elf

    Archives

    October 2020
    August 2020
    March 2020
    December 2019
    November 2019
    October 2019
    September 2019
    August 2019
    July 2019
    June 2019
    May 2019
    March 2019
    February 2019
    January 2019
    December 2018
    November 2018
    October 2018
    September 2018
    August 2018
    July 2018
    May 2018
    April 2018
    February 2018
    January 2018
    November 2017
    October 2017
    September 2017
    July 2017
    June 2017
    May 2017
    April 2017
    March 2017
    February 2017
    January 2017
    December 2016
    November 2016
    October 2016
    September 2016
    August 2016
    July 2016
    June 2016
    May 2016
    April 2016
    March 2016
    February 2016
    January 2016
    December 2015
    November 2015
    October 2015
    September 2015
    August 2015
    July 2015
    June 2015
    May 2015
    April 2015
    March 2015
    February 2015
    January 2015
    December 2014
    November 2014
    October 2014
    September 2014
    August 2014
    July 2014
    June 2014
    May 2014
    April 2014
    March 2014
    February 2014
    January 2014
    December 2013
    November 2013
    October 2013
    September 2013
    August 2013
    July 2013
    June 2013
    May 2013
    April 2013
    March 2013
    February 2013
    January 2013
    December 2012
    November 2012
    October 2012
    September 2012
    August 2012
    July 2012
    June 2012
    May 2012
    April 2012
    March 2012
    February 2012
    January 2012
    November 2011
    August 2011
    July 2011
    June 2011
    May 2011
    April 2011
    March 2011
    February 2011
    January 2011
    December 2010
    November 2010

    Jan - Nov 2010 History
    File Size: 2272 kb
    File Type: pdf
    Download File

    Jan - Dec 2009 History
    File Size: 2332 kb
    File Type: pdf
    Download File

    Categories

    All
    42
    A Year Of Repousse
    Blacksmithing
    Blogoversary
    Box Project
    Business
    Chasing & Repousse
    Commission
    Education
    Embroidery
    Enamel
    Entries
    Entry
    Exhibition
    Facebook
    Filing
    Fold Forming
    Gold
    Holloware
    Hot Forging
    Hydraulic Press
    Jewelry
    Keum-boo
    Learning
    Leather
    Market
    Metal
    Patina
    Photography
    Polishing
    Publications
    Raising
    Sanding
    Santa Fe Symposium
    Shop Elf
    Sinking
    Social Media
    Soldering
    Store
    Studio Visits
    Superbowl Challenge
    Teaching
    Teapot Project
    Technique
    Temari
    Tin
    Tools
    Vessels
    Visiting Workshops
    Weaving
    Website
    Workshop
    Yubinuki

Powered by Create your own unique website with customizable templates.