Follow Me On:
The Adventurous Silversmith
  • Home
  • Blog
  • Portfolio
    • Metal Work >
      • Chasing & Repousse
      • Holloware
      • Jewelry
      • Other Wonderful Items
    • Fiber Arts >
      • Temari
      • Yubinuki
  • Resources
    • Library
    • Tools & Equipment
    • Links
  • About
    • Artist Statement
    • Curriculum Vitae
    • How it is Made
    • Contact

A Good Day at the Soldering Station

6/17/2012

 
I have spent at least 3 hours today soldering and yesterday I probably spent another 2.  I am soldering the decorative rings on the second chasing & repousse canister I am making. I finished the first two rings I started yesterday and I also finished the second two (There are rings at the top/bottom of each piece and on the lid and the body where the two halves meet)

The primary purpose of the two canisters is of course to hold my chasing & repousse tools. But the other goals of these projects were to:
  • use a lapped seam on one canister
  • use a keyed seam on the other canister
  • make a post slide and twist locking mechanism
  • improve my soldering skills.

I have to admit that I have never been good at soldering. Part of it is my fear of getting burned.

I spent two summers in college doing welding and brazing (mostly with copper and aluminum) and I got caught in a torch "explosion". The torch was not put on the hose correctly by someone else and then when I lit it, there were flames  everywhere and it started to melt the hose. I did not get badly burned but I certainly got singed.  

I am not afraid of fire nor do I have a problem with my little butane torch, or when I am annealing with my propane/air torch; my problems happen when I am using big torches and soldering. I don't like getting my hands near the flame to apply the solder.   

As a result, when I am soldering big pieces I usually get solder everywhere because I won't hold my hands near the flame and then they start shaking and I just want to get it over with and have bad heat control.

Over the past 2 months that i have been working on these canisters (with Deb's help) I have learned that:
  • The piece won't melt right way.
  • Use lots of flux and learn when it gets glossy and up to temperature
  • Place a few pieces of solder on the joint so you know when the piece is hot enough and the solder will flow. 
  • You can move the flame to the side to place more solder. 
  • How to feed the solder in using the stick soldering method (and if you aren't nervous, it wont shake and get ALL over the place)
  • Control the heat and you really can see the solder flow down the joint
  • GO SLOW and BREATH.

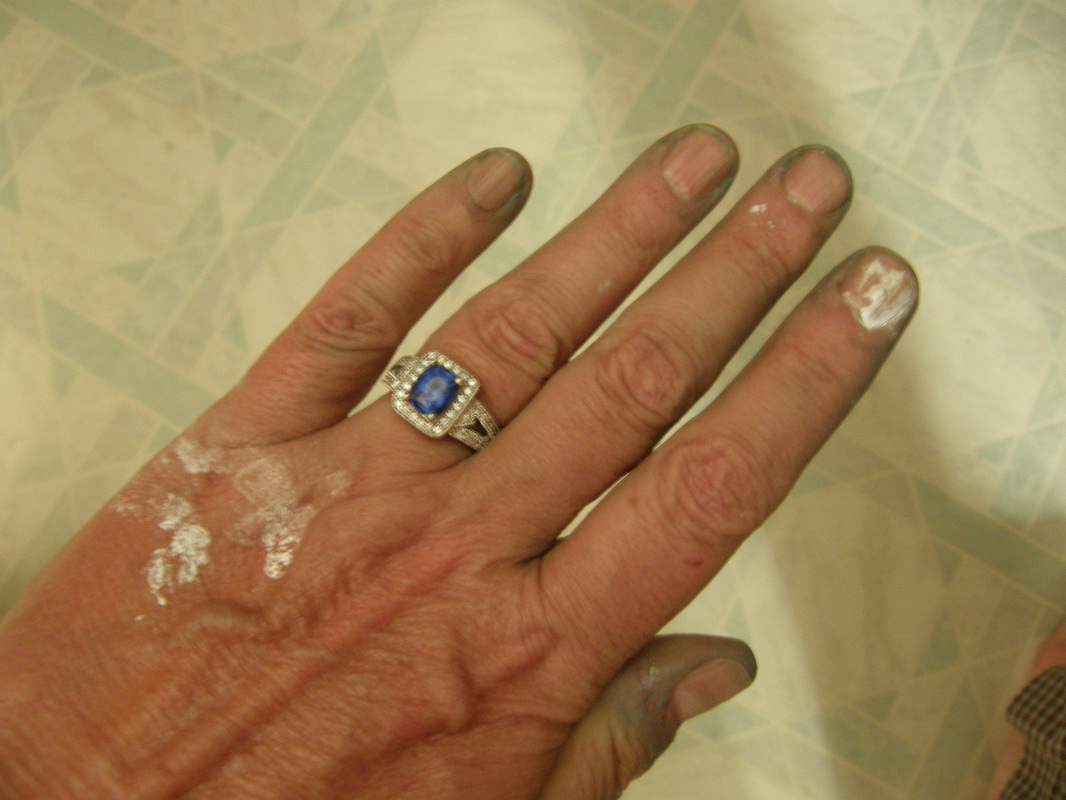
And today I have to say I did an excellent job. I won't have a massive amount of solder to clean up and I stick fed almost all of it. Right now the halves of the canister are in the pickle but below is a picture of my left hand showing the result of my time at the soldering bench.
Picture
Dirty Hands. Yes, that is green around my nails

Further Progress on the To-Do list

4/30/2012

 
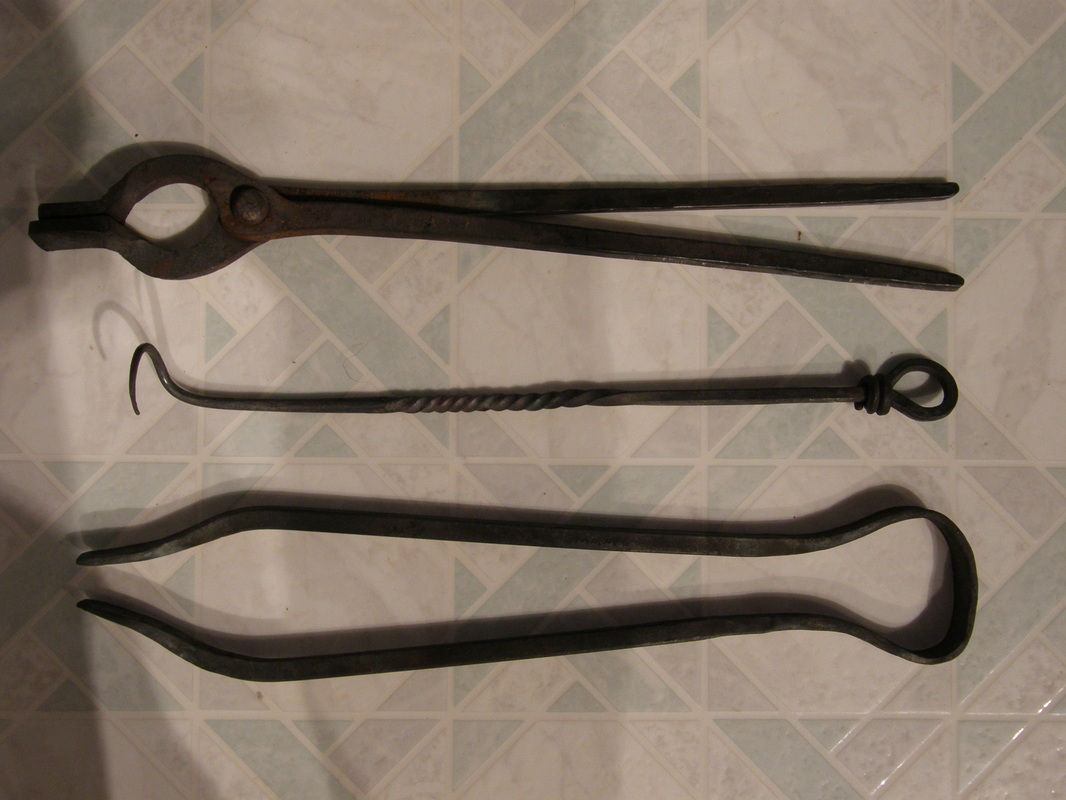
Saturday I completed Intro to Blacksmithing at the Vista Forge. I can now join the CBA and sign up for Blacksmithing 1.
I have a picture of my 3 items - Blacksmith Tongs, Steak Turner, and BBQ Tongs and I will add it to this post but later in the week.

Yesterday I had another session with Deb and sorry but no pictures as we got too busy and I did not take in process pictures, but I will try to post a picture or two of where I ended (again later). What I worked on is also on my ever shrinking and growing metals to-do list.

I did make major progress not only on making my canisters (to hold my chasing & repousse tools) but in learning how to solder big volumes of copper.

I have the top and bottom soldered on the two halves of the first canister. We also have all four rings decorative rings soldered on. There is a ring at each end of the two halves(lid and body of the canister) and we have the rings at the ends of each, where the two halves will meet and lock. We did not get to the locking mechanism (a peg and twisting ).I have to clean up the solder from all of this but I can take the first one with me to my class in 3 weeks.  Then when I go to Debs in June, we will finish the locking mechanism.

I also had the sheet and prepped to start another canister so we soldered the sheets (lid and body) into cylinders and have the top and bottom plates done as well. By June, I should have the 4 rings made and if possible soldered on each piece.

FYI the first canister has the lid slightly larger in diameter than the base section and it slides over part of the base wall. The pegs will be soldered to the inside the lid walls , 180 degrees apart and just above the ring at the bottom of the lid.  Then the slots  (L shaped) for the pegs will be cut in the base wall above the top ring on the base. The lid will be aligned in the upright part of the L and slide downward until the lid ring meets the (upper) base ring. Then the lid will be turned so the pegs move into the horizontal section of the L.

Because the lid is slightly larger in diameter than the base, it does not give a smooth transition along the body, It looks like a stacked pillar. This is why I started the second canister. The lid and the base ARE the same diameter and the rings where they meet will be flush when they meet with just a small groove between them.  It will have the same peg locking mechanism but we will solder a short (height) ring inside the lid and the pegs will be inside the base but work the same way.

When I post the pictures it might make more sense but I think this is a pretty good description.

Picture
Intro To Blacksmithing Projects

Back to the Stake... and a prototype

11/14/2010

 
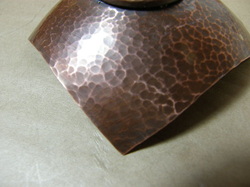
A few weeks ago I was demoing sinking on a scrap piece of copper that was square. I ended up with what I thought was a pretty nice little dish.  

Today I got back to that design and I made my prototype, I made the dish, planished it, and then added a ring base. I had to go back a planish again since the soldering annealed the piece again (note to self: invent way to solder a base onto a vessel and NOT have the piece get annealed). 

My solder job was only so-so, I was afraid of too much solder and ended up not using enough and now I have some gaps. I have to work on this more but for my sample I am ok with there being some gaps in the solder joint between the ring and the bowl. 

After a good cleaning I added a patina.  

Now I have to make a production piece out of silver and copper and in many sizes...I am calling it 'Dish-J'
Picture
Picture
Forward>>

    RSS Feed

    How to Aquire Your Own Shop Elf

    Archives

    October 2020
    August 2020
    March 2020
    December 2019
    November 2019
    October 2019
    September 2019
    August 2019
    July 2019
    June 2019
    May 2019
    March 2019
    February 2019
    January 2019
    December 2018
    November 2018
    October 2018
    September 2018
    August 2018
    July 2018
    May 2018
    April 2018
    February 2018
    January 2018
    November 2017
    October 2017
    September 2017
    July 2017
    June 2017
    May 2017
    April 2017
    March 2017
    February 2017
    January 2017
    December 2016
    November 2016
    October 2016
    September 2016
    August 2016
    July 2016
    June 2016
    May 2016
    April 2016
    March 2016
    February 2016
    January 2016
    December 2015
    November 2015
    October 2015
    September 2015
    August 2015
    July 2015
    June 2015
    May 2015
    April 2015
    March 2015
    February 2015
    January 2015
    December 2014
    November 2014
    October 2014
    September 2014
    August 2014
    July 2014
    June 2014
    May 2014
    April 2014
    March 2014
    February 2014
    January 2014
    December 2013
    November 2013
    October 2013
    September 2013
    August 2013
    July 2013
    June 2013
    May 2013
    April 2013
    March 2013
    February 2013
    January 2013
    December 2012
    November 2012
    October 2012
    September 2012
    August 2012
    July 2012
    June 2012
    May 2012
    April 2012
    March 2012
    February 2012
    January 2012
    November 2011
    August 2011
    July 2011
    June 2011
    May 2011
    April 2011
    March 2011
    February 2011
    January 2011
    December 2010
    November 2010

    Jan - Nov 2010 History
    File Size: 2272 kb
    File Type: pdf
    Download File

    Jan - Dec 2009 History
    File Size: 2332 kb
    File Type: pdf
    Download File

    Categories

    All
    42
    A Year Of Repousse
    Blacksmithing
    Blogoversary
    Box Project
    Business
    Chasing & Repousse
    Commission
    Education
    Embroidery
    Enamel
    Entries
    Entry
    Exhibition
    Facebook
    Filing
    Fold Forming
    Gold
    Holloware
    Hot Forging
    Hydraulic Press
    Jewelry
    Keum-boo
    Learning
    Leather
    Market
    Metal
    Patina
    Photography
    Polishing
    Publications
    Raising
    Sanding
    Santa Fe Symposium
    Shop Elf
    Sinking
    Social Media
    Soldering
    Store
    Studio Visits
    Superbowl Challenge
    Teaching
    Teapot Project
    Technique
    Temari
    Tin
    Tools
    Vessels
    Visiting Workshops
    Weaving
    Website
    Workshop
    Yubinuki

Powered by Create your own unique website with customizable templates.