
Back in 2012, I went up to Adams Forge for a late night fold forming session with hot forging and more. I made a few folded cups and then took on hot forging a 1/4" thick piece of copper. I never did finish it, I wanted the edges more ruffly, but I was happy with what I did.
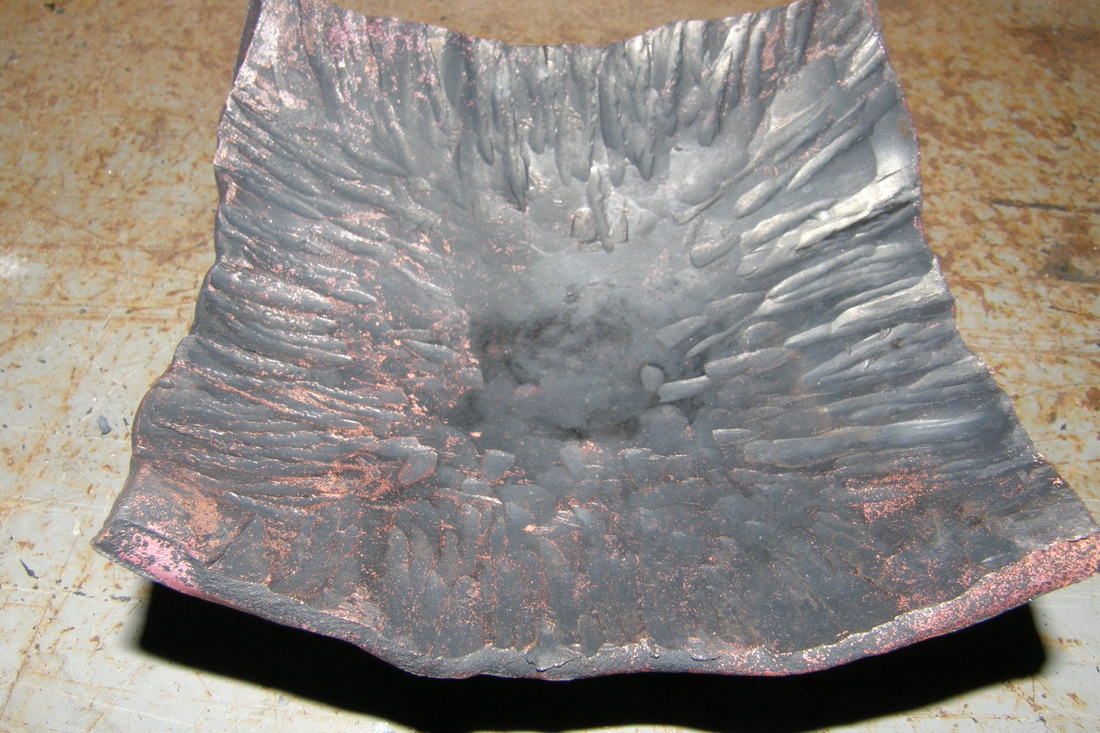
And it has been on my workbench ever since. I cleaned it at one point thinking I would put a fumed, Tiffany green patina on it but I never got around to doing that either, so it eventually just tarnished.
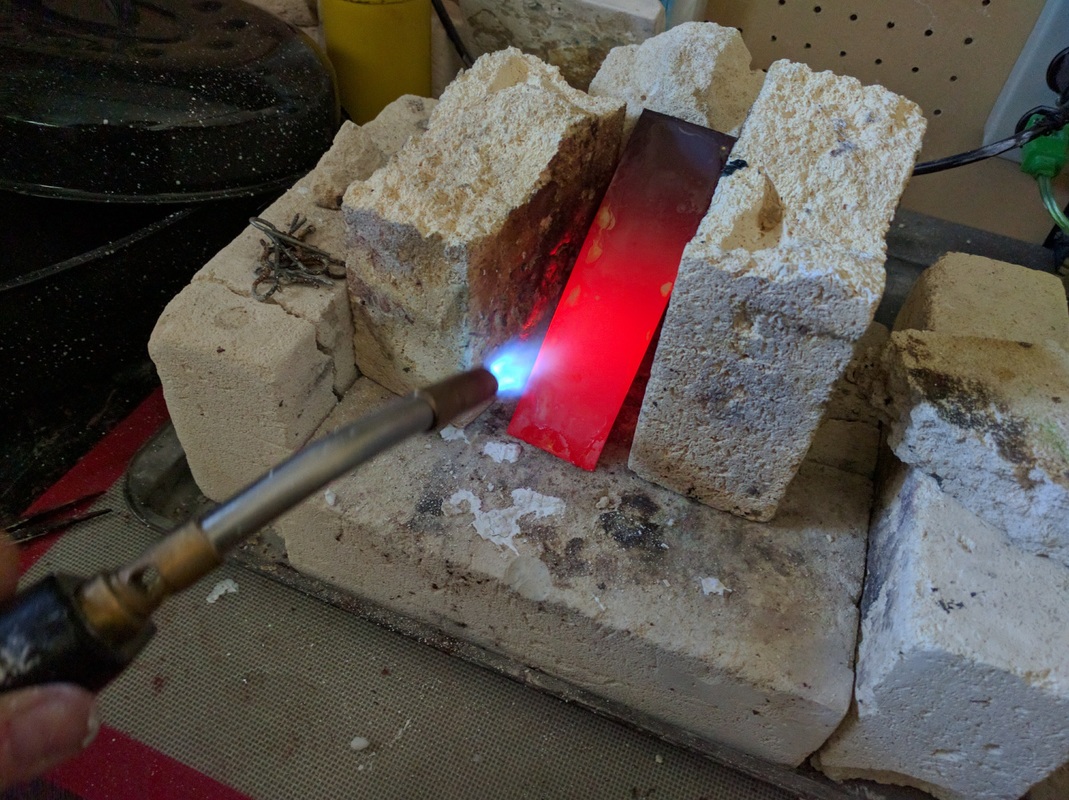
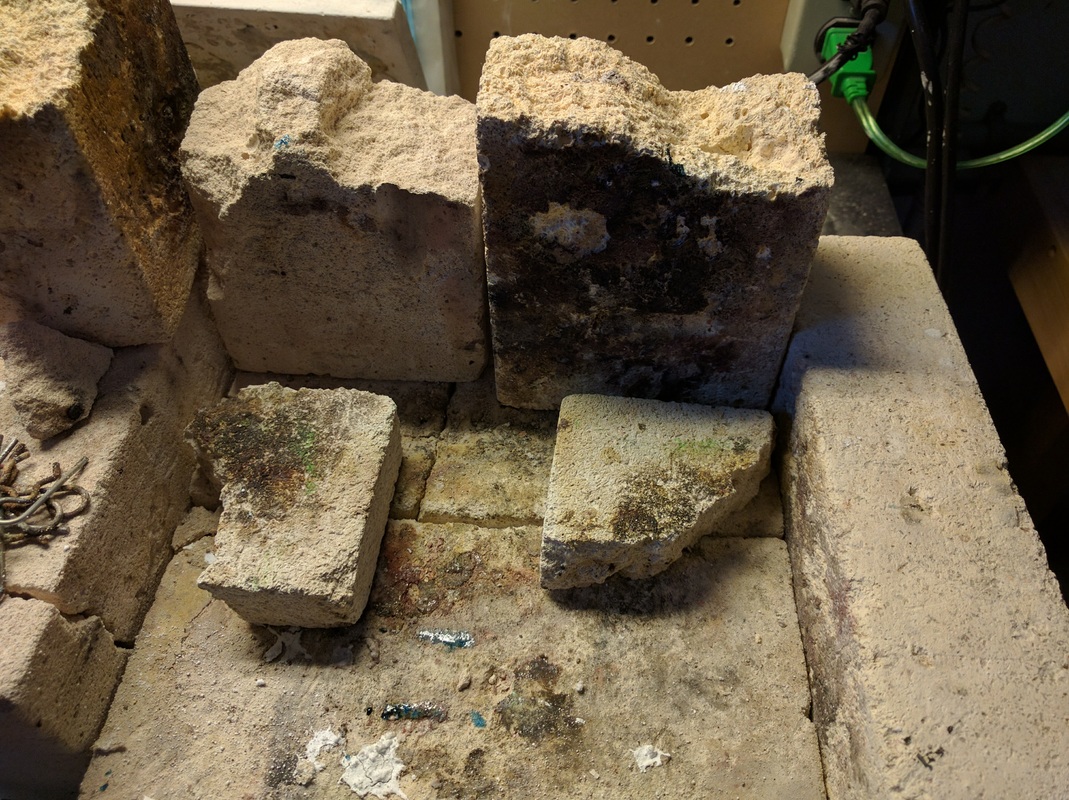
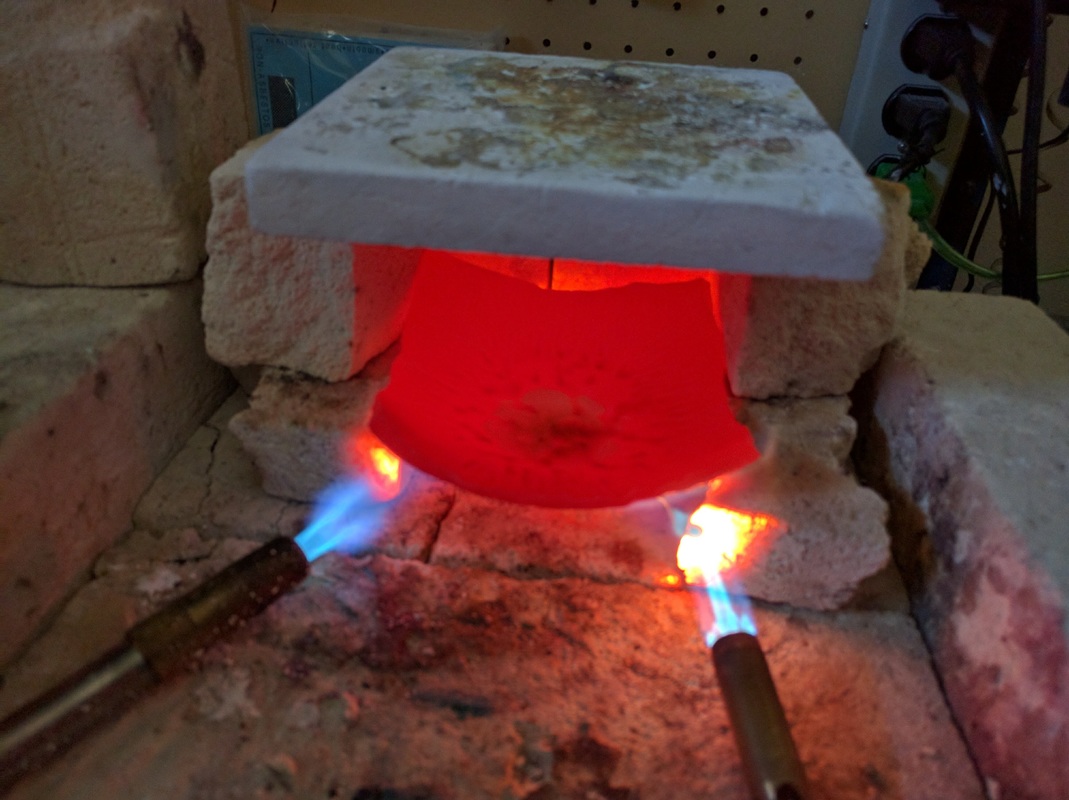
After last weekend's tool making workshop, with Jan, where we experimented with the HOT red oxide patina, I decided to do this technique on the forged copper (seen above). Yesterday, I did a good cleaning and brought it to a bright copper finish (sorry but I did not get a picture of it). Then this morning I explained to the shop elf how it all worked and what I planned - not having a forge, acetylene or a big blast-O-3000 torch, I figured I would use TWO propane plumbers torches and set up a hot box so I could get the copper really, really, red hot. The shop elf also took many of the pictures while I held the torches and flamed on!
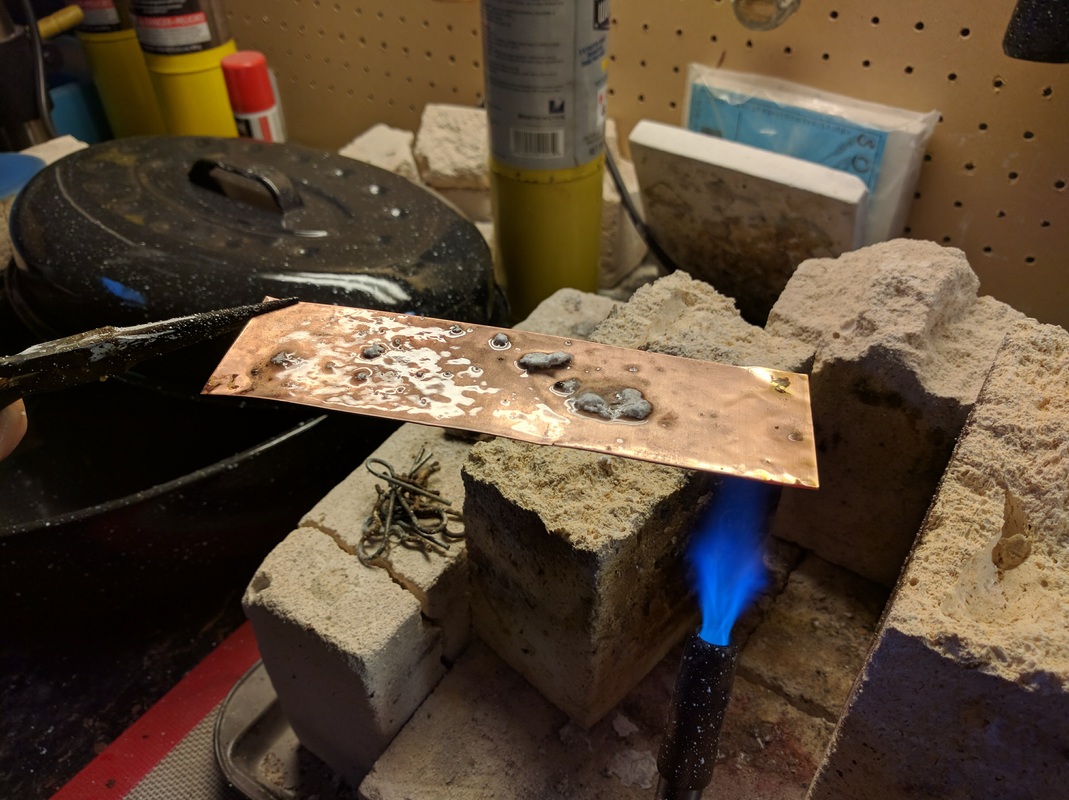
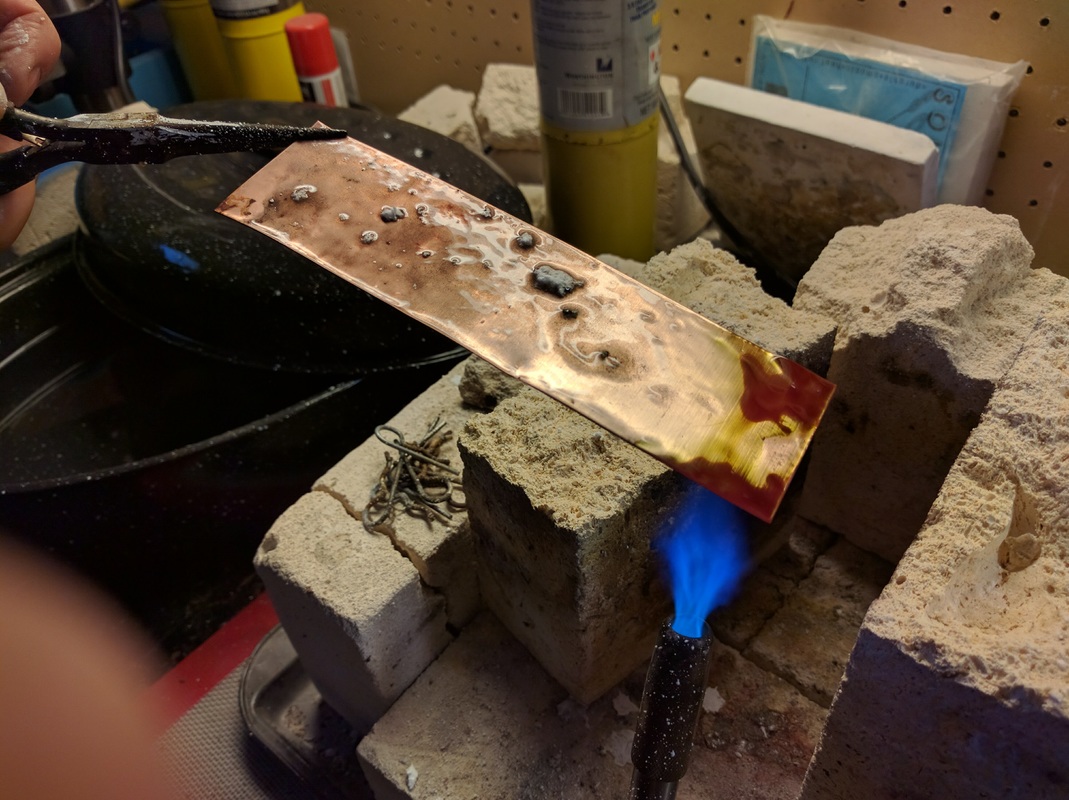
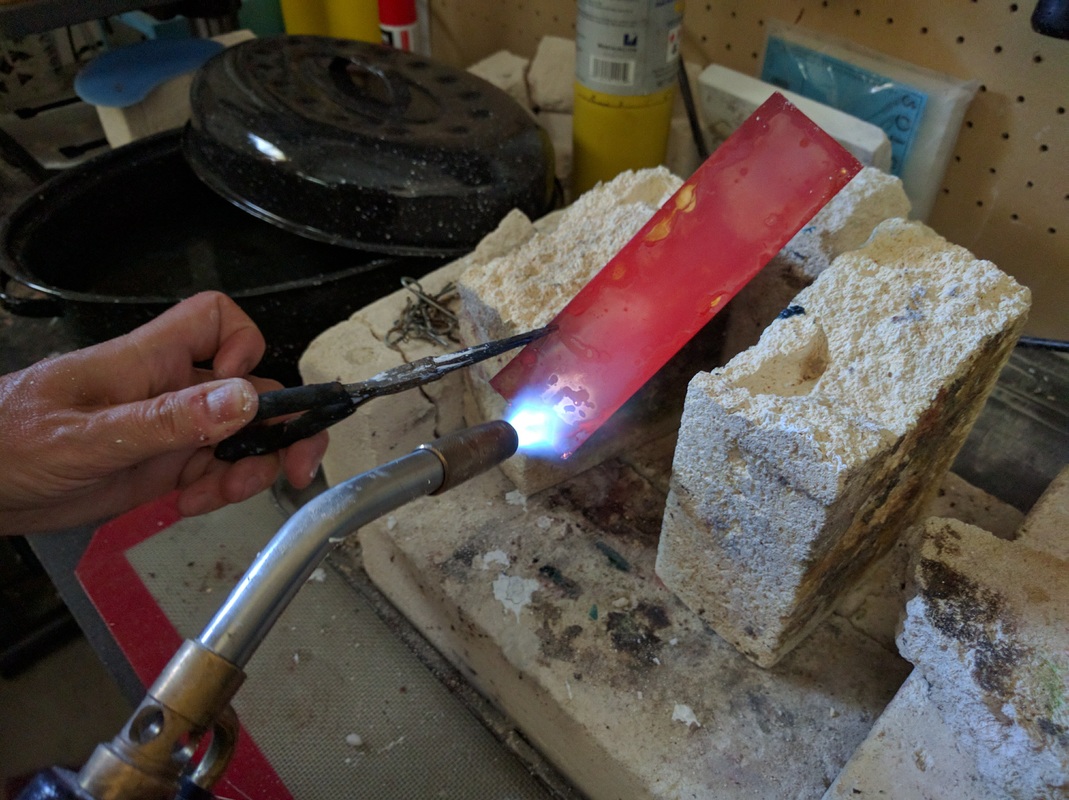
We first practiced on two smaller, thinner pieces of copper. Those pictures are next.
After last weekend's tool making workshop, with Jan, where we experimented with the HOT red oxide patina, I decided to do this technique on the forged copper (seen above). Yesterday, I did a good cleaning and brought it to a bright copper finish (sorry but I did not get a picture of it). Then this morning I explained to the shop elf how it all worked and what I planned - not having a forge, acetylene or a big blast-O-3000 torch, I figured I would use TWO propane plumbers torches and set up a hot box so I could get the copper really, really, red hot. The shop elf also took many of the pictures while I held the torches and flamed on!
We first practiced on two smaller, thinner pieces of copper. Those pictures are next.
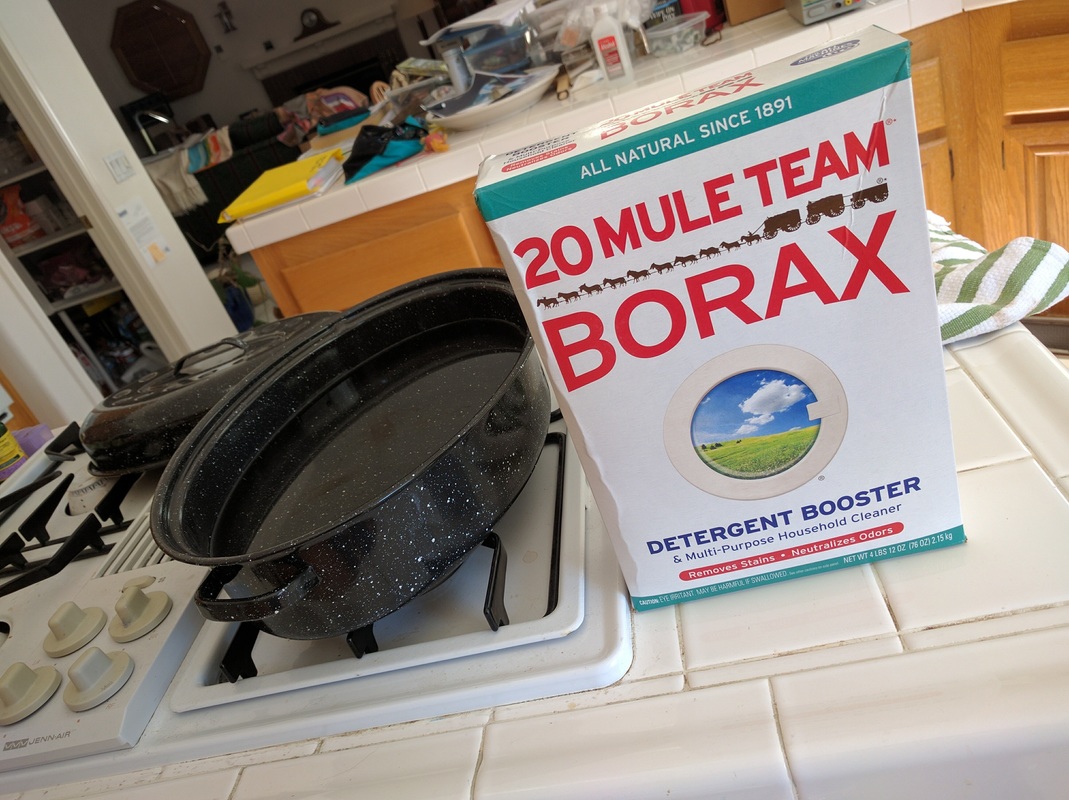


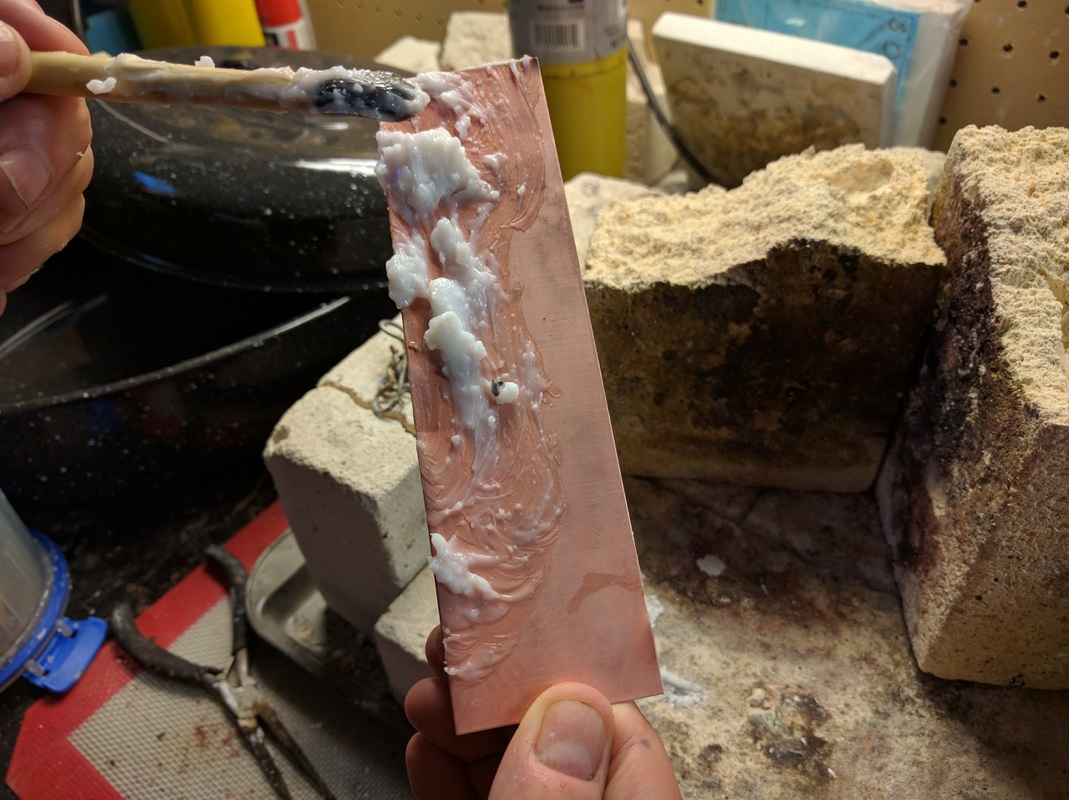
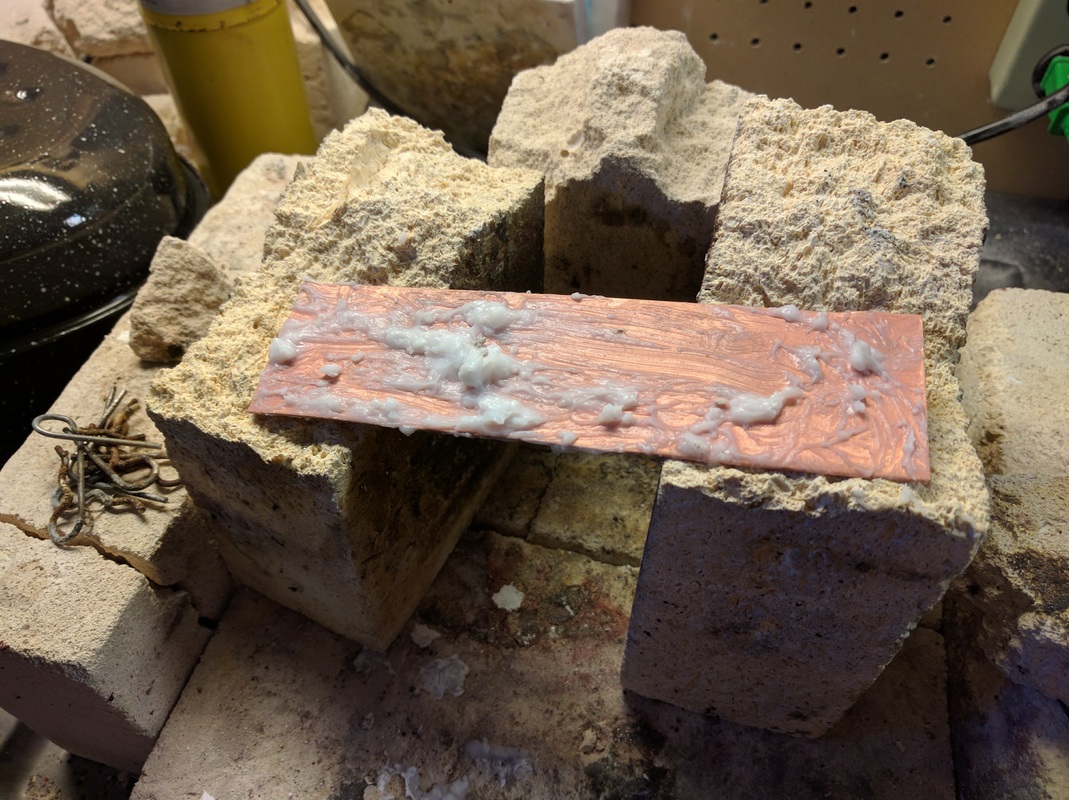
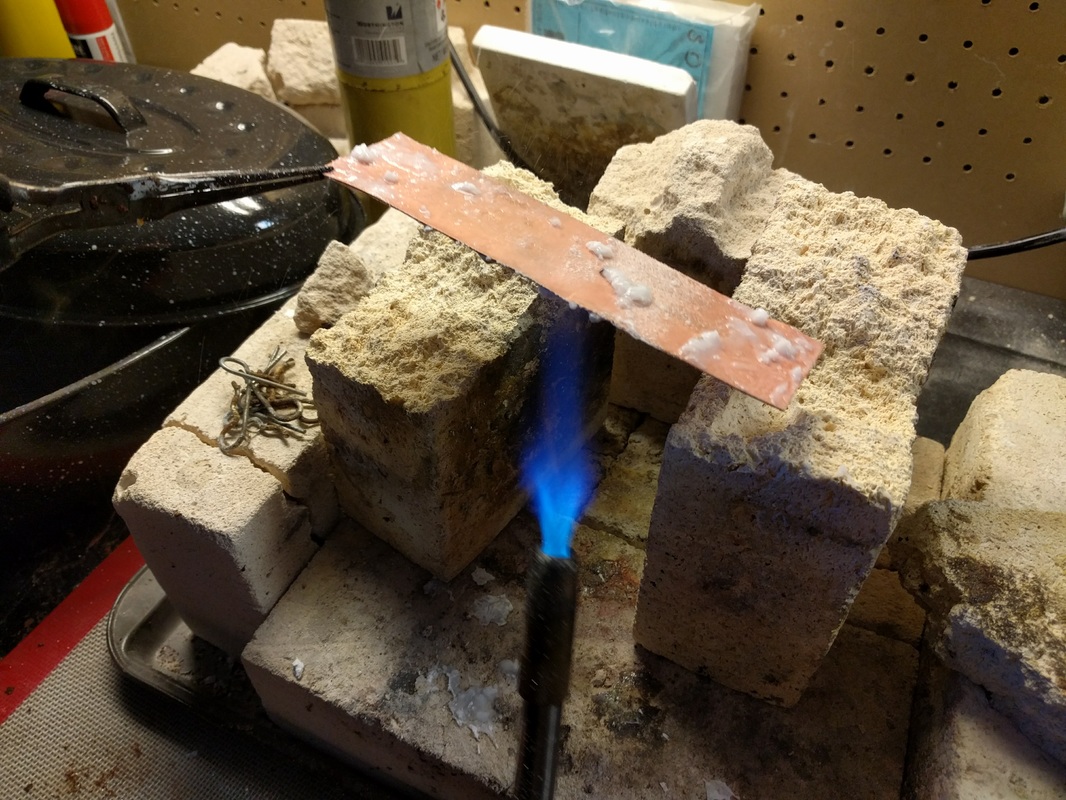
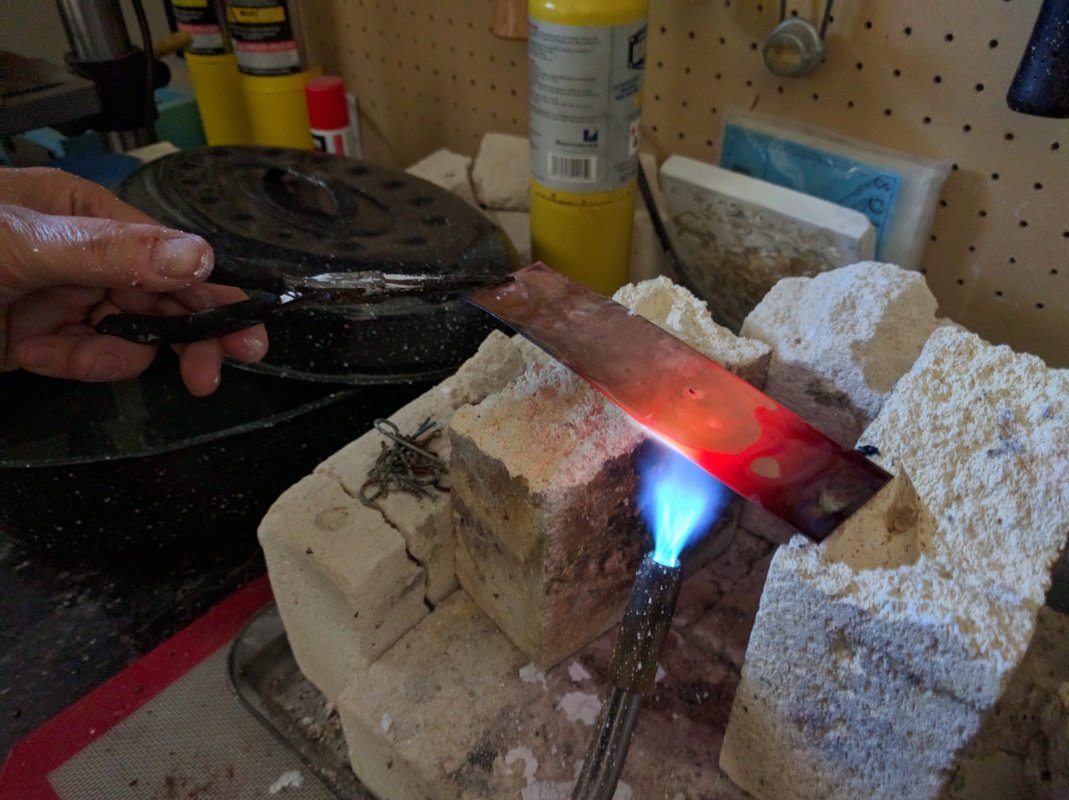
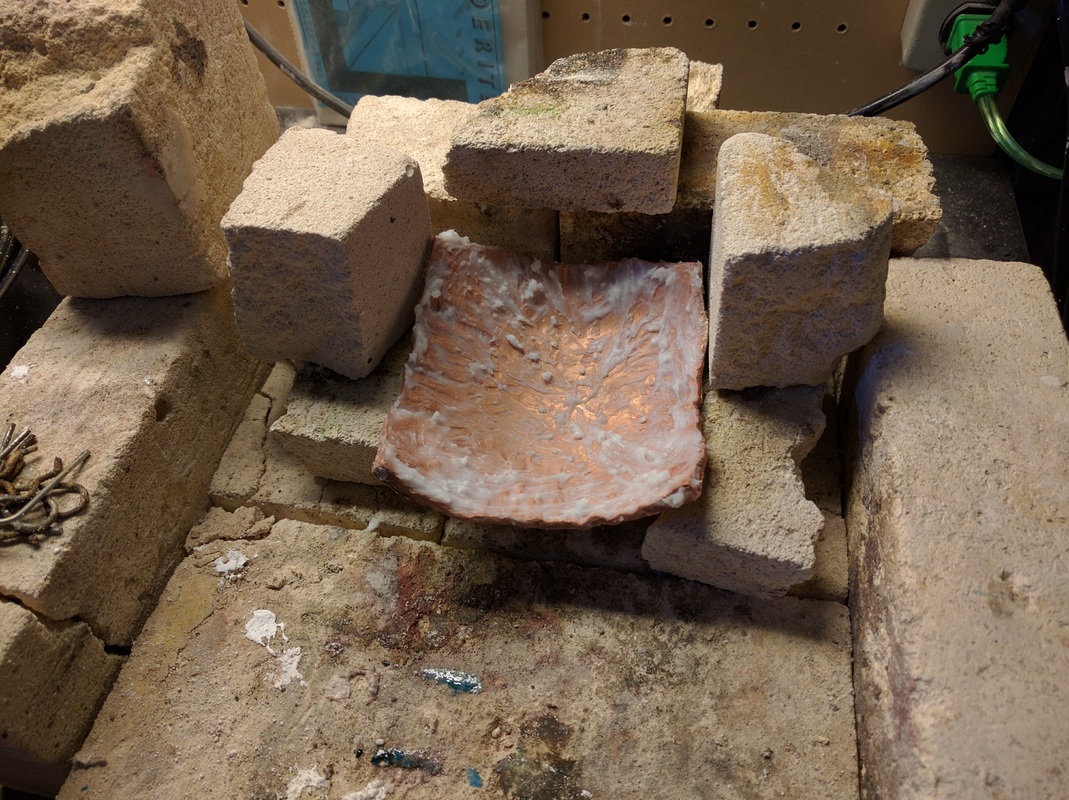
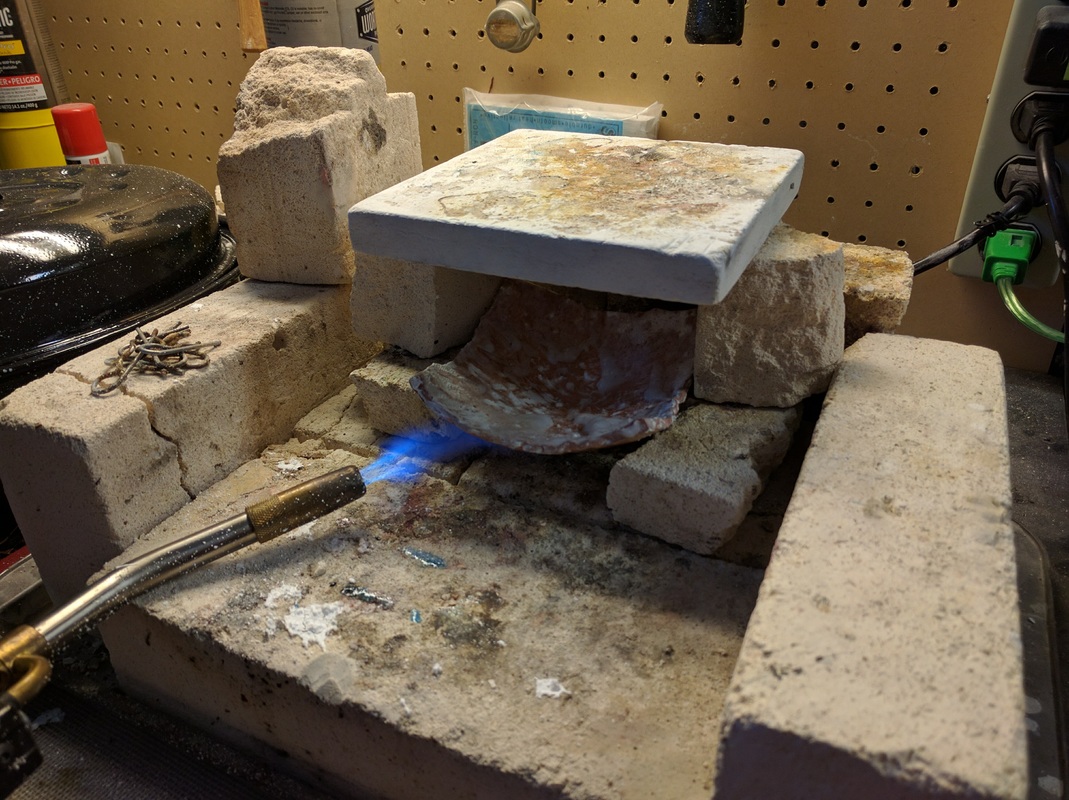
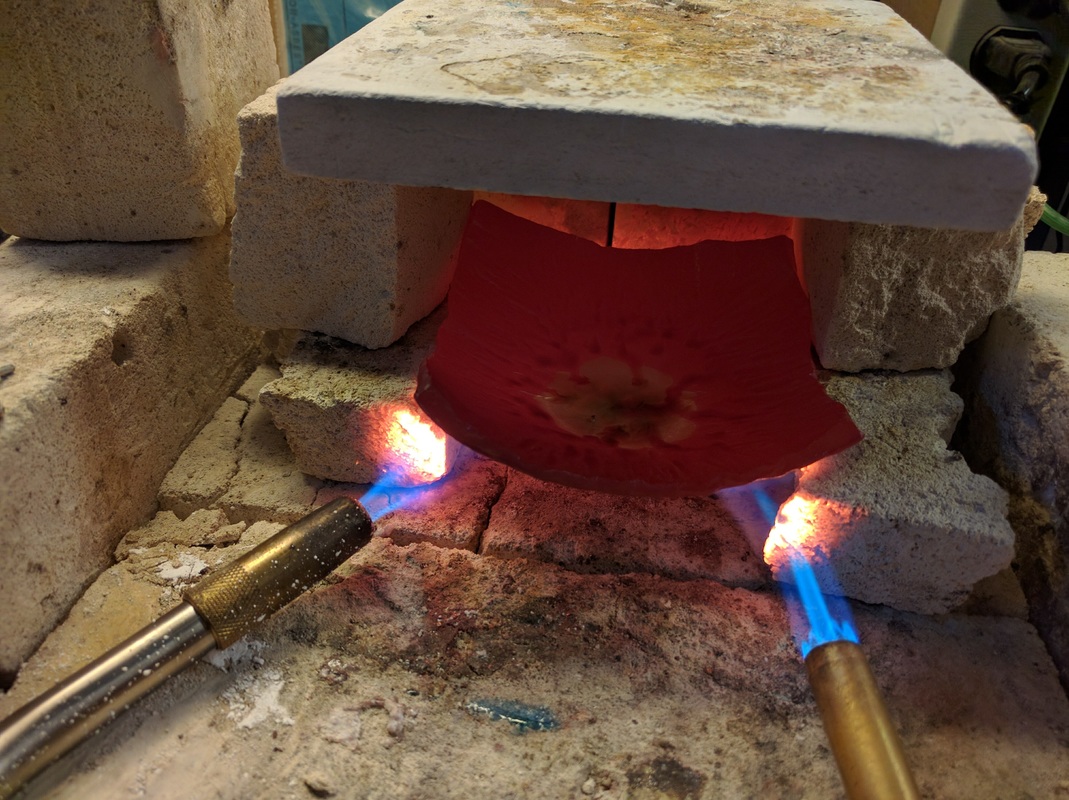
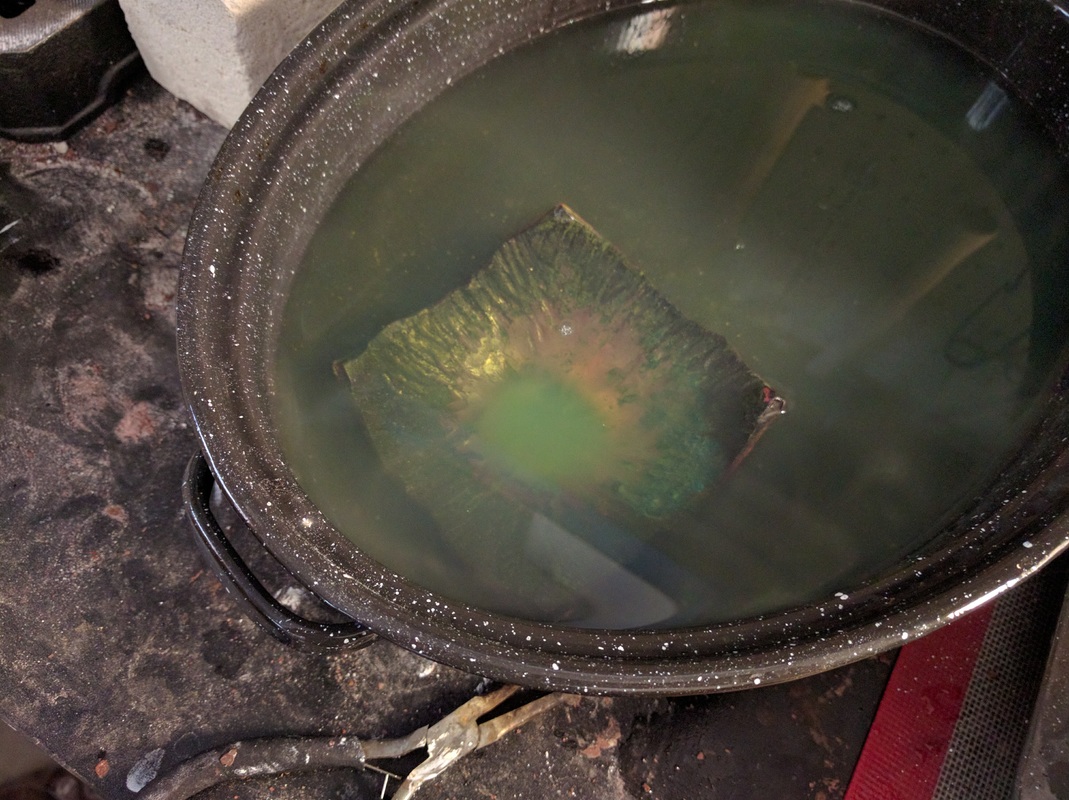
After the practice piece, I took an enameled metal pan and warmed my water and added a handful of borax and moved it to my soldering station in the garage. I then setup my fire bricks to support and surround the forged piece, I fluxed it really well and lit those torches up. I estimate it took a good 10 minutes just to get everything hot, then we could see the flux based upon the timestamps on the pictures. Then I just kept pumping in the heat... and then we took the top of the hot box off, I handed the shop elf one of the torches and I picked up the tongs so I could pick up the copper and I dropped it into the water. It bubbled and steamed and I walked away, allowing the piece to "cool" and to let the oxide develop.
We went to have a cuppa coffee and wait.
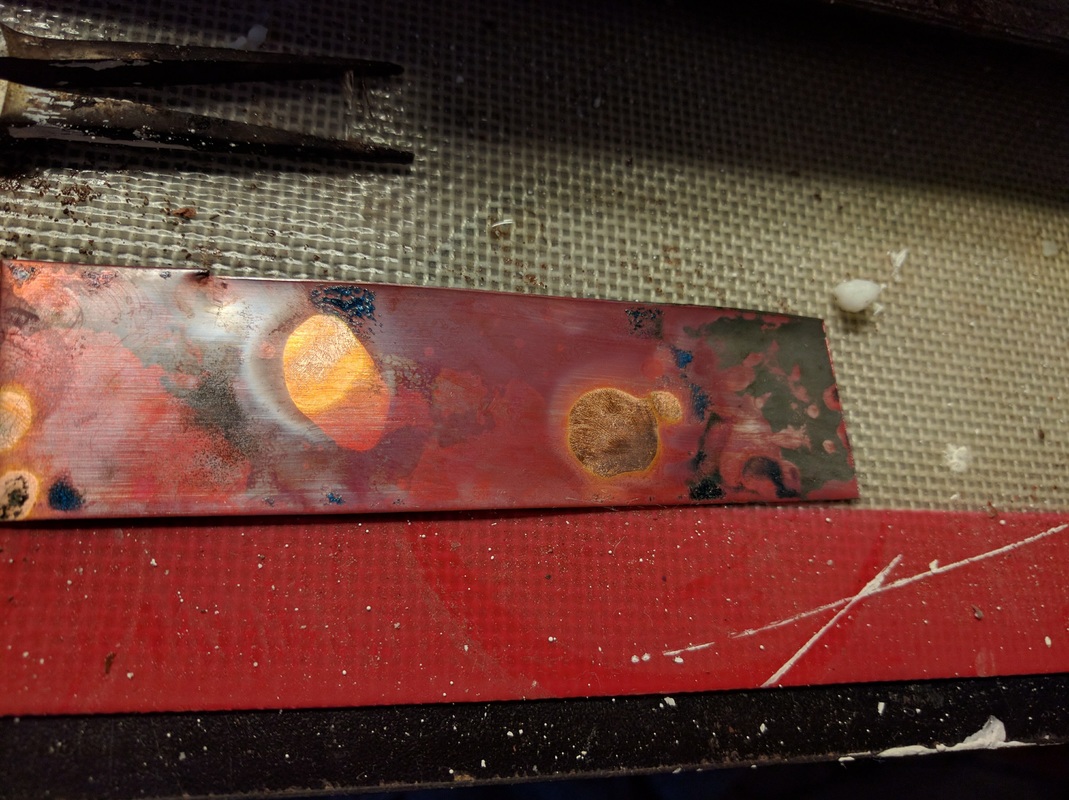
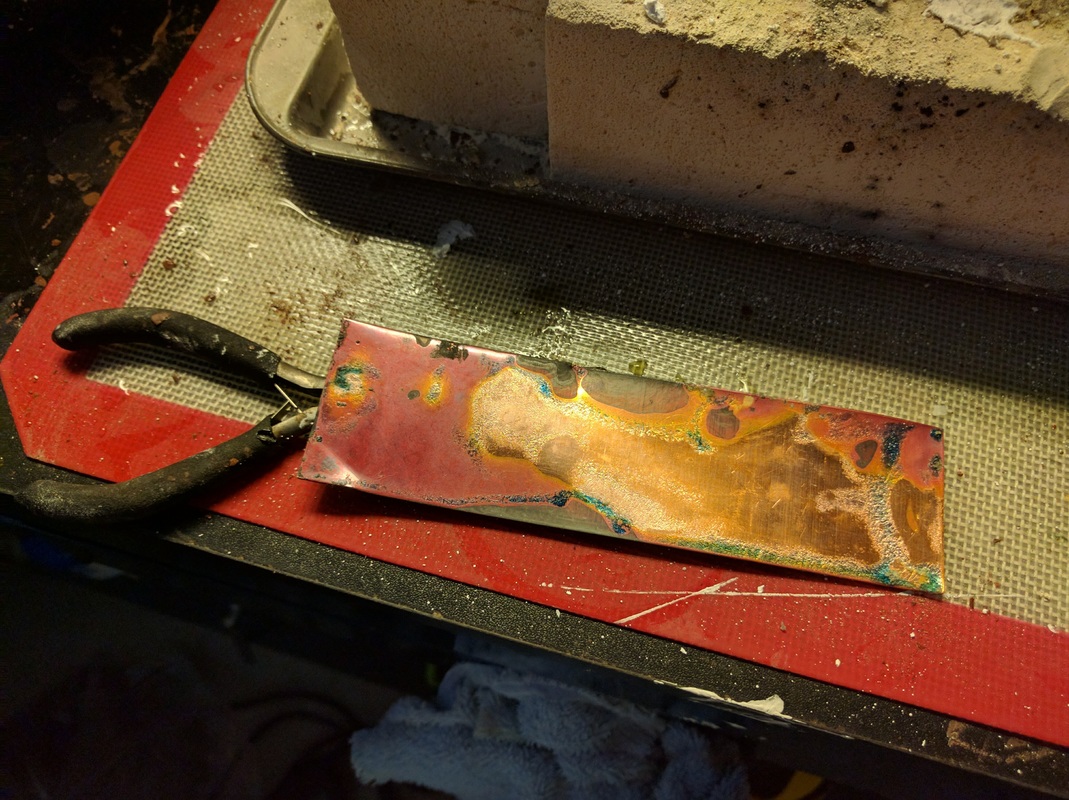
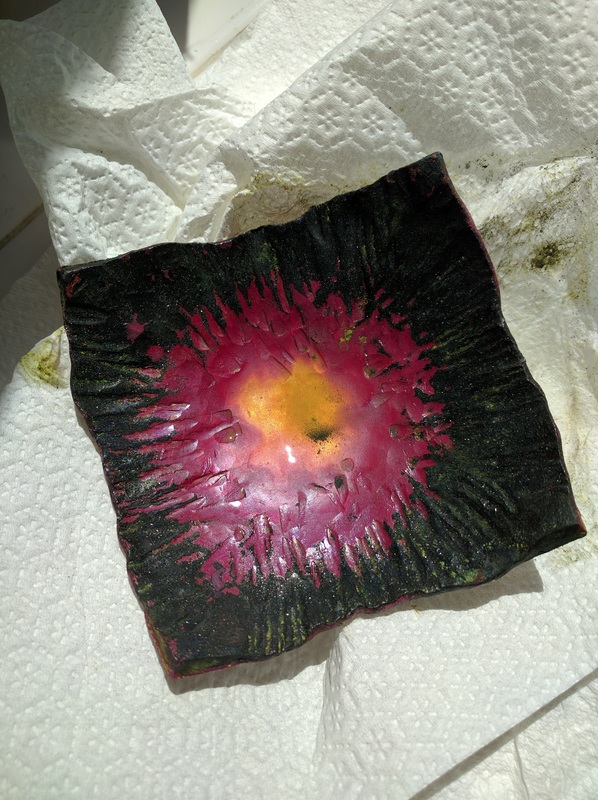
I pulled it out of the water a while later and could see some amazing effects. The edges were black and the center was a great gold with the red oxide in between. The black, you could see was a crust and there was more oxide underneath; with a soft scrubby and warm water, I was able to remove the crust. There was red oxide on the out/back side too but it did not hold up as well, to the scrubby but that's ok, as the it is the inside that was important.
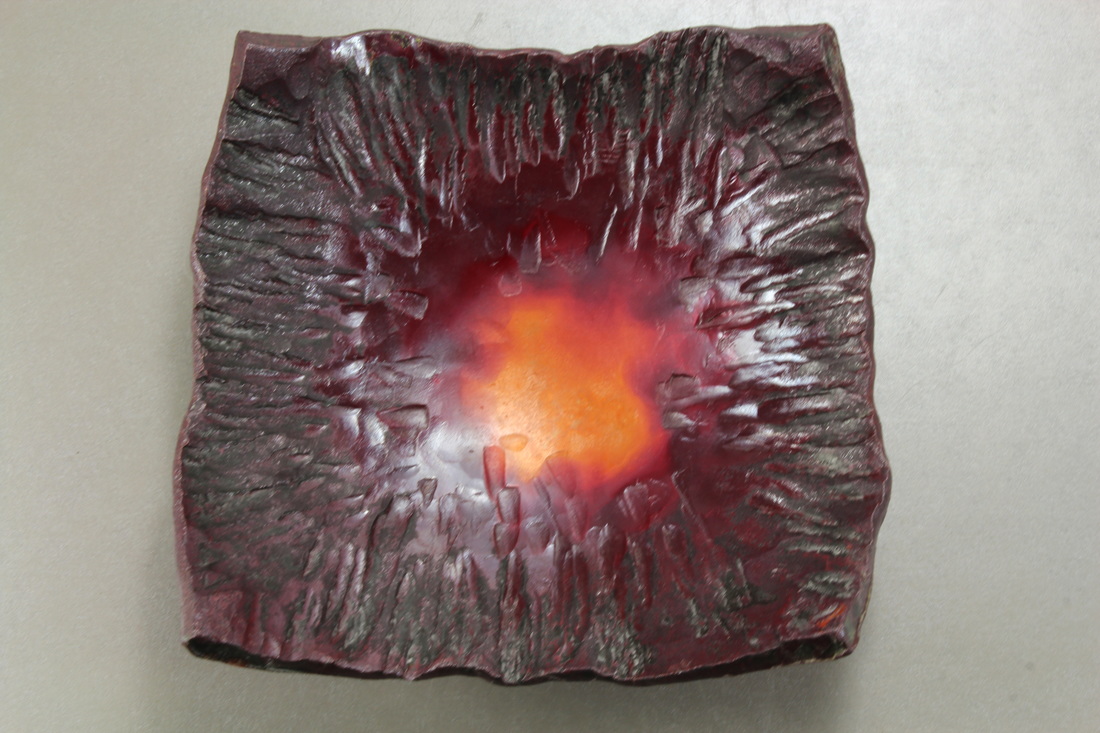
Enjoy the process pictures. The final picture is of it waxed.. and under good lights with the good camera looking down at it and along the edge.
We went to have a cuppa coffee and wait.
I pulled it out of the water a while later and could see some amazing effects. The edges were black and the center was a great gold with the red oxide in between. The black, you could see was a crust and there was more oxide underneath; with a soft scrubby and warm water, I was able to remove the crust. There was red oxide on the out/back side too but it did not hold up as well, to the scrubby but that's ok, as the it is the inside that was important.
Enjoy the process pictures. The final picture is of it waxed.. and under good lights with the good camera looking down at it and along the edge.


 RSS Feed
