Follow Me On:
The Adventurous Silversmith
  • Home
  • Blog
  • Portfolio
    • B.F.A Work
    • Metal Work >
      • Chasing & Repousse
      • Holloware
      • Jewelry
      • Other Wonderful Items
    • Fiber Arts >
      • Temari
      • Yubinuki
  • Resources
    • Library
    • Tools & Equipment
    • Links
  • About
    • Artist Statement
    • Curriculum Vitae
    • How it is Made
    • Contact

Save Time or Personal Satisfaction

8/11/2013

 
A few weeks ago I did some ebay trolling and eventually snagged an 18 pound vintage round table top anvil and a cone mandrel with removable hardy hole tang.  I am not certain but the anvil looks hand made.

I decided yesterday to start the refinishing of the anvil top.  The cone does not have pits like the anvil but will require just a small amount of surface sanding to clean it up. But as you can see from the first two pictures, the top of anvil is badly pitted. 

I went out to the garage where my new belt/disk sander is and fired that puppy up with an 80 grit belt to take down the top surface fast.  

The first problem was that the edge of the bevel does not blend into the main body, there is a thin step between where the be bevel ends and the main body. So I first round a thin piece of wood to support the body of the anvil thus allowing me to the face to touch the sanding belt evenly.  Of course this was not wide enough to support the entire body and so you had to "hold up" the body to keep it against the belt which was vertical.  I then tilted the belt back about 30 degrees from vertical so the weight of the anvil was directly slightly downward and away I (we) went.   My husband then took a turn at it and if you click on the pictures below, you can see the progress as we removed the pits. 

I used a level and laid it across the surface and there are no air gaps between the level and the surface even though the level tells me that the top surface is slightly higher on one edge and this could just be due to the bottom surface not completely square to the to body or parallel to the top. I did check my bench first and it was almost level so it is the anvil. Overall my working surface is flat just not 100% level to what ever surface it is sitting on. 

I post these images below, on my Facebook page last night and received some very nice complements including one from Kevin Potter of Potter USA  He said "I admire your determination laurie but I am more than happy to polish it for you" and then added "Spend your time making beautiful stuff let me do the dirty work."

Well I have thought long and hard about this. Ok, I only thought about it for 10 hours.  And I am very tempted to ship the anvil and the cone mandrel off to him. Just last month he modified some vintage stakes (the tangs) for me so they would fit in his stake holder and did a perfect job.  

Back in 2010 I scored a lot of  18 vintage hammer off of eBay but they needed work and I spent almost 2 months of weekends refinishing the faces.  Working on the anvil will require at least 10+ hours over several months and using the belt sander for the initial phase of pit removal took 1 1/2 hours alone. The long arduous work is still ahead of me with hand sanding. If Kevin did it, in his shop on his wonderful machines, it would take probably less than 5 hours and it could be as few as 2 or 3 to machine it down just a bit further and then working his way up to put a nice 600+ grit polish on it. 

But what would I get out of it besides saving quite a bit of my time??  And there people was the quandary.  

Saving Personal Time vs. Personal Satisfaction.  What you you do?? 

But the more I thought about it this morning over my Sunday cuppa; the more I realized I wanted the personal satisfaction of doing this vs. the time savings.    I want to say "Look what I refinished" and then be able to show these, and more, pictures off and hear people say WOW.  

Even if Kevin did do this job for me we all know people would say WOW.  PLUS it would help drive more business to Kevin which is a good thing cause he stays in business and continues to make great tools and equipment and then would be able to refinish other things for you and me when we really, really, really need it. 

So, sorry Kevin, I really do appreciate the offer but this time, this is one is mine to do.   Next weekend I will take a few hours and work my way through 100 grit. Each weekend I will then progress further up from 120, 220, 300 and when I reach 600 grit THEN I will decide if I want to spend more time for the extra WOW factor. 

What arrived yesterday.

1/5/2013

 
A box arrived for me yesterday. I was from SC Studios LLC.  
Inside was SEVEN bricks of pitch and chasing and repousse tools. 


The pitch is a 50/50 blend of soft and hard, preferred by master metalsmith, and teacher Valentin Yotkov.  This will go into a new 12" pitch pot. 

Now, about those tools..
Not just any tools, 
  Not just one or two liners,
    Not a two or three embossers, 
      Not three or four  planishers...
        but the entire freak'n  MASTER SET. 

How many tools are in the master set you are asking yourself

                                                        There are EIGHTY SIX Tools to be exact.
                                                                                      WOW
And when I start to use them, hopefully tomorrow, I will let you know how they work.
IF YOU WANT (and who does not) a few of these tools or the entire master set ...
  • For SC Studios directly, email Saign at SAIGNC 'at' GMAIL 'dot' COM (replace the dot and at with the appropriate symbols).  You can get individual tools or the entire set from him
  • From Otto Frei.  For tools, look for the Master set or those sets marked "USA Made" and the Pitch is marked "Made in California".
  • From Rio Grande. Pitch and Tools, each set is a different size but is an assortment of texturing tools
  • From Contenti.   Each set is a different size but the set is an assortment of tools
  • From FDJTools. Pitch and various tool sets including some that are NOT in the master set (which I will have to investigate further)
Picture
The entire set laid out on my desk.

David Huang Workshop - Chasing with Microcrystalline Wax

5/26/2012

 
I will let the pictures speak for themselves. Click to open in an larger view,  read the caption and scroll to the next.

(More) New Stakes

3/23/2012

 
Since my raising skills are getting better and I am much more comfortable adding curves and angles to my vessels, I am now into buying stakes that will assist me in these techniques.

Someone on eBay was selling their wife's stakes and hammers. Via email, since I had some questions about them, I found out that yes, she had been a metalsmith but was no longer working in metal. 

There were probably a dozen different stakes up for auction but 4 really caught my eye. Three stakes were for angle raising and one was a spoon stake.

So I set my bids and watched the auctions for a week.  I WON all four.

They arrived on Wednesday and my husband, who is my support crew in this endeavor, took them to the garage to polish up the surfaces. Here are a before and after picture of the 3 larger stakes (click on the images to get a bigger picture).

A friend has asked me how many stakes and hammers I have now, I to be honest I don't know the count of either. So later today I will take inventory and post pictures and numbers.
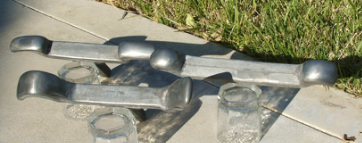
Picture
Before Refinishing
Picture
After Refinishing

It's like packing for an expedition

5/29/2011

 
I am starting to pack for my trip to Haystack and I feel like I am packing for an expedition to the far side of the world. I have done a lot of traveling in my life - I have gone backpacking for several weeks; I was a road warrior while I worked as a consultant and I would be gone for several weeks; I have gone to the wilds of Scotland for almost a month and yet this trip is throwing me off my game.

In the information packet we were sent there was information on what to bring with us which fell into 3 categories: Tools, Materials & Supplies;  Bedding; and Clothing & Personal Items. It is the Tools, Materials & Supplies that are causing me the most worry. 

Most of the classes I have taken within the past two year, for metals work, have been within driving distance so I can load up my car with the stuff I needed and I did not have to worry about not having the right things with me.  There have been a few classes I have taken that were multi-day (Metals Week and Chasing & Repousse) where I knew people were coming in from across the country. Since I knew some of these people I was always willing to tell them that I had such-and-such tools or supplies so they could leave theirs at home.

But now, I am the one flying across the country to the class and I don't know anyone else who is attending who might have an extra of whatever we need to bring so I don't have to shlep is across the country.  We don't have to bring *EVERYTHING*  as I would like to assume that the workshops have several of each of these things but there is no guarantee that there are enough for everyone and that means that there will be time spent waiting for a tool to be freed up.  

So what is on this list? There is copper sheet in 18 and 20 gauge, some silver casting grain; Heikkie Seppa's book Form Emphasis for Metalsmiths; solder; shears; scribes; solder picks; flux brushes; pliers including parallel; hand files; tweezers; layout tools like a sketch book, manila folders, pens, rulers, markers,; safety glasses; earplugs; apron; and your favorite hammers. Luckily the information packet has marked some expendable supplies as being available to purchase there so I will not take the following item which were on the list: grinding, sanding, and finishing supplies; flex shaft wheels, solder and my big hand files.

My favorite hammers?! oh, boy I am in trouble. I have tried to pare down my selection and so far I have NINE (wait make that 10 as I missed a forging hammer) and I want to take more. This is a course on moving metal so having MY hammers is really important to me and btw, I now have over 40 hammers how do you pare down the list

And considering you are off in a remote corner of Maine it is not like you can dash out to a store and pick up a few things.

So what do you take and what do you leave behind? 

I have a few days before I ship my stuff to Haystack so I welcome your suggestions - Tell me what you would do! 

Stumped!

5/12/2011

 
Over the past few months I have written about how it is important to strike the metal on the stake in the correct manner. This implies that you are not only striking the metal at the correct angle but that the stake is at the correct height for YOU.

Deb and I have been working on both of these subjects because I have had issues with them but mostly having my stakes at the correct height. My set up has been clamping my stakes in my vice which is bolted to my work bench. This put the striking surface of the stake at the height of my chest which is way to high for me. I resolved this by standing on a sprinkler box to raise me up but I was not quite at the correct height many times – for the stakes from Potter USA I was a bit too low and for the Dixon stakes I was a bit too high. I was never JUST RIGHT

As more time went by I knew I had to get a stump to mount my stake holders on.  I looked at getting a real wood stump and then mounting it on wheels but because my primary workspace is in the house on the second floor, I was not too keen on hauling a big hunk of wood up the stairs; I use the garage for things like drilling, buffing and grinding but not for raising unless it is very hot and the electricity has died. 

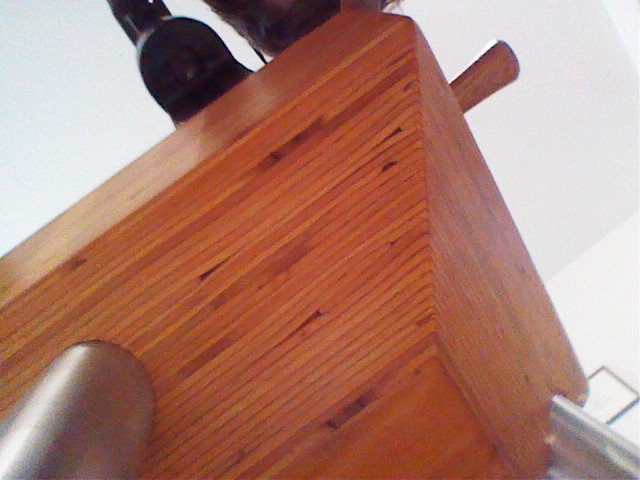
Then one day while browsing through the Rio catalog I saw a modern Anvil Stump – laminated wood with adjustable aluminum legs. The picture not only had an anvil mounted on it, there was a stake holder too.  It was the price that dashed me – 295 smacker-oos! I added it to my list of items I wanted to purchase [and as we all know that is almost everything in the Rio catalog] but I figured it would be several months before I got around to ordering it since I still had to pay for the tuition for Haystack but there was airfare to get to Maine well.

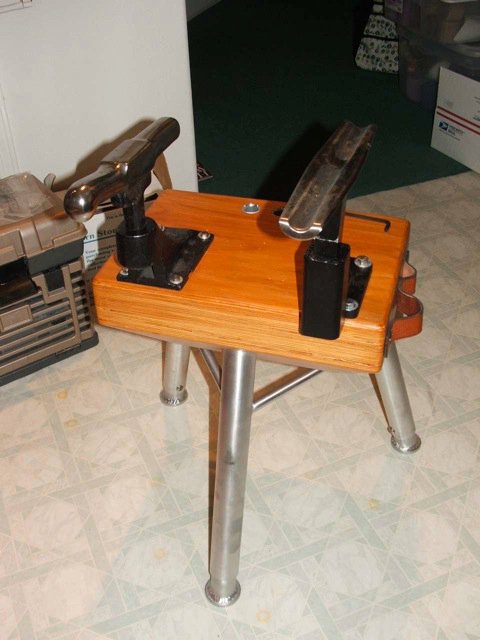
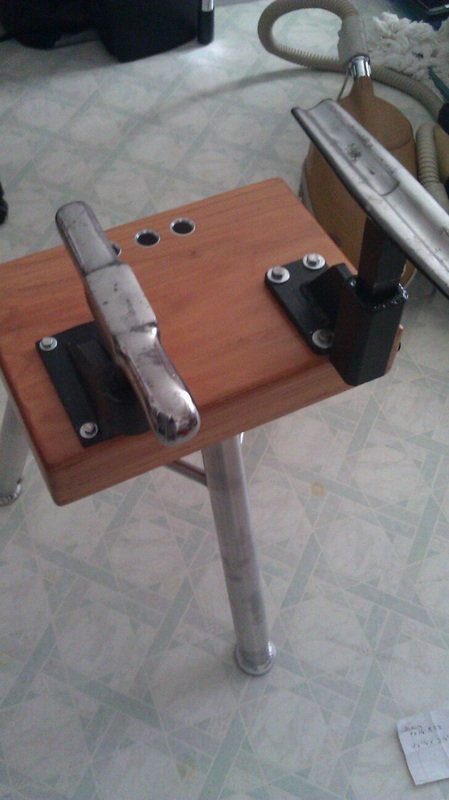
In April I bit the bullet and decided that I had better get the stump – I wanted to do some raising but I was nervous about doing it because I knew my current setup was not the best.  I then started to search the web for a better price. Since this stump is actually made for Farriers, I figured there might be a blacksmith or farrier shop that had it for a bit less. It took a few hours of comparisons of not only base price but shipping as well but eventually I did find a good deal and I ordered it and it arrived about 5 days later.  After sitting in the box for a few days I unpacked the stump and moved it upstairs into my work area. Then I had to mark the positions on the stump where I wanted my two stakes mounted and my husband did the drilling and screwing down of the holders plus he also vacuumed the floor when he was done.

I have a stake in each holder and this past Sunday I was working at the stump on another Shibori bracelet – forming the cuff. I have not adjusted the legs yet because I am experimenting with my rolling chair height to see it I am comfortable sitting while doing my raising as I normally stand.

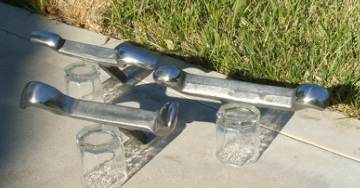
Here are a few pictures showing the stump with my stake holders. For your information the legs do come attached and are adjusted via screws with an allen wrench and it comes with 4 ‘L’ plates and screws for locking down an anvil.

Update: July 23, 2011Since people are asking - I found the best price for the stump at  www.well-shod.com 

Dirty Hands Once Again

4/23/2011

 
Back in December, I picked up a large "rustic" ball stake off of ebay for about 40 bucks before shipping costs. It is almost 3" in diameter and brand new something like this would cost almost $200. 

 It looks like an old and possibly home made stake because the tang is long and round plus only the bottom of the tang is square to fit into the hardy hole of an anvil.   The stake is/was black and had quite a bit of surface grime plus it was very pitted and not even round. There is a flat spot on the top and other flat spots on the "ball".   

The first thing i did this morning was take it to the wire brush I have on my grinding motor.  Then I went at it with a very coarse criss-cross cut file. I wanted to get out pits and get rid of the flat spots.  That took over an hour. Then I moved onto another file that had a finer cut than the previous file. I  worked out the deeper groove and refined the shape further. I also rounded the area around the top flat spot some what - it's just not as big as before and it blends into the rest of the stake better.  

At this point my hands were black so I went and cleaned them up and went back to the garage and next took the stake to a white advantage wheel on the other spindle of my grinder. Using this wheel i was able to remove most of the remaining file marks, more pits and remove the slight ridges that were still there to the touch.  This process is slow and with not a lot of pressure because if the wheel grabs the stake I could end up with a tang in my face - that and taking too much off and just making it worse. 

We are now 3 hours into the process and I was finally ready to go back upstairs and work with the sand paper.  I think I used 2 sheets of the 280 and the 320 grit paper.  Then the 400 and 600 which gave a good finish but I decided to go at it with my very fine papers too. 

I am now done and my husband can't believe the difference.  In all, it took almost 5 hours to redress.

It is pretty good looking and it now looks like a funny dome stake vs. a ball stake. The picture below is of my hand after using the sand paper.

Unfortunately I forgot to take a before picture but you can see the after pictures over on the Tools of the Craft page.
Picture

I have a (hammer) monkey on my back

1/30/2011

 
I just realized I have a problem.
I am addicted to buying hammers (and stakes) on eBay.
I just won another hammer today. I did not mean to do it - I went looking for hammers, stakes and repousse tools while I was having my first cuppa this morning. 

And there it was - a silversmith hammer, used but with nice polished faces.  

There was only 2 hours 36 minutes to go.

The current bid was only $30 but I knew it would go higher - I did not care.
 
I knew I could get it. 
Was there a fleeting thought that I HAD TO win it? Nahhh...or was I fooling my self?

So I put in my max bid and went downstairs to make my usual call to Elisa of Scotland, so we could catch up, as we do almost every weekend. We were on the phone for about an hour, then I left for the gym for my work out. 

By the time I got home, the auction was over.

I had won it.  I paid for it and I have received word that it will be shipped Monday.

I still have 5 hammers to re-dress from the eBay win in October.
I also have a ball stake to re-dress from an eBay win in November
I also have 2 snarling irons to re-dress from an eBay win in December
I also have 2 other stakes I won last week (that's January)

I know we joke that you can never have too many tools but if I am always re-dressing tools, when will I have time for raising eh?

My husband says that I should be like Mr. Levi (of the Jeans) who started out by coming to California to pan for gold. Then he realized that there was gold (money) to be made and less work, by selling goods and his jeans to the 49-er miners instead of panning for it himself.  

Don't think I have not considered this. What do you think???

P.S. I just confessed to my husband and he said "You are a sucker for a pretty hammer face".

Chasing & Repousse Tools

1/22/2011

 
Last week a reader of this blog sent me a question about Chasing & Repousse tools. We exchanged several emails and afterwards I though, this would make a good post for others too read.  

Remember, I am by no means a master of this technique (yet).  These are my opinions and I am not endorsing any tool maker nor am I not recommending  a tool maker by not mentioning them either. 

Here is the entire email thread starting with C's question:  

Hi Laurie, I'd like to pick your brain, as a newbie in the Chasing & Repousse field, on your opinion of the tools from Mettle Works vs. the Nechamkin set. Do they duplicate each other or are they a good combination to use together? What did you like or dislike about each? What additional tools would you add immediately?
Thanks for your input!!! 
Regards C.
                      *****************************************************
Dear C.

I hope the following answers your questions and IF not, feel free to ask more specific questions in another email (just reply to this one). 
I think the tools from Mettle Works are good. 
I also think the Nechamkin set is good and they are certainly "prettier" than those from the Mettle Works. 

Since I also now know how to make tools, I have several I have made too.

Would I pick one set over the other - No and Yes. It is what you are working on that will influence which tool you use. Obviously the quality of the tool will have an influence on the work as sharp edges can make unwanted marks; a tool that is short for your hand will make it difficult to hold and hit accurately; if the tool has not been tempered properly will result in a shorter tool life as well (several months or a year vs. YEARS). Which has better quality? Excluding the pretty factor, I consider the quality the same.

I will now talk about cost. The Nechamkin set as a whole costs quite a bit more than a set from Mettle Works and that is because you get 25 tools vs 12. When you look at the per tool cost the difference is just under a dollar.  

Then there is availability. I was able to get one of the first Nechamkin sets and I know there is a back order for them on OttoFrei. They are being made and I have met people who have received their sets but had to wait a few months. For a set from Mettle Works, I think you only have to wait a week or two if they are out of stock.


After I took my first class with Nancy Megan Corwin, I bought the MW set (as the N set was not even an option) I also looked at a set by Valintine Y. but his set costs quite a bit more and I was uncertain if I would continue doing C&R so getting an affordable set was my goal.  I made several pieces with just the MW set as was not disappointed or had any issues with them. When I took my second class with NMCorwin, I took both my sets - as you read in the blog everyone looked at the N set and thought they were pretty and NMC used them and agreed they were good. Were they better than the MW set or her own - NO, they are just different. We even discussed a few tools we thought were missing, and I sent Lisa N. an email which started a discussion between the two of us. It all came down to which tools she thought would be used by someone the most and every artist finds they use some tools more often than others. 

When I am working on a piece I find I use several tools from each set (mine, MW, and N), and over time I have use most of the MettleWorks tools but  with Nechamkin there are still some tools I have not used on any piece. I use my tools on and off because they were made for a specific purpose/project and they have slowly been added to my standard technique/textures.

May I ask you where are you learning C&R?  Who is your teacher (if you have one) What tools are you using now if you don't have a set?

IF I can give any suggestion, I would like to say that getting a copy of of NMCorwin's book. It is one of the best things you can do. I still go back and read chapters. 

What tools should you get for a starter set - you need liners (straight and curved), punchers, and planishers. In at least two different sizes.  The N set gives you these in 3 different sizes and several extra shapes. The MW set even though some are called liners, are really pushers (the first 4 on the left, in the picture on the website, are pushers but can also be used as liners, the next two are specifically liners, the next three, the pearls, are pushers and for texture, the three on right are planishers while the teardrop can also be used as a pusher as well.  The N set duplicates some of these tools but are different as well - the curved liners in the N set are not really in the MW set but a short thin straight liner can be used to line curves if you know how.  (I have met some people who do C&R and they only use 5 small tools!) 

Whew - are you still with me? 
So what would I do? I would still start with the MW basic set. And even though I can make my own tools, it comes down to time and I am even now pondering getting a few different tools from MW (from the custom tool page 
Pete Renzetti's set of small chasing tools)

IF you think, after all of this, that you have quite a few more questions and it would be easier to talk, let me know and I will send you my phone number and we can set up a time to talk.  Laurie 

                      *****************************************************
Hi Laurie,
Thanks for your fast reply.

I am planning to take a class from Megan in March. I do have her book and a bowl & pitch on the way, but no tools yet so your information is very helpful. A friend has the set from Mettle Works and is very interested in the Nechamkin set (with the addition of some undercutting tools). The photos of each look like there is little (if any) duplication. I know that I will not have time to make tools after I learn how, so am trying to get set up to continue working after the class.

Wow, Pete Renzetti  certainly has lots of tools! Looking forward to the day people say the same about me!

I think I’ll go ahead and order the MW set then re-evaluate after class.
Thanks again for your input.
C.
                      *****************************************************
Hi C - 
In Megan's class she lets you use all of her tools but there are times you want a tool and it is being used by someone else and then you have to go hunting to see who has it - and even if they are not using it right then, they are reluctant to give it up. IF you can get your set before the class with Megan, do so, that way you are not loosing time waiting for a tool just to start lining for example.

Also get some nail polish or tape and mark your tools so you don't loose them or they go wandering off. I was willing to let others use my tools but at the end of the day, I count to make sure I have them all back. I use purple nail polish in a band, to mark my tools, as it holds up and does not peel off easily. BTW, Megan uses blue painters tape to mark hers. You could do the same and maybe you will end up with some extra tools ;=)

I would also suggest you take your camera to take pictures though out the class. You saw how many I posted, there are many more I did not. I take pictures each step of the way and when something is pointed out to correct, I take a picture of the before correction and after, as reviewing the pictures when I get home has helped me correct the mistakes in the future. And of course a notebook for notes about what you are learning and the pictures.

You will have fun, come home tired but very excited. 
Tell Megan I said hello.

Laurie 
                      *****************************************************

Hi Laurie,
Great suggestions about marking tools- hadn’t considered that, thanks. On my way to buy some blue painters tape. Wonder if Megan will notice not having any tools left at the end of class???!!! I like the idea of fingernail polish, I could get very creative. I’ll definitely take my camera.

One more question. You said the N set had “a few tools we thought were missing”. What would you add?
Thanks again,
C.

                      *****************************************************

C -As for the missing tools, One was an under cutter and the other was a sheep foot planisher.

And one more thing, I think on the third day Megan will give you an intro to making tools and the chance to make one... When I took the original two day, we did not cover making tools. In the 2nd class I took, which was a three day, she did but I only watched the demo's and spent the time, while some people made a tool, working on my project. I did this because I was going to take the extended class with Val, at Metals Week, on making tools. SO if even if you don't make a tool, pay attention to the steps. Then, in the future, if you take another class  and have an opportunity to make a tool(s) some of it will be familiar (especially reading the book) and it will be easier to pickup.  I bring this up because you will have your set by then (have you place your order yet?) and it may not be as important to make a tool... I doubt there will be a lot of time to make a "special tool"

Laurie                  
                  *****************************************************
Thanks Laurie,
I have ordered a set of tools from MW. Sounds like another reason to bring a camera to class! Thanks for all your input!
C
.

Progress...

11/28/2010

 
Yes, it is hammers, again.
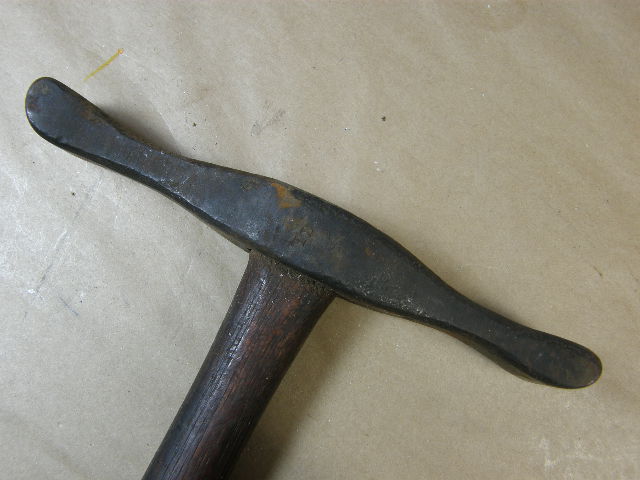
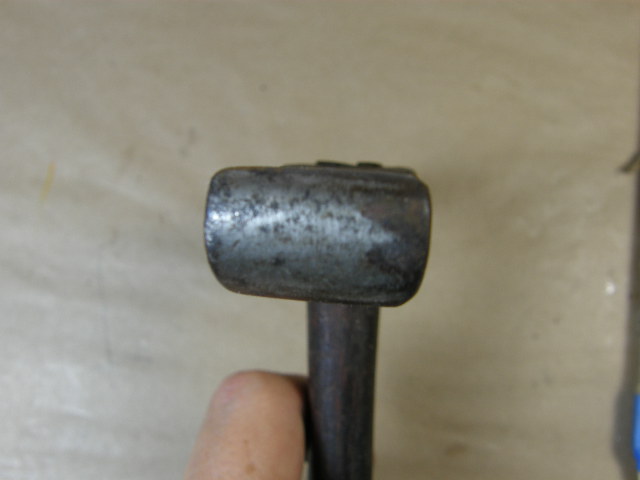
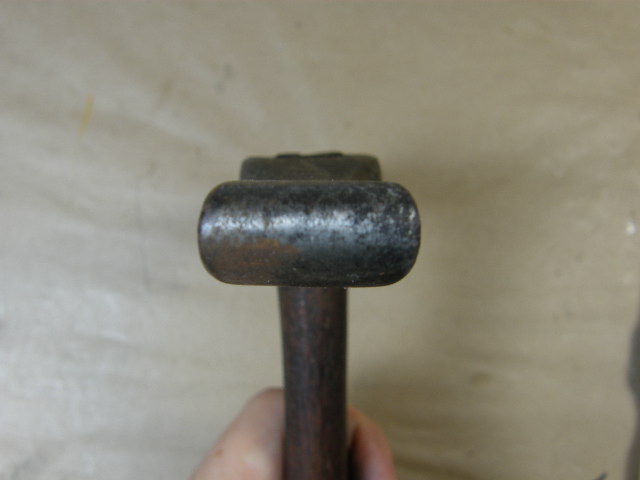
I have now refinished 4 of the 18 hammer heads. Once all of them are done then I will have to sand and clean up the handles and reseat them in the heads. I might have to replace one or two handles are they have a crack and I don't think driving the wedge in further will do any good.

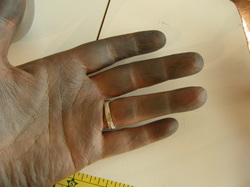
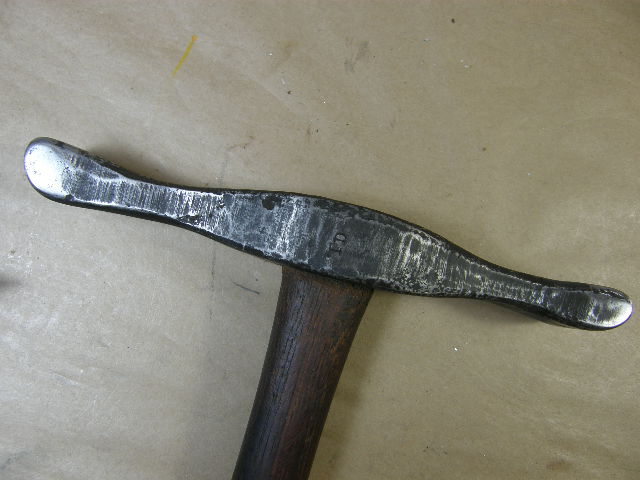
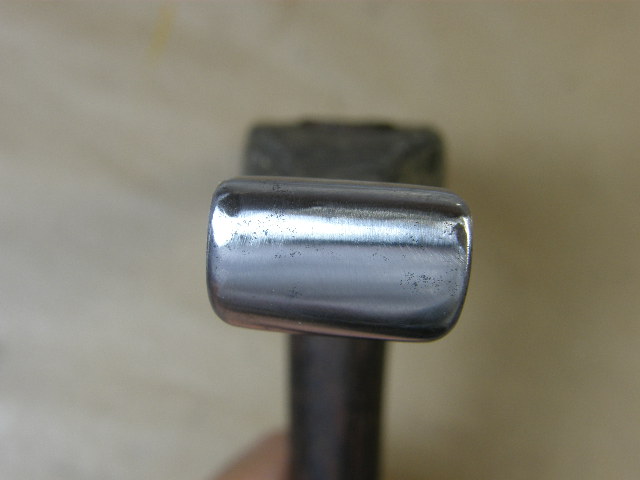
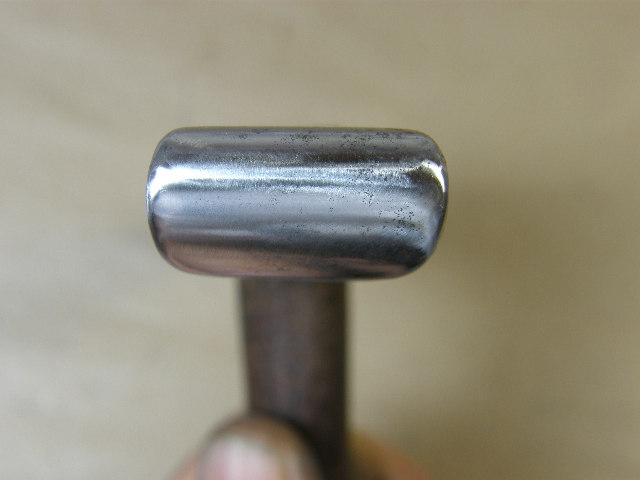
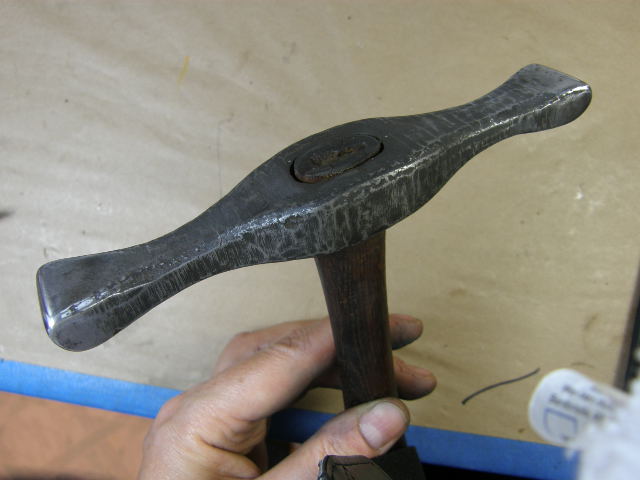
Here are some before, during and after pictures of one of the hammer. You can see they are pretty rusty and full of grime. After taking 280 sand paper to the sides, top and bottom, most of the rust was gone but not in the deep machining grooves - WD-40 will be used to get at that. Then I used 280 to clean up the faces of the hammer. This was difficult as there was some deep pitting and you don't want to ruin the shape (angles and curves) of the faces. After that I took 320, 400 and 600 to the faces as well. This process took 1.5 hours and my hands were red and gray from the sanding. WIth the first phase completed and hands washed, I started with the 9 fine sanding/polishing grits I have to get the faces nice and shiny smooth. This took another 1.5 hours but as you can see in the final pictures, it was worth it.

At this rate, it will take at least another month of weekends to finish all the hammers and the flat planishing hammers will be the hardest. 
<<Previous
Forward>>

    RSS Feed

    How to Aquire Your Own Shop Elf

    Archives

    June 2026
    May 2026
    April 2026
    March 2026
    February 2026
    January 2026
    December 2025
    October 2025
    September 2025
    August 2025
    July 2025
    June 2025
    May 2025
    April 2025
    March 2025
    February 2025
    January 2025
    December 2024
    November 2024
    October 2024
    September 2024
    August 2024
    July 2024
    June 2024
    January 2024
    November 2023
    October 2023
    September 2023
    October 2020
    August 2020
    March 2020
    December 2019
    November 2019
    October 2019
    September 2019
    August 2019
    July 2019
    June 2019
    May 2019
    March 2019
    February 2019
    January 2019
    December 2018
    November 2018
    October 2018
    September 2018
    August 2018
    July 2018
    May 2018
    April 2018
    February 2018
    January 2018
    November 2017
    October 2017
    September 2017
    July 2017
    June 2017
    May 2017
    April 2017
    March 2017
    February 2017
    January 2017
    December 2016
    November 2016
    October 2016
    September 2016
    August 2016
    July 2016
    June 2016
    May 2016
    April 2016
    March 2016
    February 2016
    January 2016
    December 2015
    November 2015
    October 2015
    September 2015
    August 2015
    July 2015
    June 2015
    May 2015
    April 2015
    March 2015
    February 2015
    January 2015
    December 2014
    November 2014
    October 2014
    September 2014
    August 2014
    July 2014
    June 2014
    May 2014
    April 2014
    March 2014
    February 2014
    January 2014
    December 2013
    November 2013
    October 2013
    September 2013
    August 2013
    July 2013
    June 2013
    May 2013
    April 2013
    March 2013
    February 2013
    January 2013
    December 2012
    November 2012
    October 2012
    September 2012
    August 2012
    July 2012
    June 2012
    May 2012
    April 2012
    March 2012
    February 2012
    January 2012
    November 2011
    August 2011
    July 2011
    June 2011
    May 2011
    April 2011
    March 2011
    February 2011
    January 2011
    December 2010
    November 2010

    Jan - Nov 2010 History
    File Size: 2272 kb
    File Type: pdf
    Download File

    Jan - Dec 2009 History
    File Size: 2332 kb
    File Type: pdf
    Download File

    Categories

    All
    3D Printing
    42
    Art
    A Year Of Repousse
    BFA
    Blacksmithing
    Blogoversary
    Box Project
    Business
    Chasing & Repousse
    Commission
    Education
    Embroidery
    Enamel
    Entries
    Entry
    Exhibition
    Facebook
    Filing
    Fold Forming
    Gold
    Holloware
    Hot Forging
    Hydraulic Press
    Jewelry
    Jooltool
    Keum-boo
    Knitting
    Learning
    Leather
    Lost Wax Casting
    Market
    Metal
    Patina
    Photography
    Polishing
    Publications
    Quilt
    Raising
    Sanding
    Santa Fe Symposium
    Shop Elf
    Sinking
    Social Media
    Soldering
    Store
    Studio Visits
    Superbowl Challenge
    Teaching
    Teapot Project
    Technique
    Temari
    Tin
    Tools
    Vessels
    Visiting Workshops
    Weaving
    Website
    Workshop
    Yubinuki

Powered by Create your own unique website with customizable templates.