Follow Me On:
The Adventurous Silversmith
  • Home
  • Blog
  • Portfolio
    • Metal Work >
      • Chasing & Repousse
      • Holloware
      • Jewelry
      • Other Wonderful Items
    • Fiber Arts >
      • Temari
      • Yubinuki
  • Resources
    • Library
    • Tools & Equipment
    • Links
  • About
    • Artist Statement
    • Curriculum Vitae
    • How it is Made
    • Contact

An Actual Silversmithing Project

11/29/2015

1 Comment

 
Over on my About - Artists Statement page there is a section titled Answers to Other Questions. In this section I actually rant on about the term SILVERSMITH and how making jewelry in silver is NOT silversmithing.  

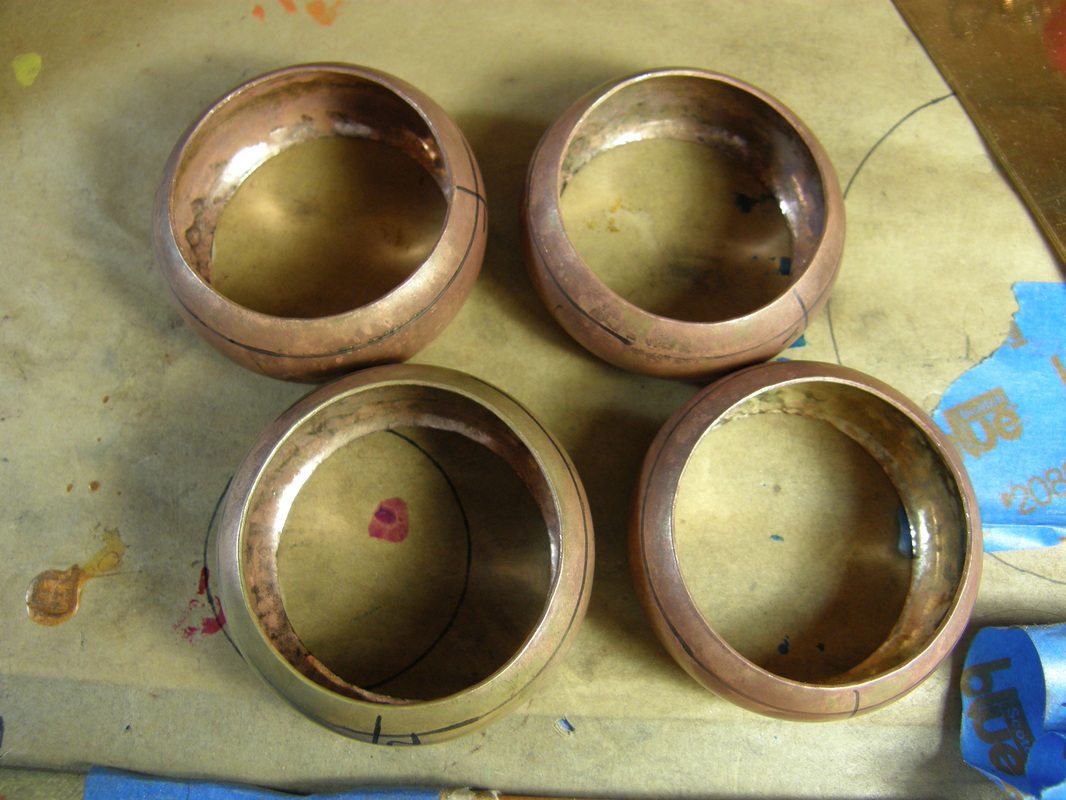
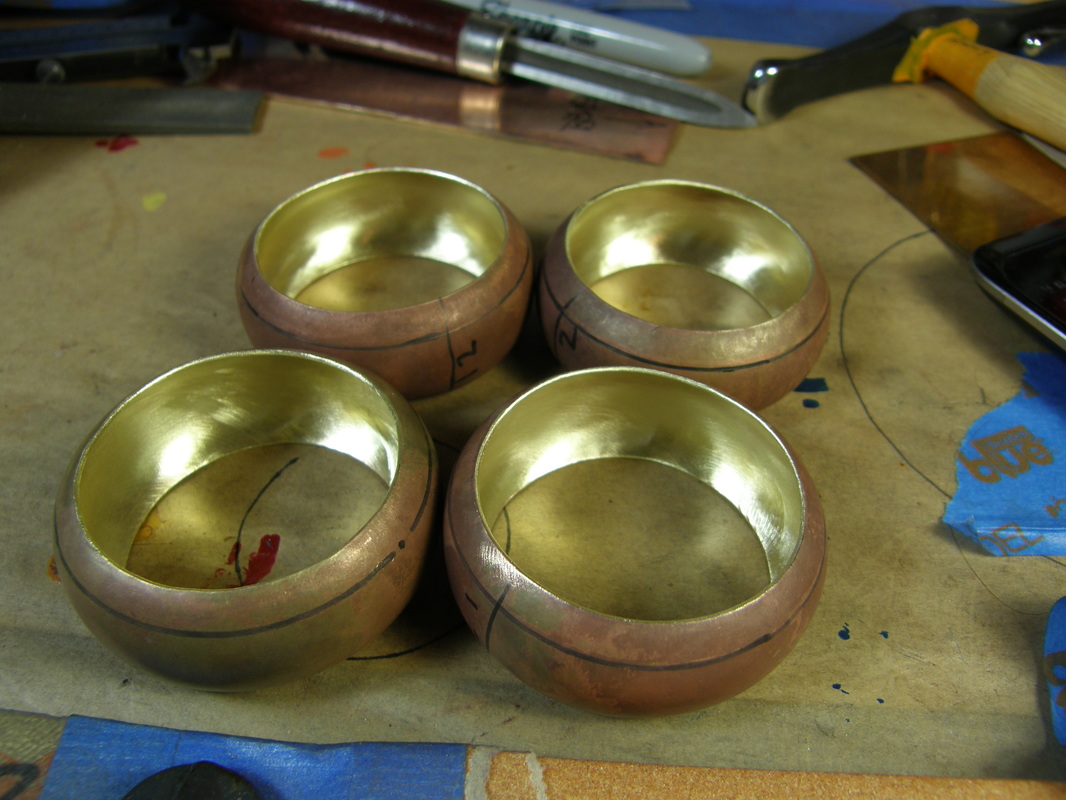
This weekend, I challenge myself to make a set of Napkin rings in brass so I could prototype a design and working in brass is very similar to working in sterling silver due to the work hardening nature of the material. Copper is easy to work in but too soft to get an idea of how long it might take to make something or how the metal moves.

Oh, and YES this is still silversmithing due to the nature of the item not the material.

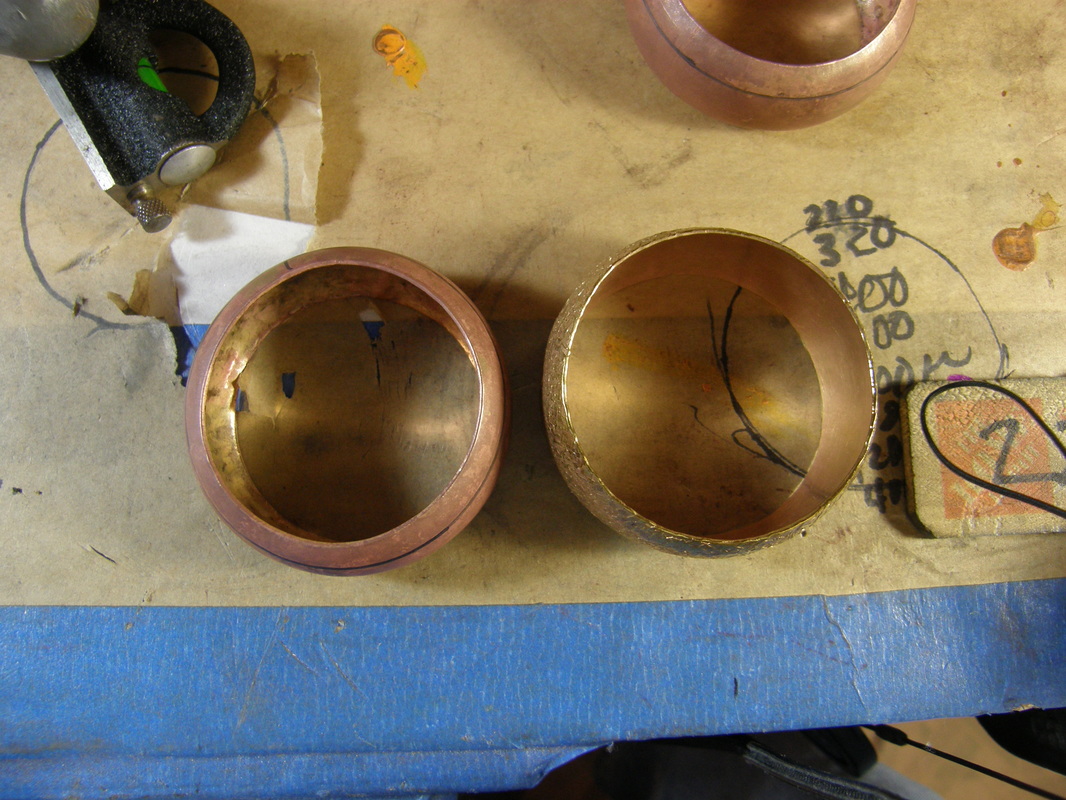
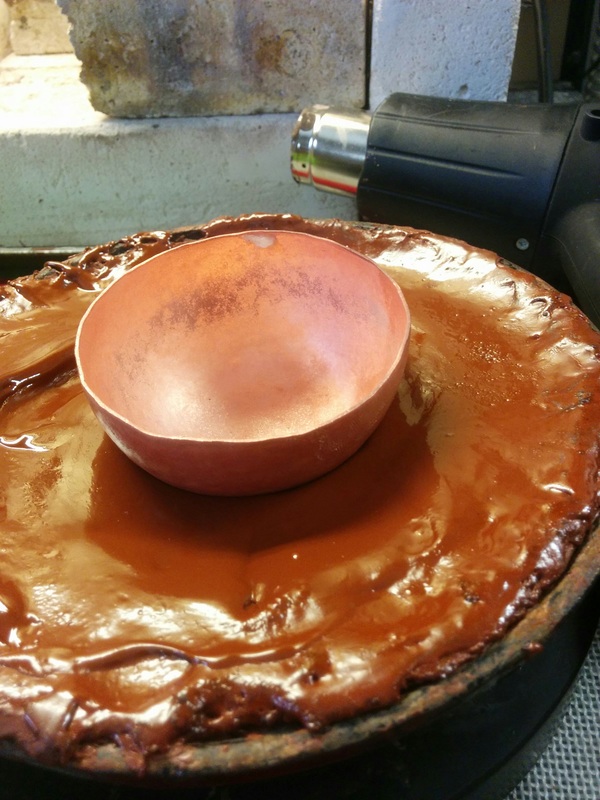
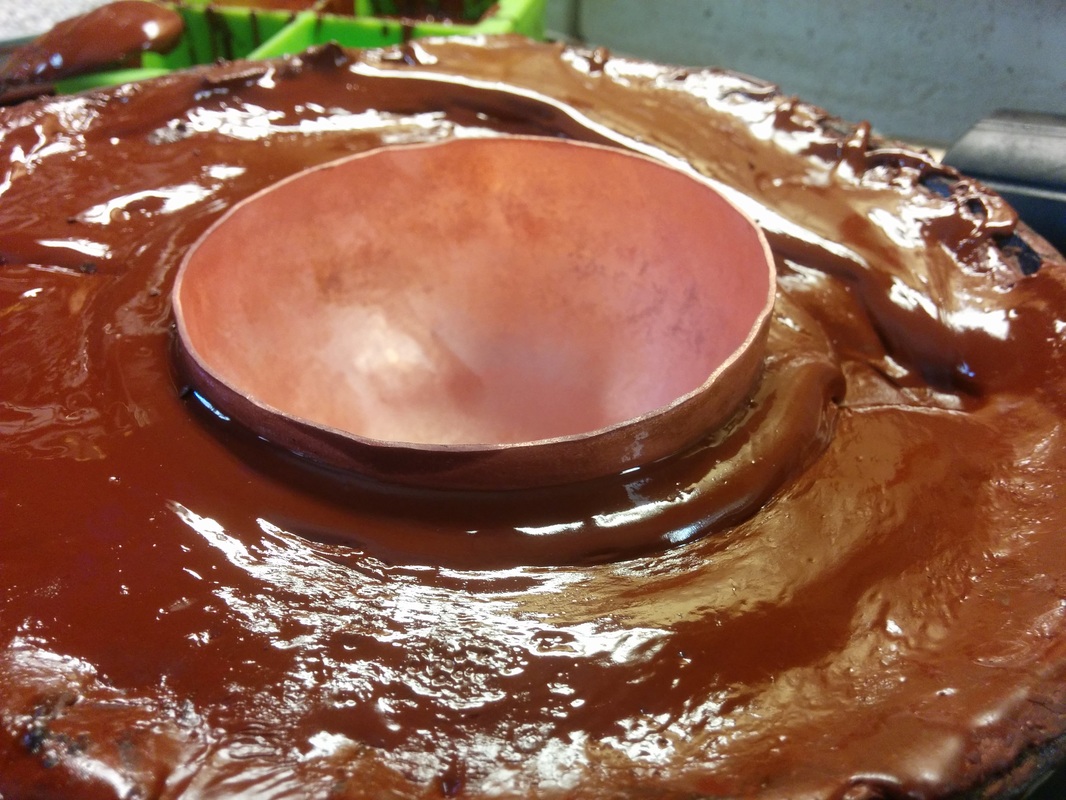
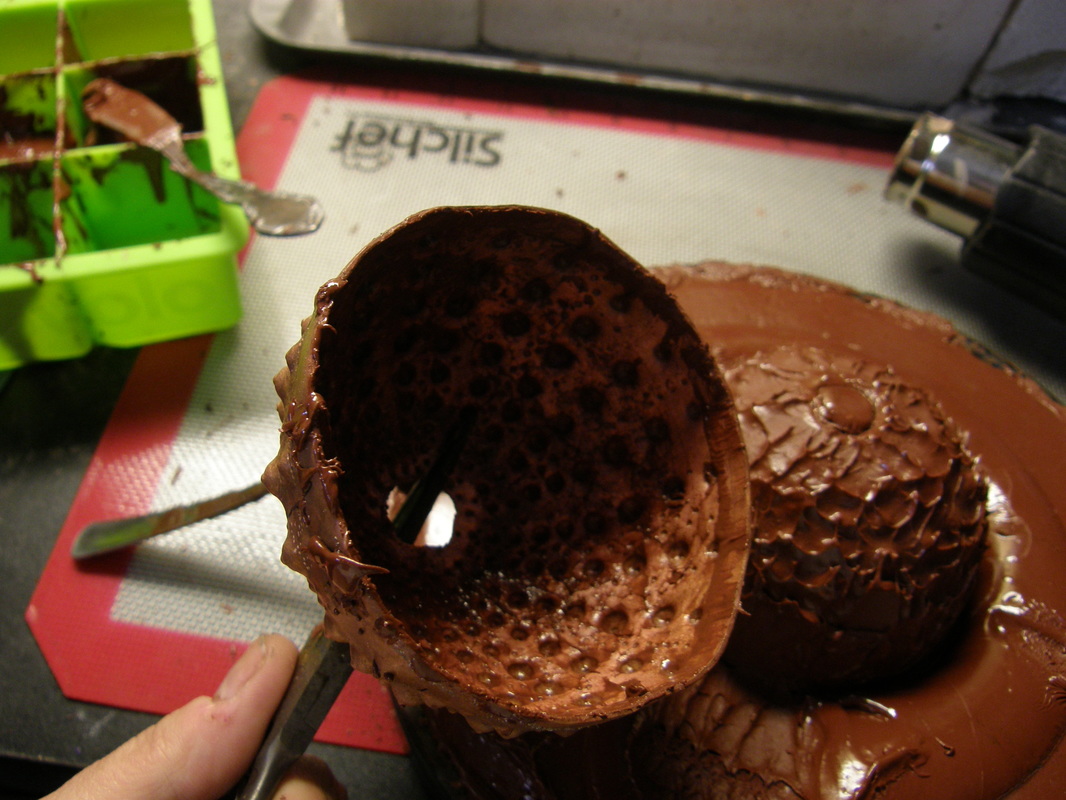
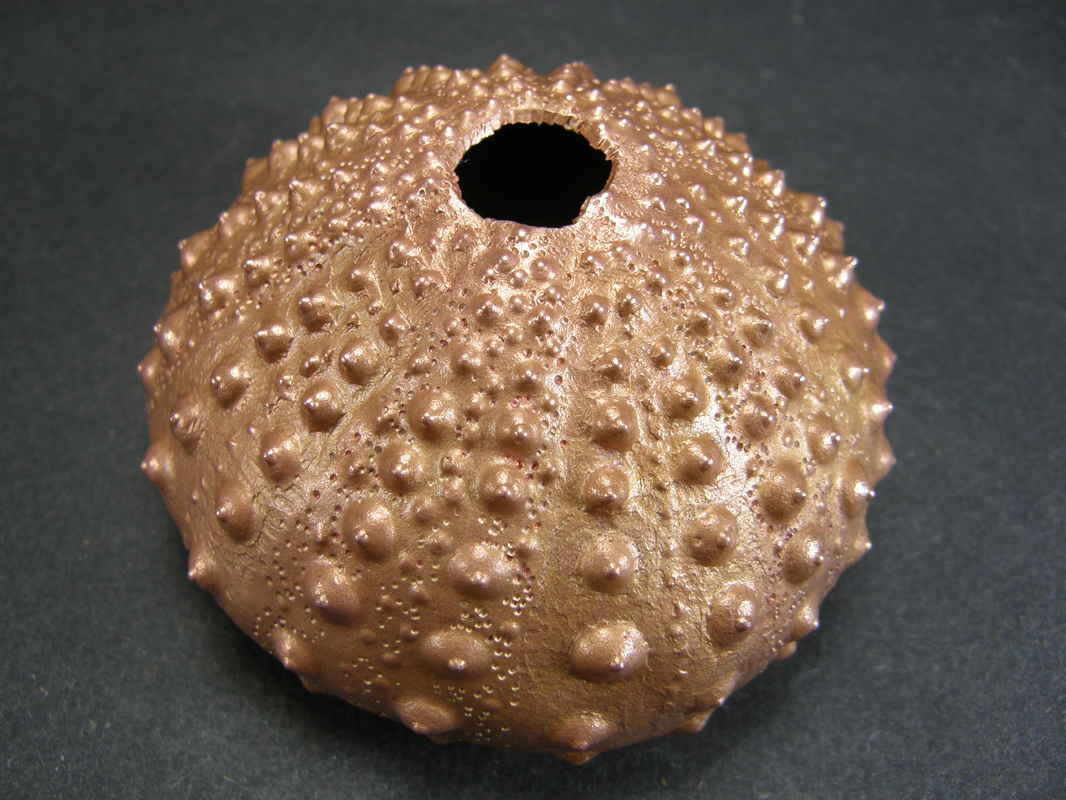
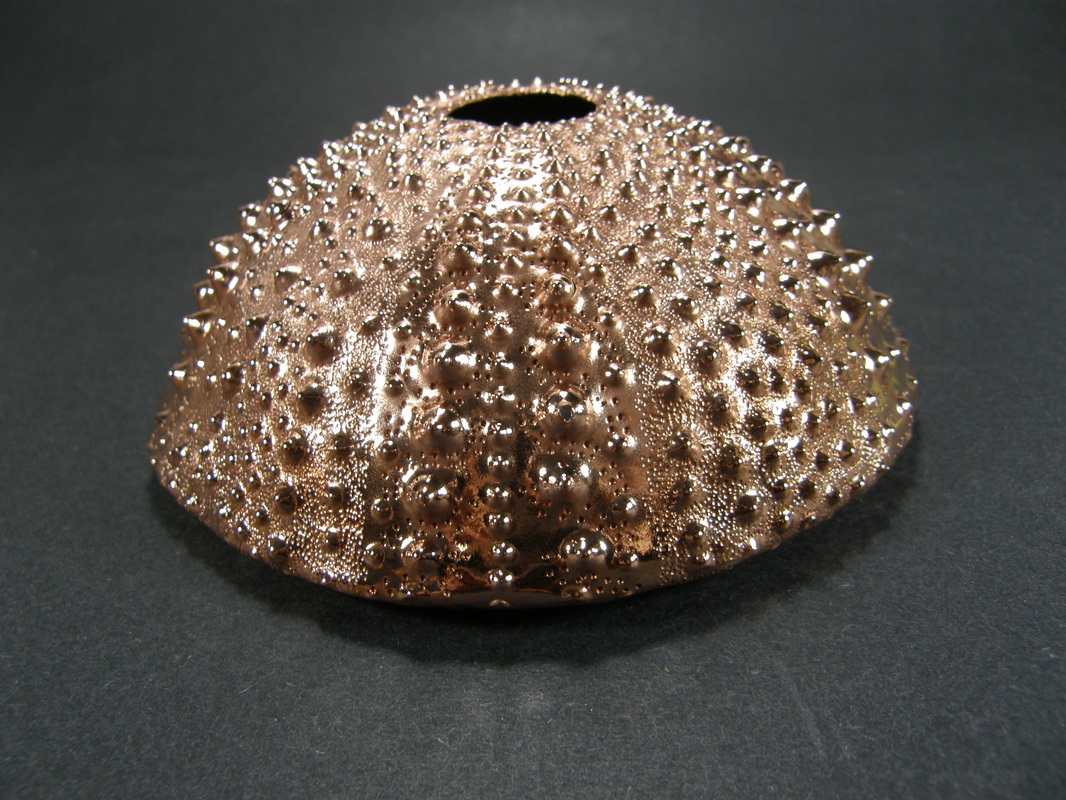
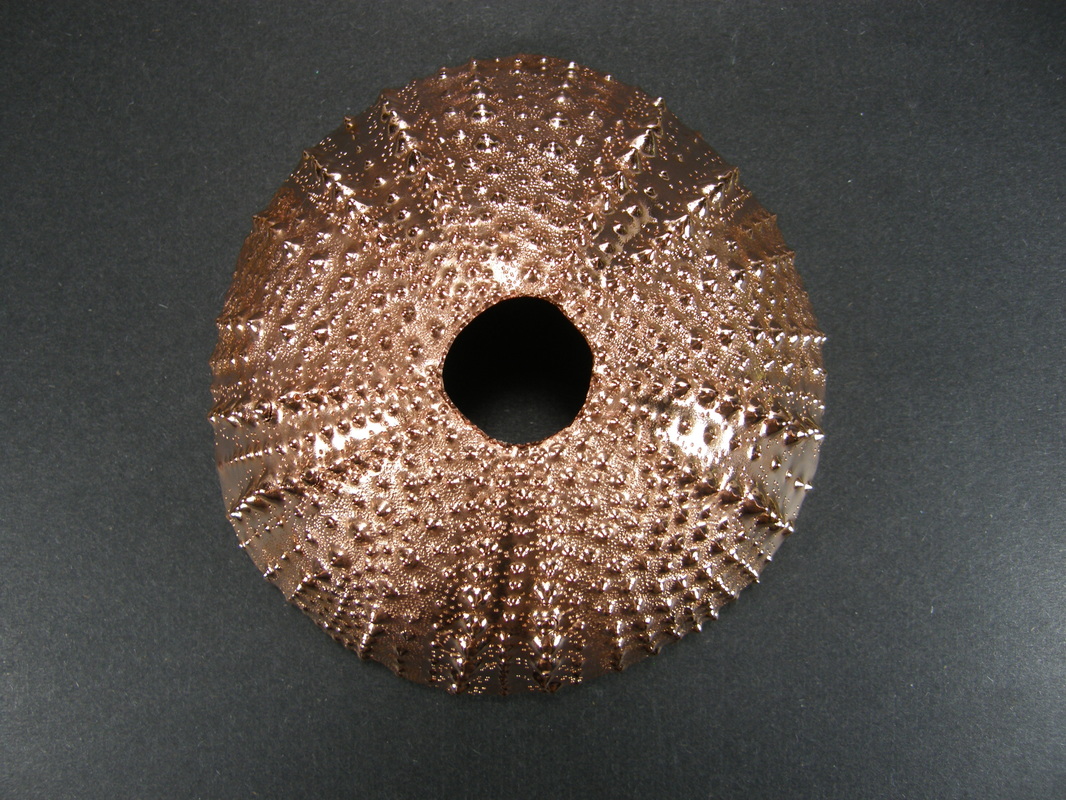
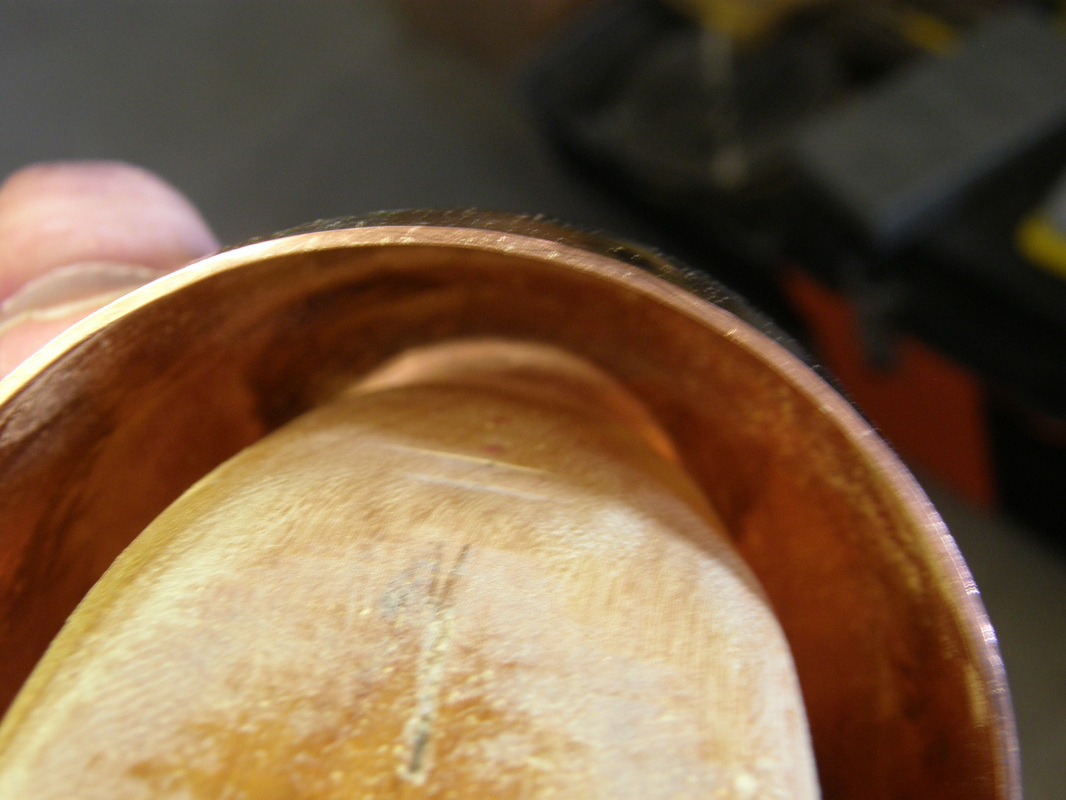
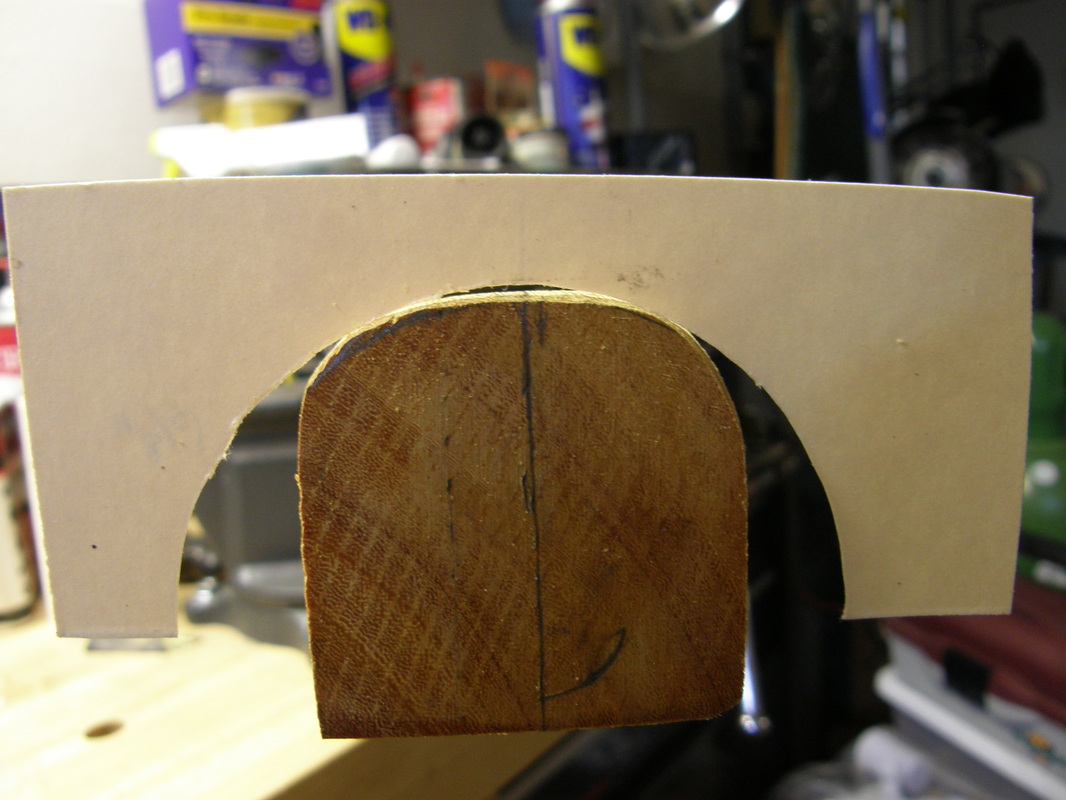
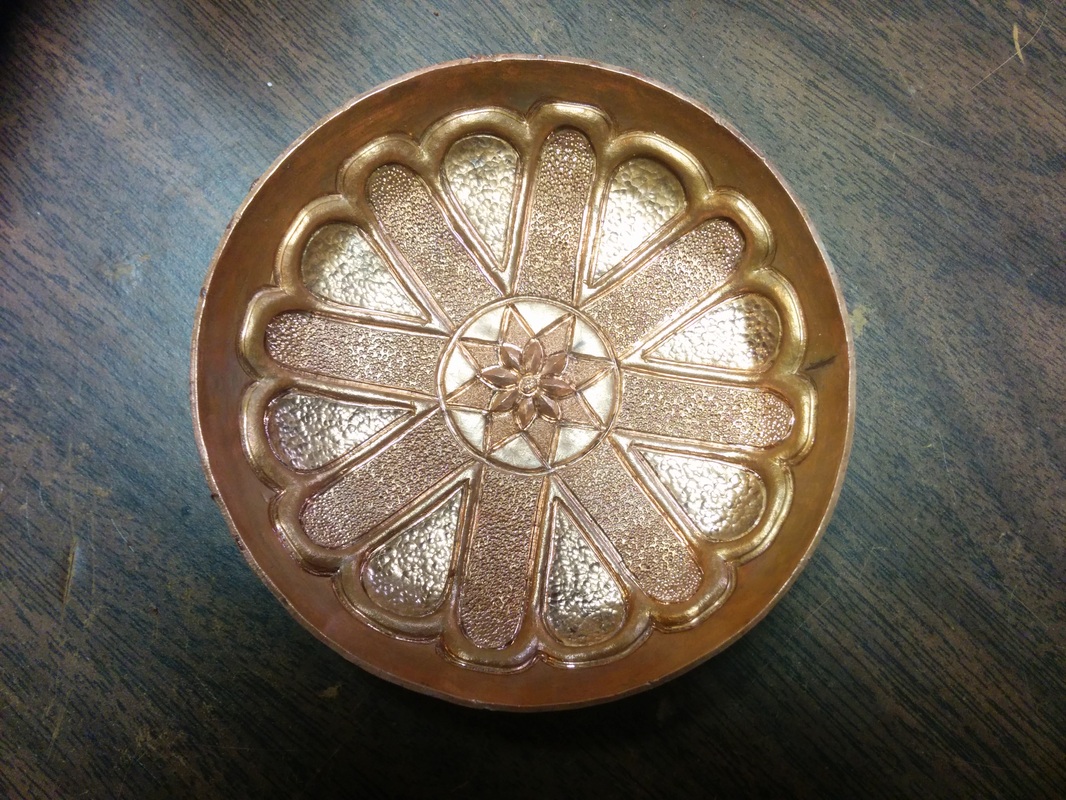
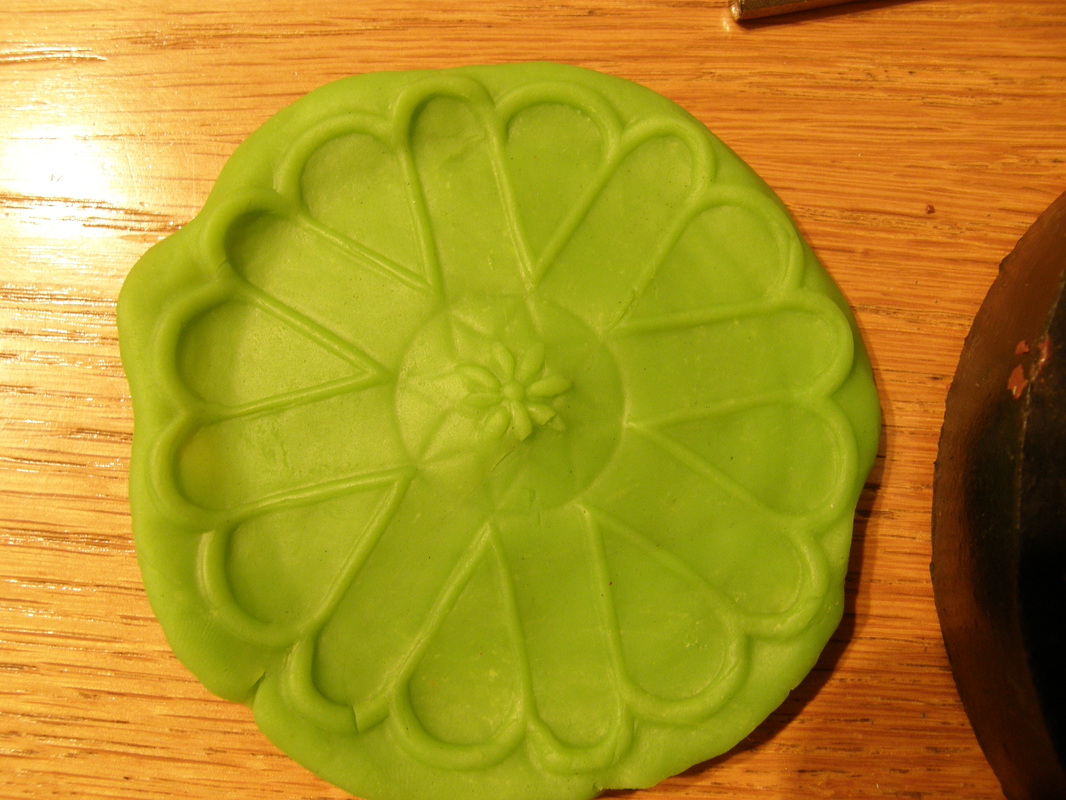
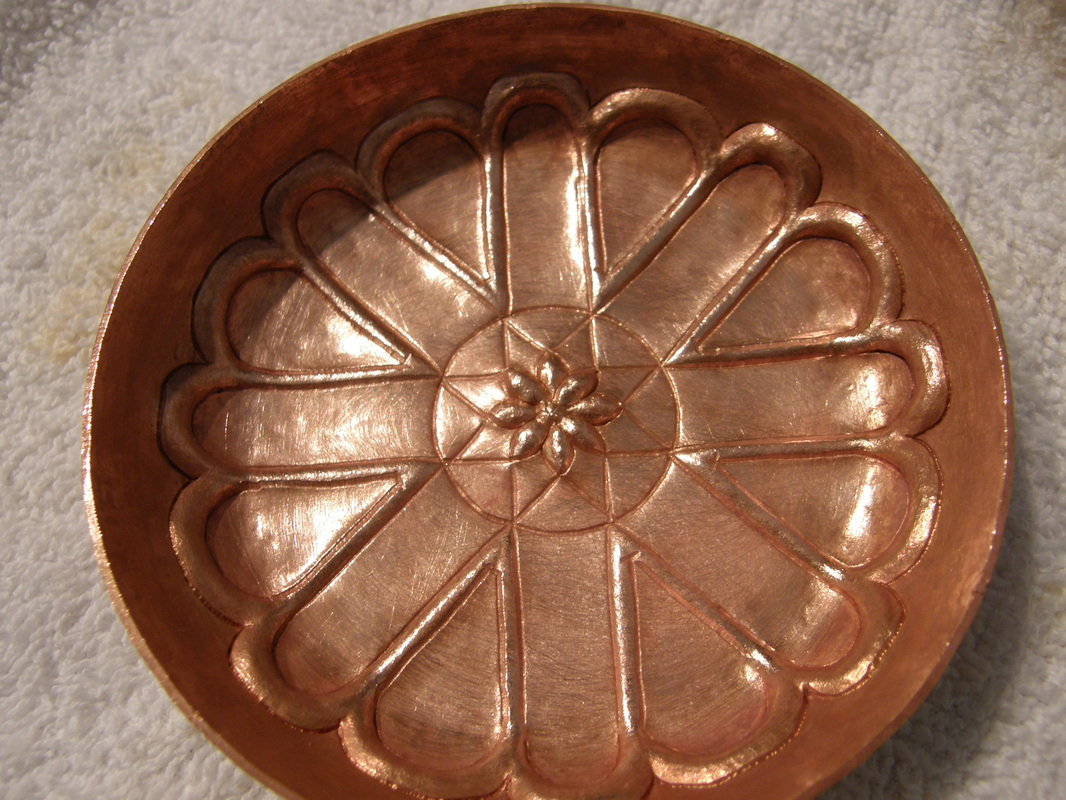
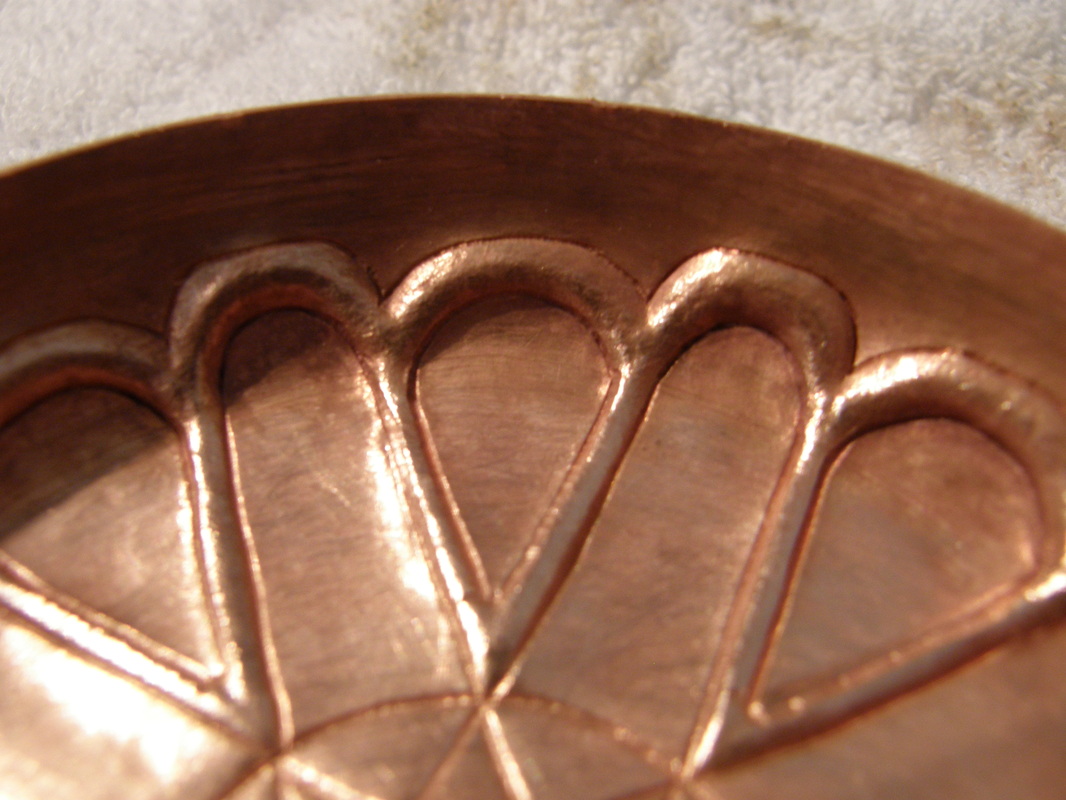
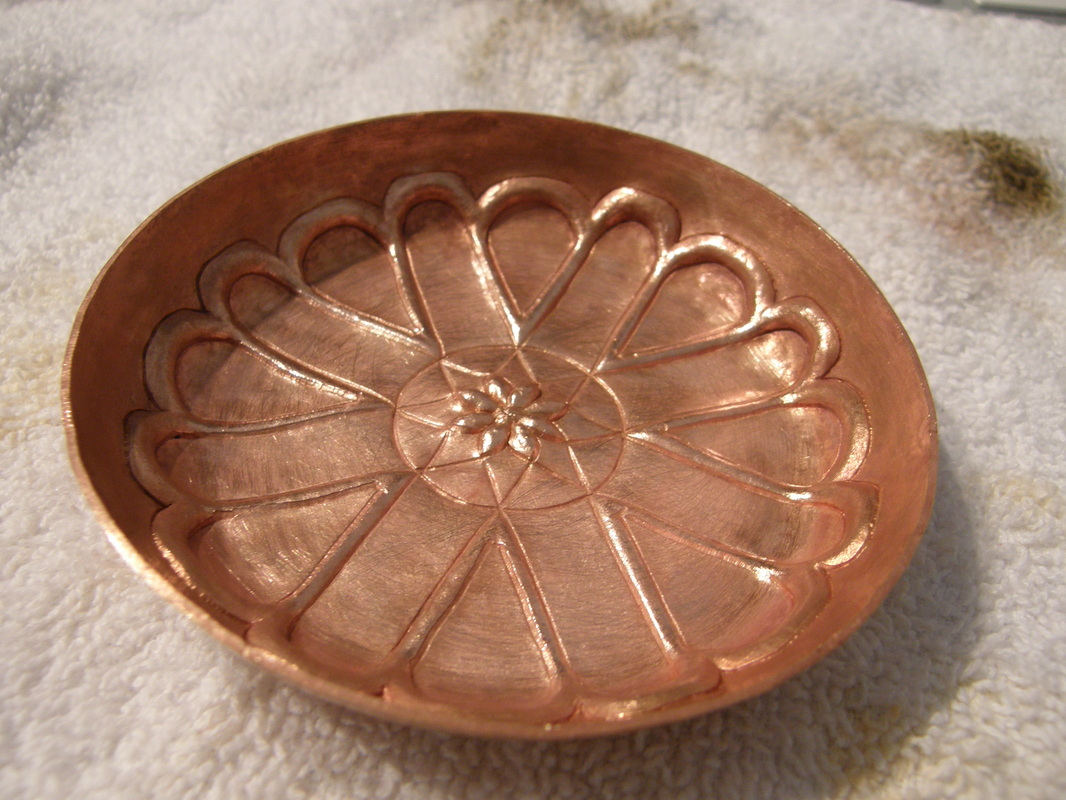
I was experimenting on Thanksgiving day with synclastic and anticlastic forms because on my trip to Haystack back in 201, you can see the two copper forms I made while there on this page, and I have wanted to do napkin rings with this shape since then. 

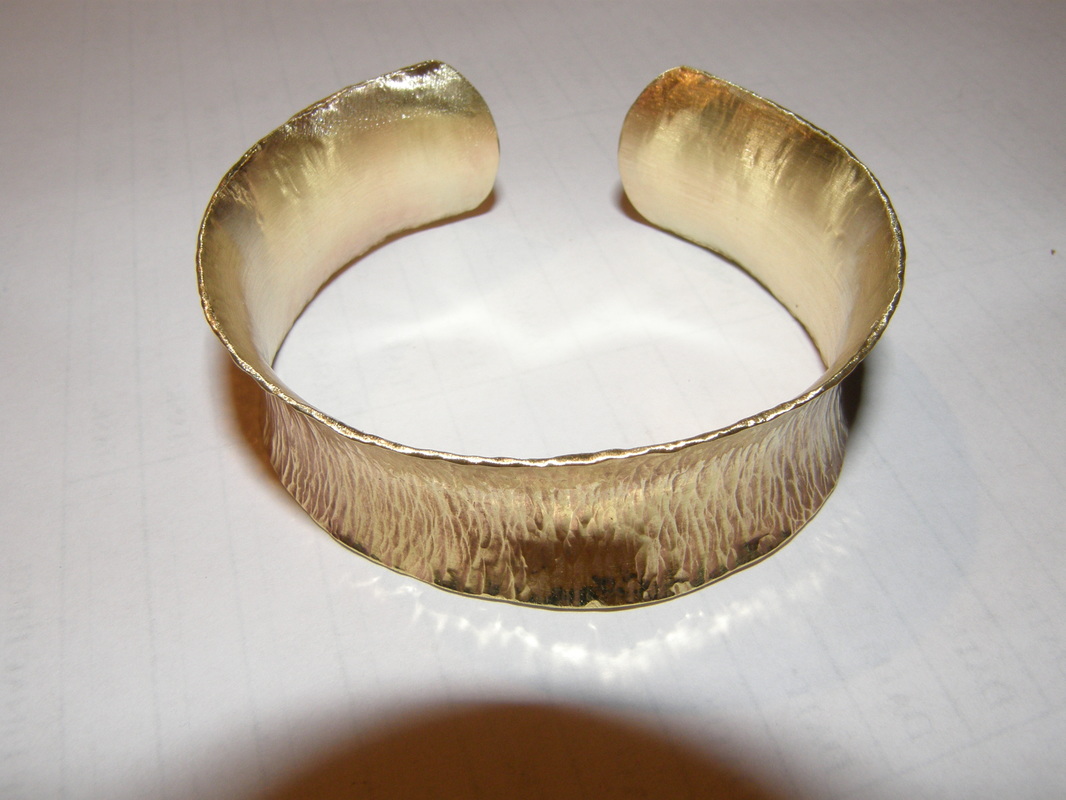
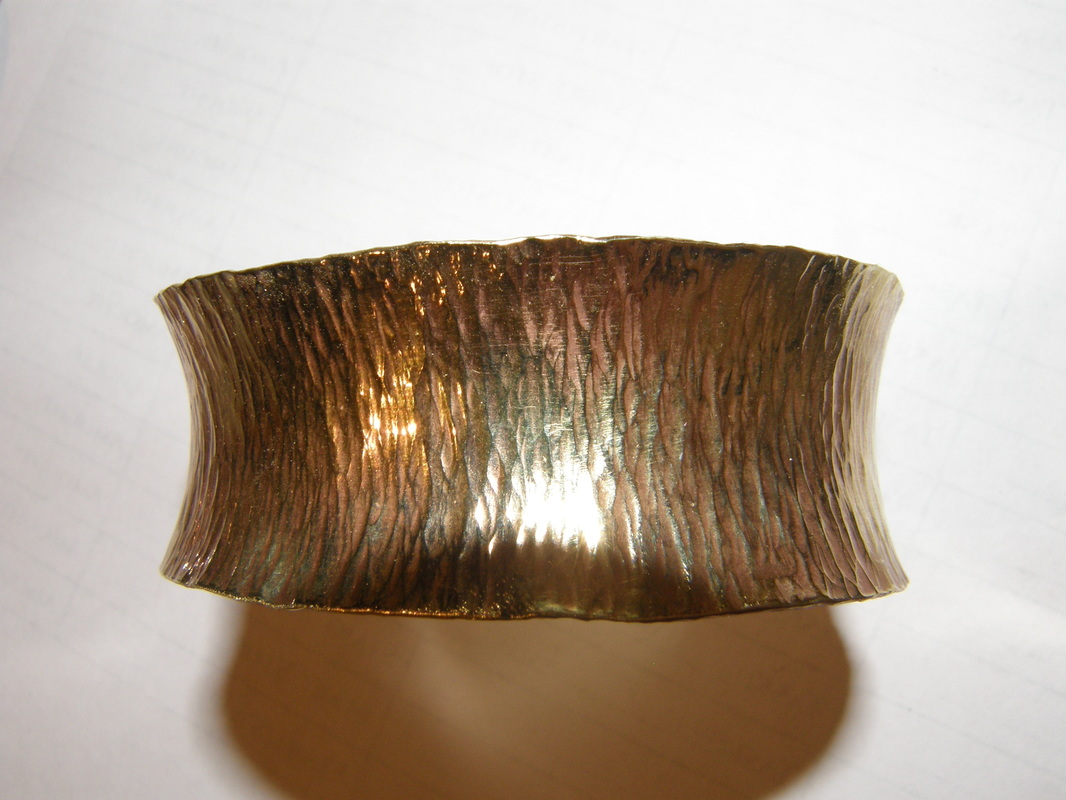
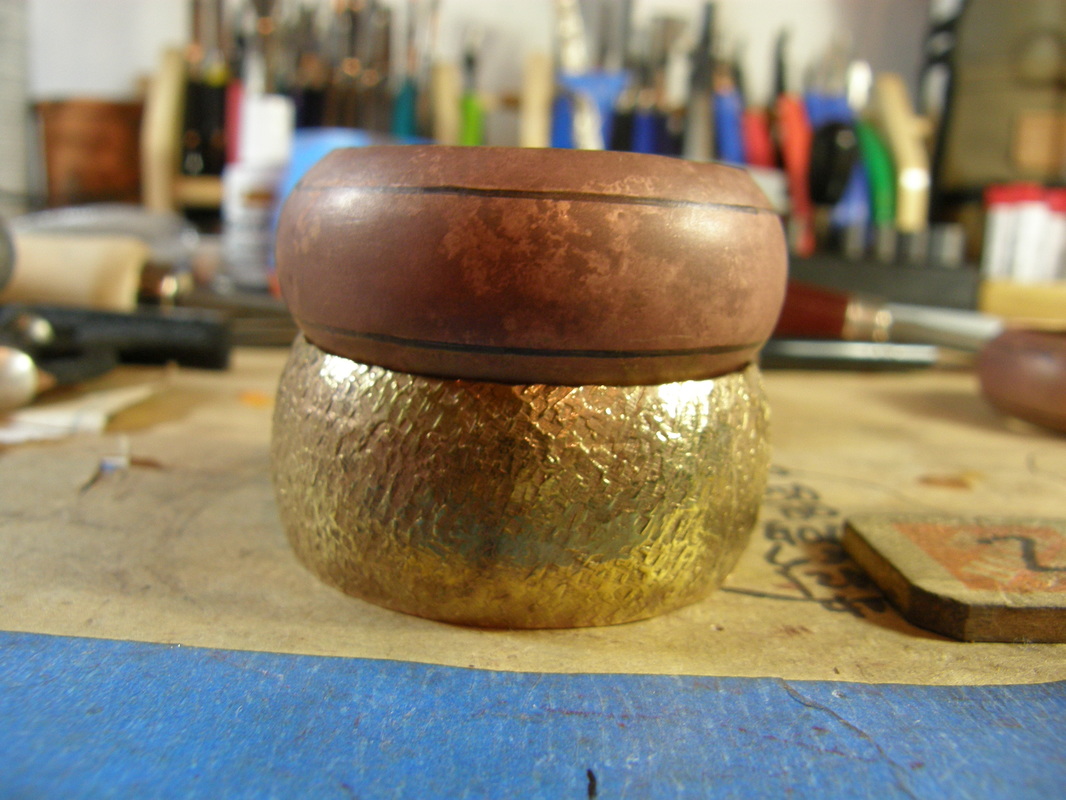
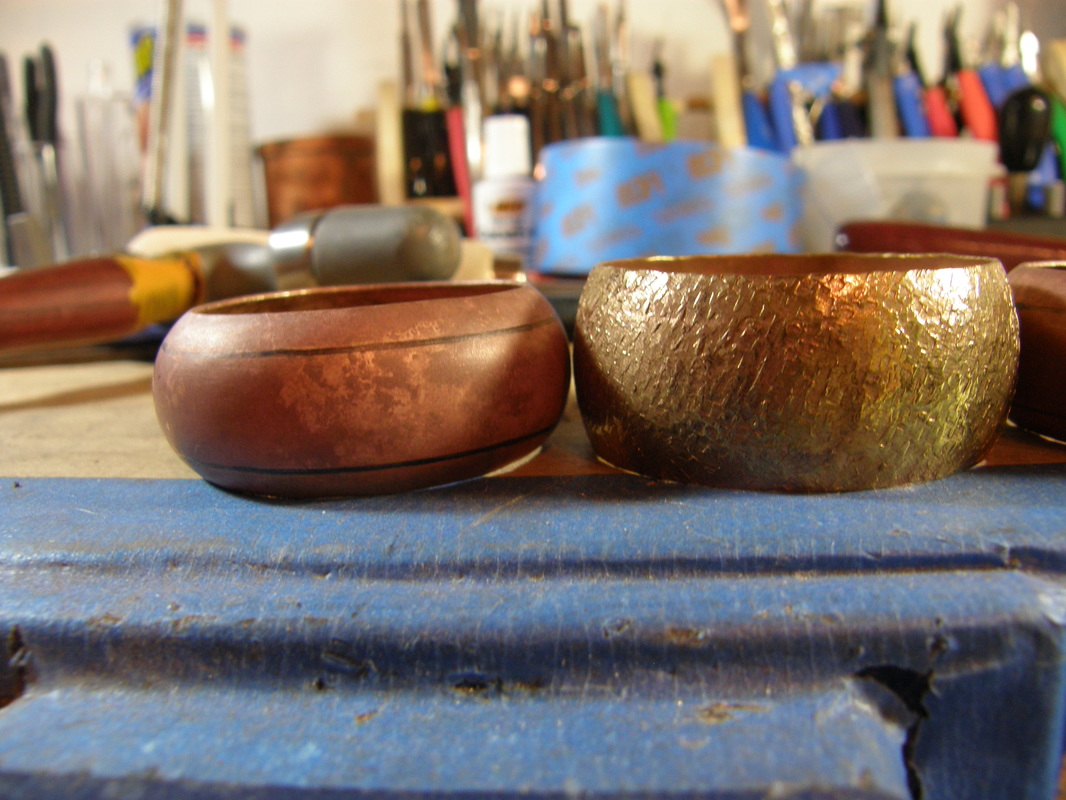
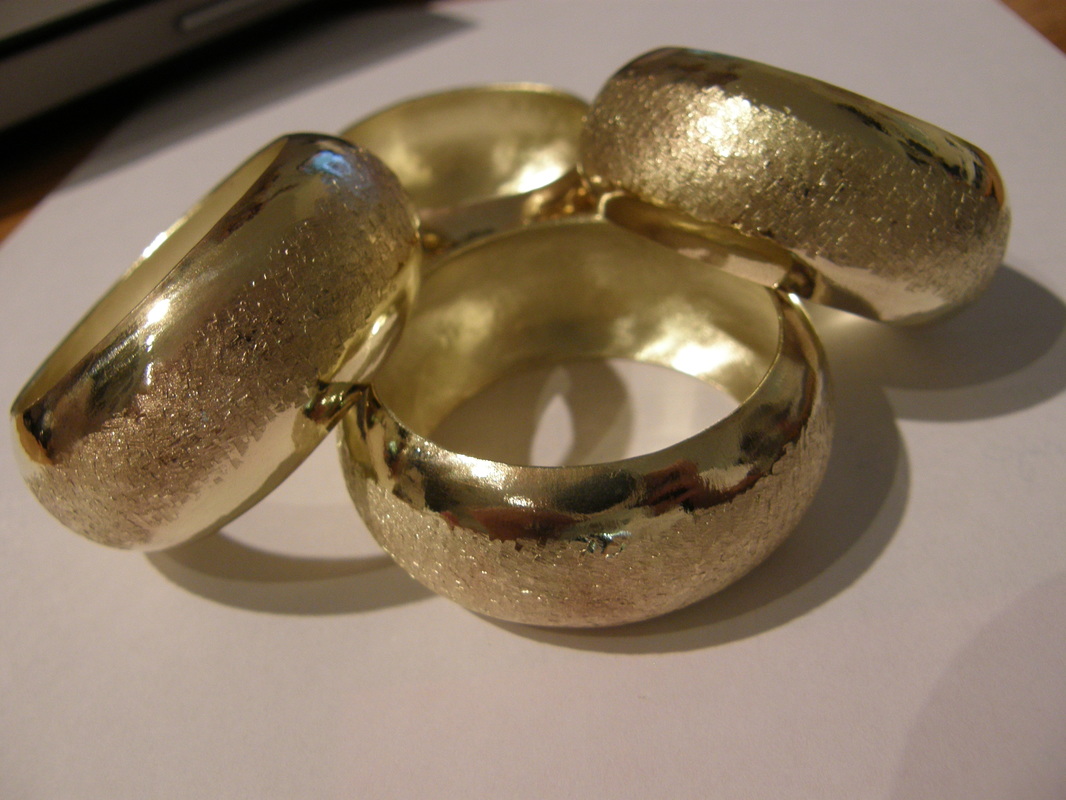
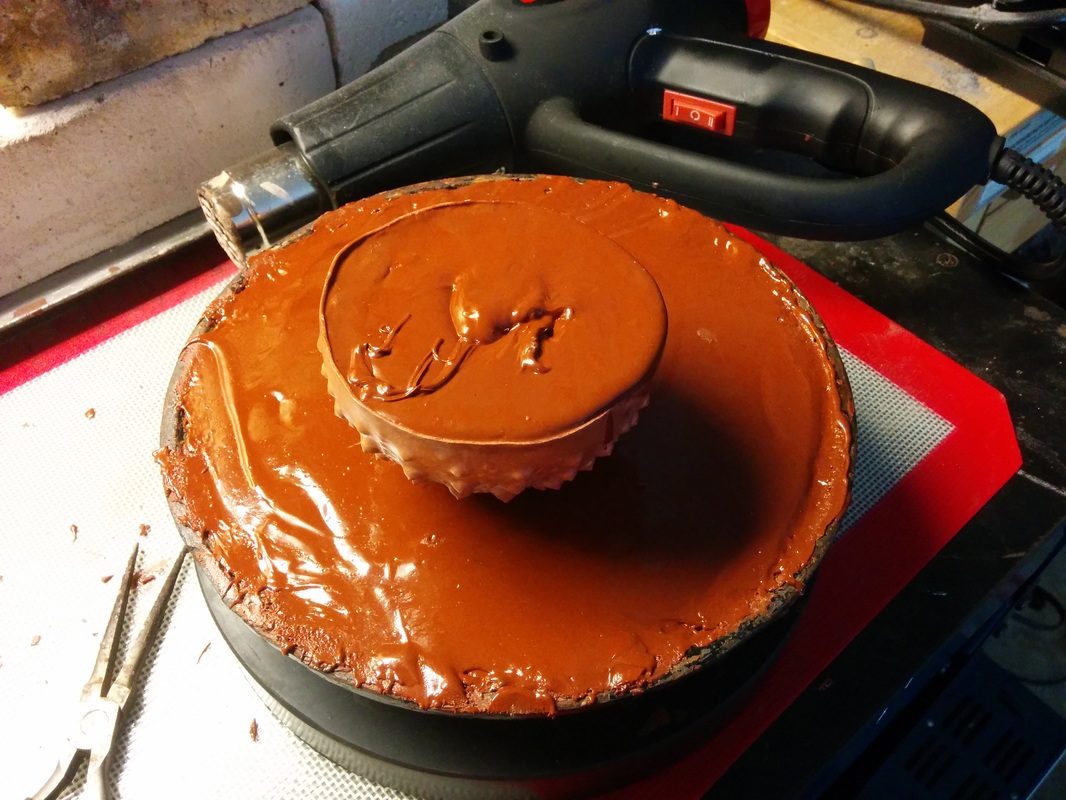
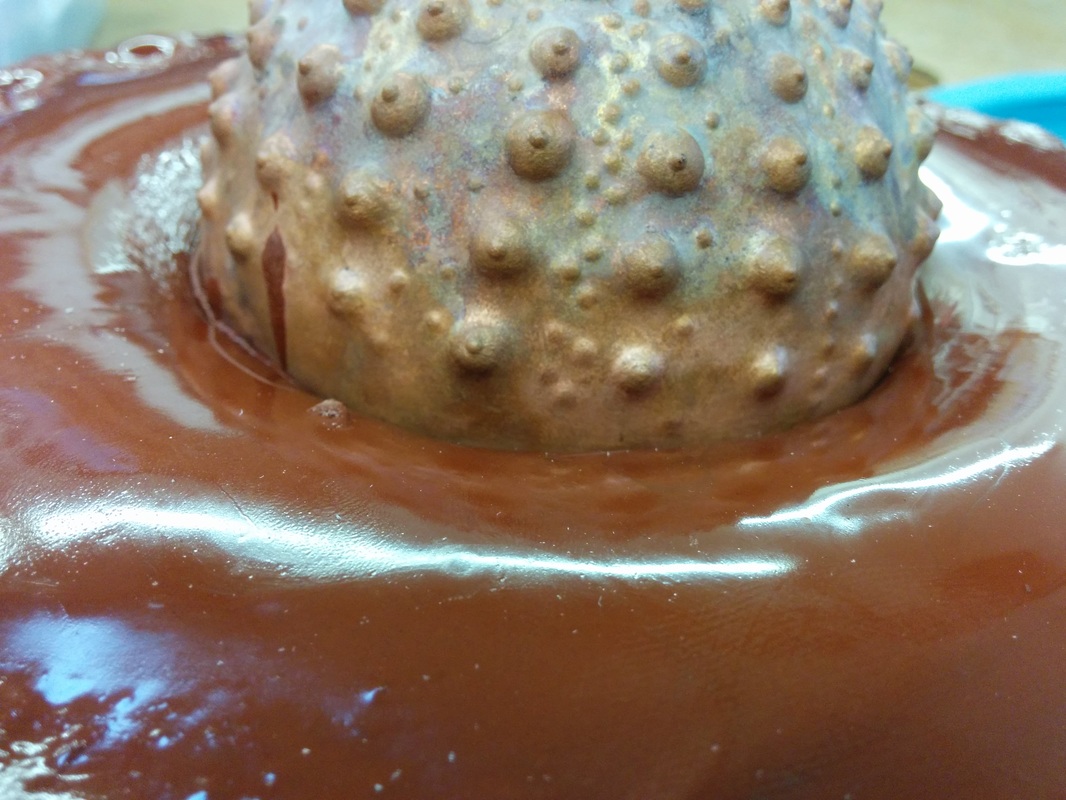
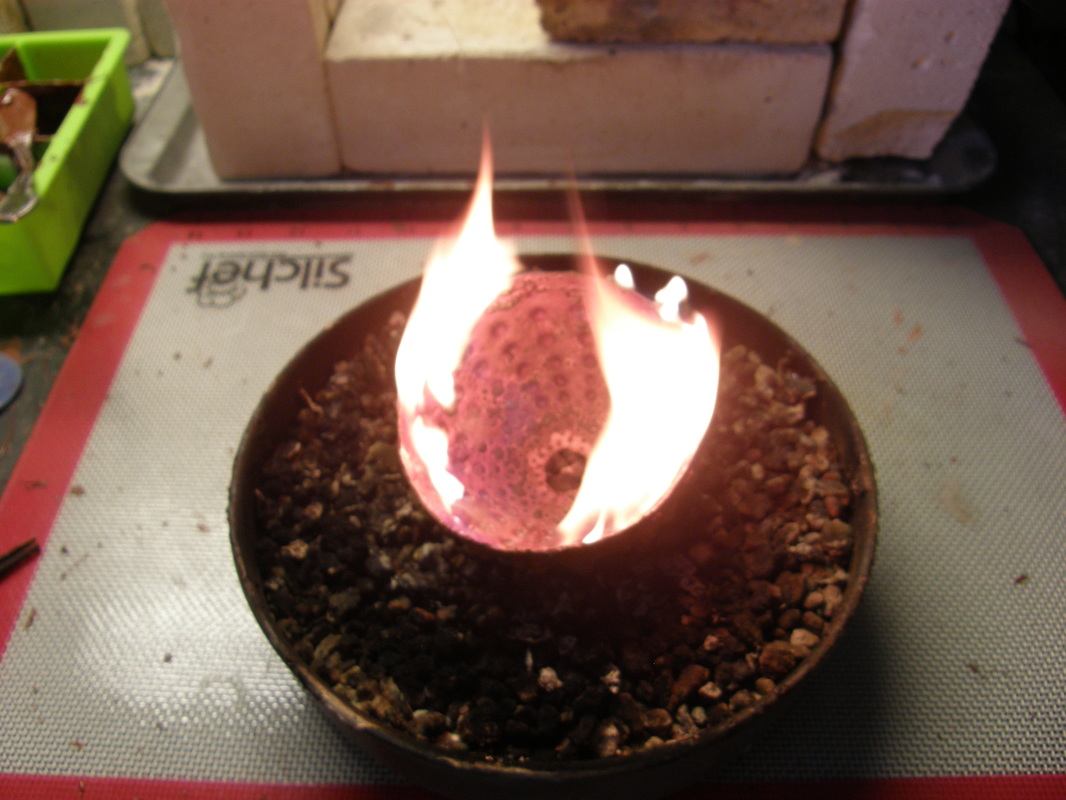
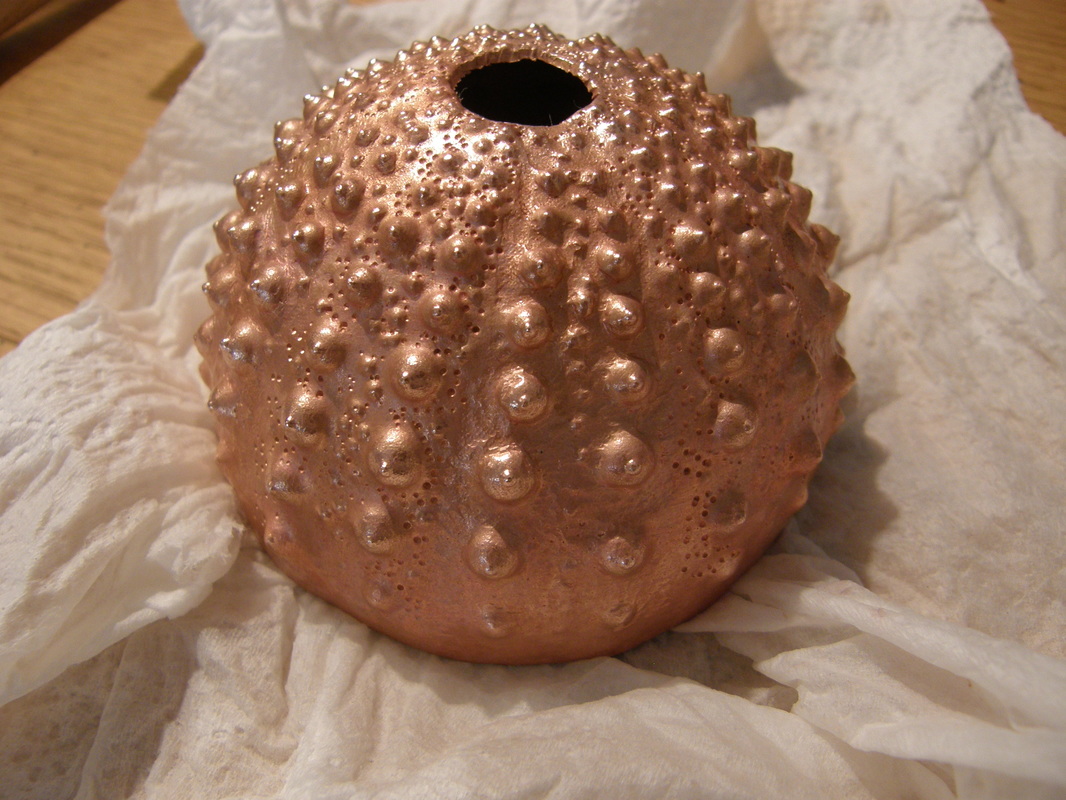
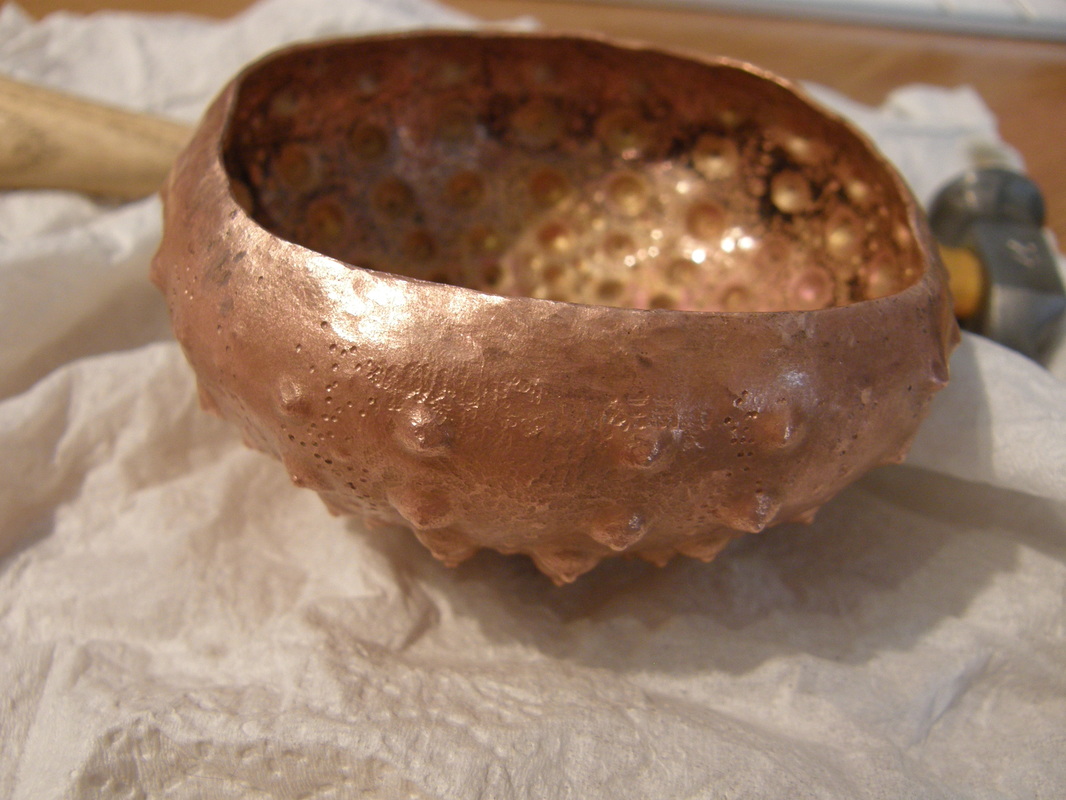
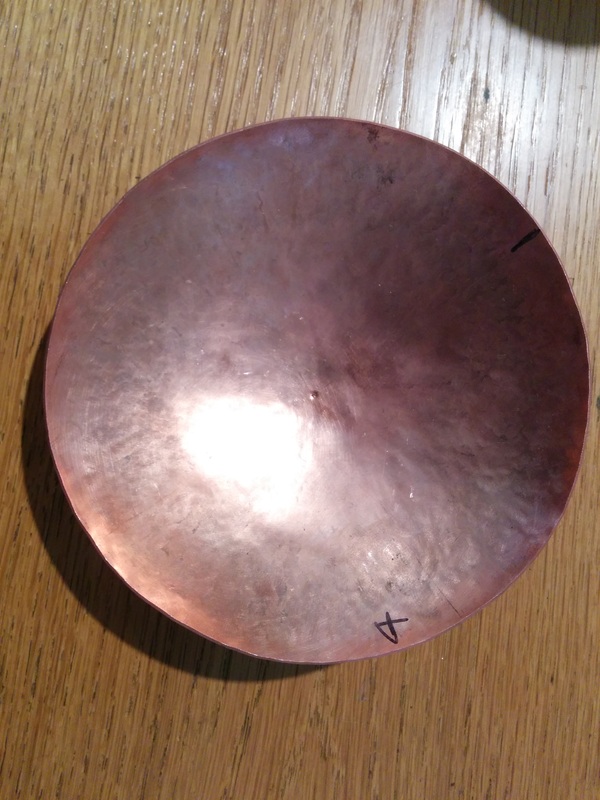
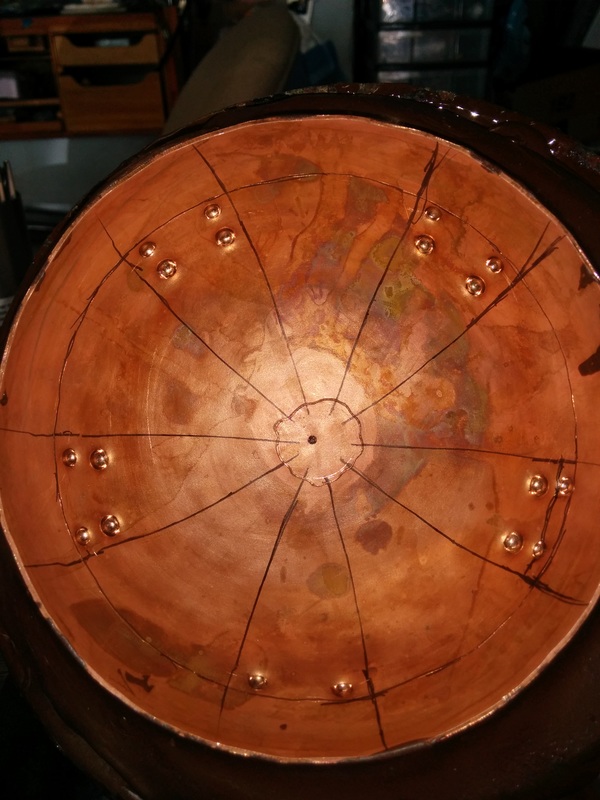
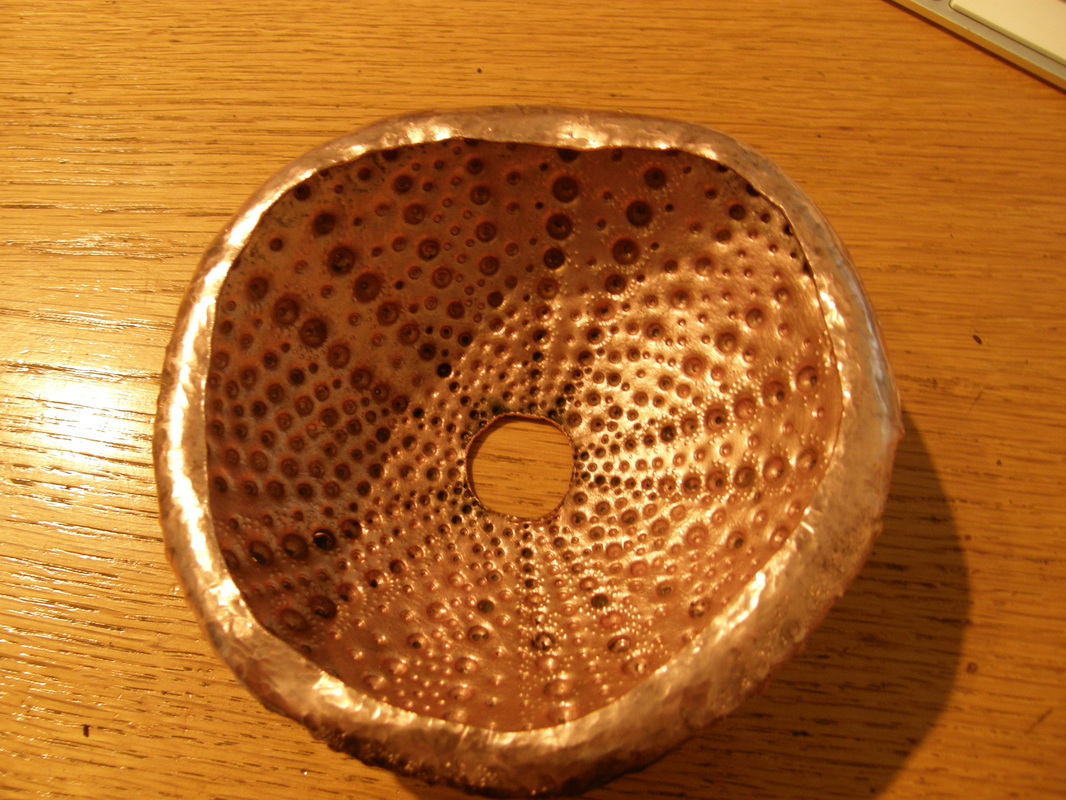
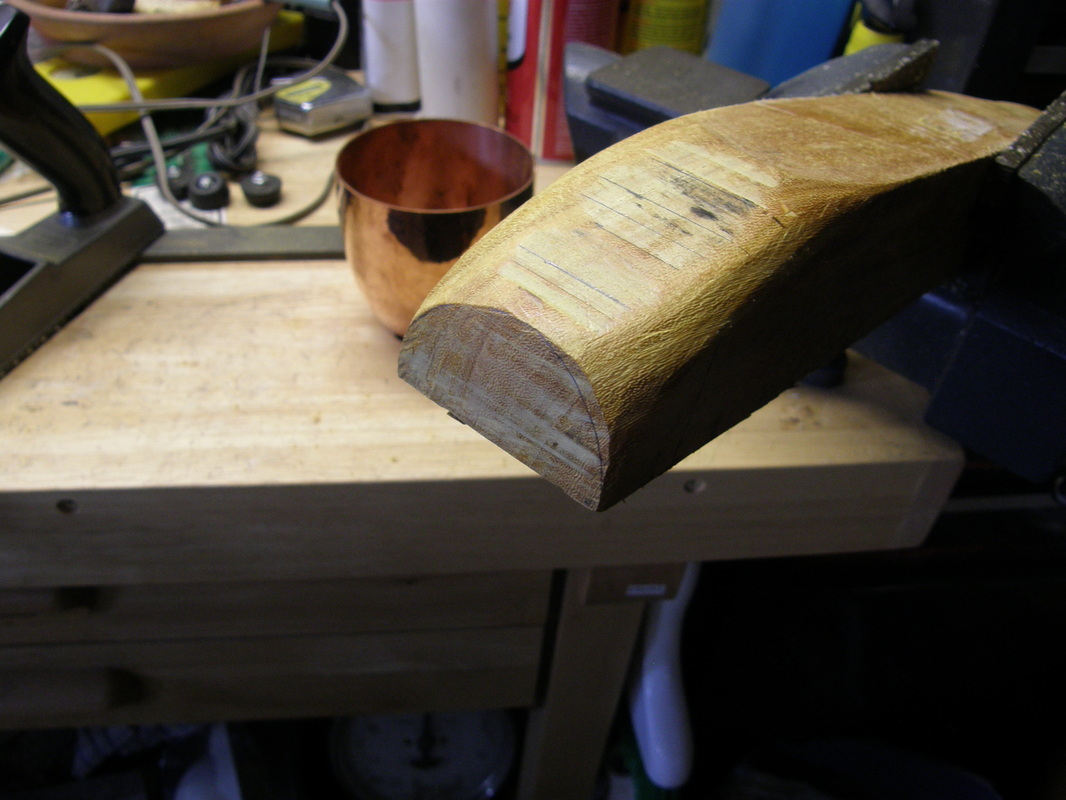
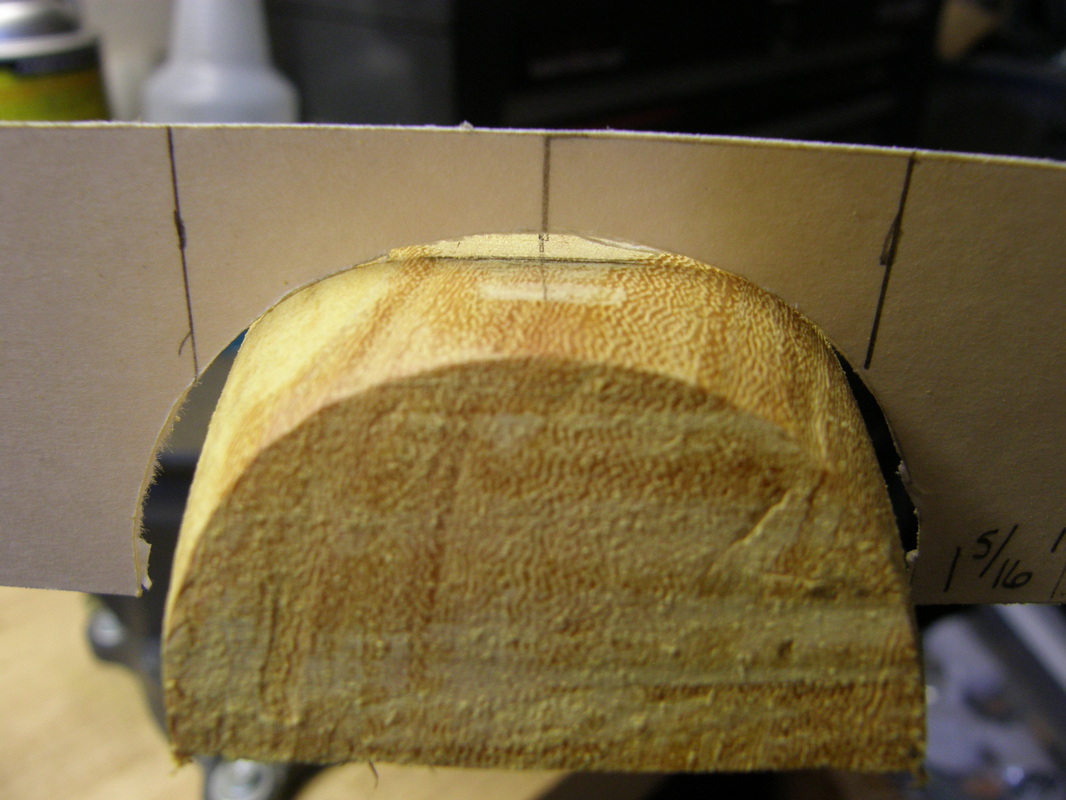
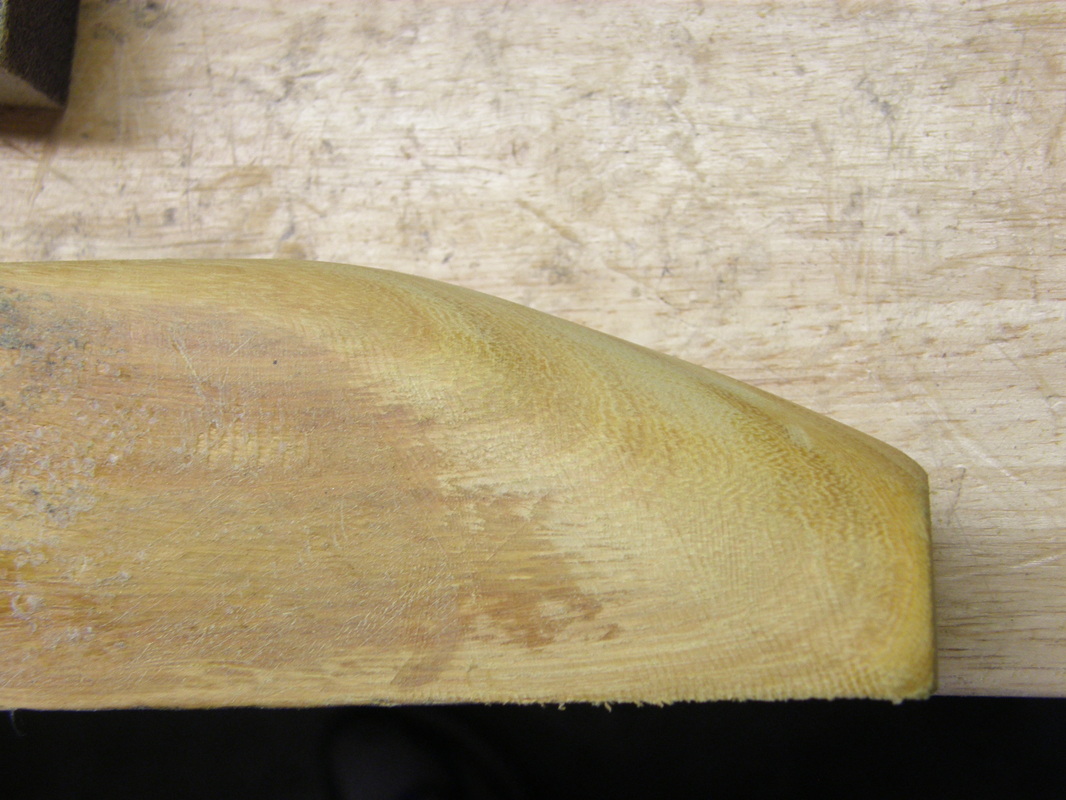
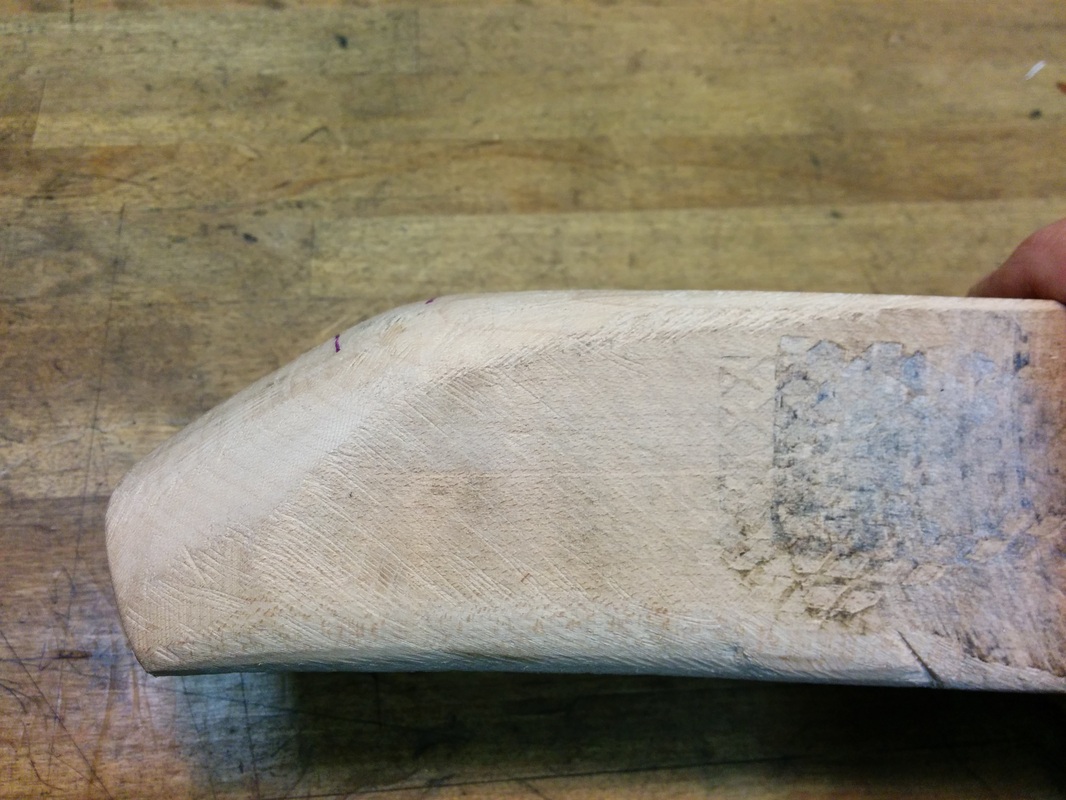
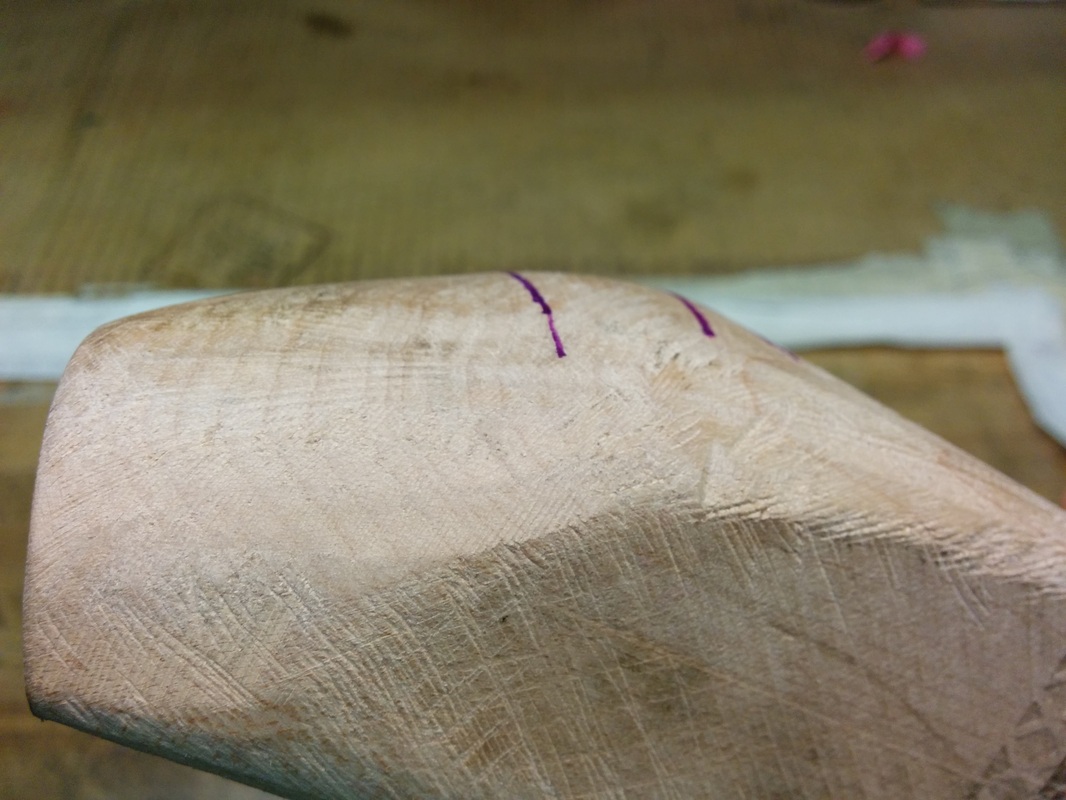
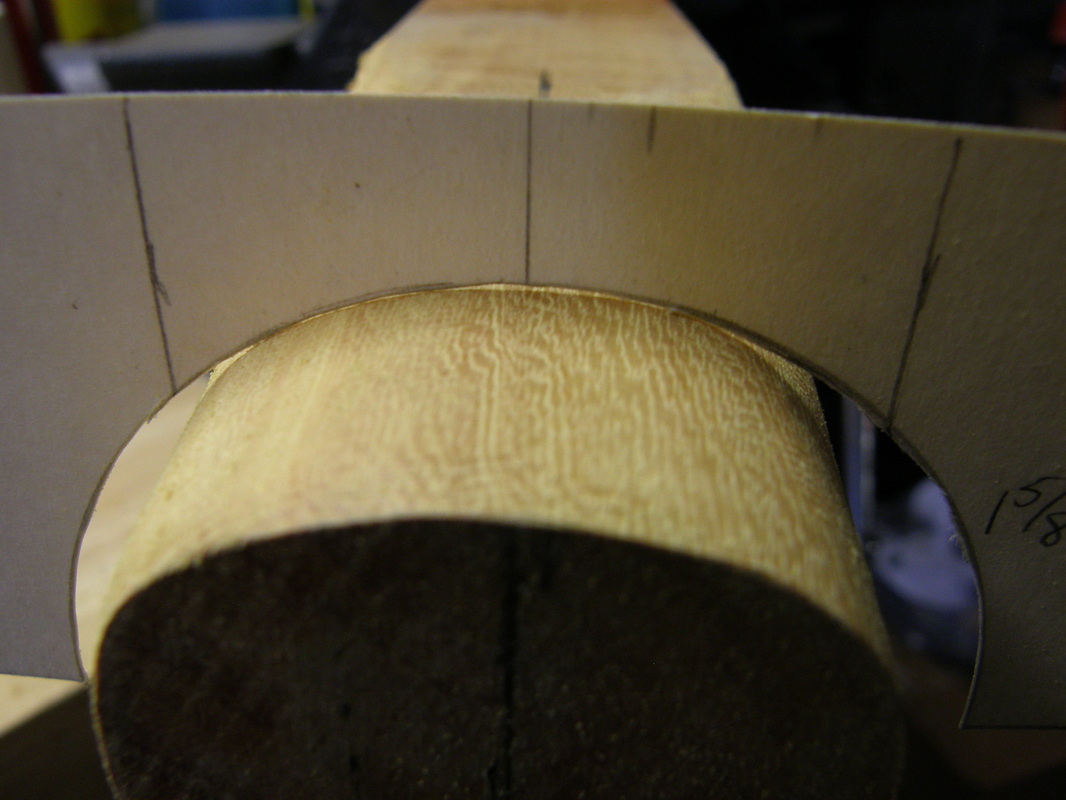
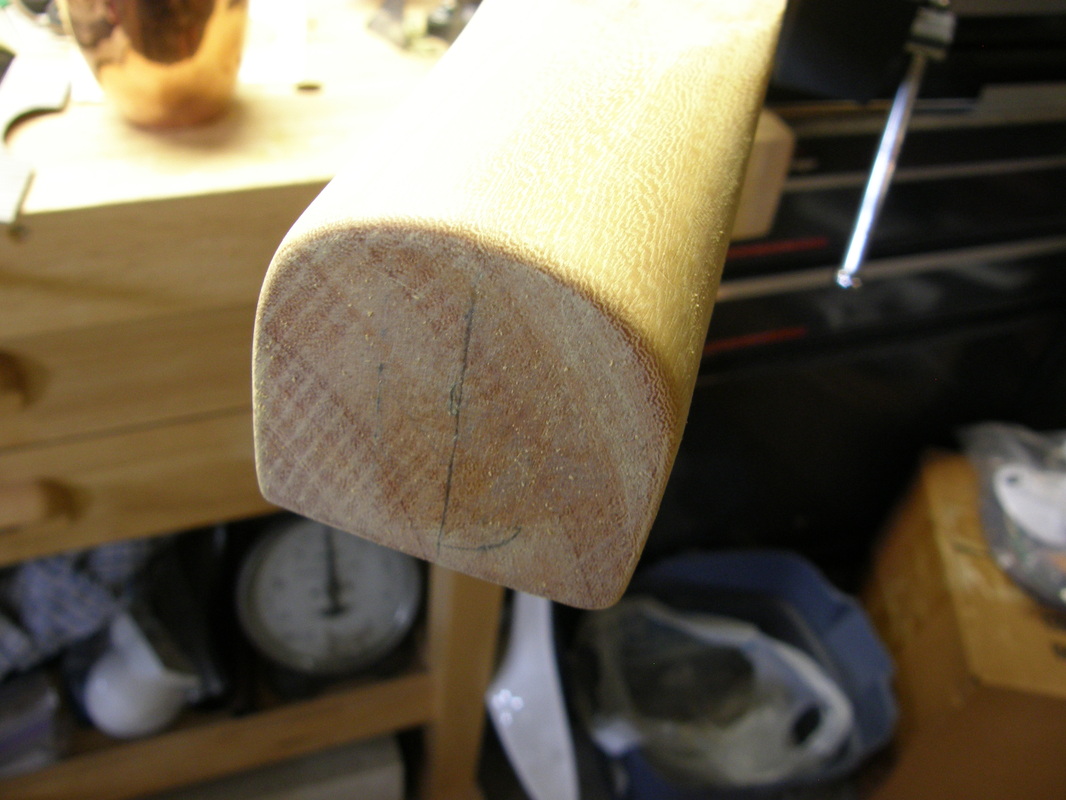
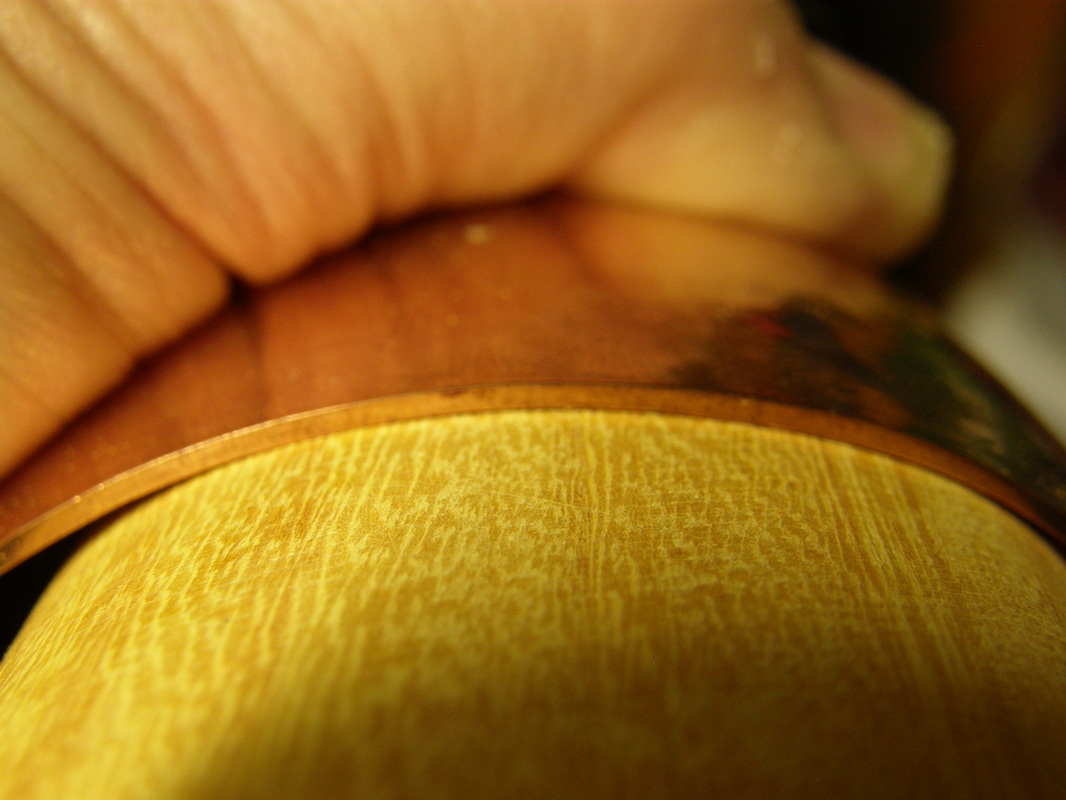
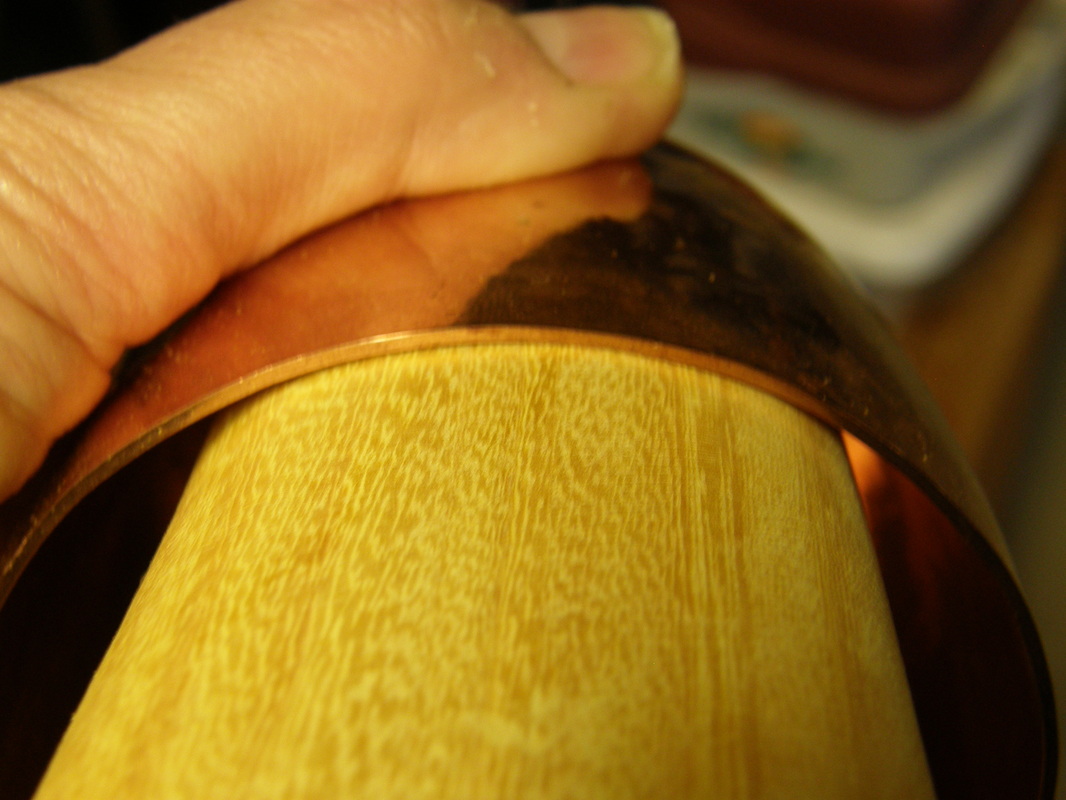
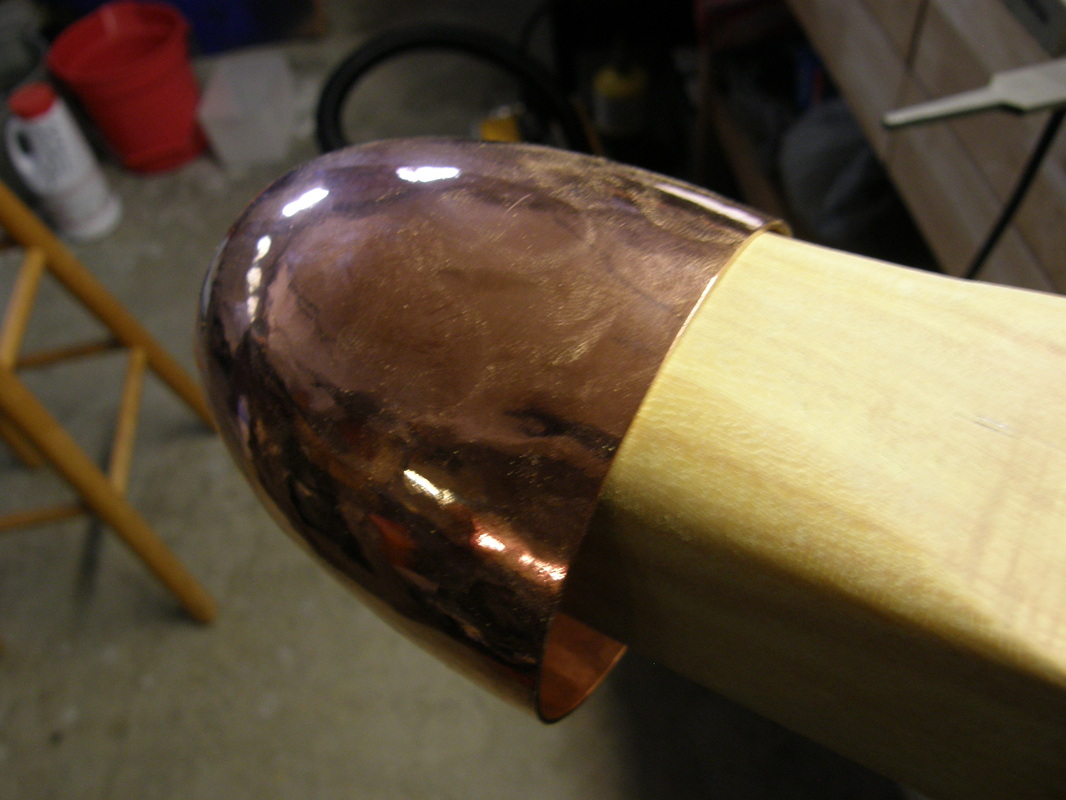
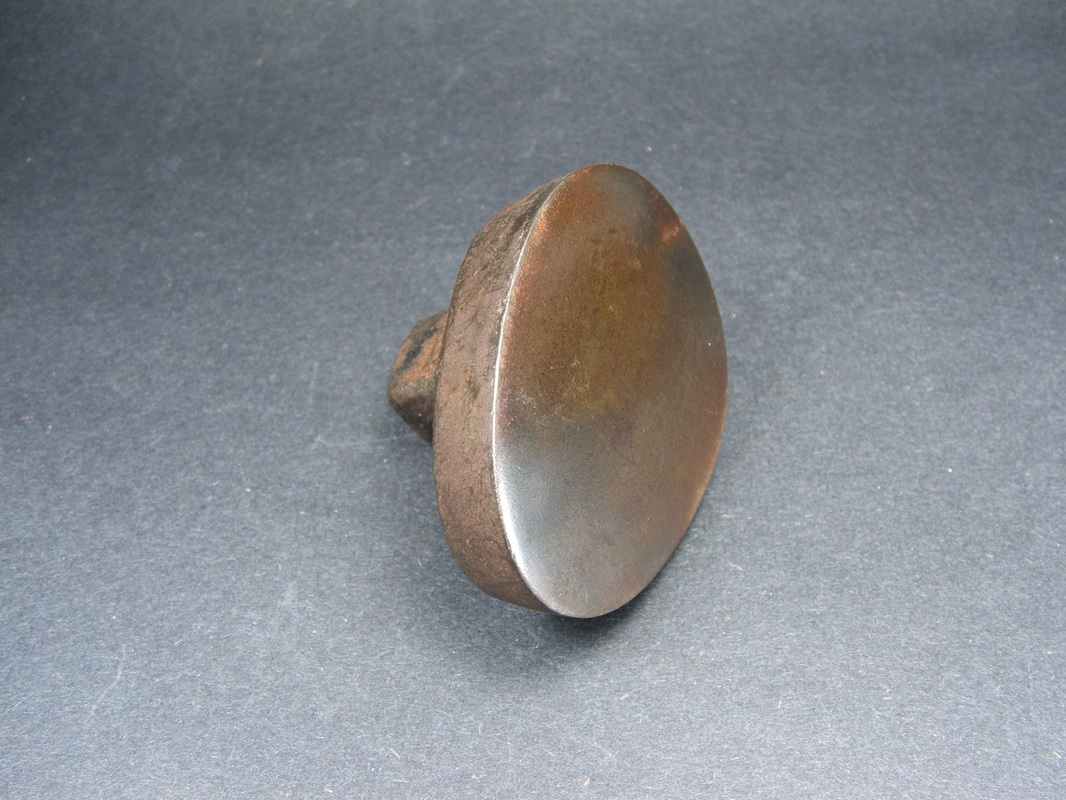
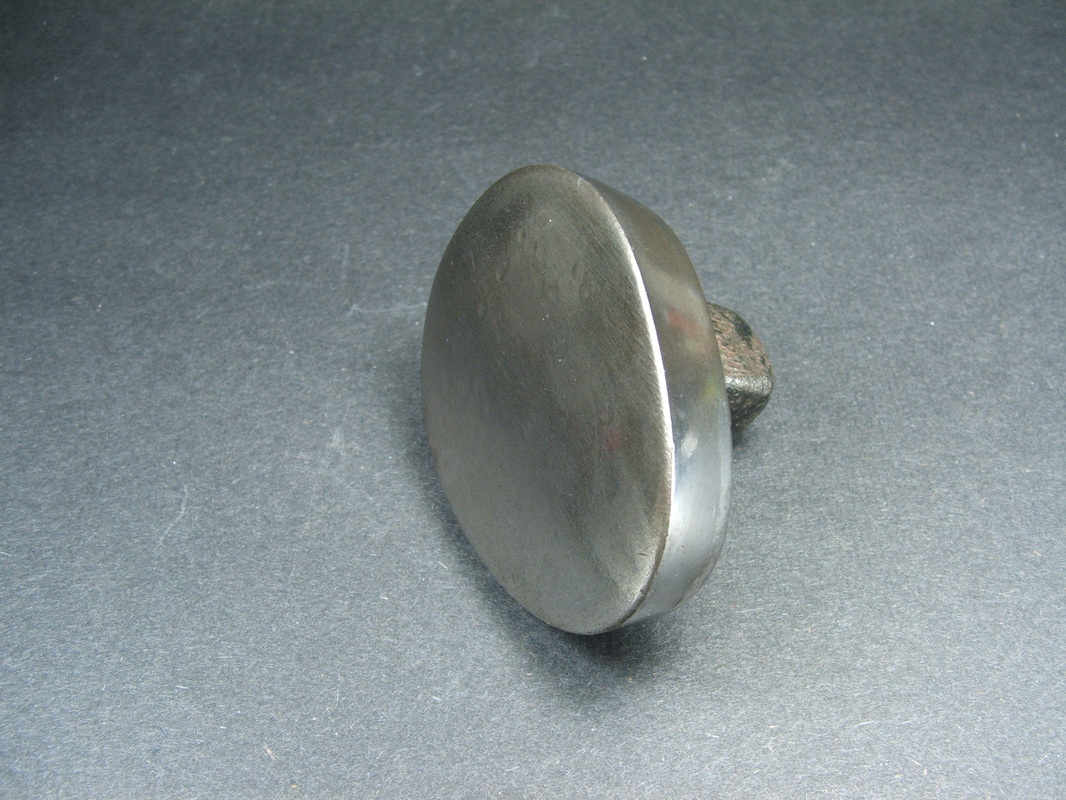
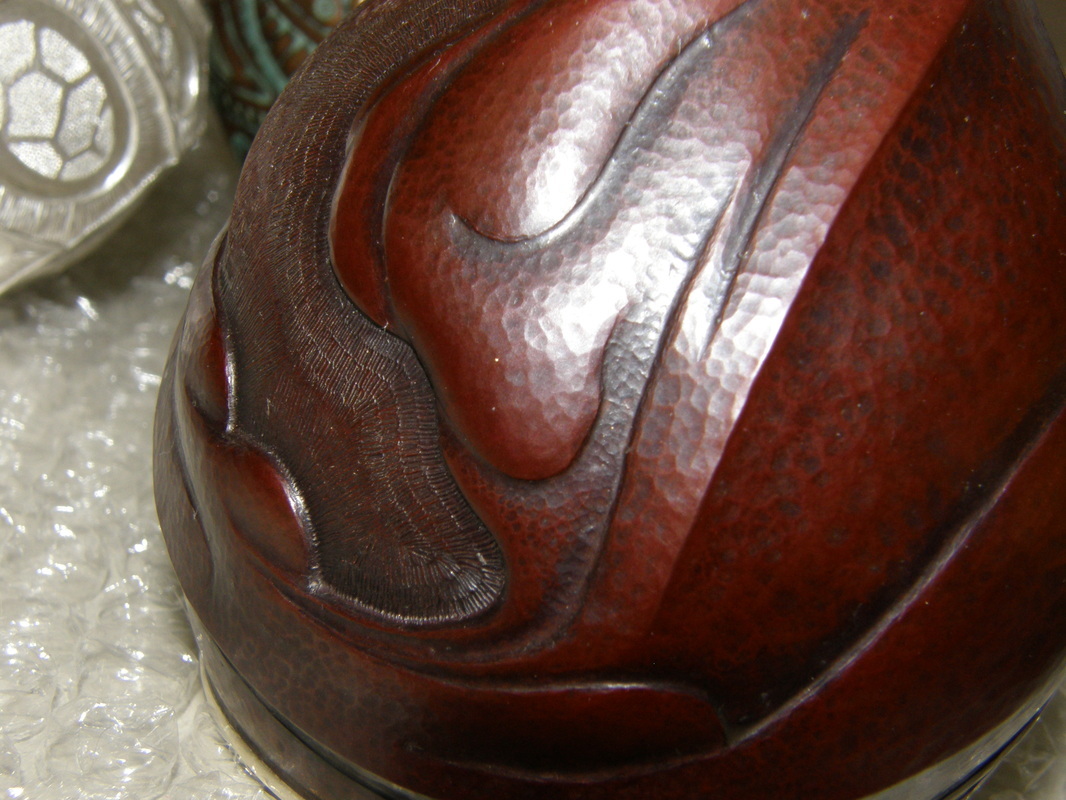
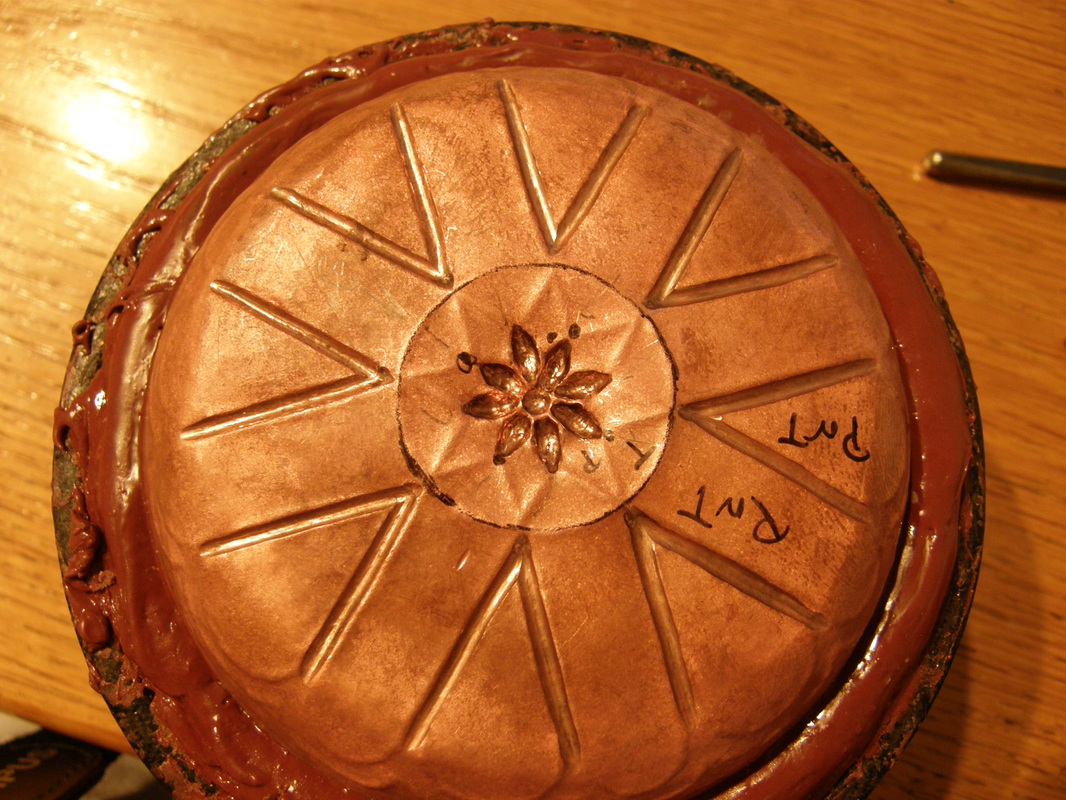
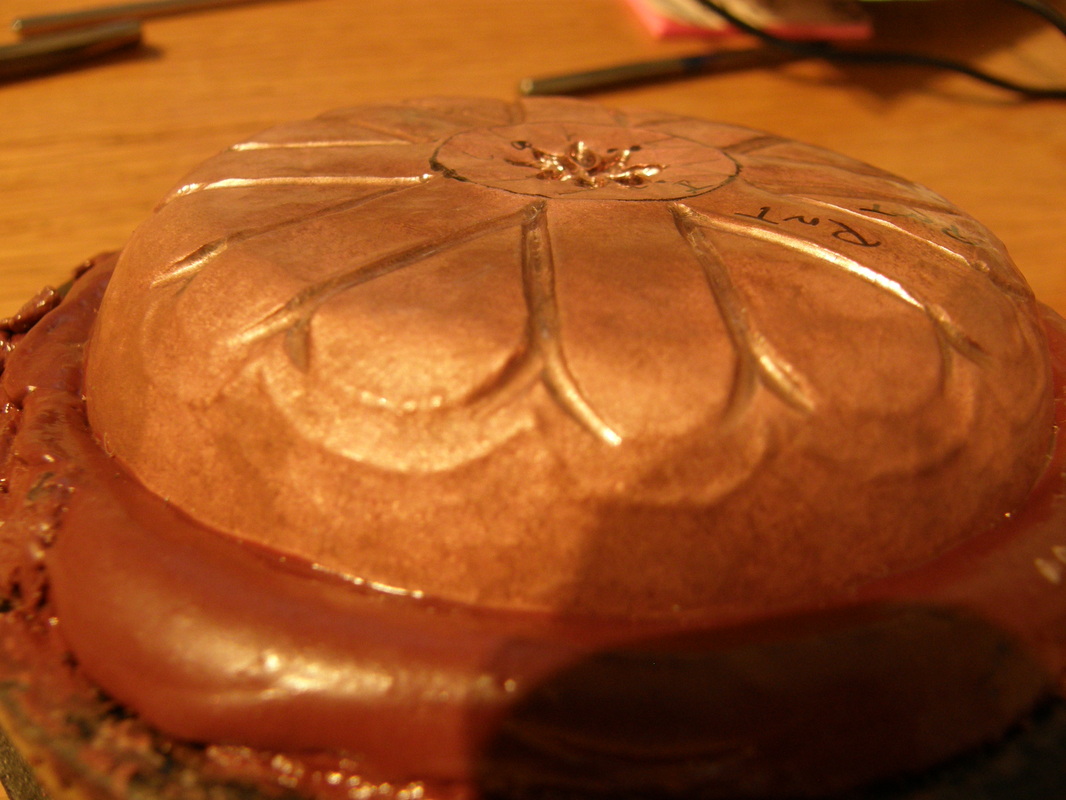
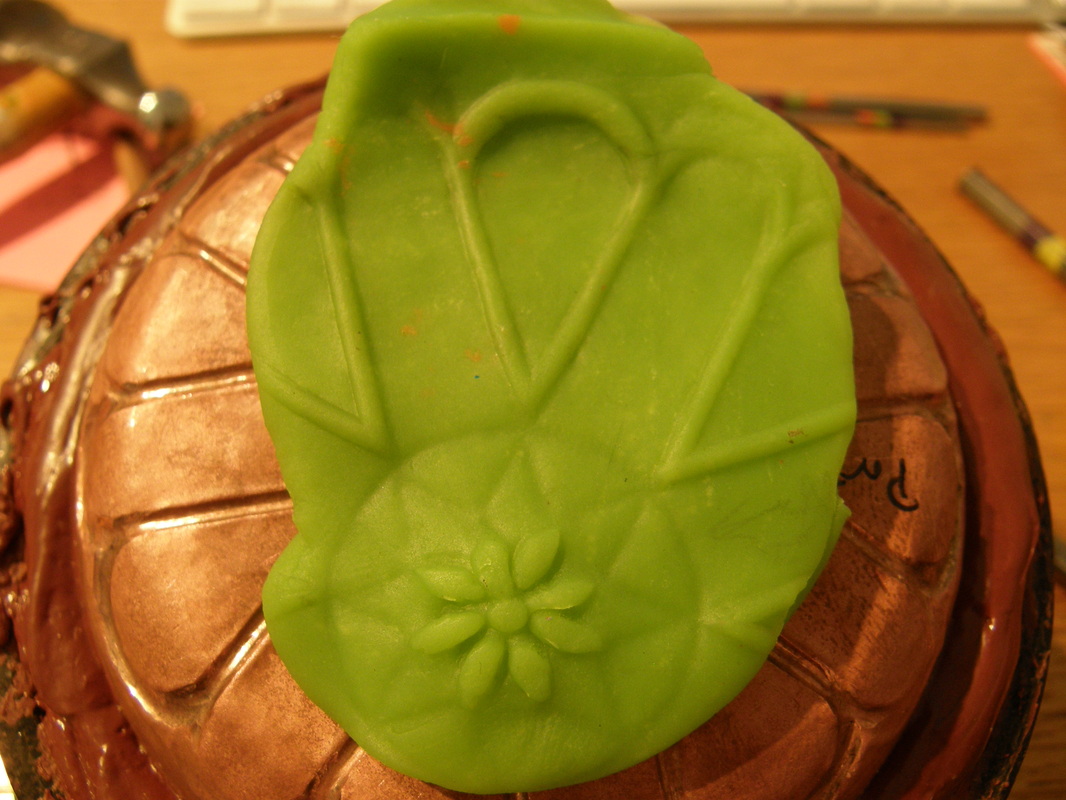
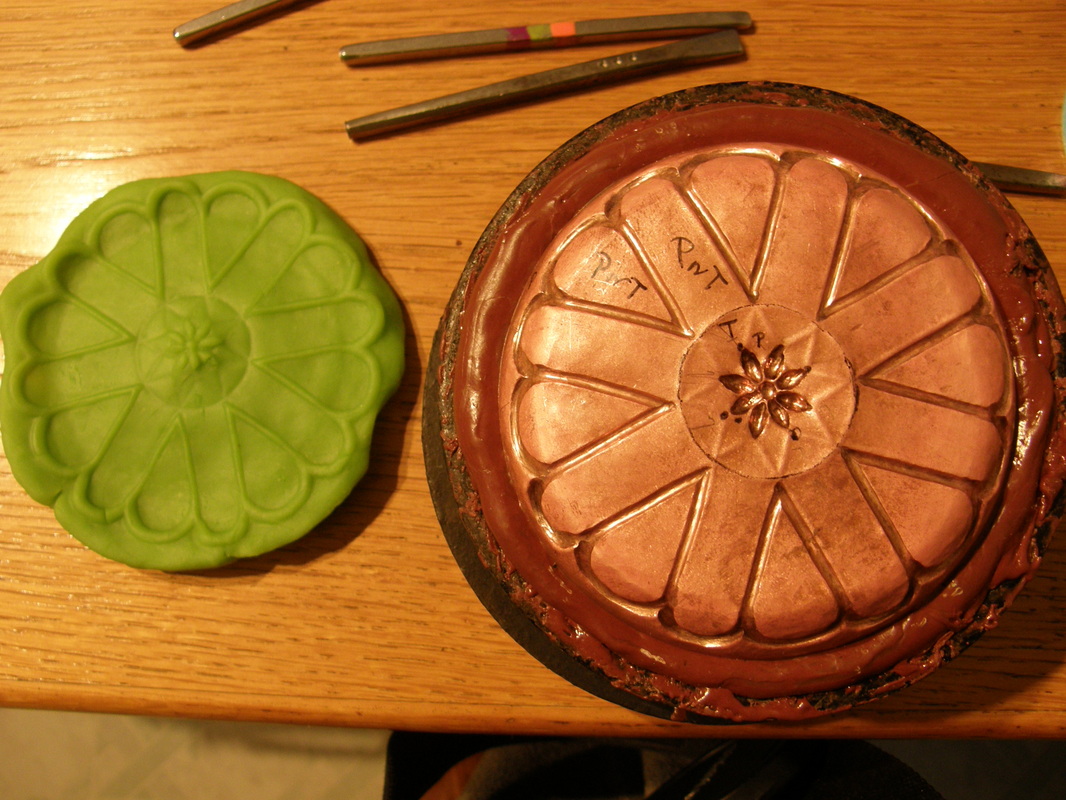
From the first anticlastic shape, I ended up actually turning it in to a cuff.  I then make a synclastic shape and did an all over hammer texture.  I liked it but I was looking at it and I thought that the curve along the top and bottom edge had to be more pronounced so I annealed again and raised the edges more. I did three courses of raising and had a nice shape. Then it was off to polish and they just sparkled. It is a goal to do chasing and repousse on the napkin rings but to start, you have to form them and then I started to work more with a hammer textures and I really liked the way the first one came out - with it not being all over but just in the center and I loved it. I showed the idea to the shop elf and he agreed that it was an elegant look. I finished up the texturing at 7pm. 

Next I will be making these napkin rings in sterling silver and both the brass and sterling silver will be for sale in my store

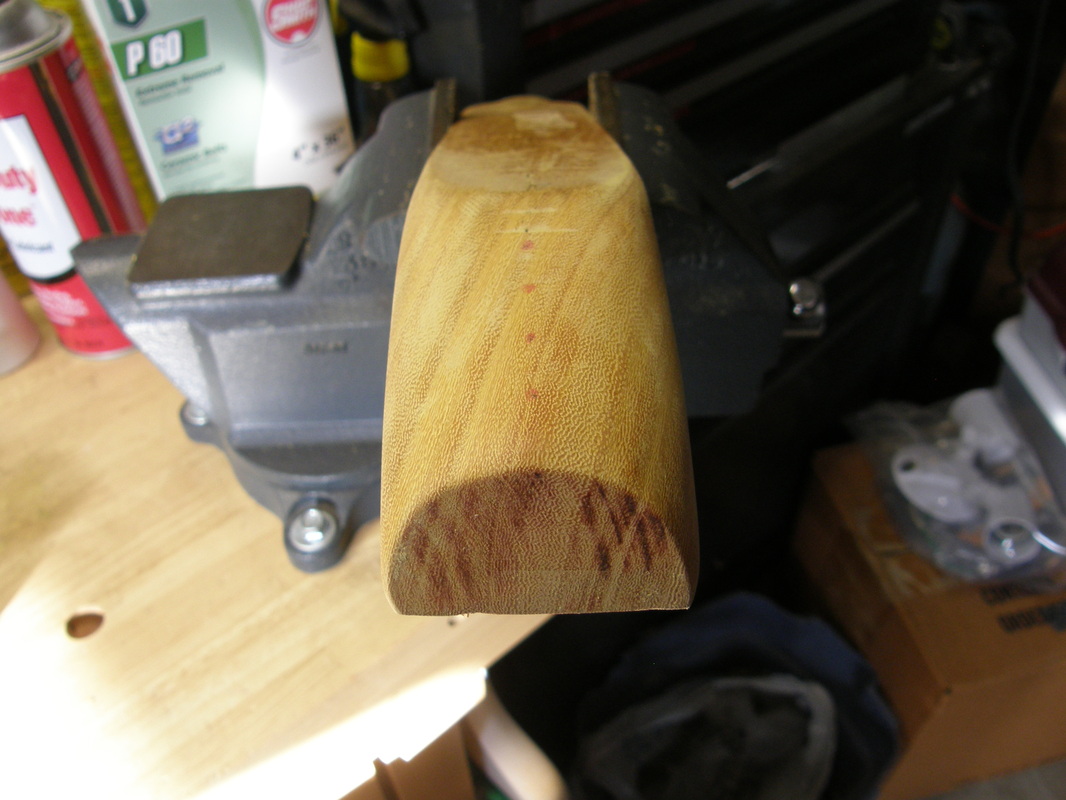
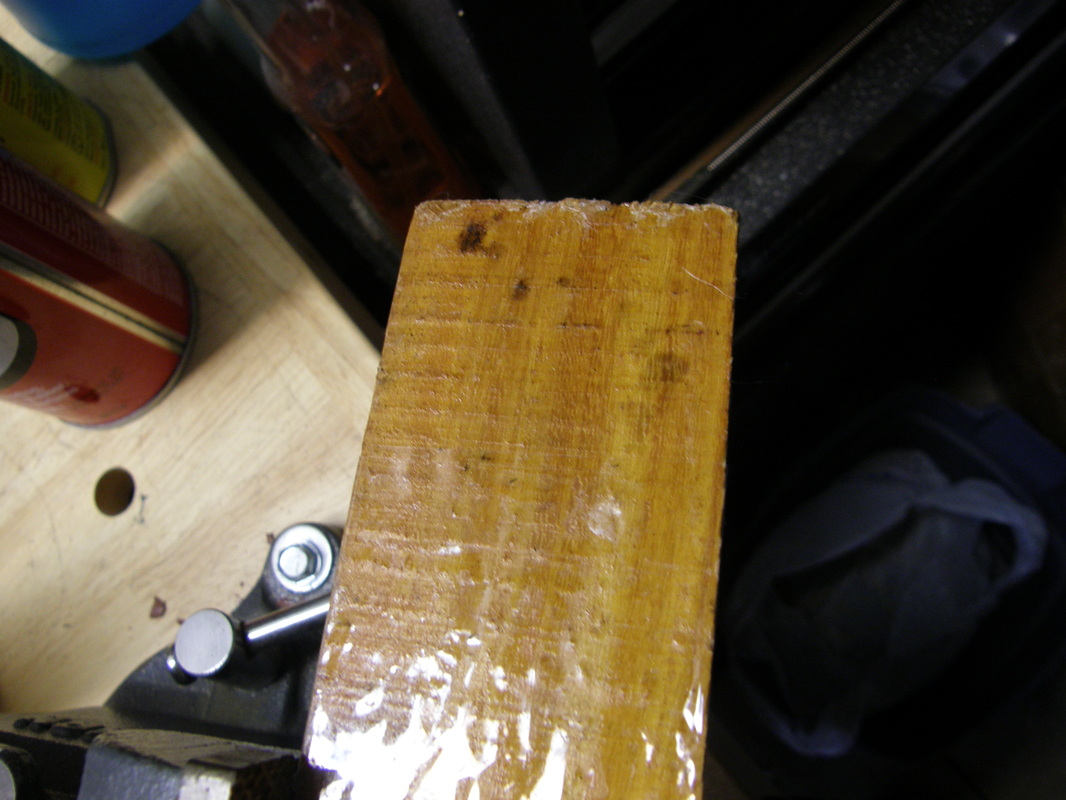
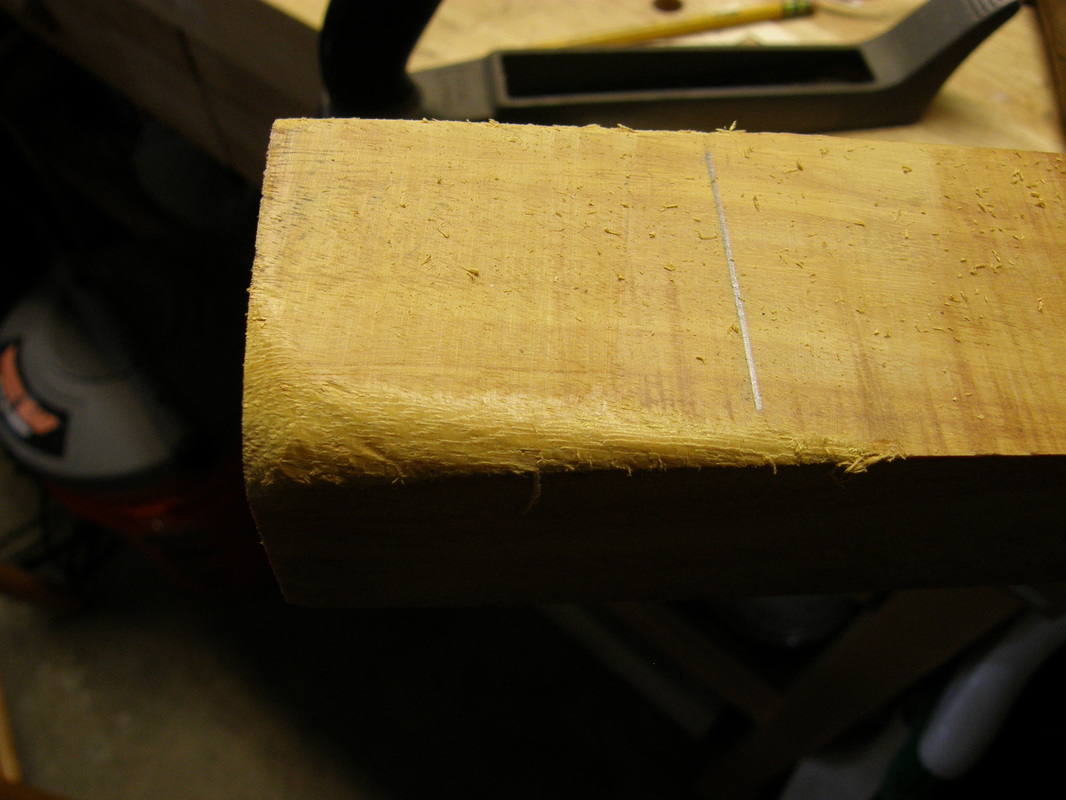
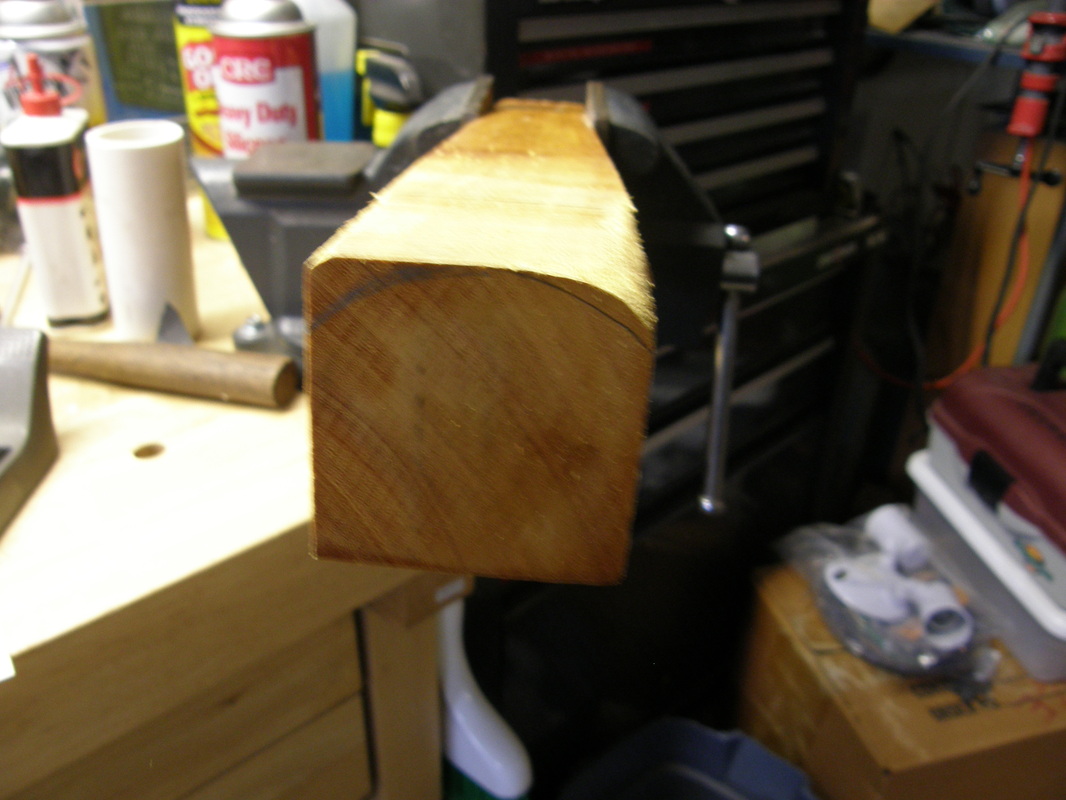
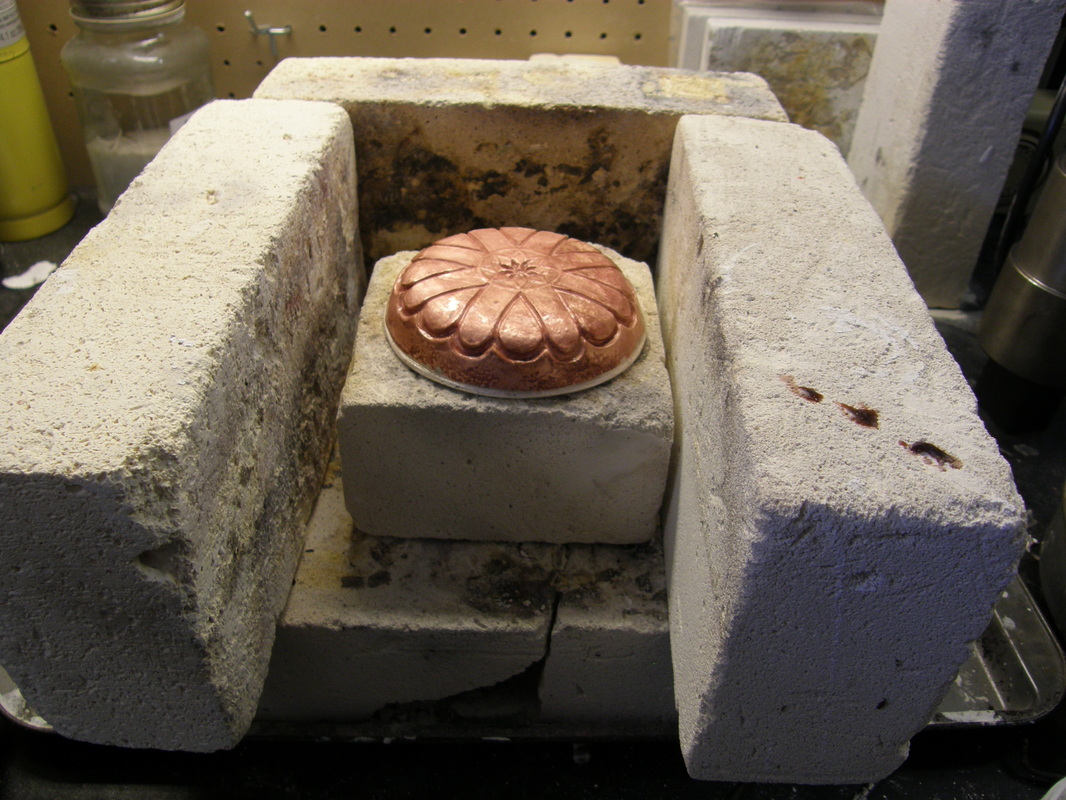
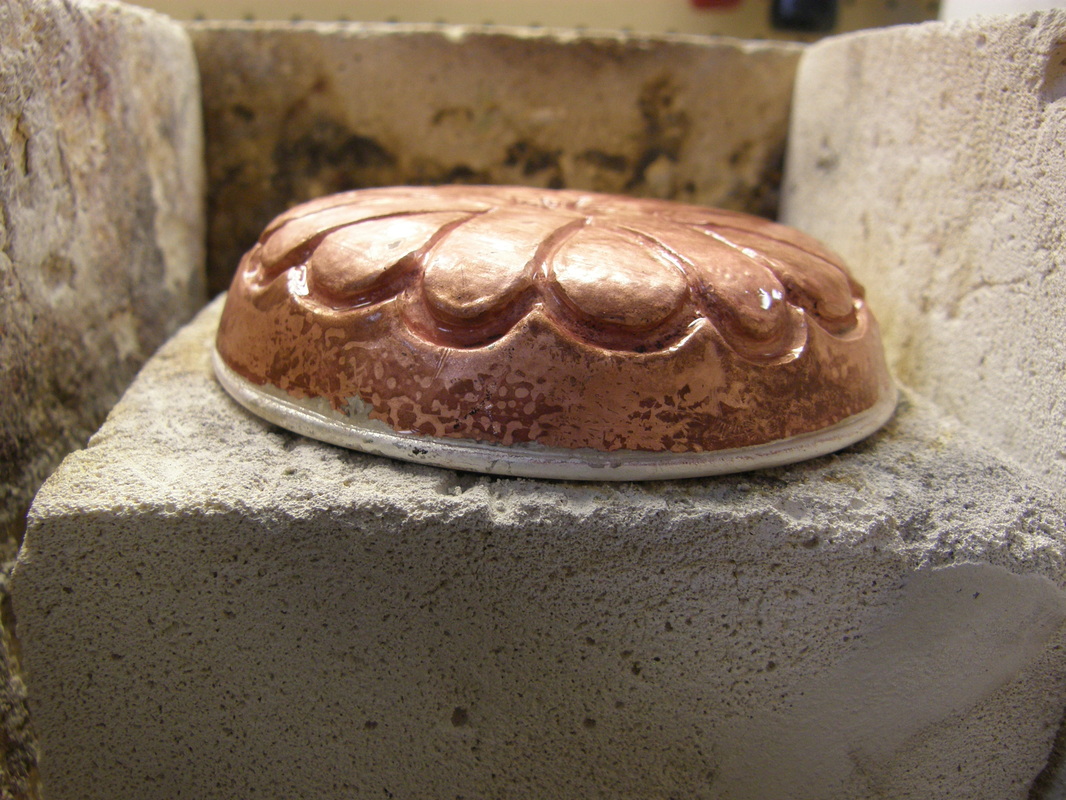
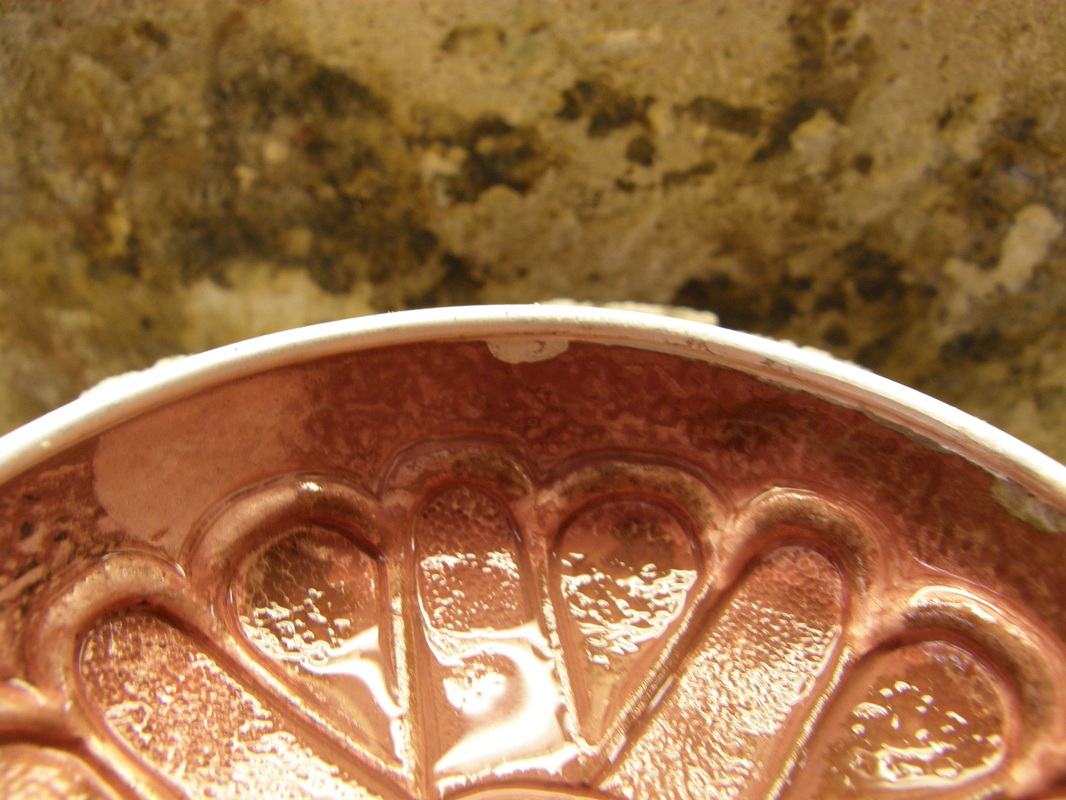
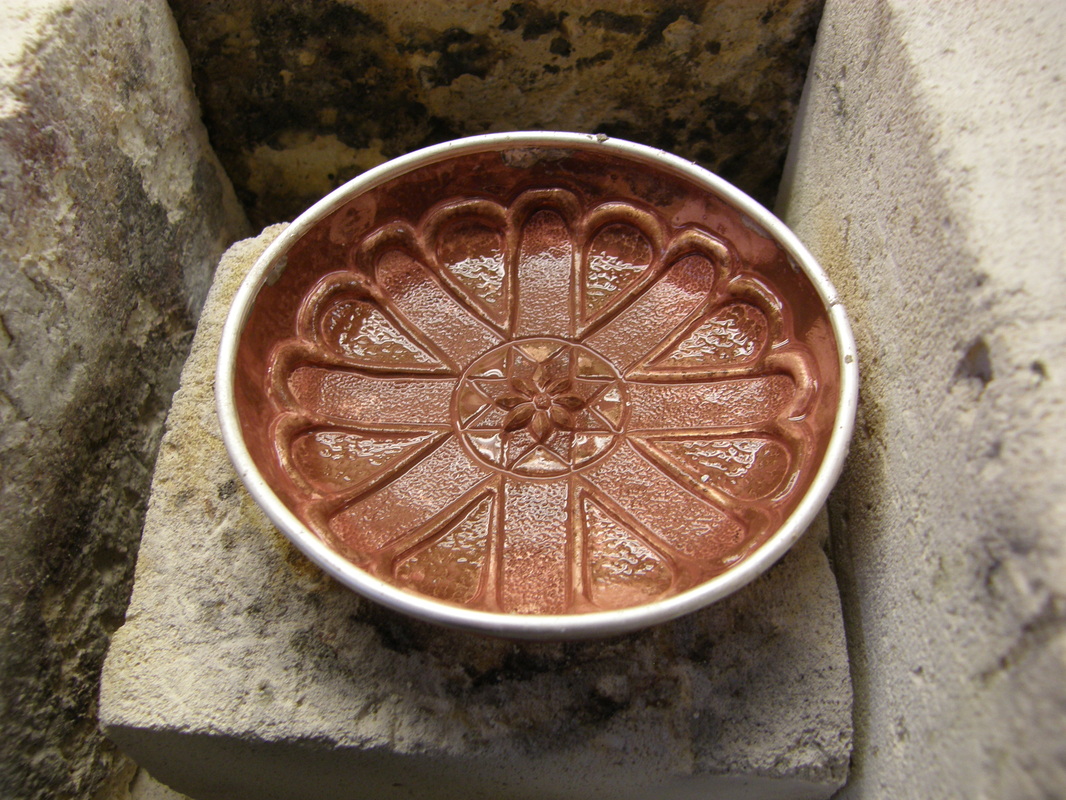
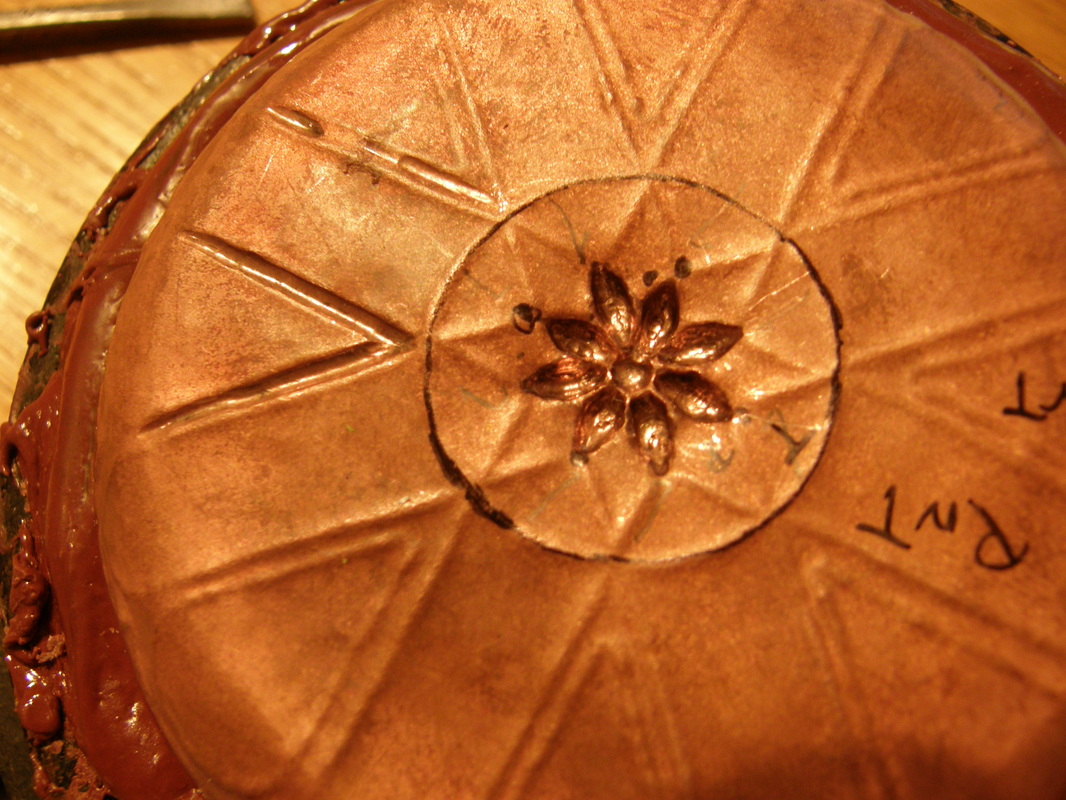
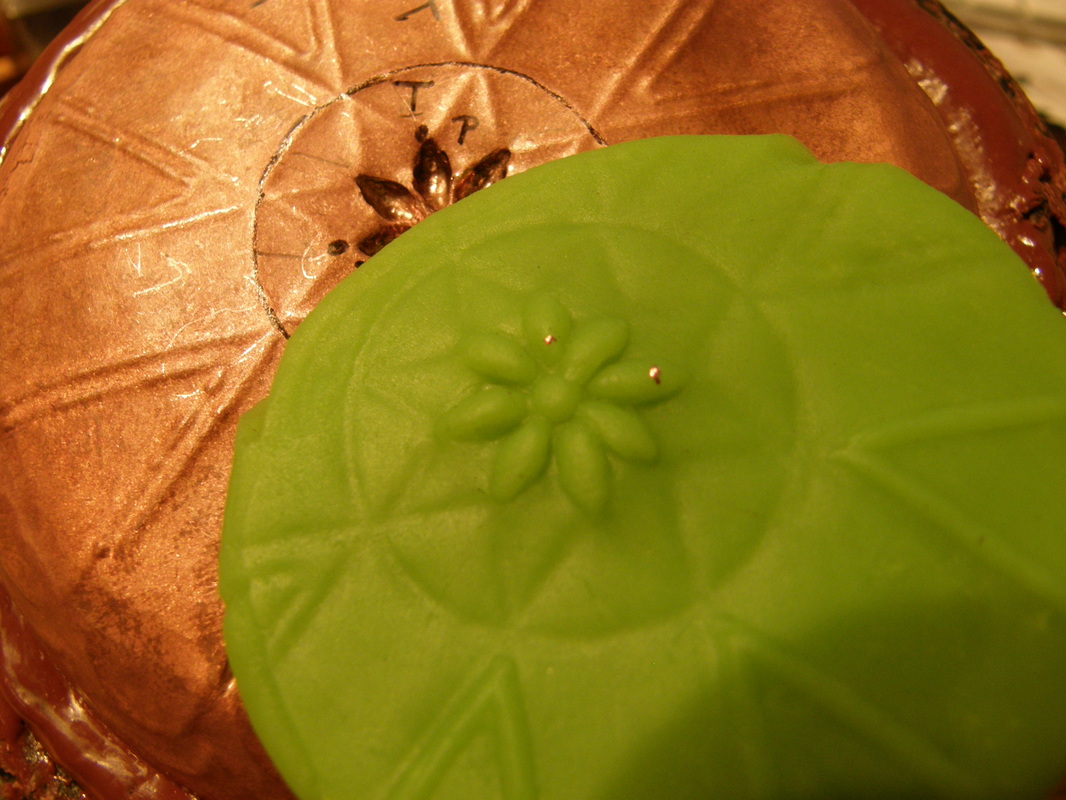
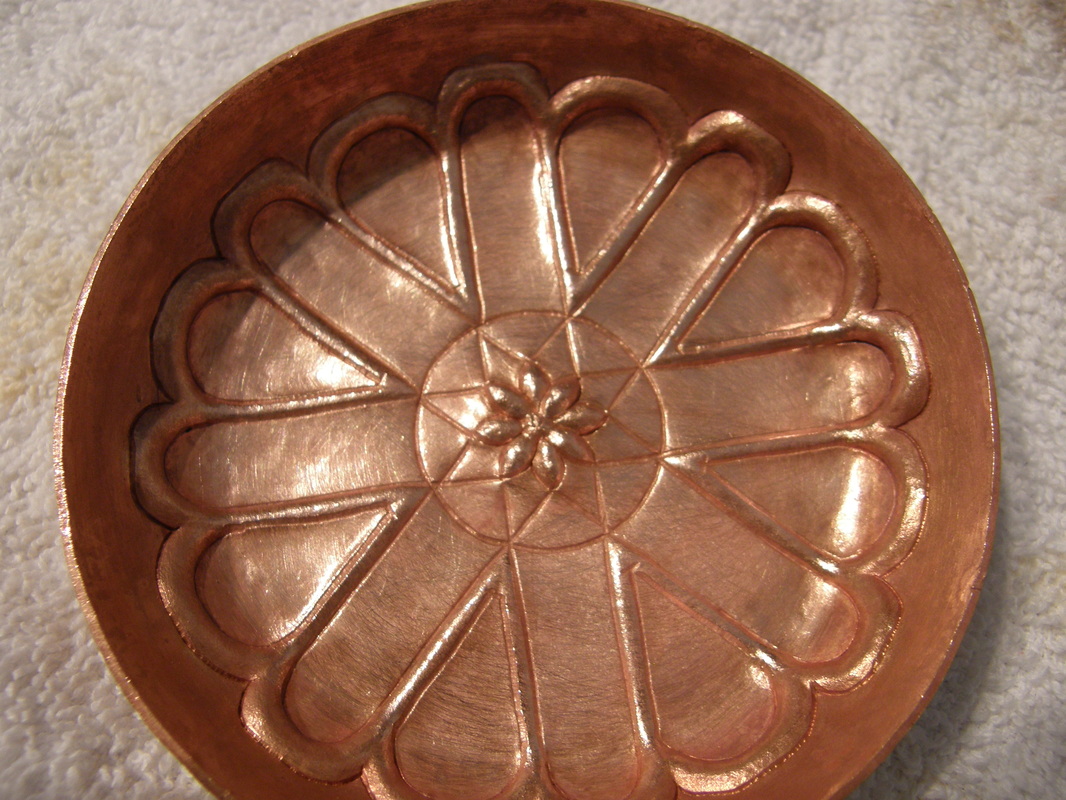
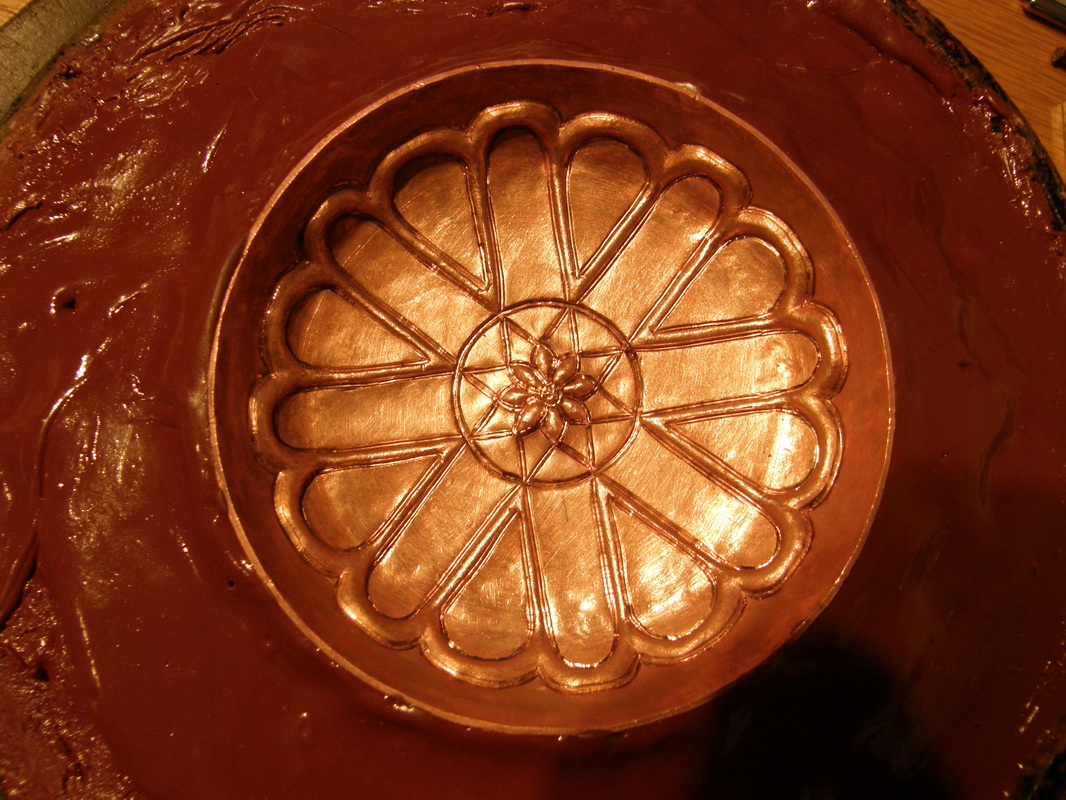
As usual, here are some of the process pictures. 
​
1 Comment

Making A Teapot - Session One

10/10/2015

 
Two weeks ago I was Nechamkin Silver Studio to start what I consider to be an essential project for silversmiths. I am going to say it is a must on the silversmith's "bucket list"  - THE TEAPOT.  

Note: we are talking traditional silversmith, not a present day silversmith who makes jewelry out of silver.  A traditional silversmith how makes hollowware such as bowls and other vessels, trays, dishes, cutlery; and other functional items.

Making a teapot has been on my list of things to learn and make since I started on this path over 5 years ago. Actually it was on my list since I was a little kid and read about silversmiths and now I am finally starting the project.

I have read as many books as I can get my hands on about raising and the various parts of the teapot - the body, the spout, the handle, the lid and the feet or support on the bottom. Then there is the making of the parts - the raising, sinking soldering, making patterns and more. BUT until you start planning and making one, the concept of how much time and effort it takes starts to sink in (yeah, that's a metal pun) and unless you have someone to guide in mentor you, the teapot can be an exceptional failure. 

That brings us to earlier this year when Liza Nechamkin and I started to plan this project which will take many visits to her studio and a lot of homework on my part afterwards to either practice what I learned in each studio visit or to move the project along. 

Which brings us to two weeks ago, which was the first session - Making the body of the teapot.  Way back when, many teapots had raised bodies but raising a body can take time and can be tea-dious (see another pun) and so the body of this teapot will be seamed.     The best seam for long tubes is lapped and keyed which is what I learned to do on the first day of my visit along with forming the sheet into the tube and wiring it for soldering.  On the second day I soldered the tube with hard and I mean HARD solder.  Trust me hard solder does not like to flow and getting a 6" long seam soldered is difficult - imagine that easy solder flows like butter when melted; then hard solder flows like frozen cheese!  Plus the tube started out as 12" long and is 18g (0.04") thick which requires massive amounts of heat to just bring it up to temperature and THEN you have to solder it with hard solder.    

But before I soldered the silver tube, I made a practice tube out of copper with the lapped and keyed seam so I had twice the practice of doing it all including the soldering. 

The soldering was done in three phases - tacking it, the soldering and then the fixing of areas where the solder did not flow or did not flow enough.  The entire process was nerve wracking to say the least but I did it with Liz's wonderful instruction.

Now I have a massive tube of silver on my workbench.  Next time we will clean up the solder and planish the seam and THEN we will raise the top and bottom in.  Until that next session, which will be sometime next year, I will be practicing making lapped and keyed seam and soldering the seams closed.  Hmm, tricket boxes?

Here is a video of the process, enjoy. 

Sea Urchin III: three down, one to go

9/12/2015

0 Comments

 
Today I finished Sea Urchin III which is the second small one I have done and the third overall. I have one more to make and that one will be a large one like the Sea Urchin II 

What I enjoyed while making this one was the confidence I had - the raising of the bowl, the repousse, and the chasing and raising the edge under. It still took careful planning and time but it just was easier to accomplish.   I am going to deliver it Wednesday and next weekend I will start the fourth one. 

Here, as usual are some process pictures. 
0 Comments

Sea Urchin II

7/4/2015

0 Comments

 
This morning I completed the larger sea urchin II.  

I have been working on this shell, in-between various workshops and other trips.

I started this one back in April when I did the raising of the shell. Then in May it was my demonstration piece at the Palomar Gem & Mineral Club show.  And if you read that post you will see the first sea urchin shell that I sold to a fellow club member, Barb, who said she would purchase this one too.

But just in case... I have also put it up for sale in the store.

I am now ready to make one in sterling silver.

Enjoy the pictures.
0 Comments

Making A Stake Part 2

11/15/2014

2 Comments

 
Last week I cut my first wood stake. That stake is for the upper half of the tumbler and I did that stake first as it was the easiest to do.  

Yes, I have a steel T-stake that would also work but this was an exercise in cutting a wood stake. 

Today I cut the second wood stake for the lower half of the tumbler - also it should be noted that when I raise another tumbler, this second stake will actually be used first but the reason it was made second was so I could get a feel for working with the wood. 

This stake is a bit more complex because the diameter of the tumbler and thus the wood, increases as the the height of the tumbler increases from the base.  At the base it is 2" in diameter and it is 3.25" at 2" in height. The diameter then stays constant at 3.25" for another 1" of height (thus the other stake).

I also cut this stake on the other end of the wood so I have two stakes but only once piece of wood.

So, shall we get to the pictures???  And at the bottom there's 4 pictures. Two of the original stake that Liza made and two of mine.
2 Comments

Making a Stake

11/11/2014

3 Comments

 
When I went to Nechamkin Silver Studio's back in September and learned to raise a tumbler, I started the raising on a wood stake and then changed over to a steel stake. Since then I have gathering my tools and equipment and making a technical drawing so I could make a wood stake such that I could raise another tumbler in my studio.   

Today I started that project. 

I went to the wood working store in San Diego and bought a 2" x 2" x 12" spindle blank (Osage Orange wood, as they did not have maple) that would allow me to cut a stake at each end.  One end would be for the lower half of the tumbler and have a compound (synclastic) curve since the diameter of tumbler increases with distance from the base. The second stake would be for the upper half of the tumbler and would be a constant diameter. 

I started with the second stake since it would be easier to make. 

Into the garage I went with my drawing, templates for the various diameters and my block of wood. Out came the files. Into the vice went to the block of wood and using my templates, I drew marks on the wood for the radius and the distance from the end to indicated where to stop filing. So the project began. 

Much sawdust was created. 

Then about 2 hours later after checking with the templates and the actual tumbler and switching from rasps to coarse files to fine files and fine sand paper. The first wood stake I have ever made was done. 

Once I raise a tumbler on this, I will then get steel stakes made. 
3 Comments

..And the elf was at it again

8/18/2014

 
Last week I was able to get another bottoming stake head on eBay. 
What was interesting is that NOBODY else bid on it so I got for a whopping $42 and change and that included shipping. 

Here are the before and afters..
Picture
Picture

Rim

5/25/2014

0 Comments

 
Today I returned to the Deco dish to apply the silver rim.

There have been many side trips along the way - 
  • Ordering the correct gauge for the wire rim
  • Finishing the display case for the Palomar Gem & Mineral show next weekend
  • Printing the display card for my entry in the San Diego County Fair which must be delivered next weekend as well
  • Meeting friends for lunch and catching up having not seen each other for 6+ months
  • An earrings with micro hinge 1-day workshop (Thanks, Deb!!) which actually renewed my confidence in soldering 
  • Avoiding wild fires in San Diego on my way home from work
  • Life, the universe and everything else that goes along with it.


The deco dish is 18 gauge copper so I went with gauge 10 round wire.  The rim of the dish is about 11.625" diameter and I cut the wire to just under 12" in length. I did a quick solder to get the ends joined and to see how much of the ring to remove. I removed less than a quarter of an inch and it was still to big. I removed a tad more and won't you know it, it was a tad too small. I then soldered the ends to make the ring again and then with a rawhide and lead filled mallet, I gently stretched the ring so would rest on the edge of the rim.  

With some sand paper I put a small flat on the bottom of the ring and tested the rim. It had to be tweaked in a few places but it looked good. 

I set up my soldering station - I put a second small fire brick on top of  another to bring the dish up a bit so it would be easier to solder and put the rim on the brick first and put the dish, upside down on the rim. I good slathering of flux and I then positioned three more fire bricks around the setup to help hold the heat in.  

And I lit the torch to start......

With medium solder I slowly applied small amounts of solder and using the heat of the torch, pulled the flowing solder around as I pushed down on the dish to remove any gap between the edge of the dish and the rim.  I stopped half way through and threw it all in the pickle pot for 15 minutes and a quick clean after which I slathered the remaining area  with more flux and finished the job.  

The whole thing took less than 45 minutes and I only have a little bit of solder to clean up (yeah me!)  

Unlike other times I have had BIG soldering jobs, I was calm and collected; I knew I could do this and do it well. My hands did not even shake (yeah me, again).

Sorry but no process pictures 'cause I forgot to take them but I do have a picture of how I set up the fire bricks and a few of the dish with the rim before I cleaned up the solder.

(Play music here)

I have just finished cleaning up the solder.. I think the rim should have been a bit bigger as on the outside, the copper edge comes right up to the silver but the silver does not hang over it as it does in other places. Too late now but a mental note made for the future. 

Tomorrow I attempt the patina!
Picture
Picture
Picture
Picture
0 Comments

Deco Dish - Chasing Done

3/23/2014

1 Comment

 
I know I called this the Deco bowl but I have settled on the title of Deco Dish - I like alliteration. 

This week the chasing was finished and while I was putting the finishing touches on the dish I started to think about how I wanted to finish the dish.

Picture
Having taken a class with David Huang, I thought that putting a silver wire rim on the dish would take it to the next level. 

BUT before I do that I should determine what the patina should be. In this case I do not think LOS will be enough, I want something that POPs. I have pondered a verdigris patina  (i.e. Tiffany green as it is sometimes called)  but if you don't know what that is, just look at the patina on the Statue of Liberty - that's the color we are talking about.

I like the green but the more I thought about it, I did not think it would be dramatic enough.  Again from the workshop from David he discussed some of his patina's. And when I saw this picture, I knew it has to be THAT red.

 [David was kind enough to let me take many pictures of his vessels. If you use the link above, you will see all the pictures I took]

I am now working on sample pieces of copper to learn how to get the red. Soon the Deco dish will be done and then I will have a few more process pictures to show you. 
Picture
1 Comment

Deco Bowl

3/16/2014

1 Comment

 
Back in January, I sunk a small bowl down at Diane's house while also helping her make one too.

Then I planished it.  

Now I am doing the chasing and repousse on it and it has been given the name "The Deco Bowl".

Yesterday I finished the repousse and this morning I completed the lining. I can now move on the the chasing. 

When it is almost done, I will cap the rim with a silver wire.

I hope to finish it before April as I will be back in Brooklyn at Valentin Yotkov's studio for another workshop and I want to show it to my friends who will also be there.

So for now here are lots of process pictures of the lining and repousse - I know everyone enjoys seeing these and look at the links above to see the forming and planishing process.
1 Comment
<<Previous
Forward>>

    RSS Feed

    Archives

    October 2020
    August 2020
    March 2020
    December 2019
    November 2019
    October 2019
    September 2019
    August 2019
    July 2019
    June 2019
    May 2019
    March 2019
    February 2019
    January 2019
    December 2018
    November 2018
    October 2018
    September 2018
    August 2018
    July 2018
    May 2018
    April 2018
    February 2018
    January 2018
    November 2017
    October 2017
    September 2017
    July 2017
    June 2017
    May 2017
    April 2017
    March 2017
    February 2017
    January 2017
    December 2016
    November 2016
    October 2016
    September 2016
    August 2016
    July 2016
    June 2016
    May 2016
    April 2016
    March 2016
    February 2016
    January 2016
    December 2015
    November 2015
    October 2015
    September 2015
    August 2015
    July 2015
    June 2015
    May 2015
    April 2015
    March 2015
    February 2015
    January 2015
    December 2014
    November 2014
    October 2014
    September 2014
    August 2014
    July 2014
    June 2014
    May 2014
    April 2014
    March 2014
    February 2014
    January 2014
    December 2013
    November 2013
    October 2013
    September 2013
    August 2013
    July 2013
    June 2013
    May 2013
    April 2013
    March 2013
    February 2013
    January 2013
    December 2012
    November 2012
    October 2012
    September 2012
    August 2012
    July 2012
    June 2012
    May 2012
    April 2012
    March 2012
    February 2012
    January 2012
    November 2011
    August 2011
    July 2011
    June 2011
    May 2011
    April 2011
    March 2011
    February 2011
    January 2011
    December 2010
    November 2010

    Jan - Nov 2010 History
    File Size: 2272 kb
    File Type: pdf
    Download File

    Jan - Dec 2009 History
    File Size: 2332 kb
    File Type: pdf
    Download File

    Categories

    All
    42
    A Year Of Repousse
    Blacksmithing
    Blogoversary
    Box Project
    Business
    Chasing & Repousse
    Commission
    Education
    Embroidery
    Enamel
    Entries
    Entry
    Exhibition
    Facebook
    Filing
    Fold Forming
    Gold
    Holloware
    Hot Forging
    Hydraulic Press
    Jewelry
    Keum-boo
    Learning
    Leather
    Market
    Metal
    Patina
    Photography
    Polishing
    Publications
    Raising
    Sanding
    Santa Fe Symposium
    Sinking
    Social Media
    Soldering
    Store
    Studio Visits
    Superbowl Challenge
    Teaching
    Teapot Project
    Technique
    Temari
    Tin
    Tools
    Vessels
    Visiting Workshops
    Weaving
    Website
    Workshop
    Yubinuki

Powered by Create your own unique website with customizable templates.