Follow Me On:
The Adventurous Silversmith
  • Home
  • Blog
  • Portfolio
    • Metal Work >
      • Chasing & Repousse
      • Holloware
      • Jewelry
      • Other Wonderful Items
    • Fiber Arts >
      • Temari
      • Yubinuki
  • Resources
    • Library
    • Tools & Equipment
    • Links
  • About
    • Artist Statement
    • Curriculum Vitae
    • How it is Made
    • Contact

Fold Forming for the Seriously Demented

3/3/2012

 
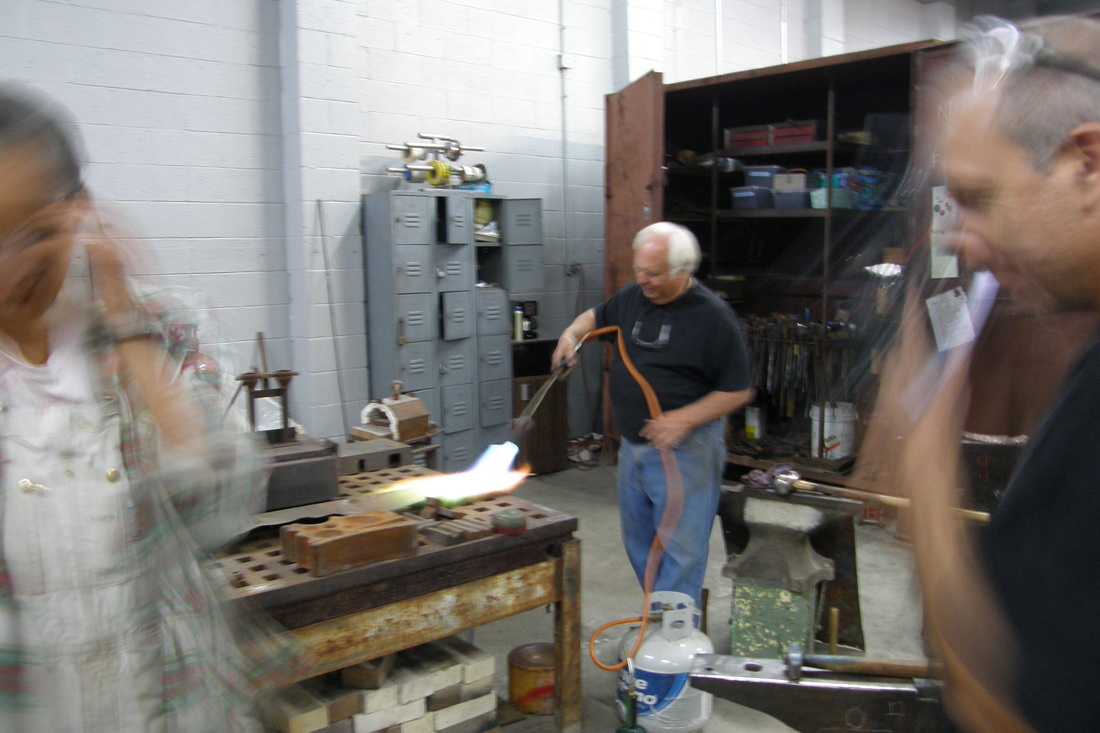
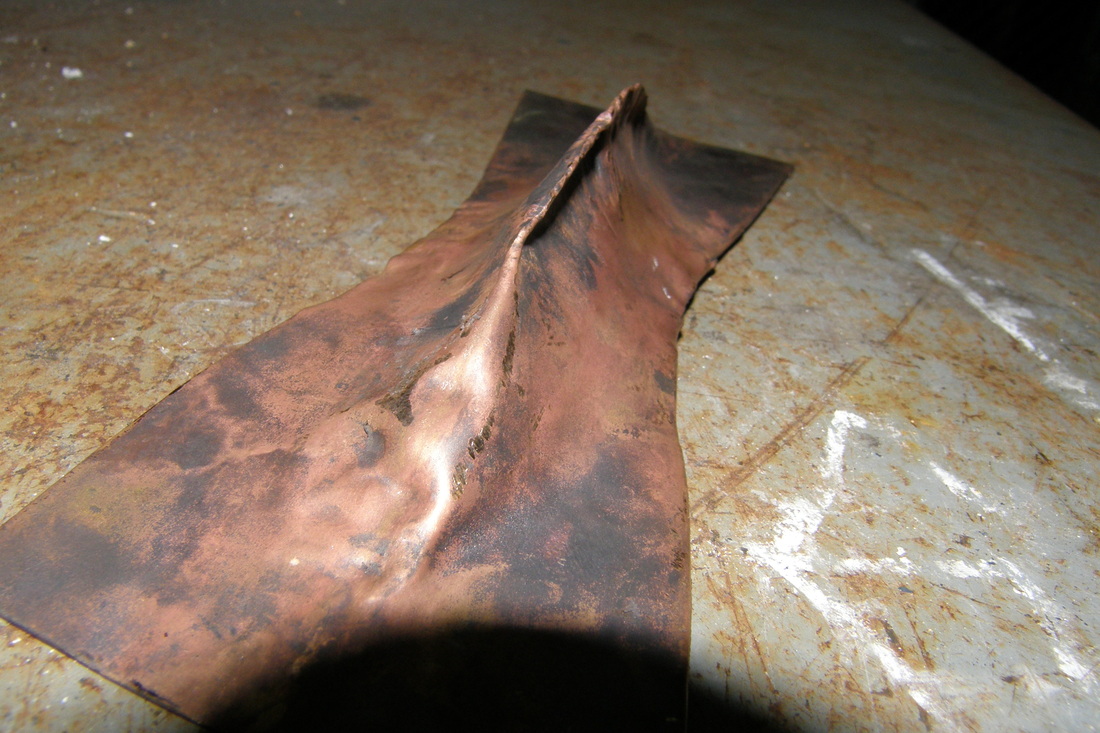
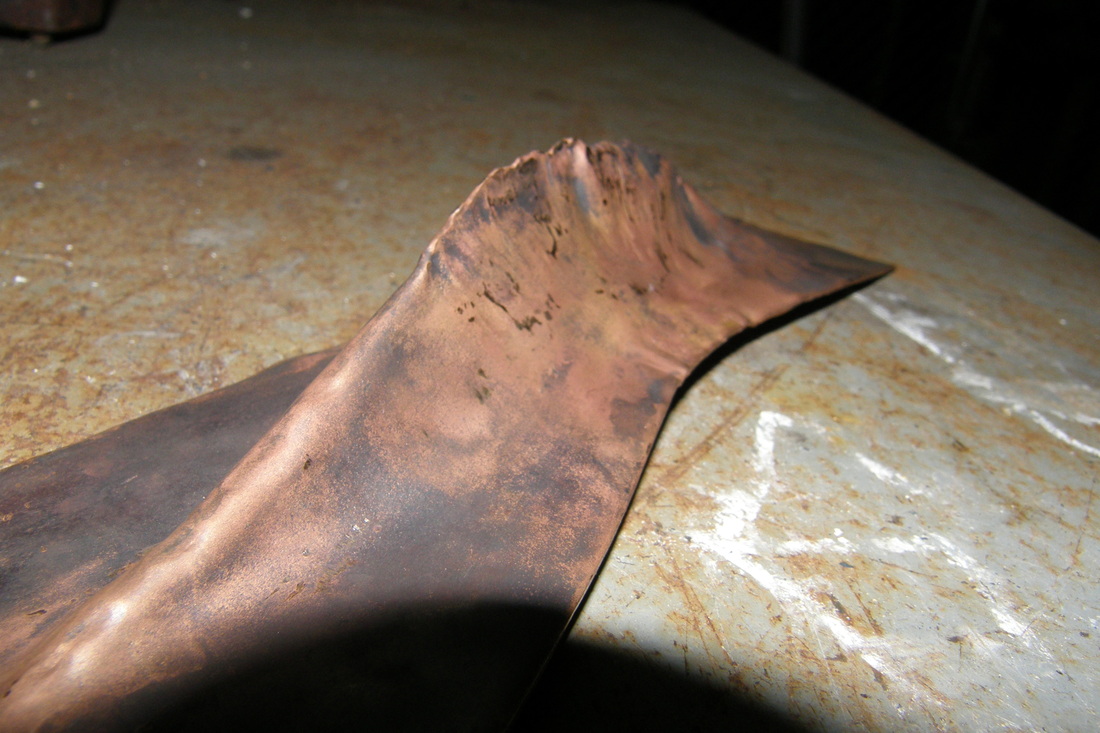
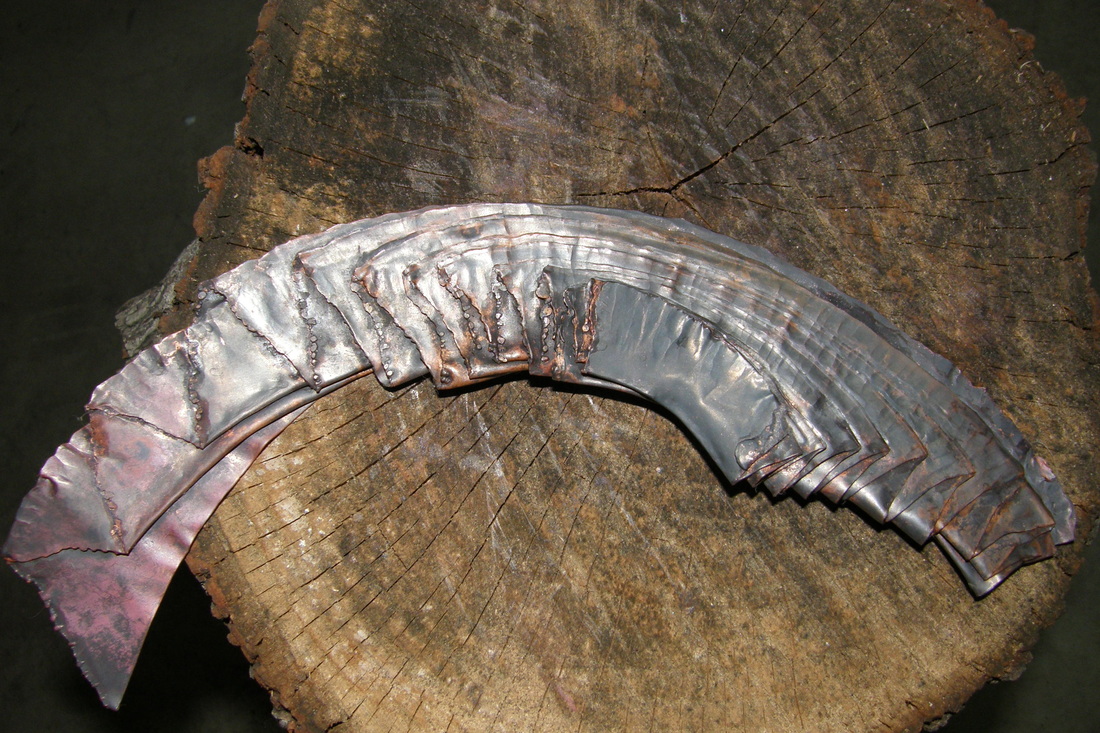
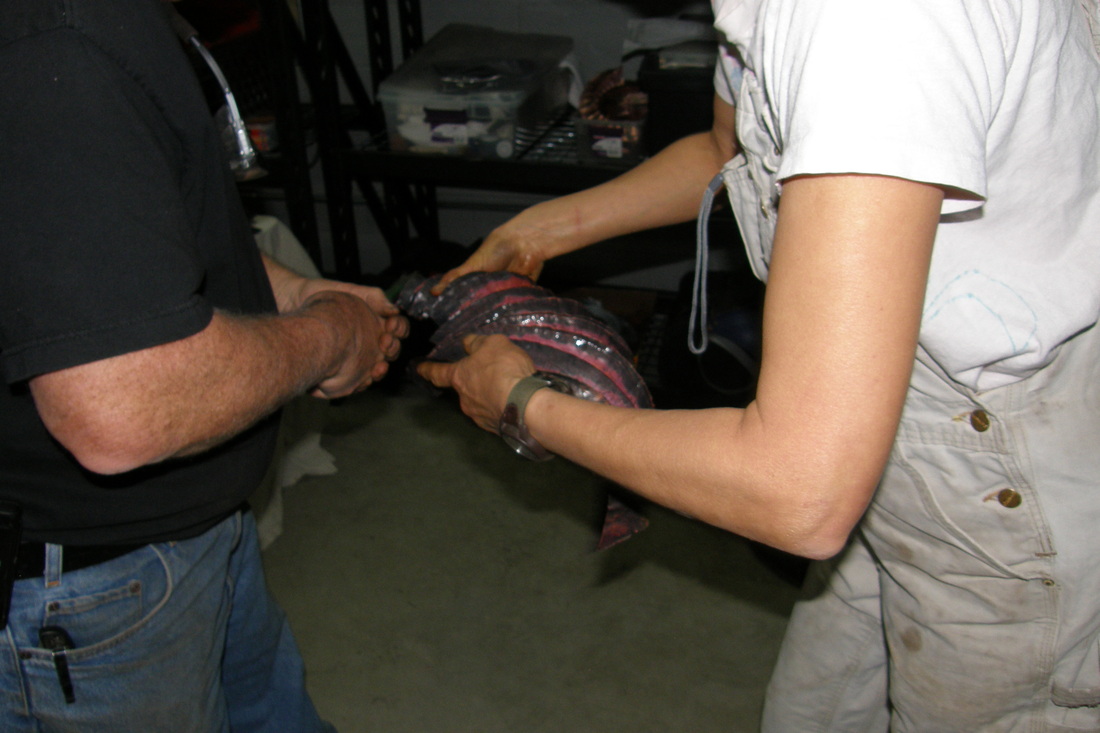
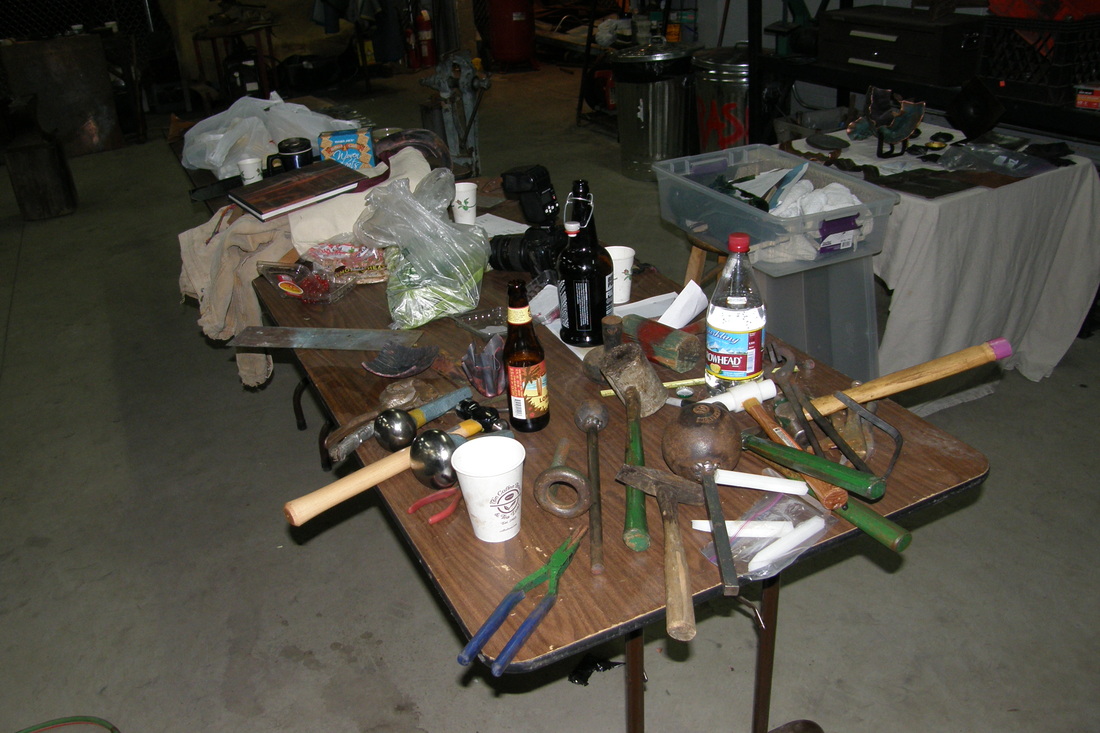
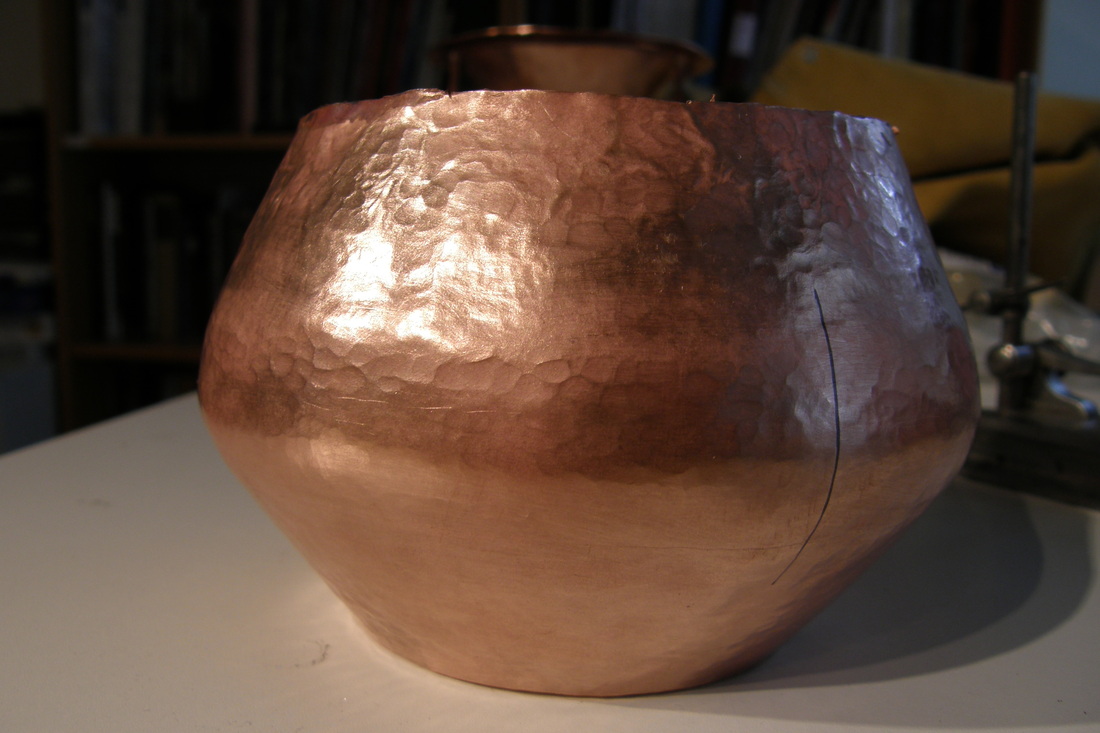
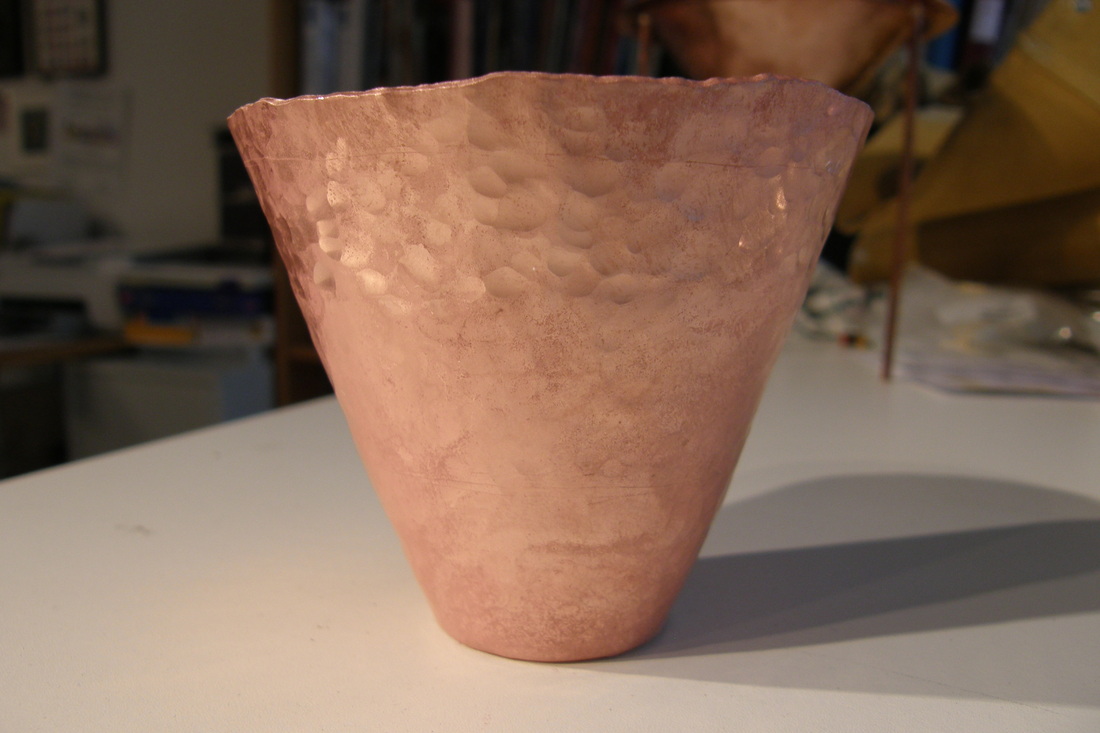
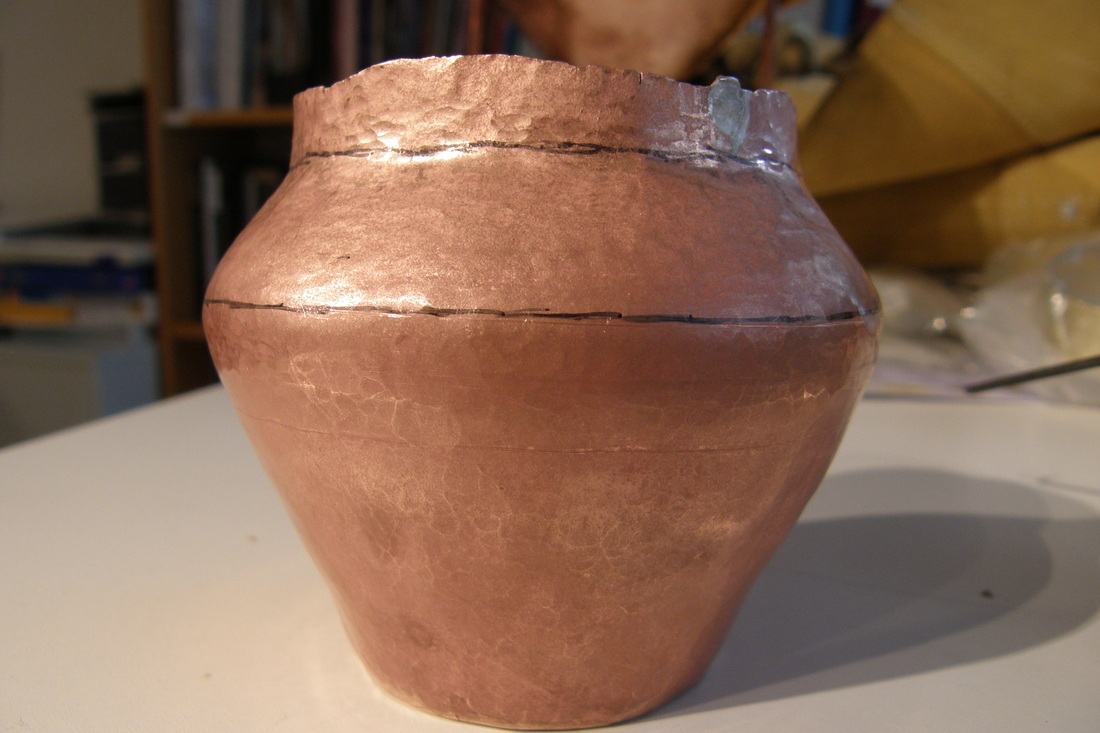
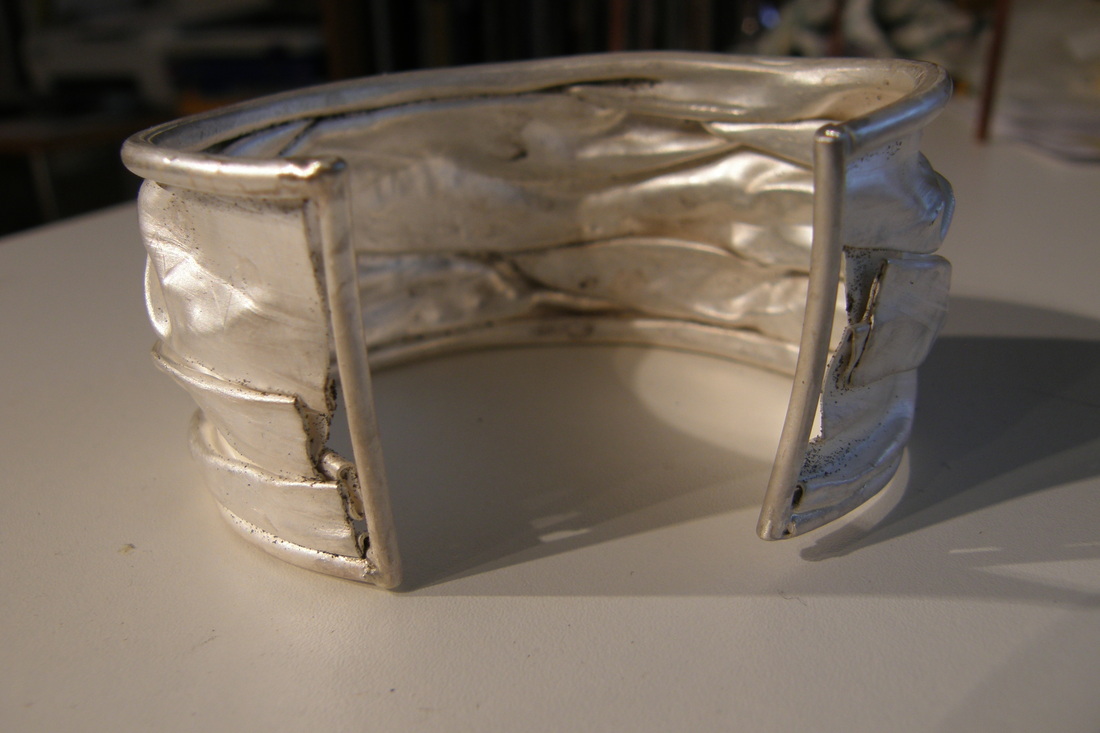
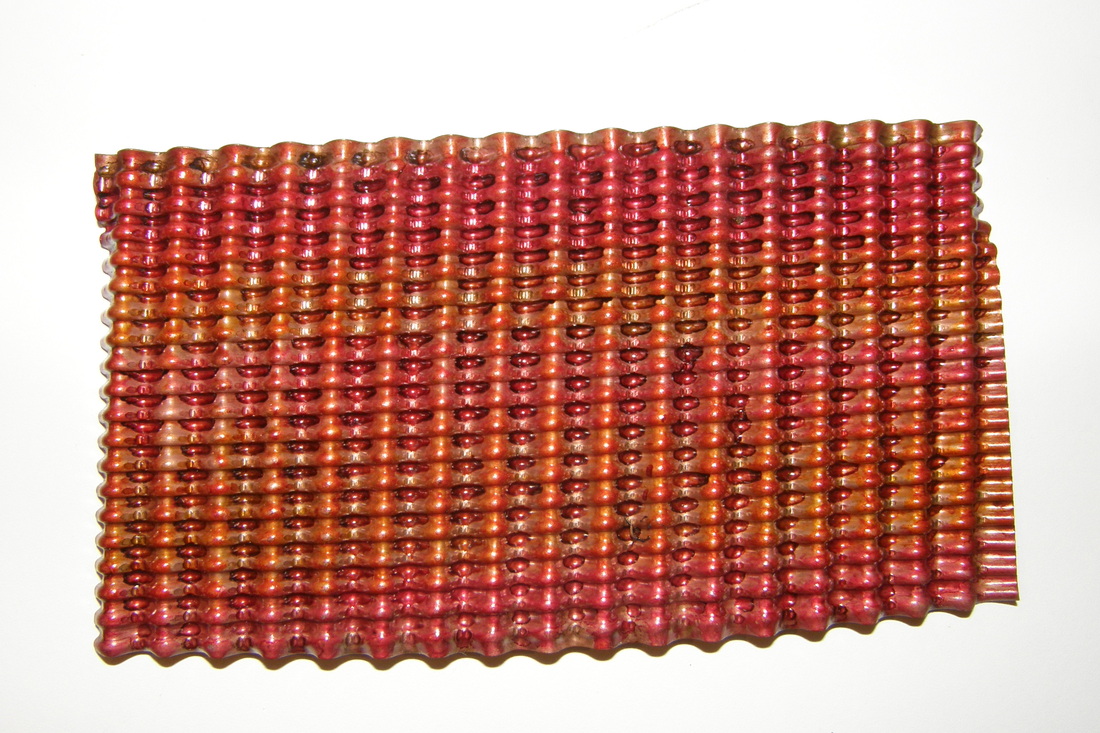
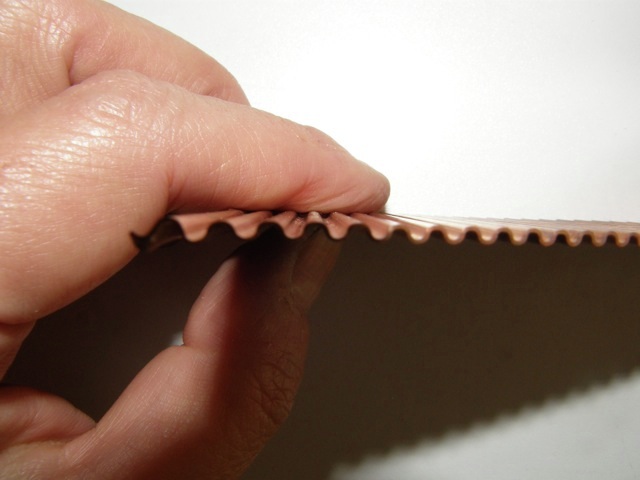
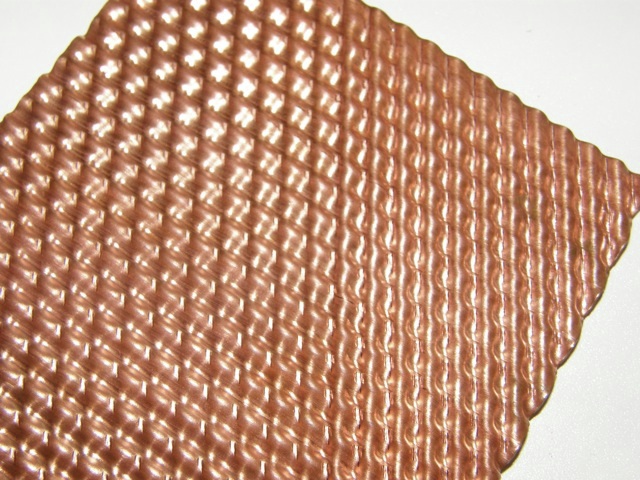
Last Saturday I went up to LA for a hot forging fold forming session at Adams Forge. Not only was this the first time I was there, it was in their new digs. The session started at 6:00pm and was to go until 9:00pm but of course when playing with hammers, metal and heat - time flies and we stayed until 11:00pm!

Pat Downing was there as our leader and I met many new folks who also hung out at the forge. The big surprise was that one of the people there was also at the same session of Haystack last summer. He was in the blacksmith group (I was in metals) but we did have several conversations while we were there and it was nice to talk and catch up on what we have been doing since then.

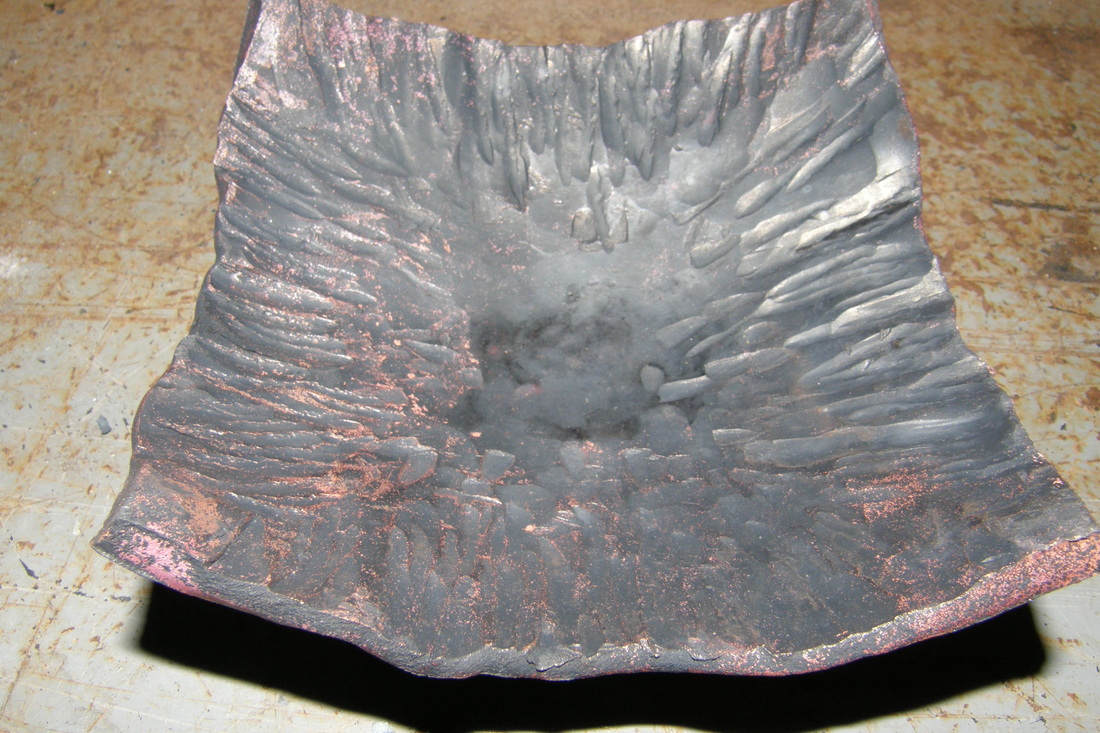
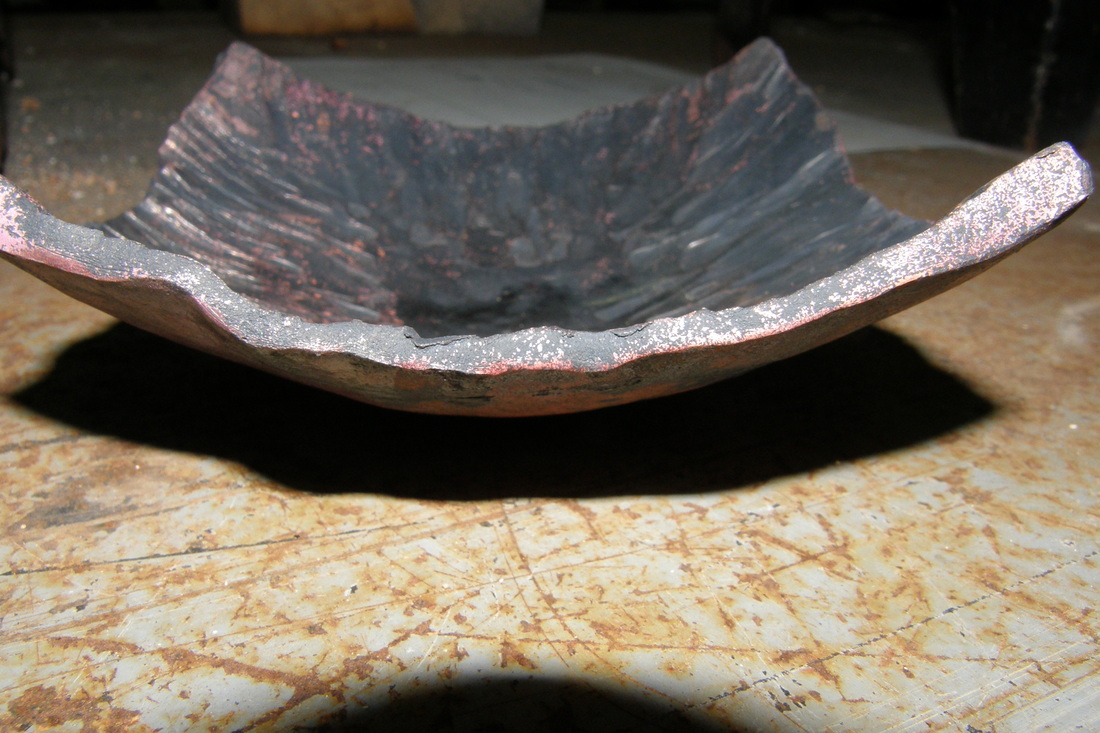
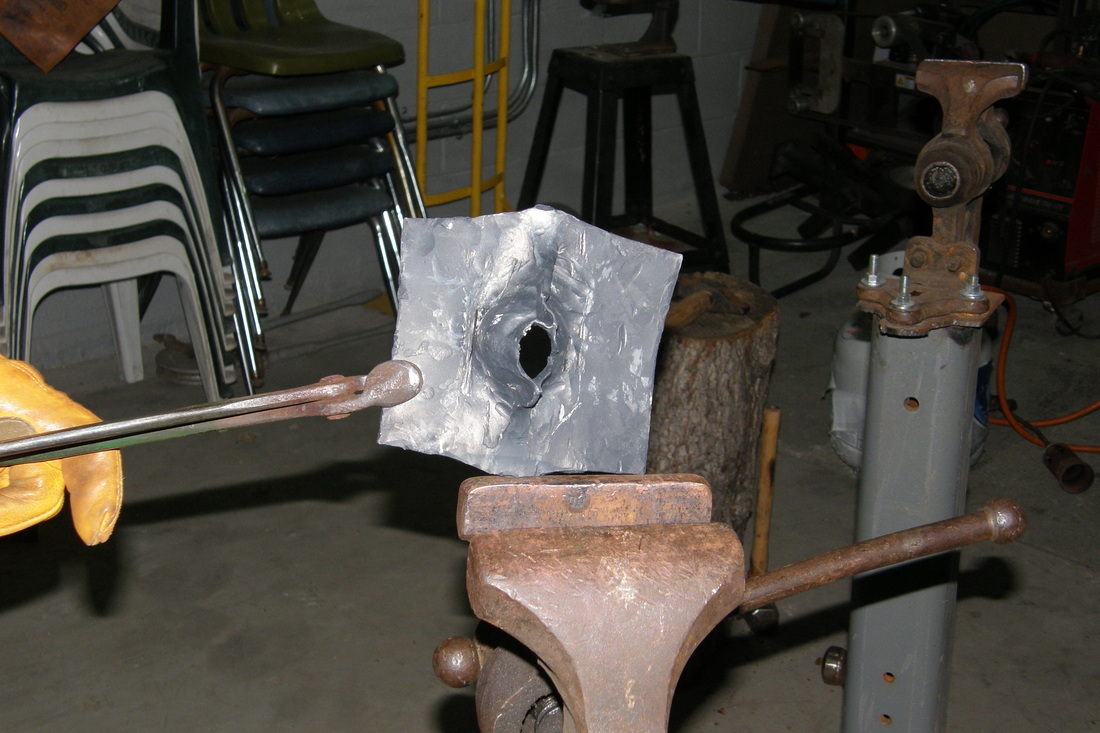
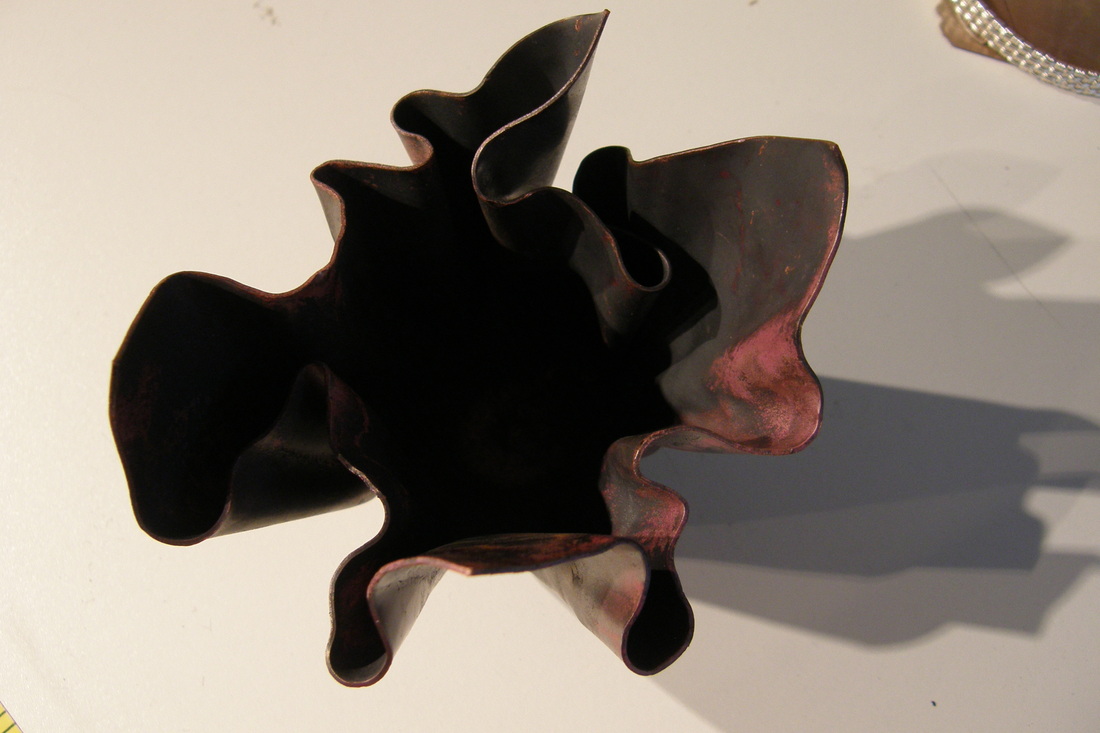
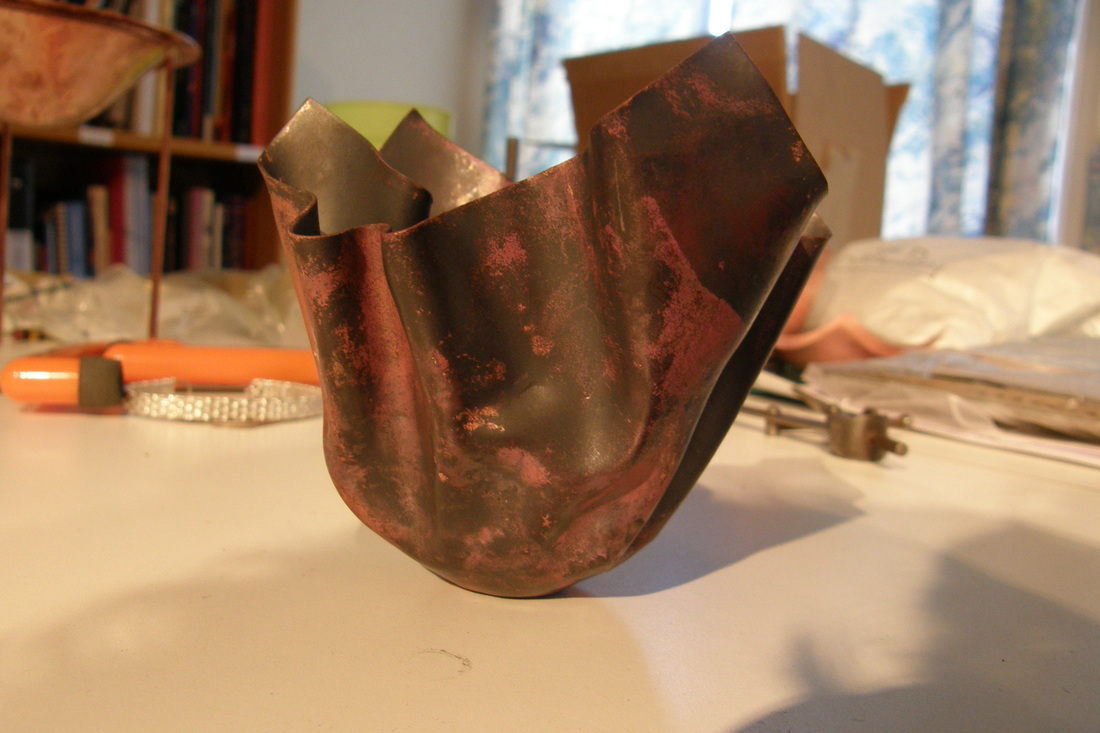
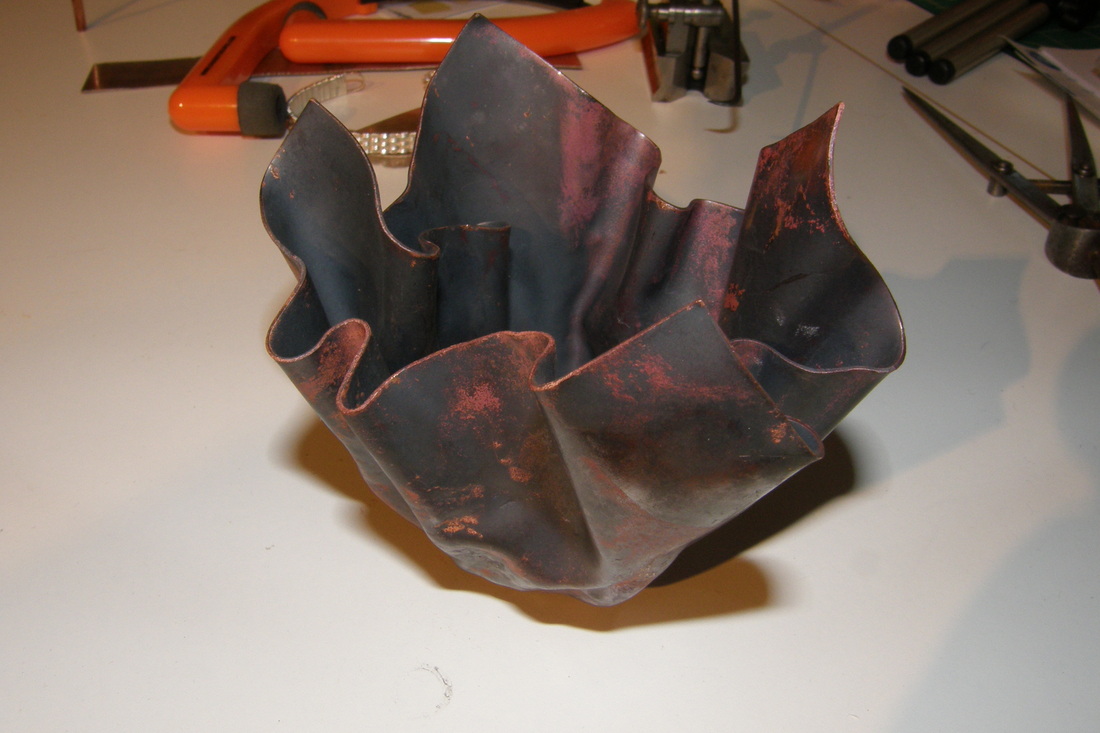
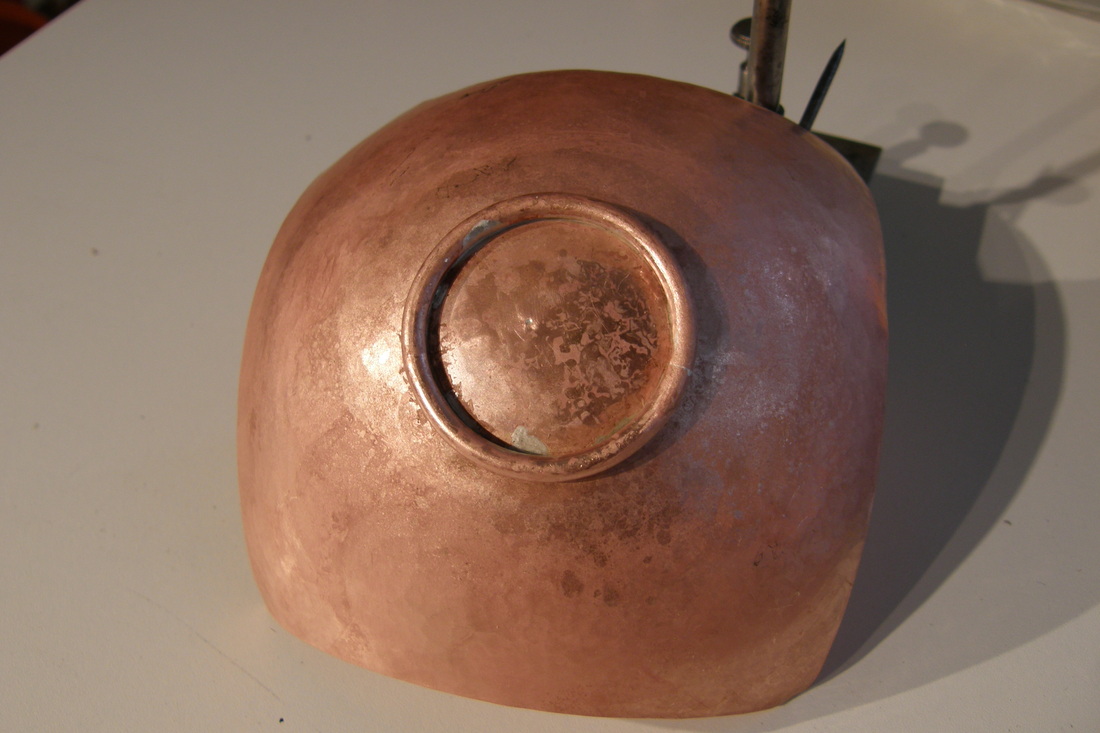
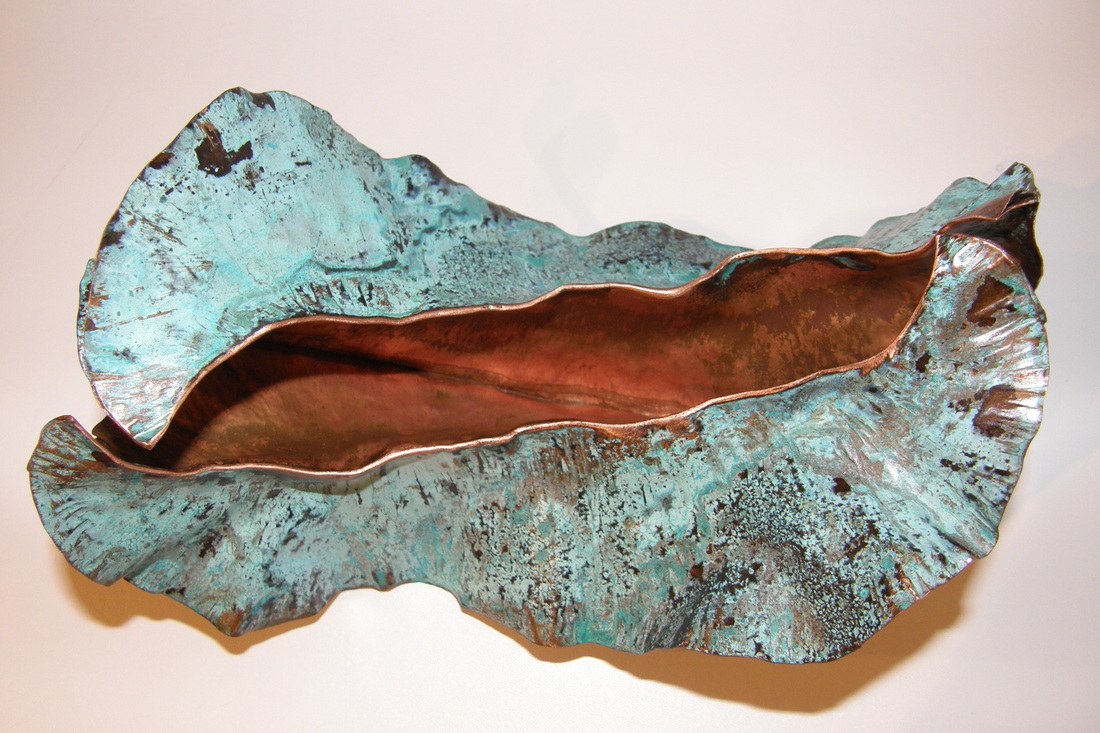
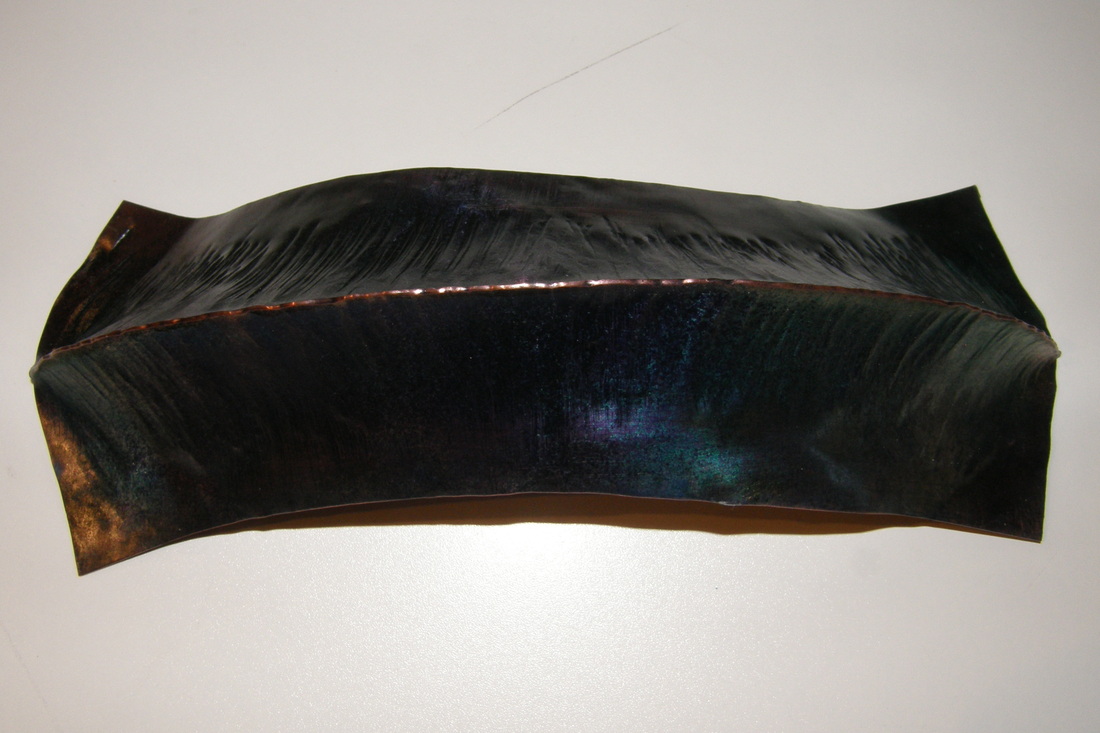
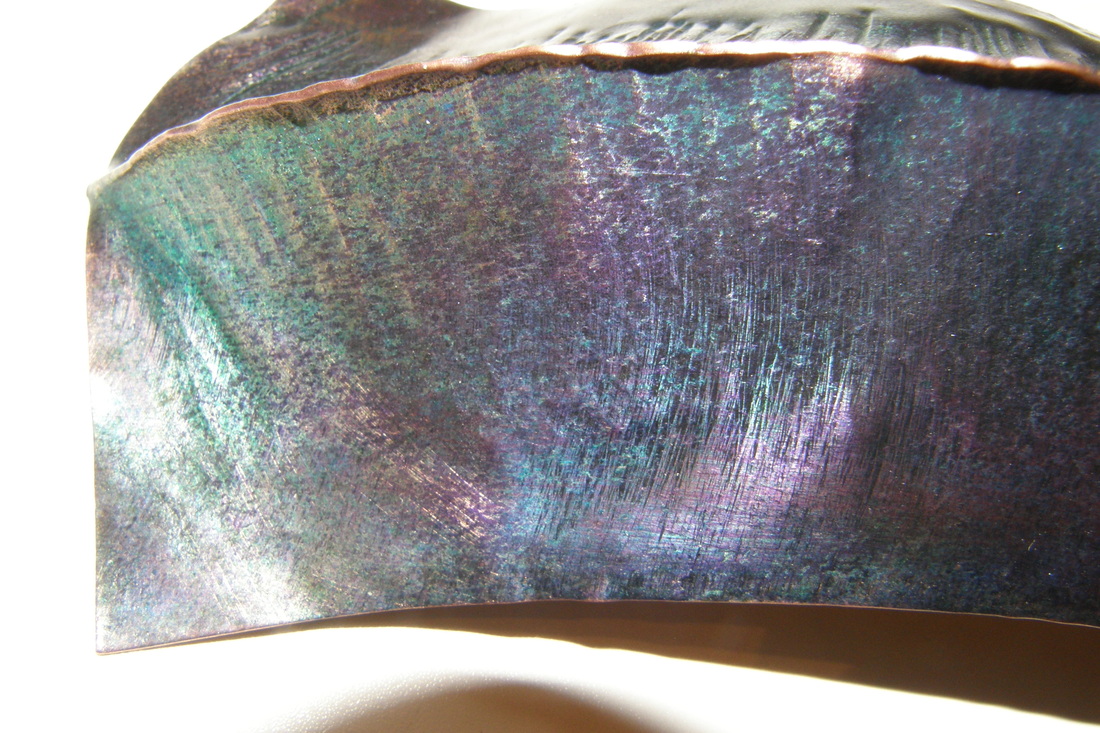
Here are pictures of what happened.

Progress

2/20/2012

 
Yesterday, I had a private session with Deb. I have not seen her in over a year yet it was like only a few weeks had gone by.  I brought several items to work on and to discuss since so much had happened in-between this session and the last.  I brought the following to work on:
  1. The crumpled bowl which has been sitting there since November of 2010. I am hoping that it could be saved and finished.
  2. This fold formed bracelet   - I needed to form the shape into a cuff and solder the end pieces on it
  3. These two vessels -  which I want to also finish and possibly use for the chasing & repousse class with David Huang in May
  4. Another 4 corners dish that needed its base soldered on.
  5. A hand cast, hand rolled sheet of shibuichi that I want to use for a bracelet in the chasing & repousse class with Nancy Mega Corwin in March. Deb has a great shear that I used to trim and square up my blank.
  6. Items I made at Haystack for us to talk about plus pictures to look at.
  7. Lots of hammers and stakes to use

The reason for some of these items being taken to the session is that I STiLL don't have a good soldering setup at home and Deb has 2 wonderful stations with torches and tips.

I did all of the soldering with some great assistance and pointers from Deb and while the various items were being cleaned and pickled we talked Haystack. It was so great to catch up and share with Deb. Deb also told me about her time at Haystack.

Then we moved onto the vessels. For the crumpled one, I trimmed off the top and now I can finish the raising and plannishing. The vessel without the curves I brought in more and trued up some.  I will take the walls a bit more vertical and then have it ready for the David Huang class. the vessel with the curves was also trued, then the curved section finished - but along the way I changed the upper portion of the curve, is now more of a angle and turned (literally) up a straight rim. The rim needs a bit more work and I have some plannishing to do here as well. Then this piece will also be ready for some C&R!

Enjoy the pictures.

Fold Forming Follow-up

8/7/2011

 
Last weekend was the 3rd and last session of fold forming with Pat. Actually this last session was not really fold forming at all but was about Patina and we used our fold formed pieces or other scrap to apply the patina too.

During the first hour or two of the class Pat explained natural patina's as well as commercial products that could be used to apply a patina to metal work in lieu of waiting week, months, or years for a natural patina to develop. Pat also showed examples of using secondary materials to affect the patina so a pattern - even if random, would develop.

Here are some pictures of my completed pieces.

Fold Forming

7/18/2011


One technique of metals I’ve wanted to explore is fold forming and months ago I purchased the definitive book on the subject – Foldforming by Charles Lewton-Brain http://www.amazon.com/exec/obidos/ASIN/1929565267/theganoksinpr-20

I figured this would be something I would eventually explore with Deb as there were so many other subjects and techniques to learn, it was quite a ways down on my list.

When I was down at the Vista Antique Gas & Steam Engine earlier in the month, I found out that they were having a 3 one day classes in fold forming and patina with each class being on a Sunday. I signed up for it immediately. 

Two weeks ago was the first class and I had a great time. Pat Downing is teacher and he is a fun and very relaxed man – he spent the morning talking basics and demonstrating various folds. You can see some of his work here http://www.patdowning.com

In the afternoon we attacked the copper which he supplied as well as many hammers and other tools. Everyone in the class help each other with annealing the copper, ideas and great conversation.

(you can see pictures of my fold forming here)

I started off with just playing with some scrap so the first two aren’t really “anything”. I just made some practice folds with no ideas as to what or where to go with it.   The third piece I made is a sample mini cuff, it might fit a small child but not an adult. I started off with the pulled fold and then saw it as a possible cuff design, so I worked it up with the material I had.   After the mini cuff, I did a fold  where the folded edge is forged to make longer and thus the piece will curve when opened.  My next piece was a M fold (imagine the metal folded like the letter) a and this time I forged the bottom edge of the M which is the center fold and the legs on either side – just keep pondering this and when you see the picture,  you will understand it.

This past Sunday I went to the second class were we learned how to  do bowls and boxes and lids. 

I only made 2 pieces but since one is a box with a lid,  you could count it as three.

When I started the ‘cup’, Pat told me how he would do make it; then I told him how I wanted to do it and he could not see my idea. The conclusion, before I started, was hey, that was what experimentation is about. He went off to help another student and I set about to making my cup. When I was done I found Pat outside eating his lunch and showed it to him. He just shook his head in disbelief – because he really did not think it would work.

I then made my box. It is does not have a square footprint, it is actually more of a trapezoid with one of the short sides even shorter than its opposing side. I used a dapping punch on carpet to make the bumps on the box walls.  Because of the trapezoid shape I had some difficulty cutting the bottom to fit inside and this resulted in me using a few more rivets to attach the bottom. 

Pat had spent some time during the demo to tell us about making lids. He stated that placing a fold formed or flat piece of metal across the top of a box was not a lid if it was not fitted; nor was making a fitted lid that flat would not make the box interesting. Lids should add something to the box or bowl being made.

When I started the lid  Pat commented on the folding, thinking I was making another piece like I did last week – no, I said as this was the start of lid.  When I had the forging done and had opened the folds some I then flattened the legs, placed the piece on the box and told Pat I was done which resulted in a mild look of shock as he thought I was serious. At that point I relieved his fears and said I was just making a joke of what he had told us NOT to do, earlier.

I went and annealed the piece so I could then fold down the corners to make a fitted lid. This bending also pulled the fold formed section down and opened it a bit more. Once done I again showed Pat and he was pretty amazed at how I forged the M-fold and turned it into a lid; he also commented that maybe my background in raising has allowed me to see how to form the metal  a little differently than him as he does not know how to raise.

After class, I offered to be his teaching assistant the next time he teaches the class. He is not teaching again until September and said that he would keep it in mind.

During this week, I will cleaning the pieces I made in class as well as a few other pieces including one or two from Haystack.  Why?

Next Sunday is the third and final class with Pat.  We will be doing patina, coating and sealants – some made from household items and some commercial patinas. We will be using some of our work from the prior 2 classes to apply the  patina to. My husband Erich has decided to come to that class with me as the subject of patina and using household products to make them interests him. He is my chemical go to guy and he can mix up a mean pot of pickle!

Fascination with Fold Forming

12/26/2010

 
A year ago, I took a class where we did some fold forming and learned to use a hydraulic press. The folding forming was a basic T-fold and then we used the press to deform the T-fold. We used the folded metal with a semi-circular die, to spread the fold open and to create dept for our finished piece.

I had not planned on taking that class but because I cancelled another one, I took this class instead only to find out about the hydraulic press. Afterwards I was pleaseantly surprised because I like the pendant I had made and I had learned two new techniques.

All of this was just prior to me taking classes with Deb. I was at that point were I knew I did not want to concentrate on jewelry; I wanted to learn silversmithing and was still looking for a teacher. I tucked these two techniques away only thinking about how they might be applied to jewelry and moved on.

Last month (November to be exact), I learned how to make a silver shibori bracelet. [Shibori is a Japanese term for several methods of dyeing cloth with a pattern by binding, stitching, folding, twisting, compressing it, or capping. Some of these methods are known in the West as tie-dye.] When the term shibori is applied to metal, it is a type of fold forming such that the folds are gentle giving the allusion of fabric. 

I fell in love with my cuff bracelet and now I want to learn more about fold forming so I spent part of the weekend watching YouTube videos on fold forming; I Google-d images; I researched books; I read everything on Charles Lewton-Brain's website (http://brainpress.com/Foldforming.html); and then I ordered his book as well as a good quantity of thin gauged copper.

At the December 2nd Saturday, with Deb we discussed my bracelet, fold forming in general and then we went through a box of her fold forming experiment samples and Deb explained how she made some of them. Deb also had set up 2 metal corrugators made by her husband and I came home with some simple samples where I had used the 2 different corrugators alone and together which resulted in some very interesting textures. Yes, Virginia, corrugation is a type of micro-fold forming (See pictures below - remember you can click on the pictures to see a larger image).

With the new year around the corner, I hope to work my way through CL-B's fold forming book by doing a new fold every few weeks and then pondering some ideas of how to apply it to my work.

For your delight - here are some pictures of the corrugated samples I made. Click on any image to view it full sized

    RSS Feed

    How to Aquire Your Own Shop Elf

    Archives

    October 2020
    August 2020
    March 2020
    December 2019
    November 2019
    October 2019
    September 2019
    August 2019
    July 2019
    June 2019
    May 2019
    March 2019
    February 2019
    January 2019
    December 2018
    November 2018
    October 2018
    September 2018
    August 2018
    July 2018
    May 2018
    April 2018
    February 2018
    January 2018
    November 2017
    October 2017
    September 2017
    July 2017
    June 2017
    May 2017
    April 2017
    March 2017
    February 2017
    January 2017
    December 2016
    November 2016
    October 2016
    September 2016
    August 2016
    July 2016
    June 2016
    May 2016
    April 2016
    March 2016
    February 2016
    January 2016
    December 2015
    November 2015
    October 2015
    September 2015
    August 2015
    July 2015
    June 2015
    May 2015
    April 2015
    March 2015
    February 2015
    January 2015
    December 2014
    November 2014
    October 2014
    September 2014
    August 2014
    July 2014
    June 2014
    May 2014
    April 2014
    March 2014
    February 2014
    January 2014
    December 2013
    November 2013
    October 2013
    September 2013
    August 2013
    July 2013
    June 2013
    May 2013
    April 2013
    March 2013
    February 2013
    January 2013
    December 2012
    November 2012
    October 2012
    September 2012
    August 2012
    July 2012
    June 2012
    May 2012
    April 2012
    March 2012
    February 2012
    January 2012
    November 2011
    August 2011
    July 2011
    June 2011
    May 2011
    April 2011
    March 2011
    February 2011
    January 2011
    December 2010
    November 2010

    Jan - Nov 2010 History
    File Size: 2272 kb
    File Type: pdf
    Download File

    Jan - Dec 2009 History
    File Size: 2332 kb
    File Type: pdf
    Download File

    Categories

    All
    42
    A Year Of Repousse
    Blacksmithing
    Blogoversary
    Box Project
    Business
    Chasing & Repousse
    Commission
    Education
    Embroidery
    Enamel
    Entries
    Entry
    Exhibition
    Facebook
    Filing
    Fold Forming
    Gold
    Holloware
    Hot Forging
    Hydraulic Press
    Jewelry
    Keum-boo
    Learning
    Leather
    Market
    Metal
    Patina
    Photography
    Polishing
    Publications
    Raising
    Sanding
    Santa Fe Symposium
    Shop Elf
    Sinking
    Social Media
    Soldering
    Store
    Studio Visits
    Superbowl Challenge
    Teaching
    Teapot Project
    Technique
    Temari
    Tin
    Tools
    Vessels
    Visiting Workshops
    Weaving
    Website
    Workshop
    Yubinuki

Powered by Create your own unique website with customizable templates.