Follow Me On:
The Adventurous Silversmith
  • Home
  • Blog
  • Portfolio
    • Metal Work >
      • Chasing & Repousse
      • Holloware
      • Jewelry
      • Other Wonderful Items
    • Fiber Arts >
      • Temari
      • Yubinuki
  • Resources
    • Library
    • Tools & Equipment
    • Links
  • About
    • Artist Statement
    • Curriculum Vitae
    • How it is Made
    • Contact

L.A Trip Day 1 and 2 (after the fact)

7/3/2015

1 Comment

 
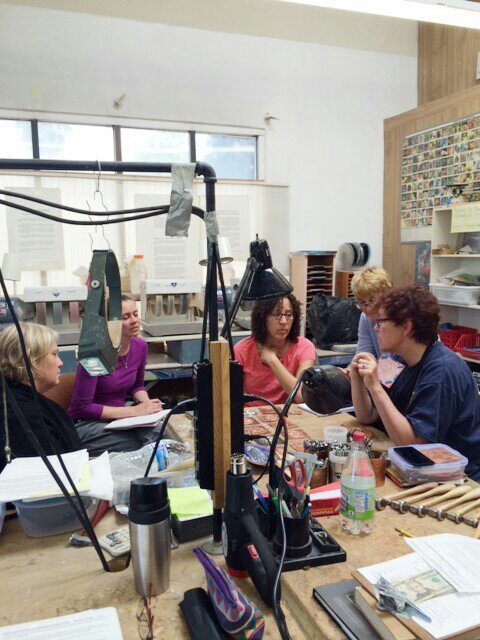
(Last) Saturday morning, after a great sleep at my AirBnB place, I headed over to Adam's Forge for the first day of the high relief chasing class with Heather McLarty.   There were 10 of us in the class and Heather started with a morning lecture on the differences between high relief and classical chasing and repousse - in high relief, as she was taught by Alfred Habermann who was THE MAN in blacksmithing,  there is almost NO repousse.  

YES FOLKS  - None to very little. 

For classical chasing and repousse. The metal is bulged "up" from the back of the metal which results in the thinnest point being the highest point as seen from the front. 

With high relief, he metal is pushed inwards and upwards to a bulge with a wee bit of sinking... and from there everything else is either pushed around or pushed down. This results in the thinnest point being around the edge of the design and the highest point, 9 times out of 10, being the original thickness of the metal.   The Japanese also do their chasing work this way and it is called uchidashi and so if you are curious watch this video by Ford Hallam who I consider to also be THE MAN for Japanese metal work by a Westerner!  Also Jim Kelso who is another great Japanese (western) metal worker has a great page about it.

I knew this was a great technique to learn so for example if (when) I do another tentacle, I won't break through when forming the suckers.   Which is why I wanted to learn it and Heather being a master blacksmith/artist was just the person to learn it from. 

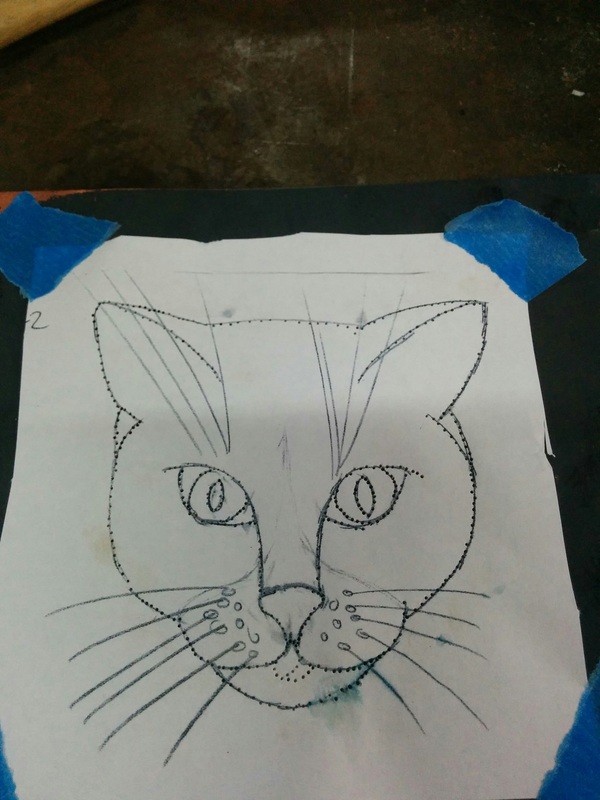
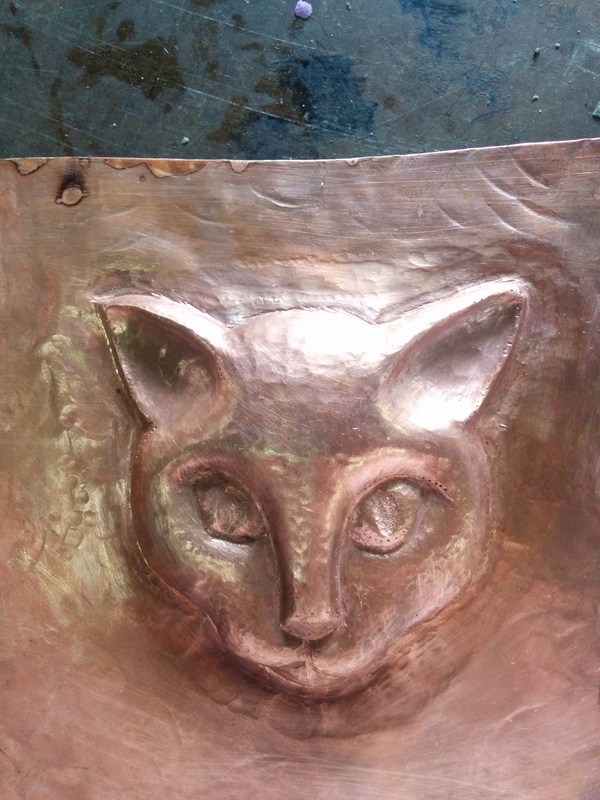
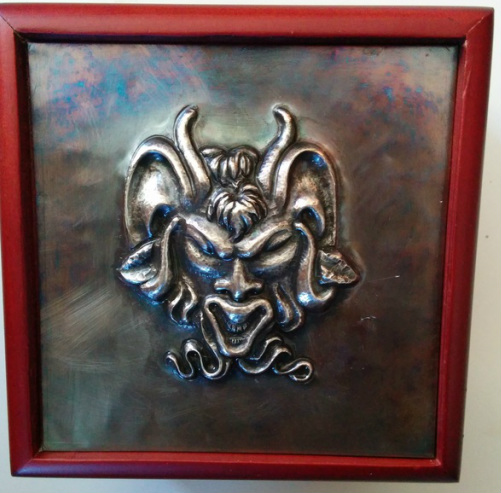
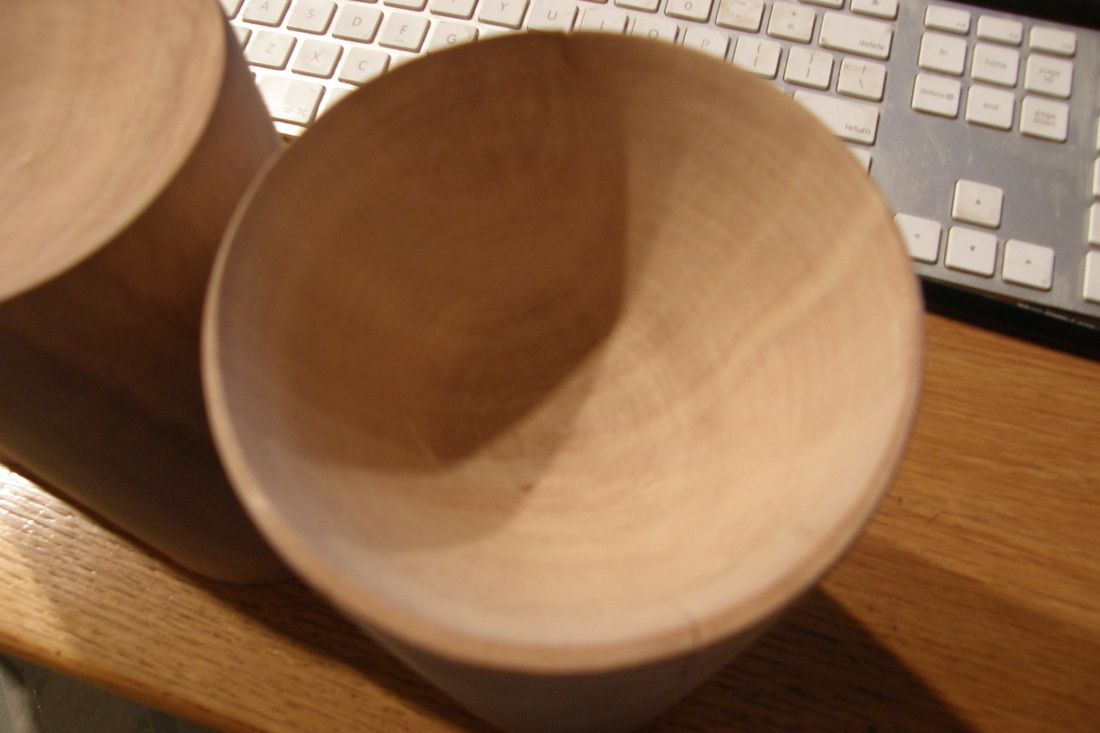
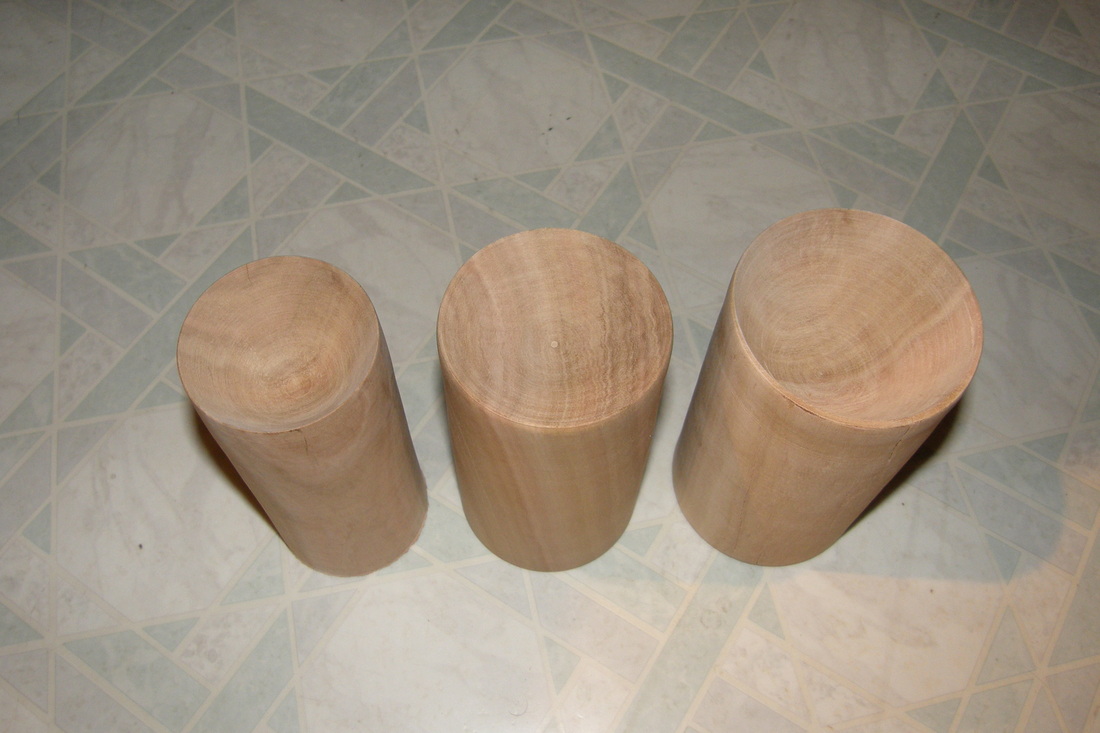
After the lecture,  we annealed our 18 gauge copper and started right in.  My design was to be the shop pet (not shop elf) BOOTS.  Actually she is the shop elf's cat. She spends most of the day following him around the house; naps on his lap and plays with him. Boots only see's me as the person who lets her into the house on weekend and who gives her the best chin scratches - other times she avoids me but I am gone all day with the day job so it is understandable that she has a stronger bond with the shop elf. 

Picture
I think Heather appreciated me being there (well she said so, but actuality may be another thing) because at times I would raise my hand or just interrupt and give the "classical" view point on chasing & repousse.  

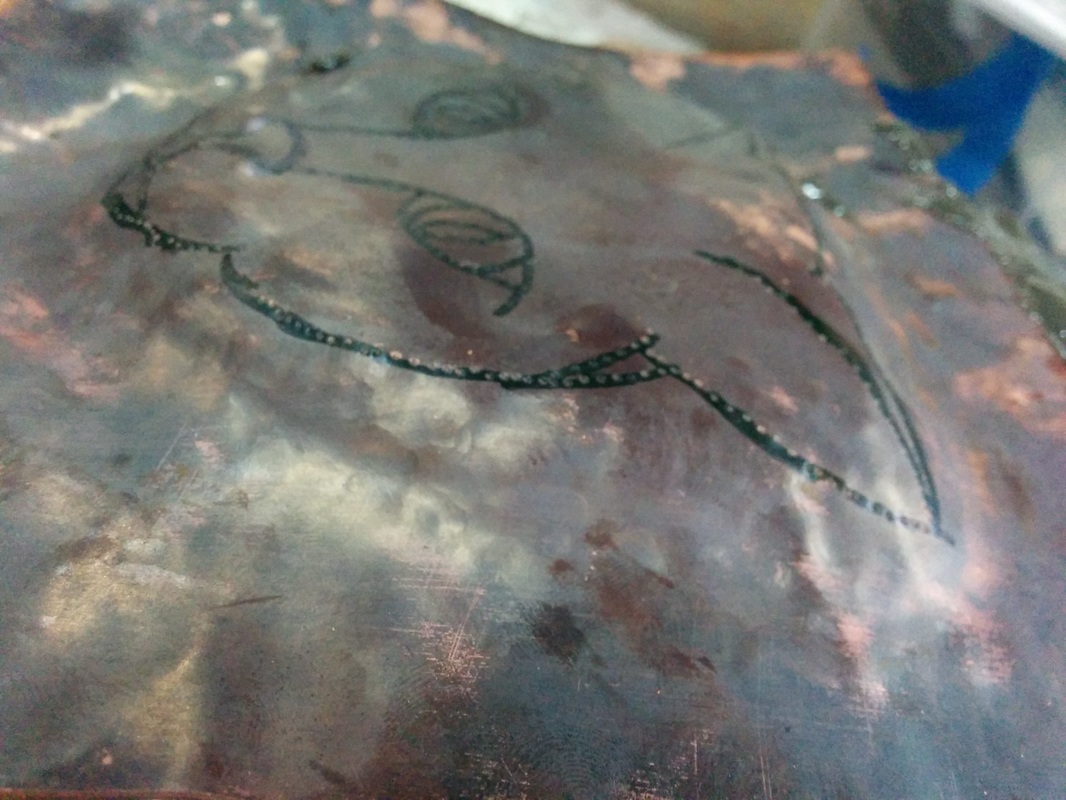
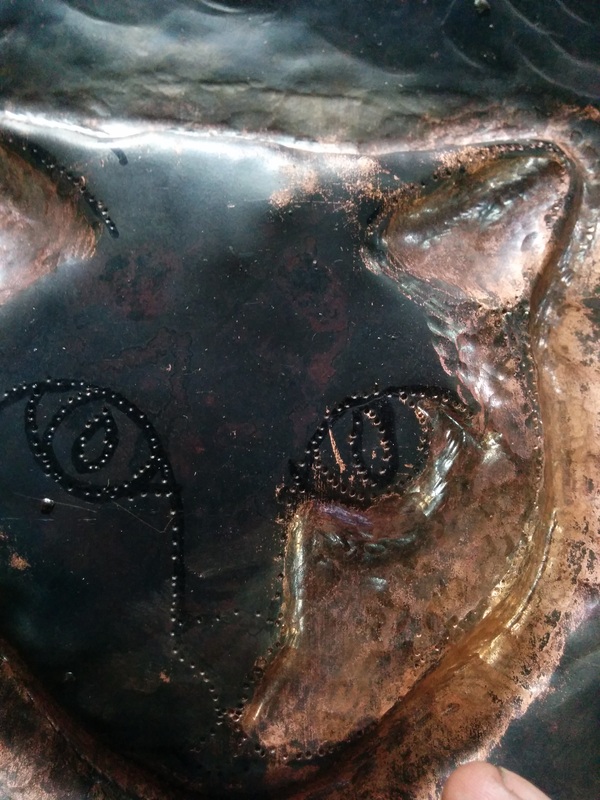
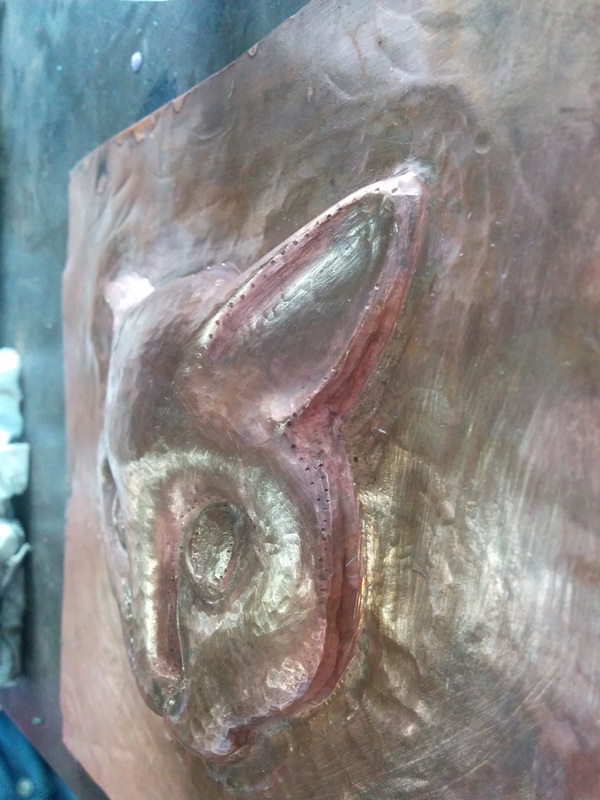
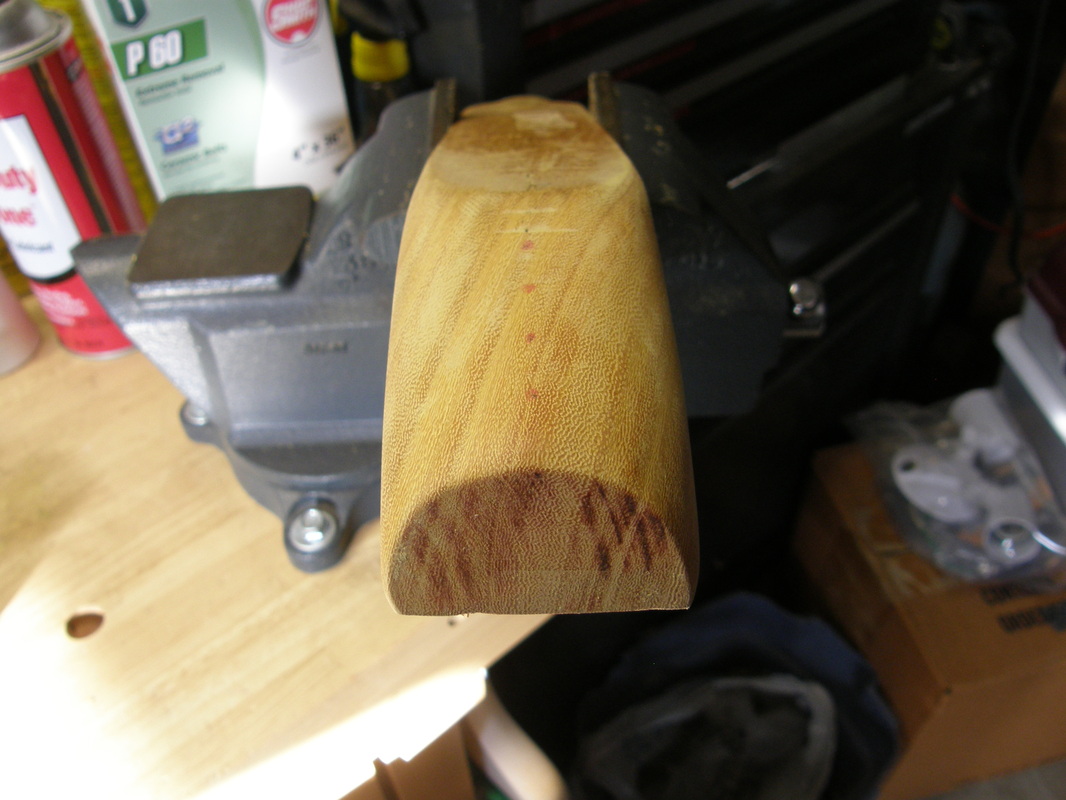
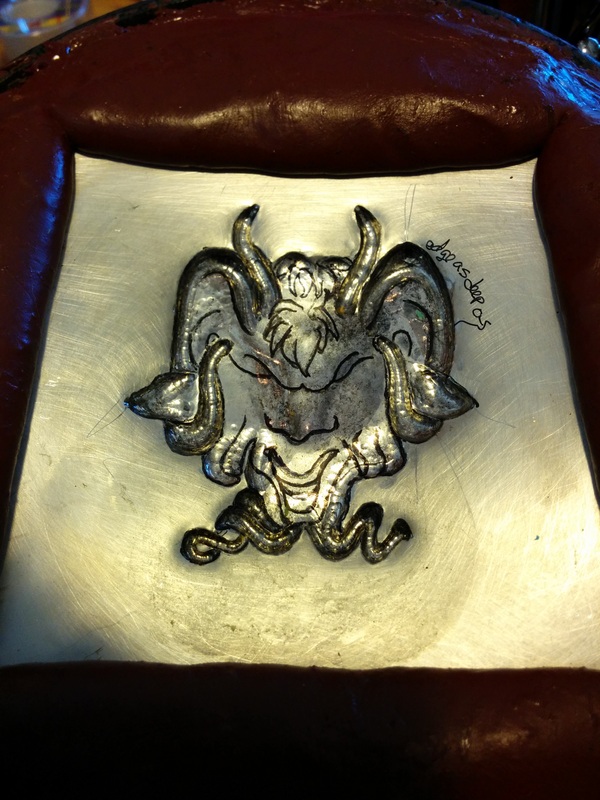
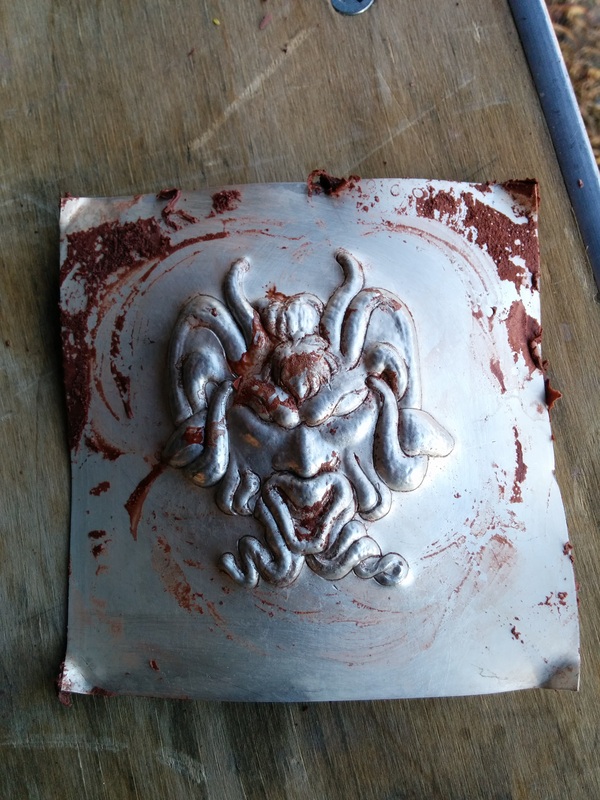
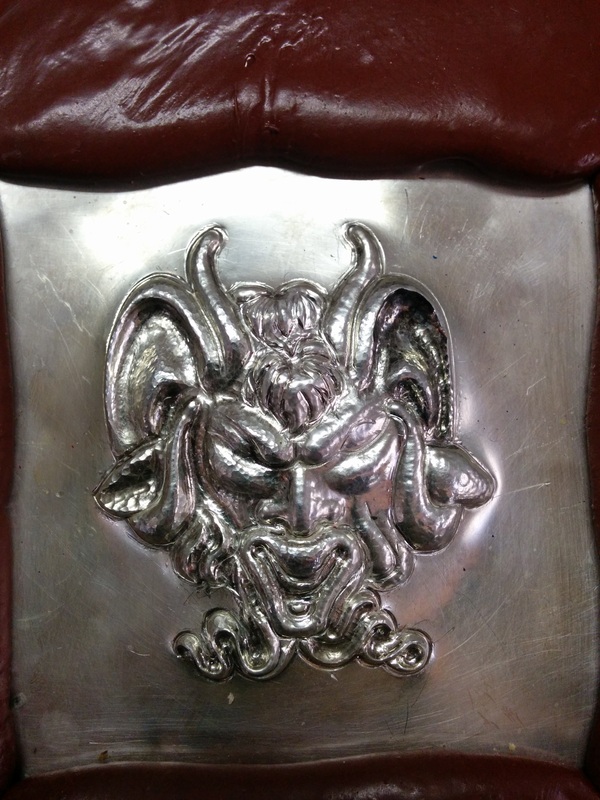
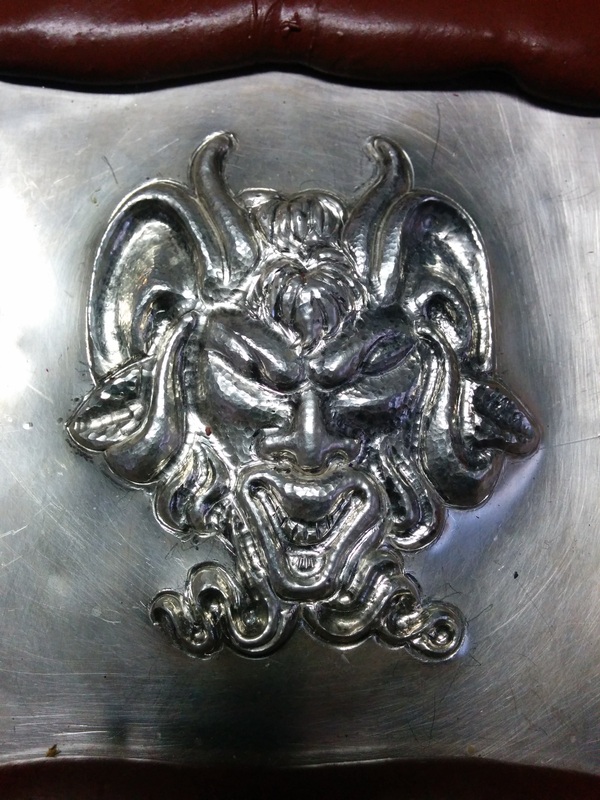
On the first day I completed the bulge and started pushing down Bootsies ears and eyes. 

After class, we went to Heather's house for a dinner of hamburgers and great conversation. By 8pm I was exhausted so I returned to my AirBnB, took a hot shower and a long one too; then spoke to my sweetie and had a deep sleep - which was interrupted at around 3 am by the sound of gun shots through the open window. YES you read that correctly; I rolled over and went back to sleep.

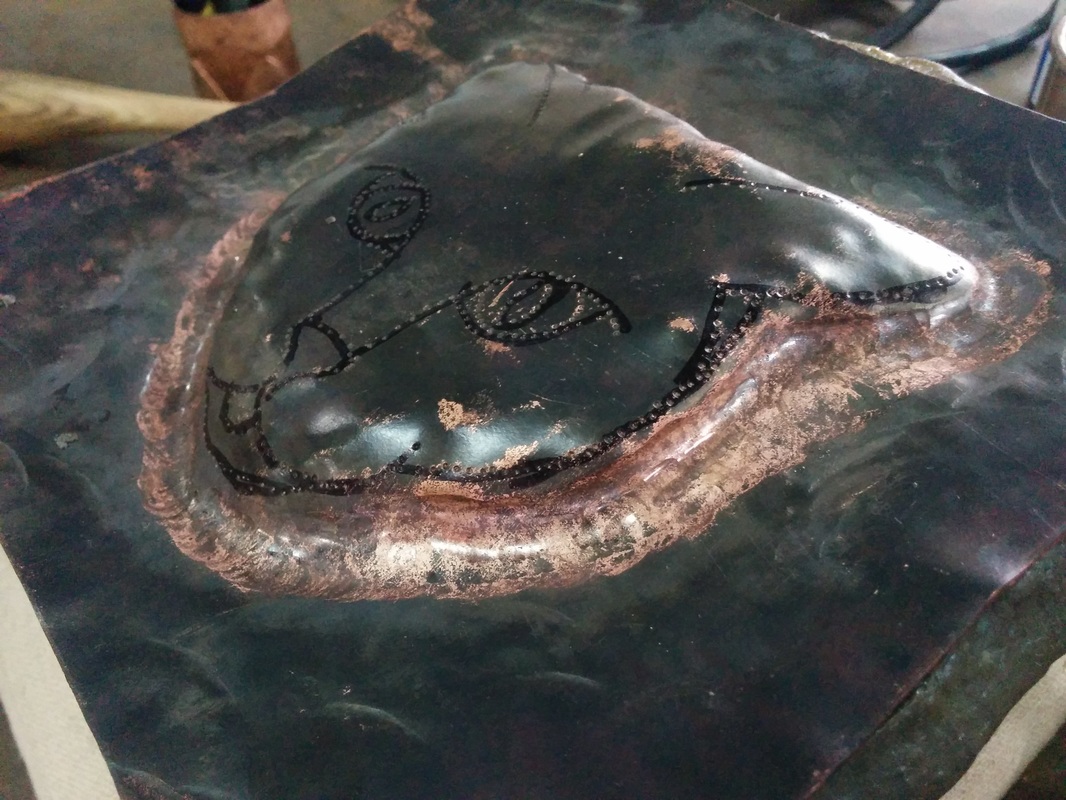
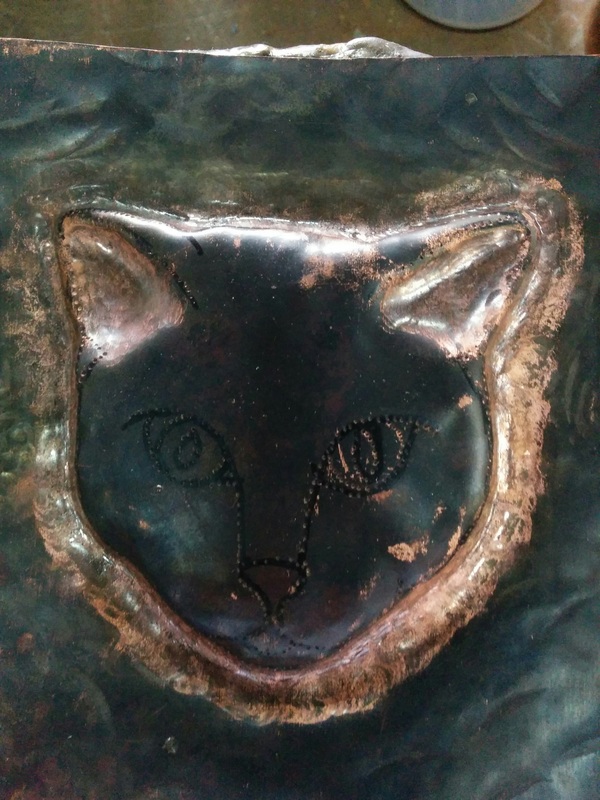
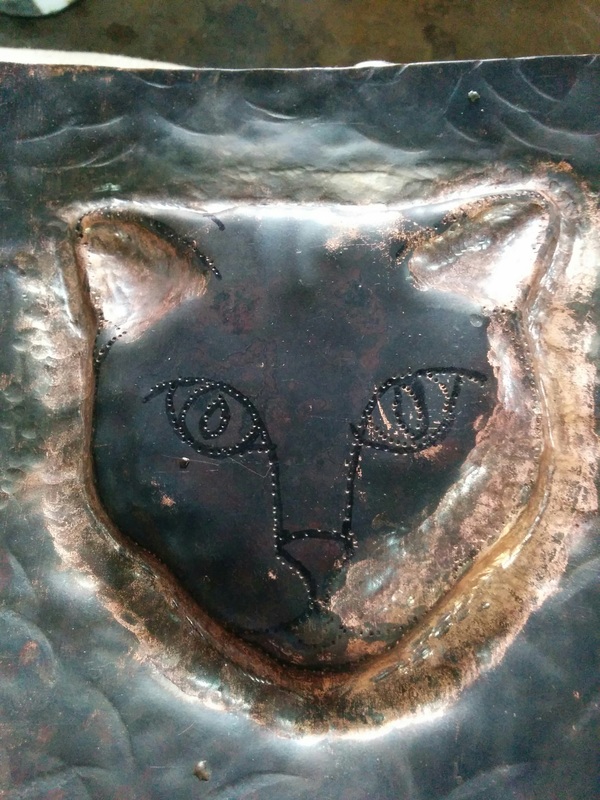
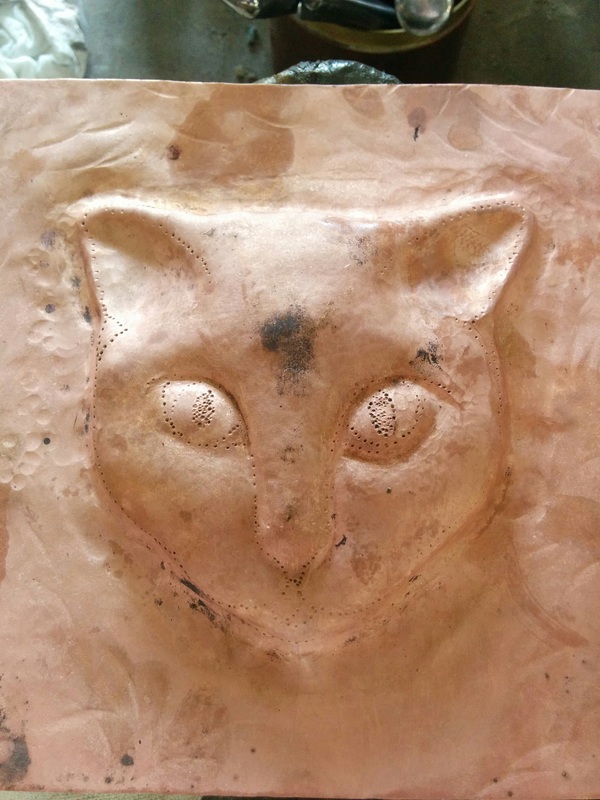
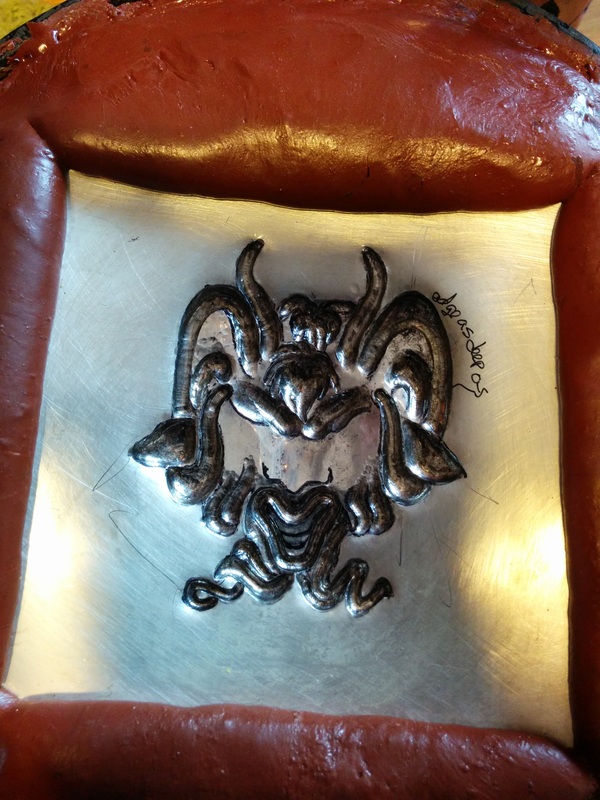
On the second day I shaped Boots' cheeks, nose, lips and chin. I am almost done but I need/want to even out her lips, shape the nose a bit more and the left ear which I hope to do tomorrow.

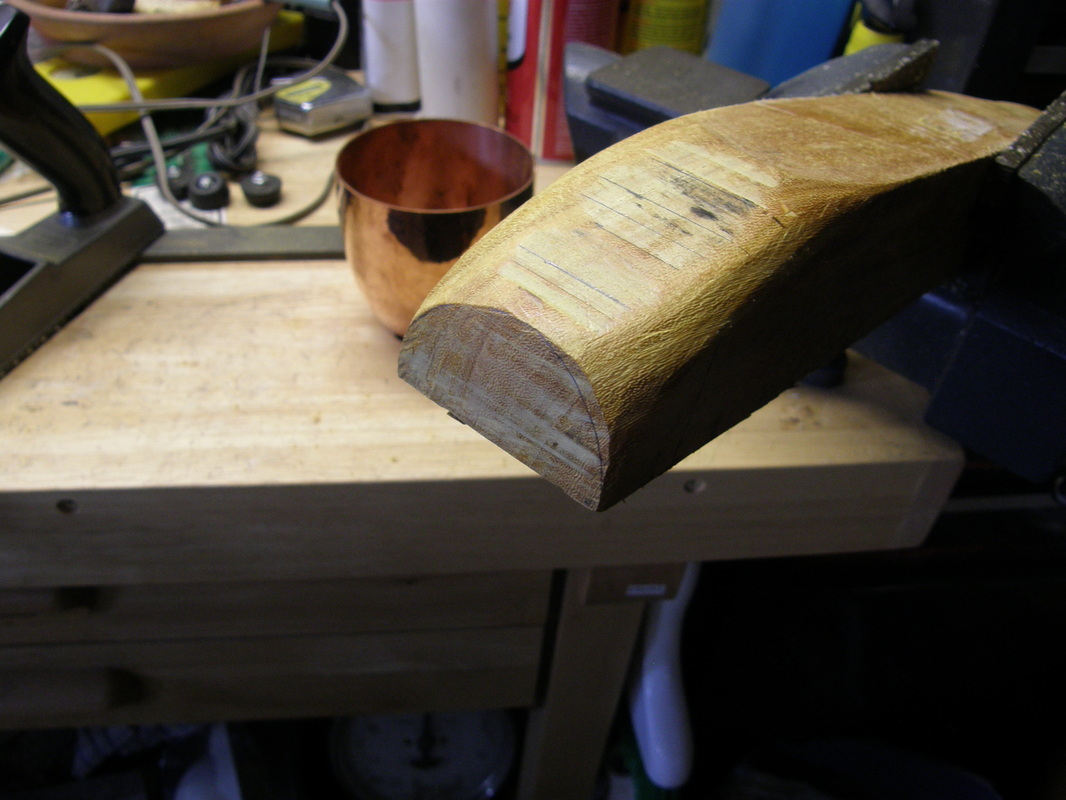
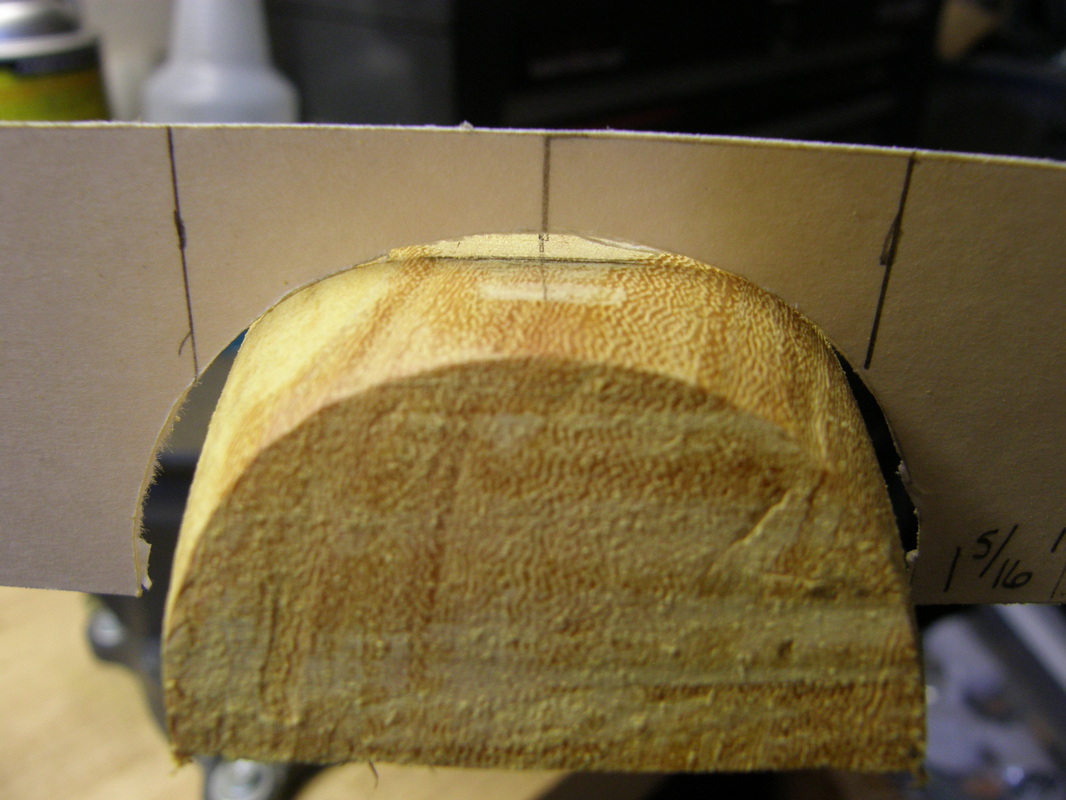
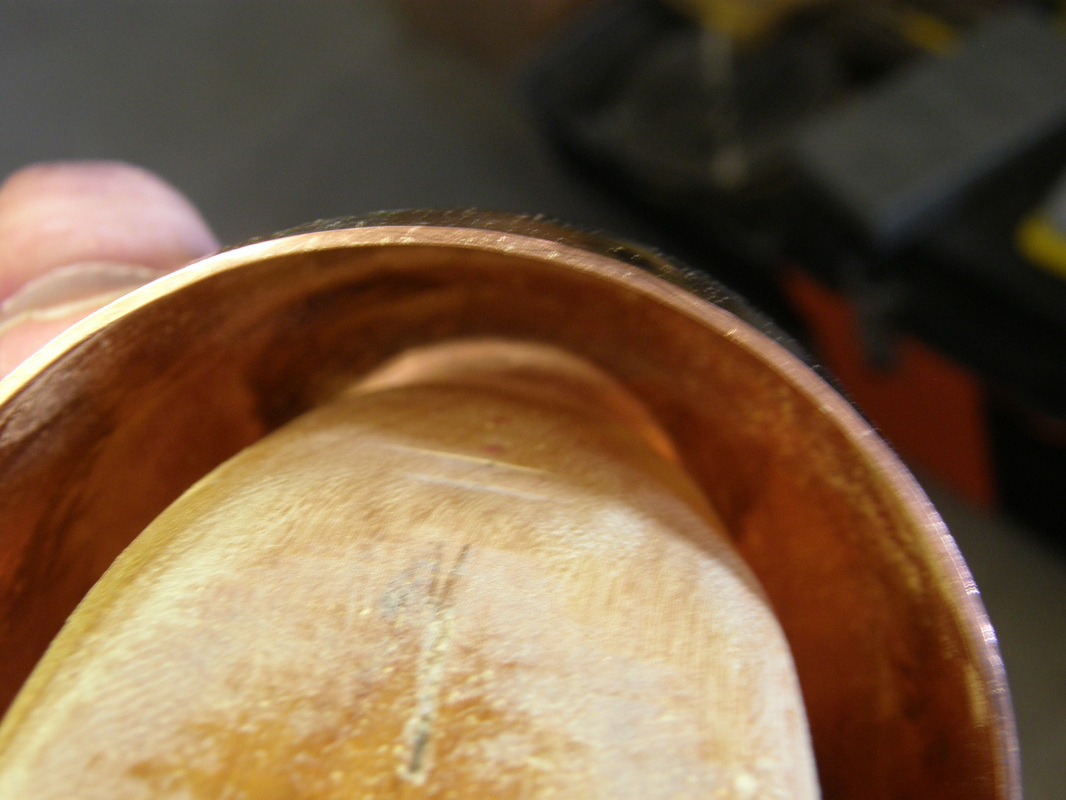
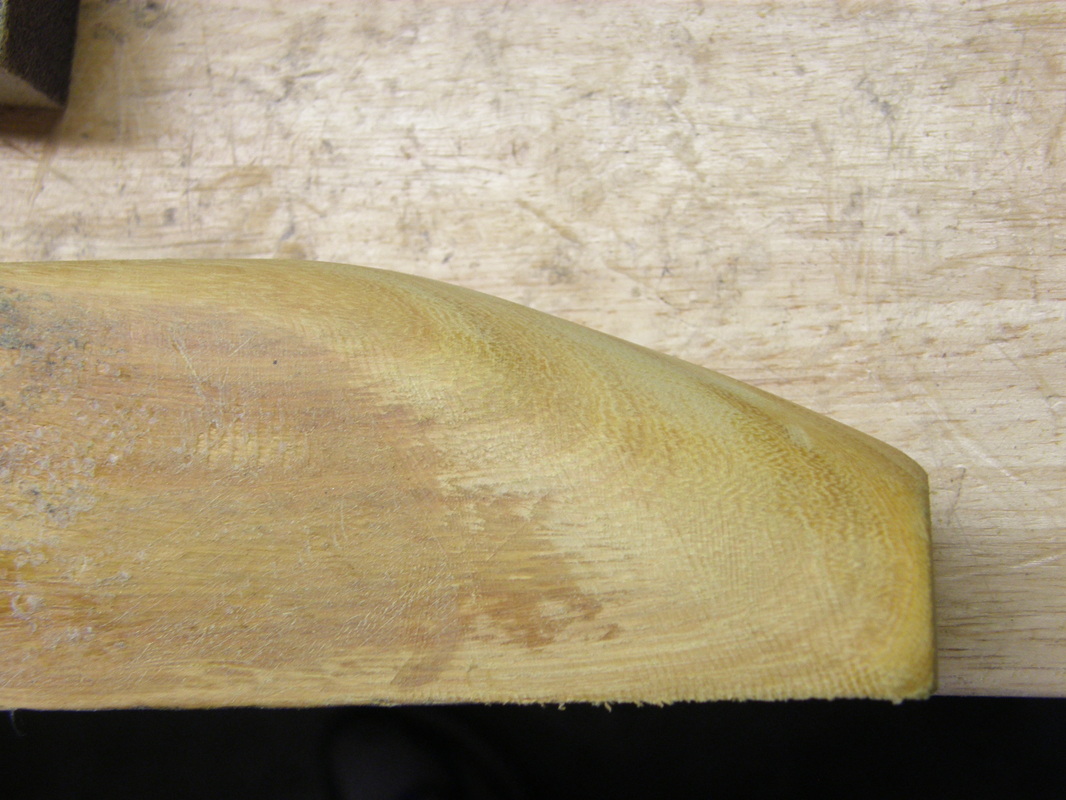
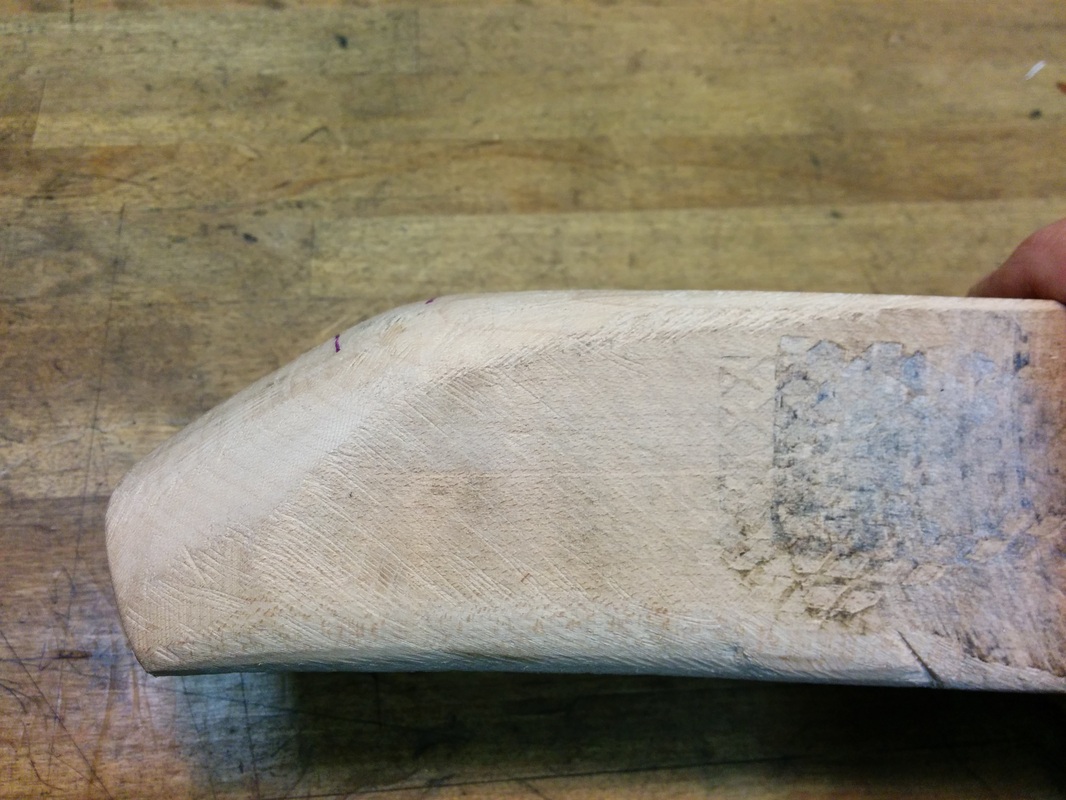
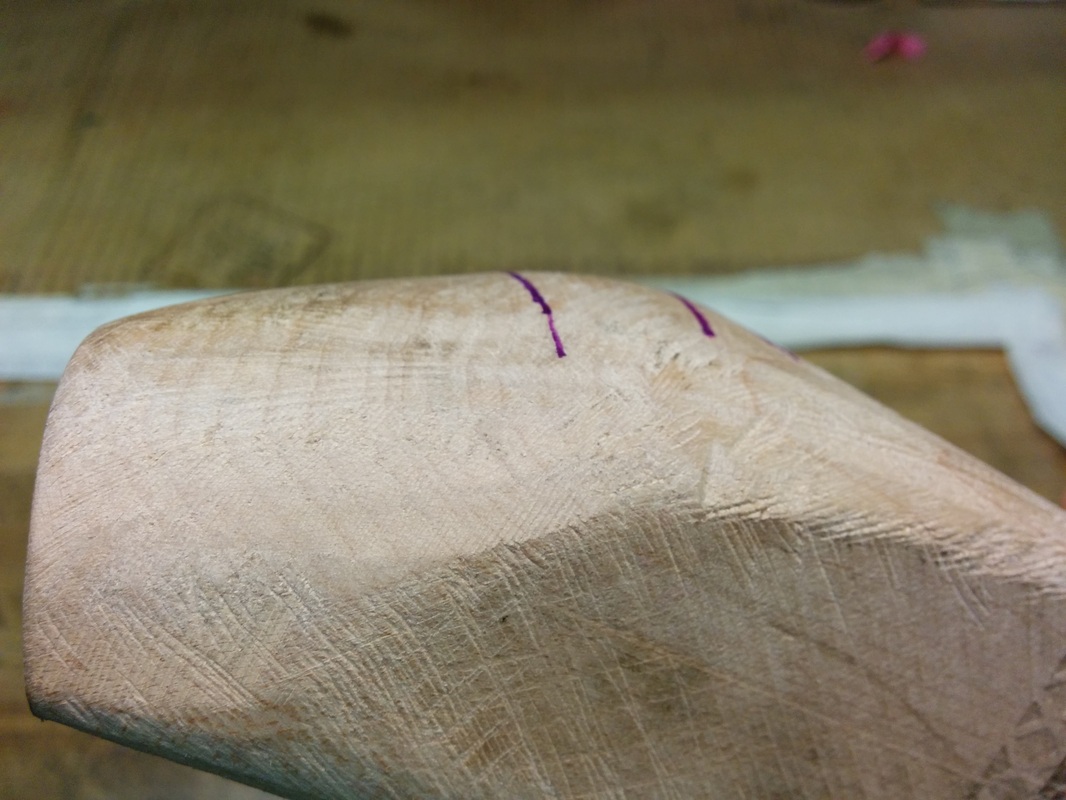
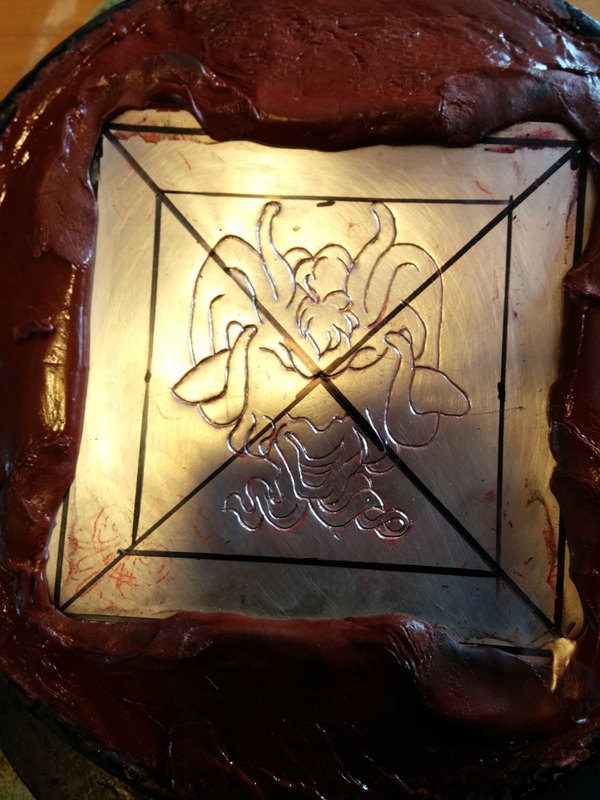
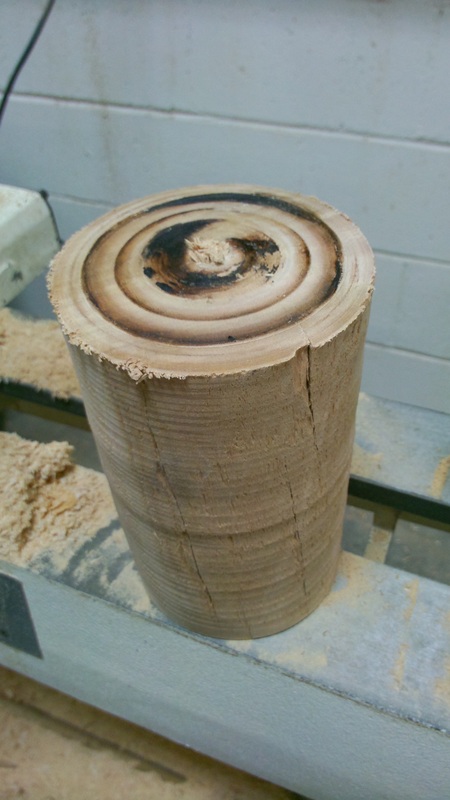
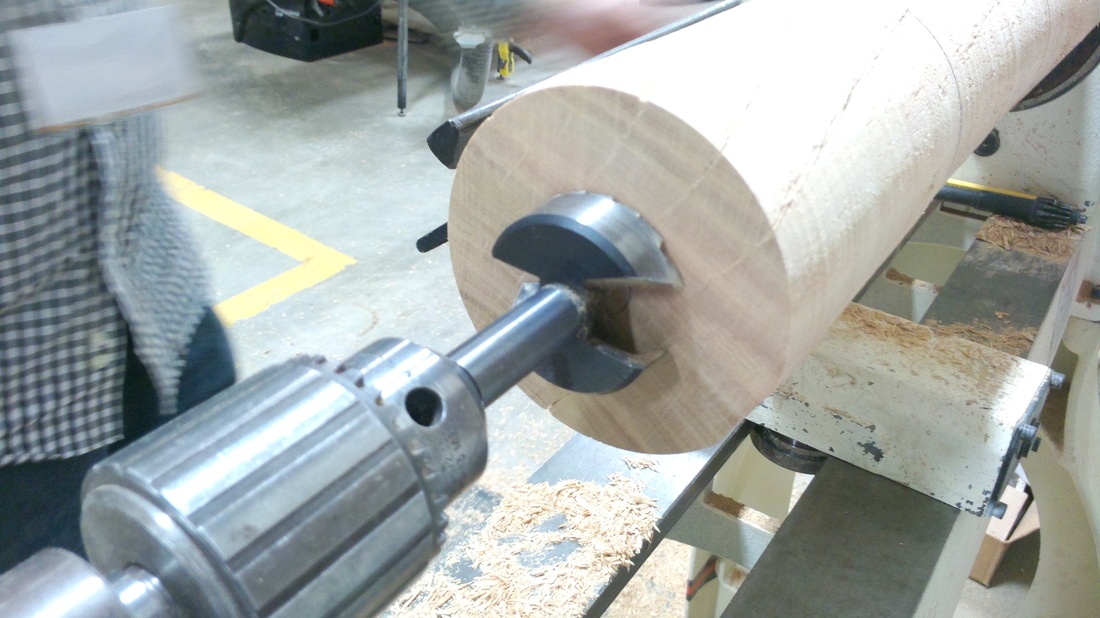
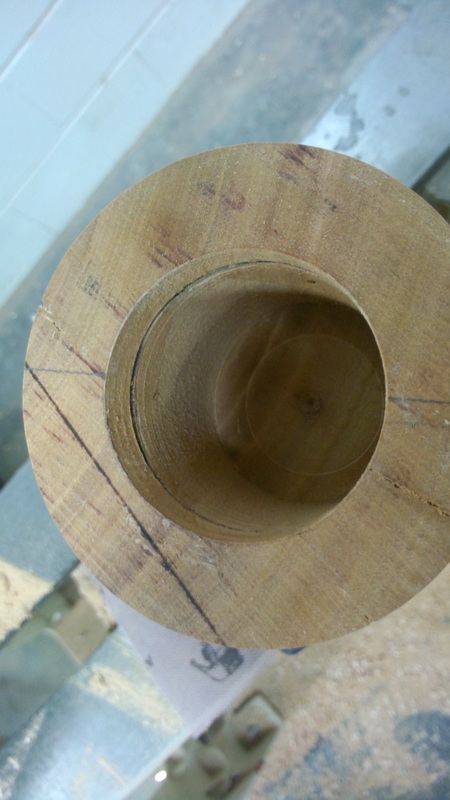
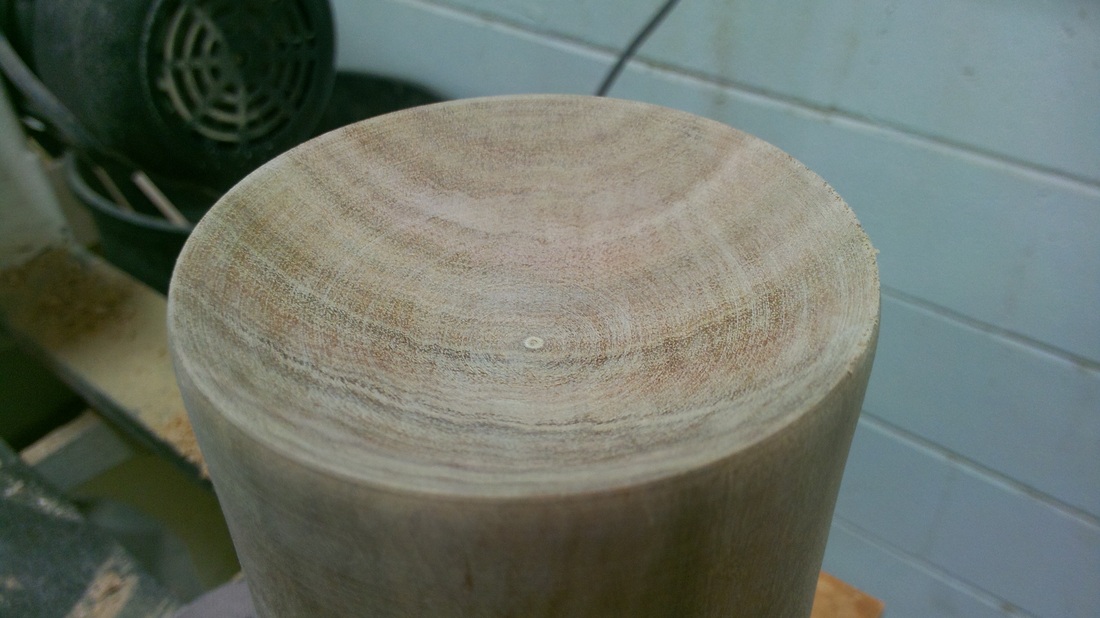
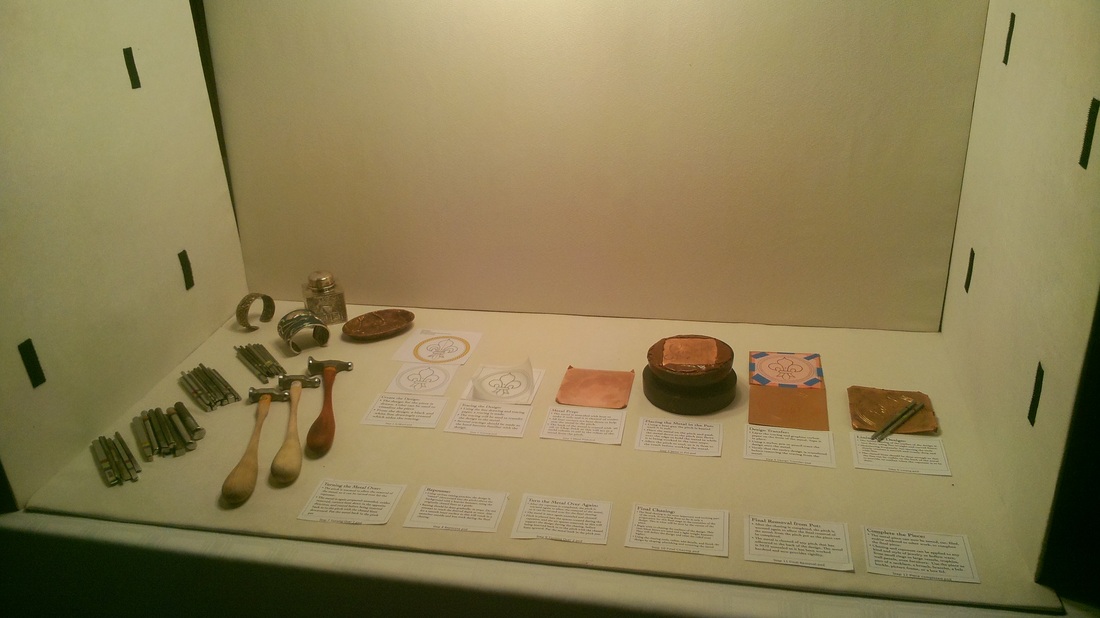
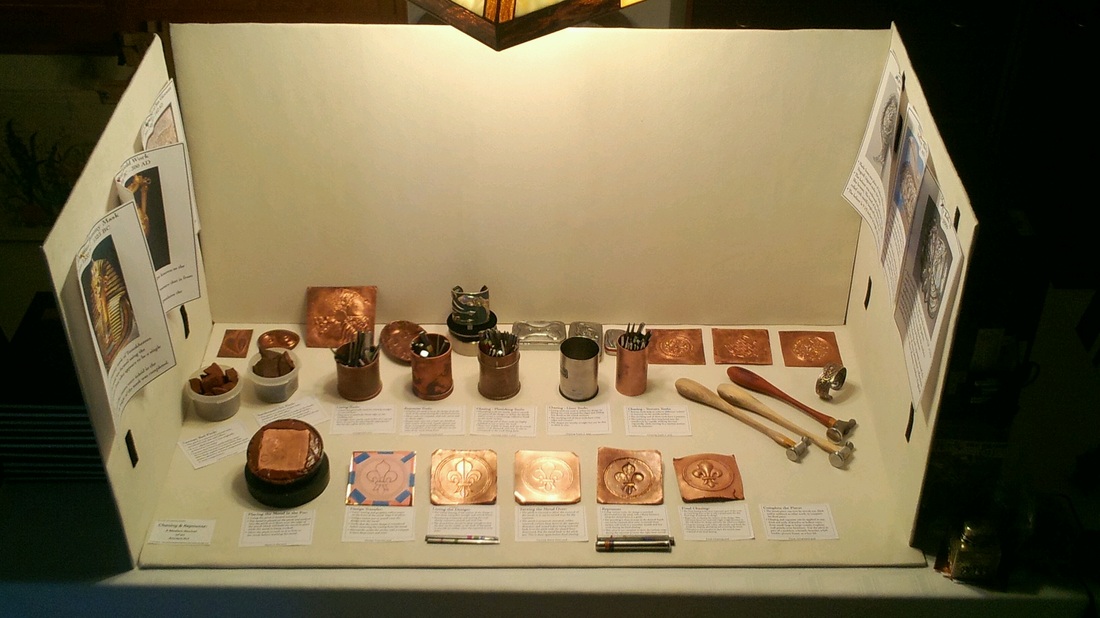
Here are some process pictures as usual. 
1 Comment

Making A Stake Part 2

11/15/2014

2 Comments

 
Last week I cut my first wood stake. That stake is for the upper half of the tumbler and I did that stake first as it was the easiest to do.  

Yes, I have a steel T-stake that would also work but this was an exercise in cutting a wood stake. 

Today I cut the second wood stake for the lower half of the tumbler - also it should be noted that when I raise another tumbler, this second stake will actually be used first but the reason it was made second was so I could get a feel for working with the wood. 

This stake is a bit more complex because the diameter of the tumbler and thus the wood, increases as the the height of the tumbler increases from the base.  At the base it is 2" in diameter and it is 3.25" at 2" in height. The diameter then stays constant at 3.25" for another 1" of height (thus the other stake).

I also cut this stake on the other end of the wood so I have two stakes but only once piece of wood.

So, shall we get to the pictures???  And at the bottom there's 4 pictures. Two of the original stake that Liza made and two of mine.
2 Comments

Venetian Mask - AYoR #3

3/8/2014

1 Comment

 
The third project is now done and I mean completed.   
This project was part of the workshop I went to last month and I finished it 2 weeks ago and this weekend I trimmed it to size, applied the patina and then mounted it in the lid of a wood box. 

Project Name: The  Venetian (Devil) Mask 
Material: Sterling Silver Sheet.
Major Points:
Hammer raised area for the face. 
A traditional "black" patina provided contrast so the details of the face were easier to see. 
Related Posts:  Tucson 2014
Lessons Learned: 
Sometimes a traditional black patina can be good. 

Here is the final piece done, before the patina and then below is the piece with the patina and it is mounted in the box lid
Picture
Picture
1 Comment

Raising Alexander

3/2/2014

1 Comment

 
Back in November 2013 I went to NYC for another workshop with Valentin.  And yes, I was remiss in writing about it which is why I am doing it now; especially since I wrote about the 5th workshop last time.  

The NYC trip was my 4th workshop/project with Val and for this one I was worked on "Alexander The Great" which is taken from the famous coin of Alexander with the ram's horn of the Egyptian god Ammon. This project is a major step up in technique as you "raise" the face before you even start the repousse for all the details (hair, eyes, nose, chin, jaw, horns). 

I did head out to NYC a few days before the workshop started so I could do some fun stuff and of course a certain bunny went with me and I was joined by several other C&R friends (Kimberly and Lisa) who were also in the workshop.

On Thursday morning got up and took the ferry from lower Wall Street, across the river to Dumbo, and walked to Val's studio. We were be in the workshop from 10 am until 4pm. Then took the ferry back across the river, dropped our stuff of at our lodgings and then took off to find dinner. This was repeated for 4 more days. 

At the end of the workshop I had new friends, some of who I saw in Tucson, and other that I hope to see again soon.

Here is a photo montage I made of my pictures, from the workshop (there is music too).
1 Comment

Tucson 2014

2/23/2014

1 Comment

 
The first week of February meant another chasing & repousse workshop, in Tucson Aridzona with Valentin Yotkov. This was my 4th workshop with Valentin and this time the design  I worked on the Venetian Mask called "Il Diavolo" though many say "El Diablo" which is more Spanish than Italian. 

The workshop begins on a Saturday and concludes 5 days later, on Wednesday  before the distraction of majority of the big Gem & Mineral shows begin.  We also start early so we can get to some of the shows in the late afternoon before they close up shop, for the day at about 6 pm. 

The  mask is a complex piece, more than Alexander The Great which I did back in November (and I just realized that I never blogged about that, and I will soon).  There were several of us working on the mask and so we sat together so we could easily share what we were working on and it was easier to watch and listen when Valentin told one of what to do next or demonstrated how a part of the mask was to worked on.   

One of the biggest differences I noted with this design was the specific instructions on what tool to use for each part of the mask.  With the first design that every student does, Val provides specific direction of what tool, and size, to use for each part of the design. And of course that makes sense because you don't know what you are doing and you are not knowledgable as to what tools will result in what effect when used.   As I have progressed through the 4 designs I have noticed there has been less hard direction and more guidance and even questions as to what I thought should be done.   So with the mask it "now work the hair" or "do the nose" but no instruction as to what specific tool to be used.  

For the first time, in one of Val's workshops,  I did not finish the design. The repousse was completed but I only chased the left hand side of the mask.  By the last day of the workshop I knew I would not finish it so I focused on finishing one side of the mask and this would allow me to know what to do on the right side so I could finish it when I got home.  So for the past two weekend, I have been slowly working to complete it and yesterday I was done with the chasing. 

I have taken the piece out of the pitch pot and I have remove the extra pitch from the back, flatten the surrounding metal and then put a patina on it so the fine lines make the design pop.

Here are just a few of the process pictures for you to see. 

Yes, I worked in silver for this one!
1 Comment

Wood Turning

10/20/2013

 
Two weeks ago, I took a basic wood shop class and made a bird house.  That class was the prelude to what I did today. 

I took a private lesson in WOOD TURNING. 
YES, wood turning.  
Why?
Well, I want some larger wood "dapping" blocks for when I am sinking bowls. 
I have the small wood and steel cube's with the dapping punches but the largest piece of metal they will take is about 1.5" diameter. I have 2 other wood sinking block and they take 3", 3.25", and 4.7" diameter pieces and most of the dishing areas are not even 50% of the diameter deep some are not even 25%.  PLUS I have the Pepe Tools Cupola Punch and Die Sets,

The issue is I need some in between sizes and I want them deep - at least 50% of the diameter if not more so I can get a good wall on the bowl I am sinking 

Thus, learning to "turn" a bowl allows me to make my own in the sizes I need.

At 11:00 am I met with Mike McElhiney a wood turner in San Diego and I had a 2+ hour lesson. Before we started, I showed him a few of my existing dapping blocks and what I can make with them so he could understand what I wanted to do with what we were going to be making.  

Mike had brought the wood and tools and showed me how to set up the lathe, put the wood in the chuck, turn the outside, drill a center bore and then turn the bore into the "dishing" bowl.  

The wood chips and dust were flying everywhere (even down my shirt and into my BRA!)

I (we actually)  made 3 dapping bowls and a 4th blank (outside turned only) for one more.
The end result: 
  • 3.5" outside diameter with a 3.25" inside diameter by .7" deep
  • 3.25" outside diameter with a 3" inside diameter by 1.4" deep
  • 3.75 outside diameter with a 3.5" inside diameter by 2" deep 


I sink some metal in them, in the next few weeks to test them. Then I will get back together with Mike for another lesson and  then make some with specific dimension 

Here are some pictures and at the end a very short video of Mike turning the big block of wood round. 

Gathering & Talking

10/7/2013

 
I know what you are thinking.. "Wait, did I miss something. She normally posts on Sunday and that was yesterday (wasn't it). Well yes it was my friends but I doing another post cause I have an announcement.

THIS THURSDAY - YES, in THREE DAYS (that is October 10, 2013 if you are reading this sometime in future or in the past and you have somehow got the ability to see it) I will be giving a presentation (a.k.a a talk) at the Fallbrook Gem & Mineral Society on Chasing & Repousse.  

The presentation is based upon my award winning educational display that I had at the San Diego County Fair this past Summer. 

So tonight I am gathering up some of my tools, the small pitch pot and many pieces that I had in the display plus the slides I wrote up and they are now in a box waiting for Thursday.  During the talk I shall be passing around many of samples and if there is time, just a quick demo of how I work my craft.

The presentation is open to the public and is FREEEEEEEEEE.  The meeting starts at 7:00 pm and I should be starting my talk about 7:30 pm. 

I hope to see some of you there.

Fair Update

6/9/2013

 
First a correction. 
The educational exhibits do not have a first, second or third place awards.

That being said, I have since spoken to BJ and have found out that I was awarded the 
 Educational Merit ($50)
and......... 
                     wait for it..............
John Dalley Memorial Award - Best Educational Exhibit. Rosette and $100.

And not all of the independent awards have been announced so there is a chance for more but word is they will be done by Wednesday for Exhibitor Appreciation night.

I will be posting pictures. 

YIPEEEEEEEEEE 

San Diego County Fair Results

6/9/2013

 
The Fair opened yesterday and I could not get a hold of BJ who was down at the Volunteers for Minerals booth in the Hall of Gems & Minerals to find out how I had 'faired' in the judging. BJ had sent me an email on Thursday stating that I had won an Award of Merit - which is a good start.

What does Award of Merit mean; we will get to that in a minute. 

Let's start off explaining the judging process. Every entry is judged on a scale of zero to one hundred (0-100) and those who get the highest points in their category win first place and a cash award of $35;  those with the second highest score win second place and a cash award of $25; and those with the third highest score win third place and $15; a rather logical process.  Since the entry fee for the Jewelry category is $10, you get your fee and a little extra back, if you place in your category, which is a good thing.  

For educational displays,  you are judged on educational value (40%); Presentation (30%); and labeling (30%). IF you earn a minimum of 85 points out of 100 points you receive an Award of Merit.  This earns you $50.  

And I have "at least" earned the Award of Merit. Whew. 
How did I place? I don't know yet

When BJ sent me that information all the OTHER awards had not been awarded YET thus until I go to the fair to see the result or someone tells me I have no clue as to the final results.  

What other awards can I win? 
Well there are awards presented by the fair and there are awards presented and funded by individuals and groups these are determined by those funding the award. These privately funded awards are for Jewely, Gems/Minerals, or Education and have specific criteria such as "Best Self-Collected Mineral" are more general such as "Best Exhibit" and could be awarded for any of the categories.  Below are those that I think I am eligible for for. 

There are the special awards presented by the Fair: 
John Dalley Memorial Award - Best Educational Exhibit. Rosette and $100. 
Coordinator’s Award -  Rosette and $100.

These are the privately funded awards by individuals and groups:  
Kenneth Cilch Award for Best Educational Display, $50 
Thomas M. Schneider Award for a Jewelry Exhibit, $100 gift certificate.
Gregory Anderson Award for the Best Display, $50.
Irv Brown Award for Best Case, $100.
Courtenay McGowen Award for Creativity, Single Item or Display, $100.
Anne Schafer Award for Best Exhibit, $100.
Anne Schafer Award for Best Showmanship, to be selected from full case exhibits, $150.  
Volunteers for Minerals Award for Best Case, $50

I will be going to the fair on Wednesday evening for Exhibitor Appreciation night and it is here that I can talk to the Judges and find out not only what my final score was, I can find out what they liked and did not like.   Note: Last year the Calamari Cuff won it's category so I am familiar with the entire process.  Once I know my final score, I will write another post about it.

Evolution of a Display Case

6/1/2013

 
When I decided to do this display case for the San Diego County Fair, I knew it would time consuming but I had no idea how much time it would really take. 

But, as my father taught me, if you are going to do something, do it well. 
In other words, don't do it half assed!

In mid-March I contacted my friend BJ, who has done cases at the fair before, and she lent me her case liners.   I set them up on my dining room table so as I worked on the sample pieces and started to type up the text, I could see it all come together.  This is the first picture of the display.  As you can see it is some hammers, tools, pieces I made, and a few text panels.
Picture
Start of the Display
Then as I started to finish the samples, I added them and more items I made and printed out some pictures of repousse through history.... 
Picture
Start Placing Items
I then added some risers and used my web color guide to find a good color that would coordinate well with the beige/fleshy color of the liners. Once the risers were made and covered I started to play with the arrangement and text that would explain it all.
Picture
Add Risers and Start Arranging
I trimmed down the text more and shrunk the over all size of each text/image page.  I purchased some glasses to hold the tools and put wedges behind the copper samples.  This image is the layout I thought I would go with but BJ was on her way over to do a look-see and appraisal. 
Picture
(Almost) Final Layout
This is the aftermath of the appraisal with BJ, we discussed flow, eye focus, typos and word changes, a few more risers and the final printing. 
Picture
Appraisal Changes
After the appraisal, I printed it all again and worked on the positioning of each piece. A few more typos were corrected and sentences changed. The pedestal risers were made but had to be covered.
Picture
Almost Done
Then the final printed could start. I did this on photo paper so the colors would be more vibrant and give a more professional look. I did one final change to the title banner and bought smaller glasses to hold the tools.  All I had left to do was break it down and take it to the fair.
Picture
Final Layout
This is the final and I mean final setup. It took 3 hours to do. I found out during my packing last night that the back and bottom panels were switched and the left and right panels were rotated by 90 degrees. So when I got the fair I had to un-pin and re-pin everything.  Then because the case has light in the top and that large top border in the front blocks the top 5", everything on the back and side panels had to be moved down. Once the back items had been down, the finished pieces on the pedestals on back riser now blocked a good amount of text. So all those items had to move and I removed one finished piece.  
Picture
It's Really, Really Done!
The case has now been locked and will remain this way until July 5th, when I go back to take it all out and home again. The judging will be on Tuesday and I will know how I did by the weekend. I have spent over 150 hours on this but I think it is fantastic and when you go to the fair and see it, you can say "I KNOW WHO DID THIS!".
<<Previous
Forward>>

    RSS Feed

    How to Aquire Your Own Shop Elf

    Archives

    October 2020
    August 2020
    March 2020
    December 2019
    November 2019
    October 2019
    September 2019
    August 2019
    July 2019
    June 2019
    May 2019
    March 2019
    February 2019
    January 2019
    December 2018
    November 2018
    October 2018
    September 2018
    August 2018
    July 2018
    May 2018
    April 2018
    February 2018
    January 2018
    November 2017
    October 2017
    September 2017
    July 2017
    June 2017
    May 2017
    April 2017
    March 2017
    February 2017
    January 2017
    December 2016
    November 2016
    October 2016
    September 2016
    August 2016
    July 2016
    June 2016
    May 2016
    April 2016
    March 2016
    February 2016
    January 2016
    December 2015
    November 2015
    October 2015
    September 2015
    August 2015
    July 2015
    June 2015
    May 2015
    April 2015
    March 2015
    February 2015
    January 2015
    December 2014
    November 2014
    October 2014
    September 2014
    August 2014
    July 2014
    June 2014
    May 2014
    April 2014
    March 2014
    February 2014
    January 2014
    December 2013
    November 2013
    October 2013
    September 2013
    August 2013
    July 2013
    June 2013
    May 2013
    April 2013
    March 2013
    February 2013
    January 2013
    December 2012
    November 2012
    October 2012
    September 2012
    August 2012
    July 2012
    June 2012
    May 2012
    April 2012
    March 2012
    February 2012
    January 2012
    November 2011
    August 2011
    July 2011
    June 2011
    May 2011
    April 2011
    March 2011
    February 2011
    January 2011
    December 2010
    November 2010

    Jan - Nov 2010 History
    File Size: 2272 kb
    File Type: pdf
    Download File

    Jan - Dec 2009 History
    File Size: 2332 kb
    File Type: pdf
    Download File

    Categories

    All
    42
    A Year Of Repousse
    Blacksmithing
    Blogoversary
    Box Project
    Business
    Chasing & Repousse
    Commission
    Education
    Embroidery
    Enamel
    Entries
    Entry
    Exhibition
    Facebook
    Filing
    Fold Forming
    Gold
    Holloware
    Hot Forging
    Hydraulic Press
    Jewelry
    Keum-boo
    Learning
    Leather
    Market
    Metal
    Patina
    Photography
    Polishing
    Publications
    Raising
    Sanding
    Santa Fe Symposium
    Shop Elf
    Sinking
    Social Media
    Soldering
    Store
    Studio Visits
    Superbowl Challenge
    Teaching
    Teapot Project
    Technique
    Temari
    Tin
    Tools
    Vessels
    Visiting Workshops
    Weaving
    Website
    Workshop
    Yubinuki

Powered by Create your own unique website with customizable templates.