Follow Me On:
The Adventurous Silversmith
  • Home
  • Blog
  • Portfolio
    • B.F.A Work
    • Metal Work >
      • Chasing & Repousse
      • Holloware
      • Jewelry
      • Other Wonderful Items
    • Fiber Arts >
      • Temari
      • Yubinuki
  • Resources
    • Library
    • Tools & Equipment
    • Links
  • About
    • Artist Statement
    • Curriculum Vitae
    • How it is Made
    • Contact

The Blood Orange Dish - AYoR #5

5/26/2014

 
The fifth project is now done and I am still on track with one project per month but this one was close.
  
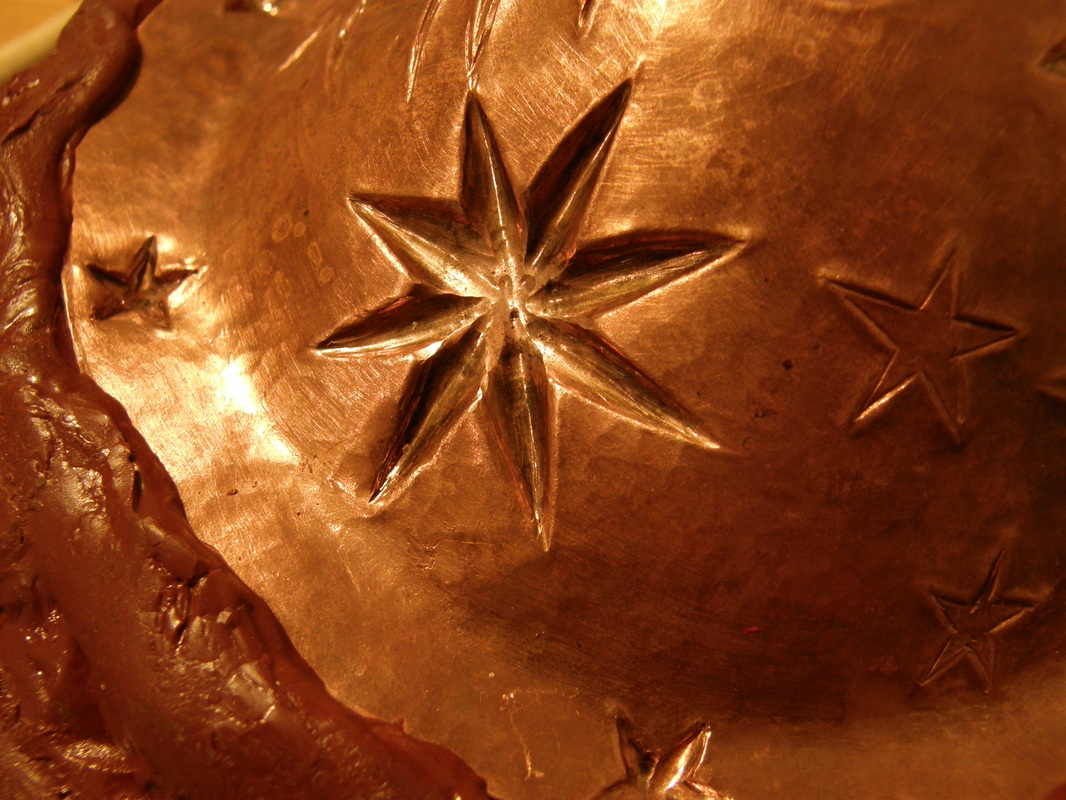
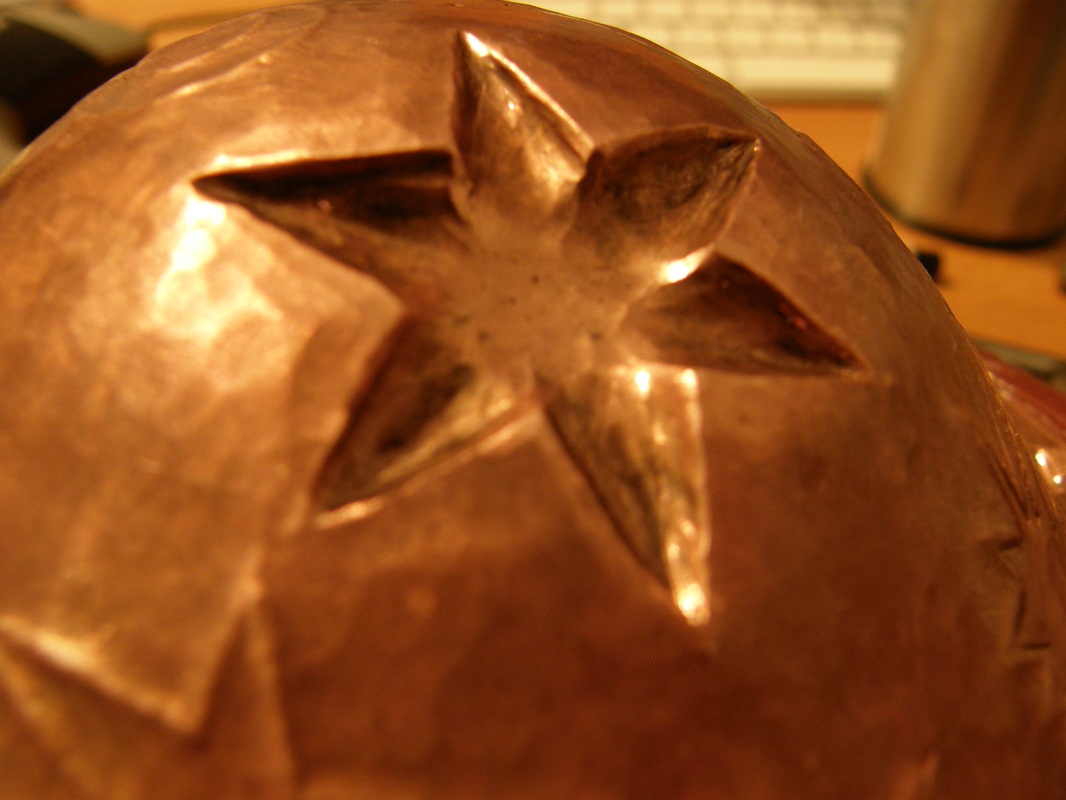
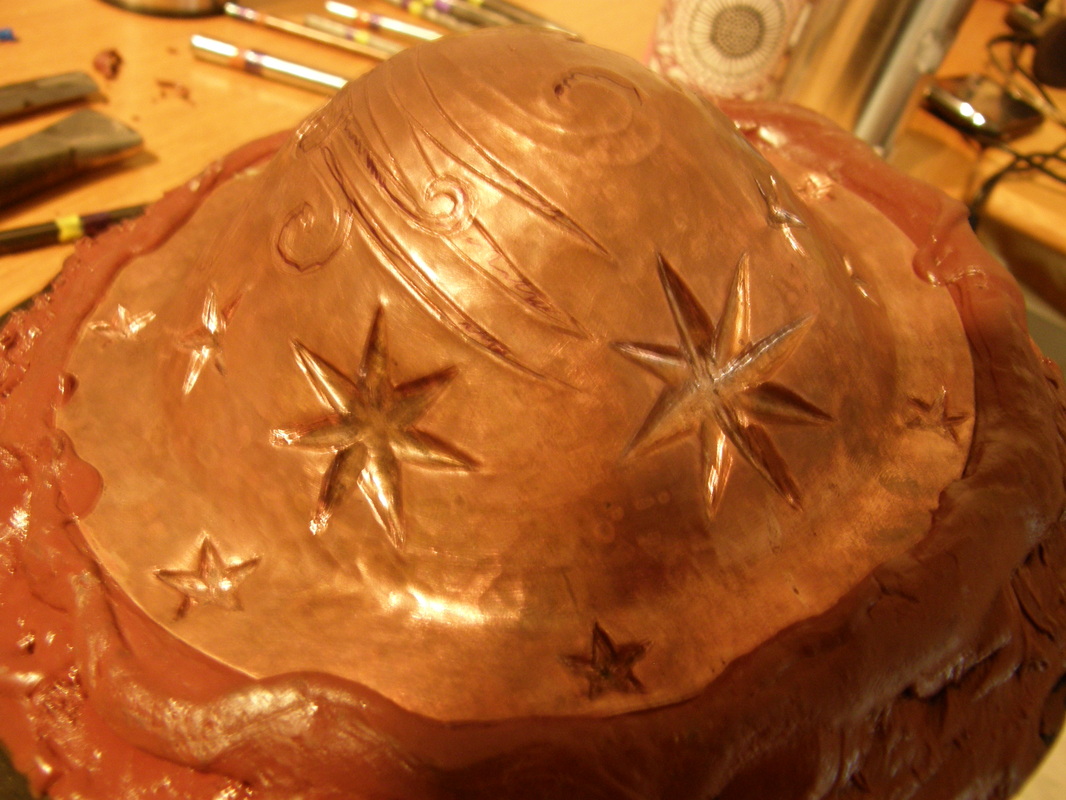
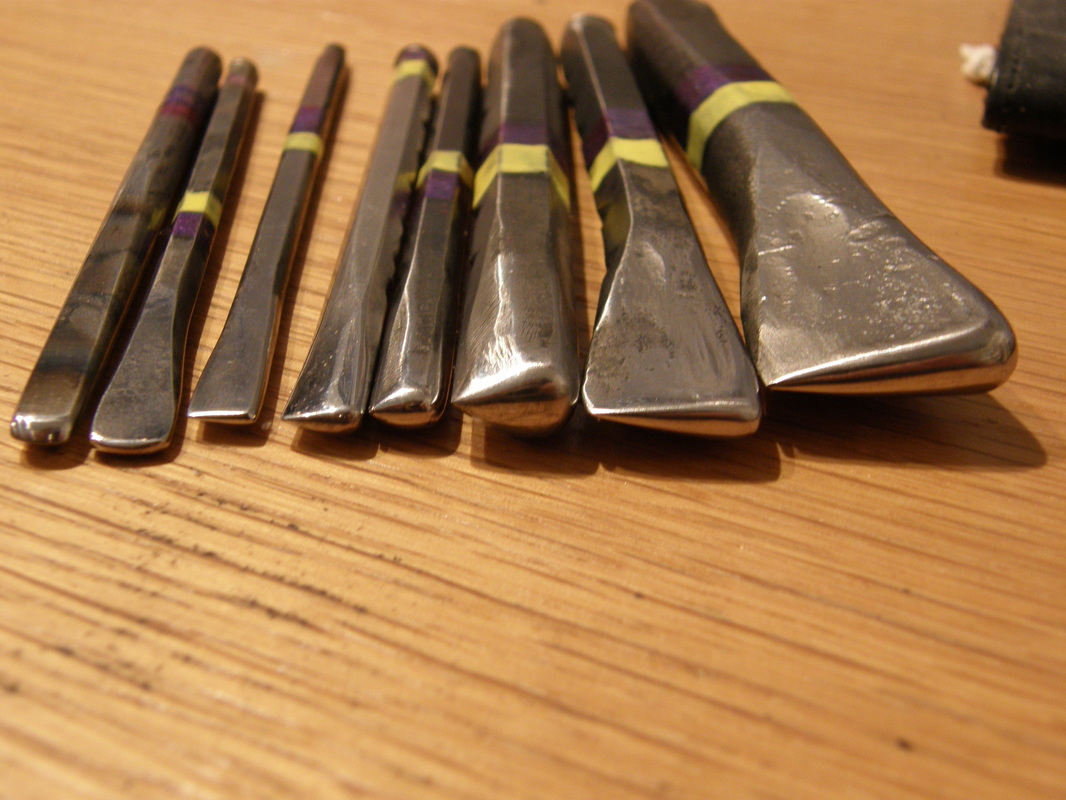
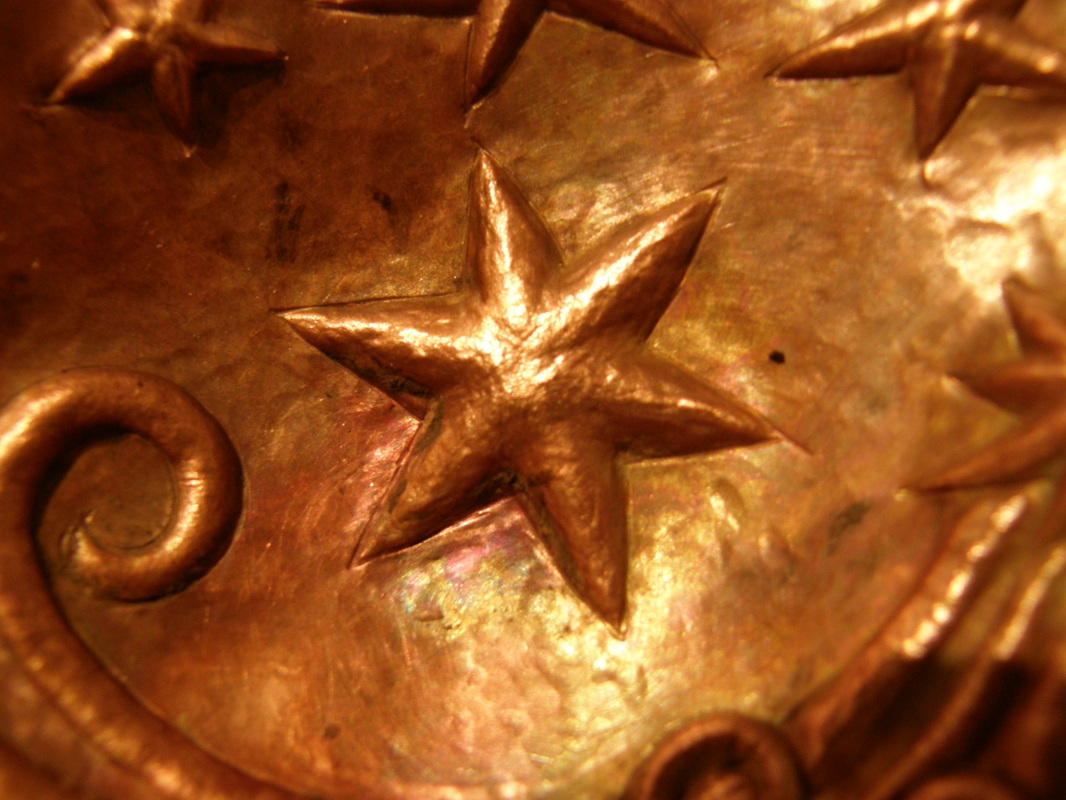
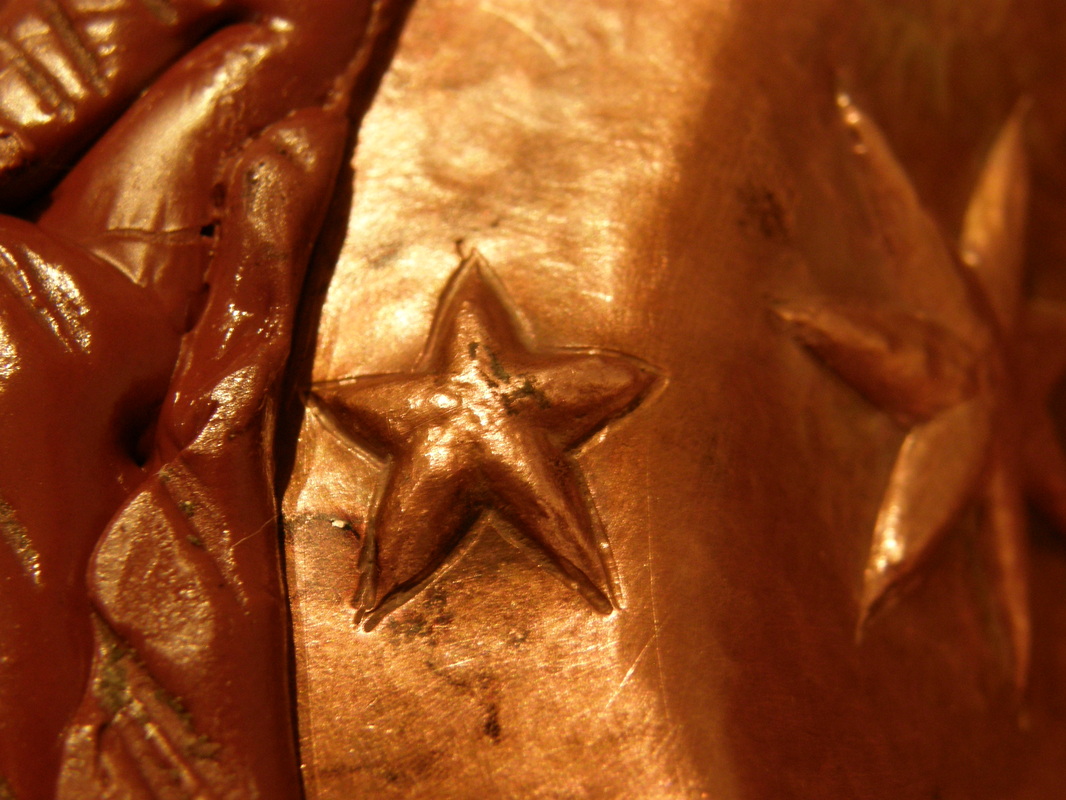
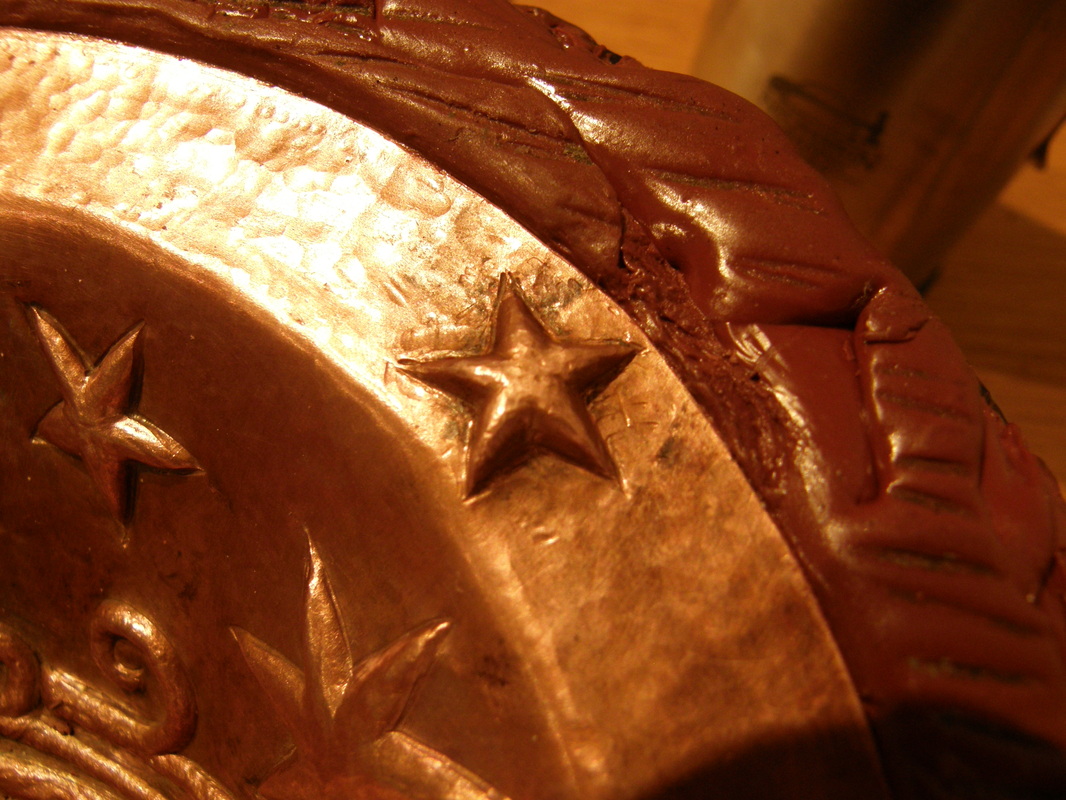
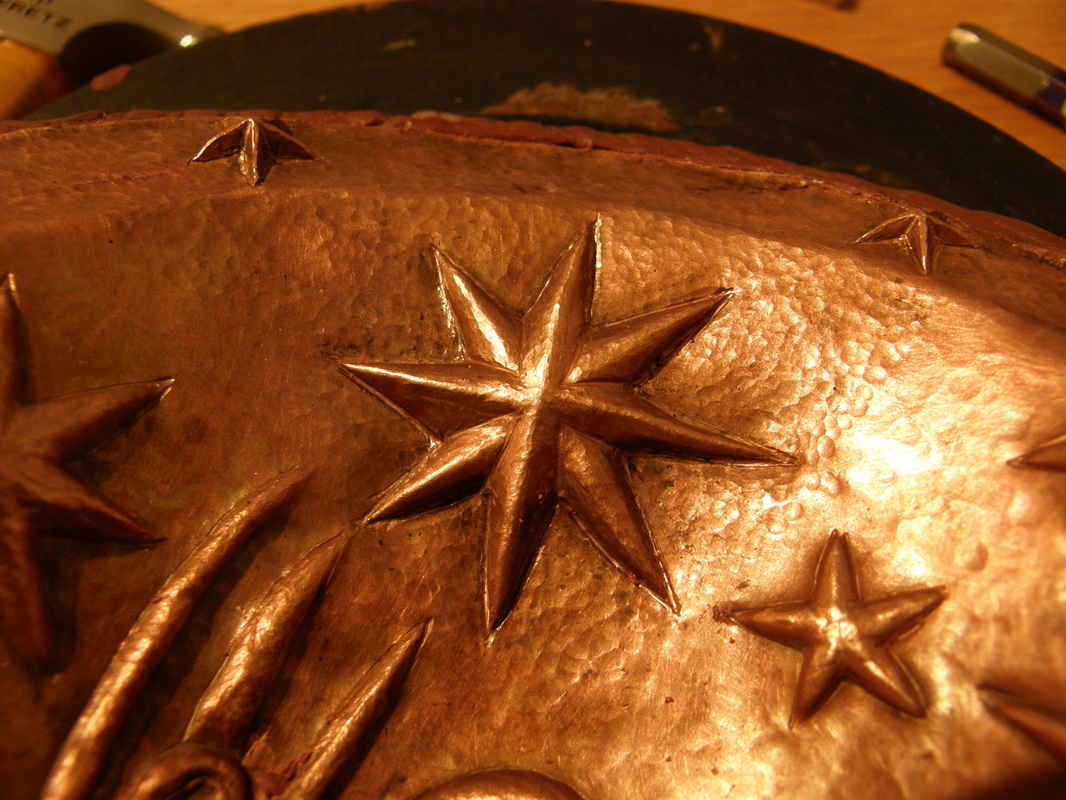
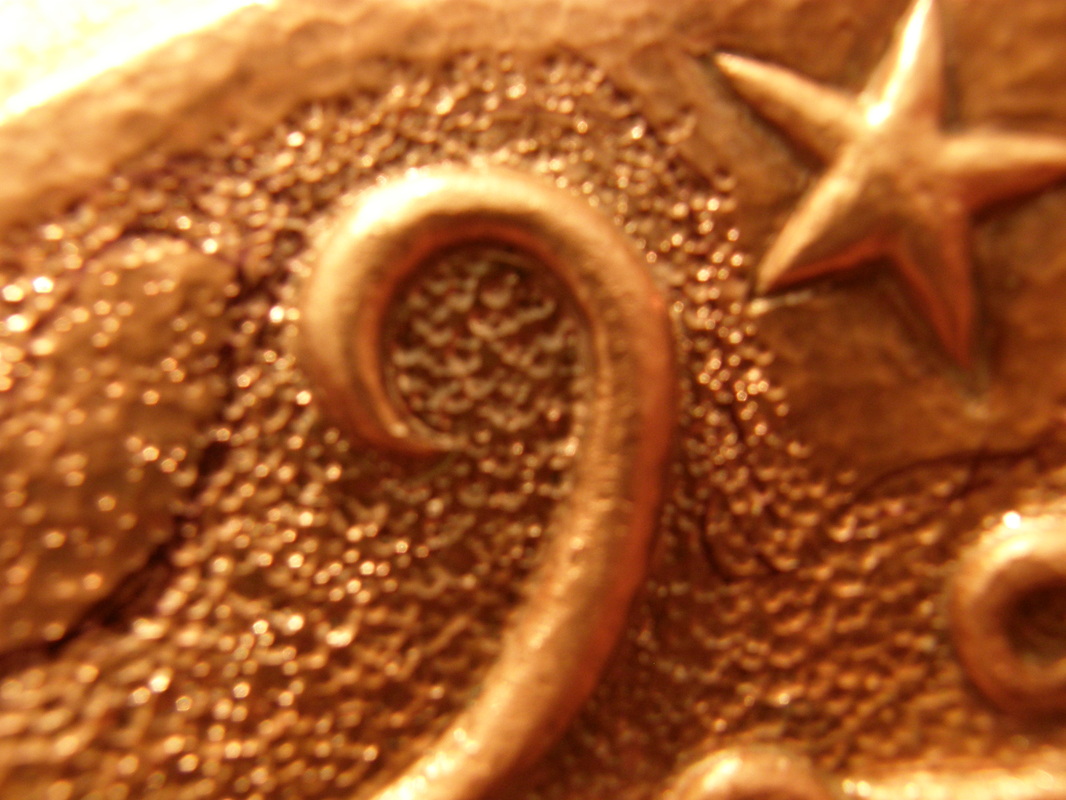
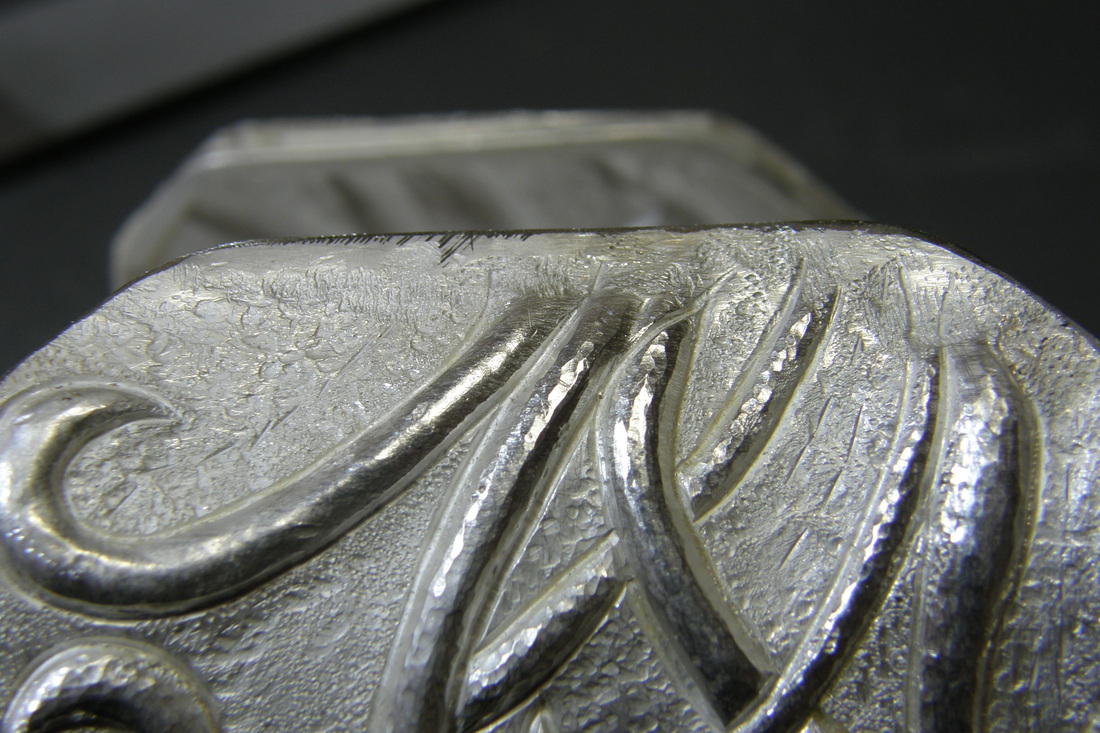
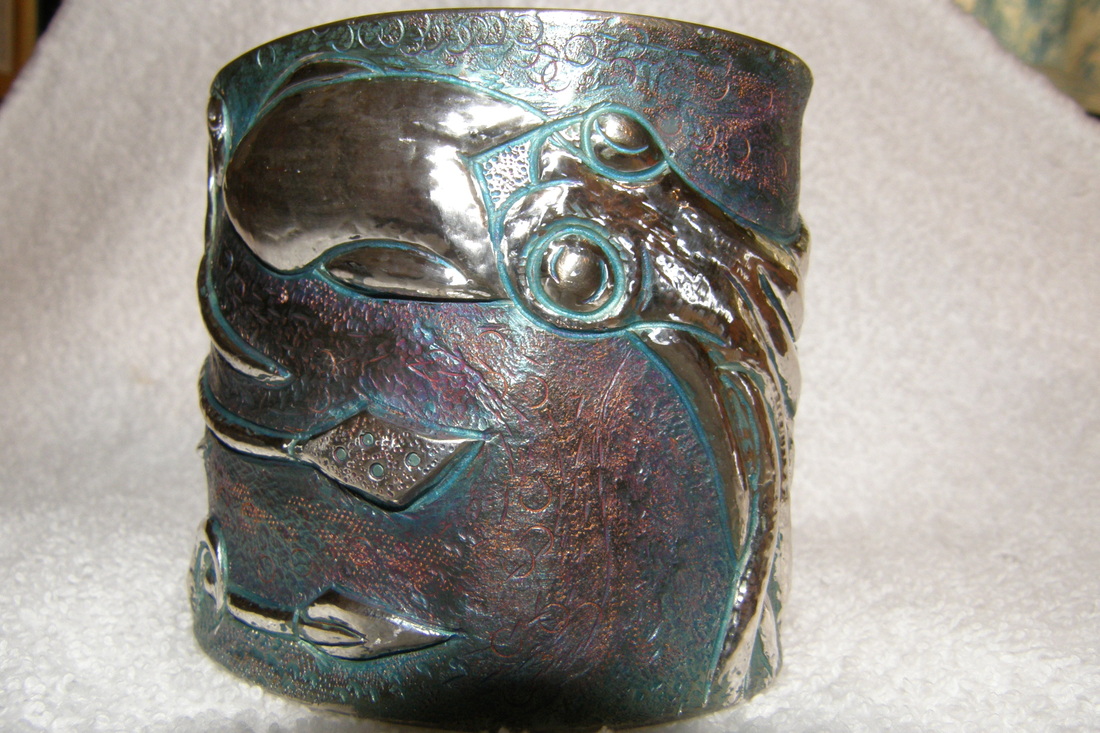
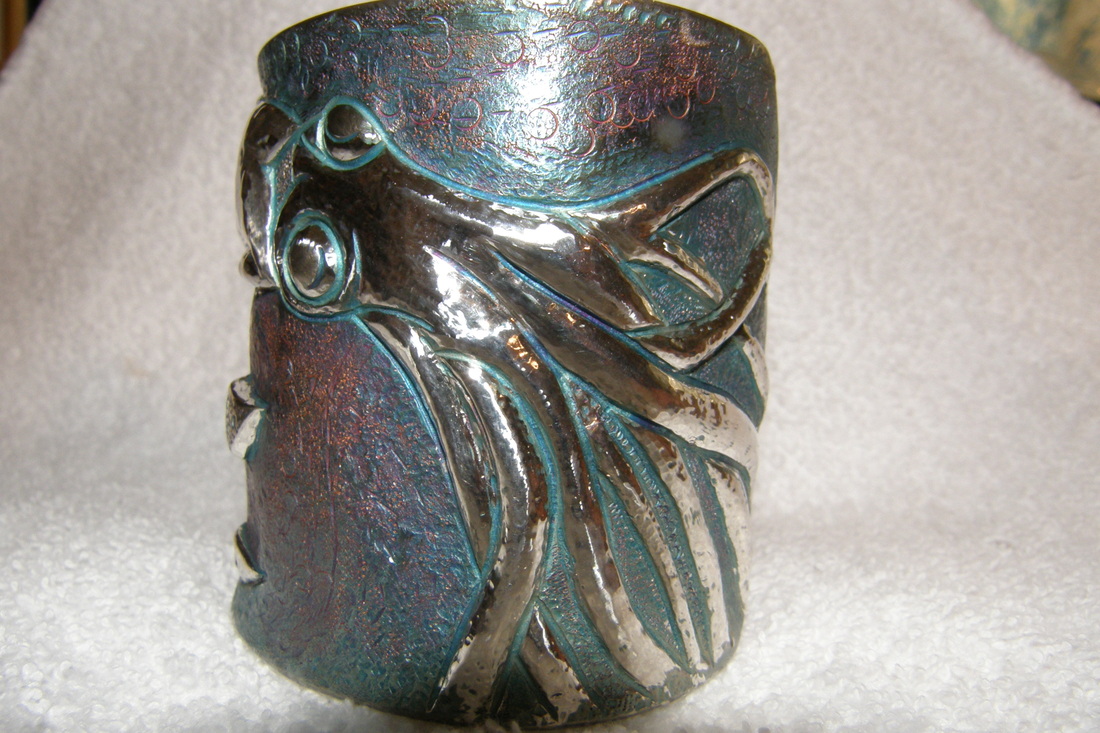
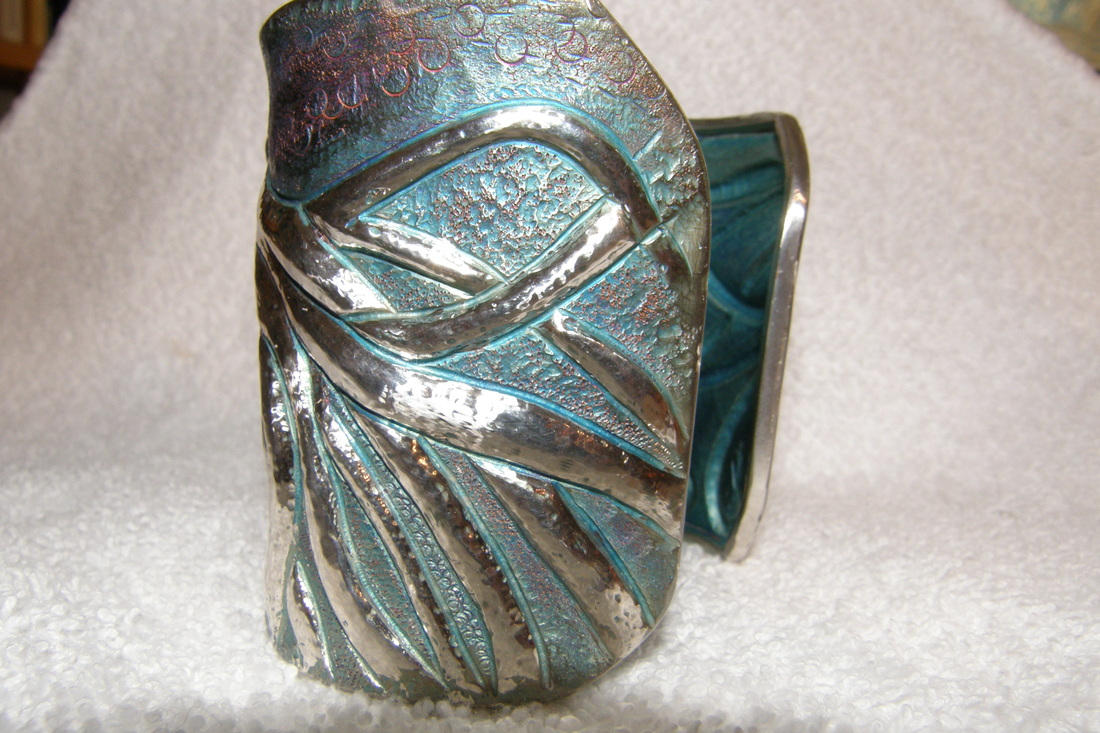
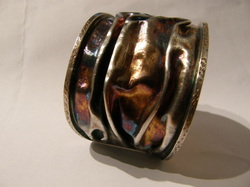
My long term goal is to make vessels with Chasing & Repousse and this was my second project that falls under this category during my AYoR.  The first project, the tool canister, in this series was the first chasing on a 3-D form I had done.

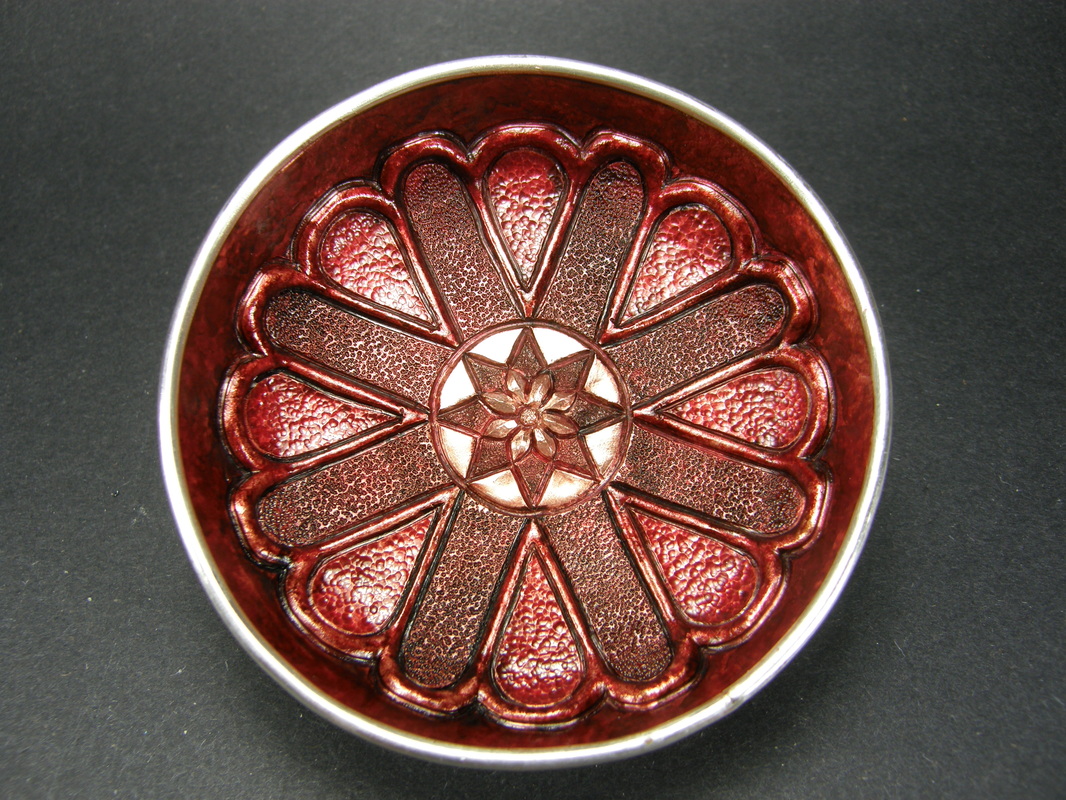
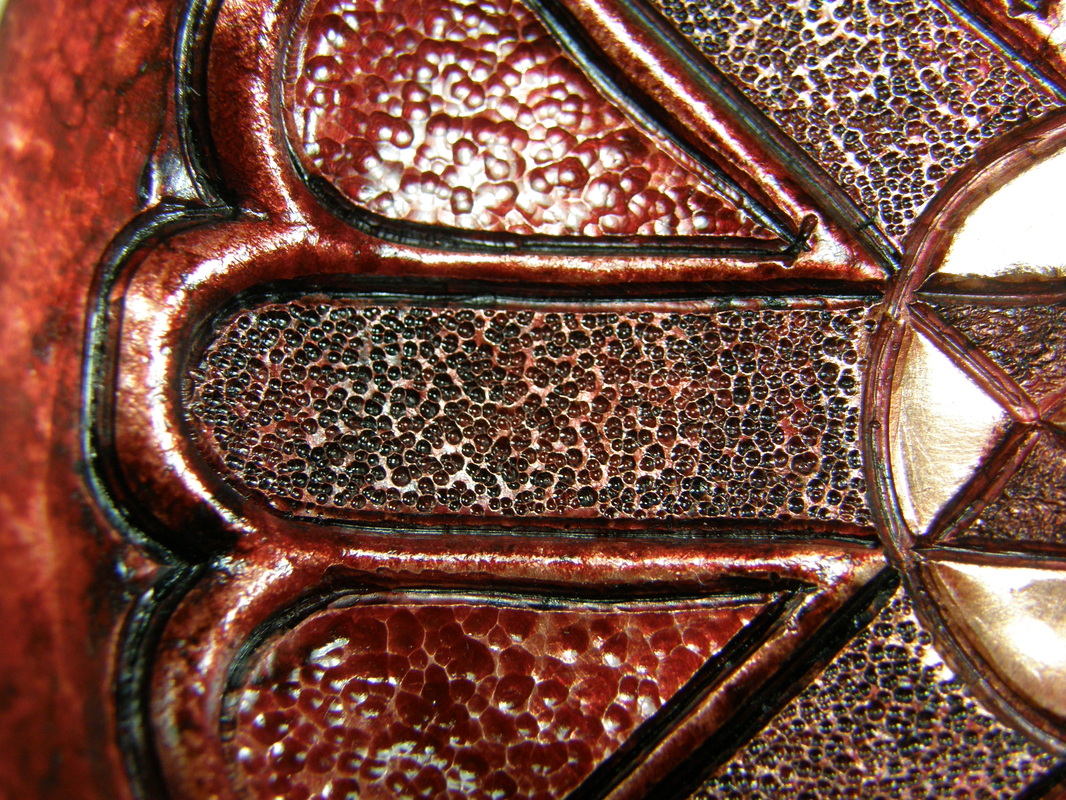
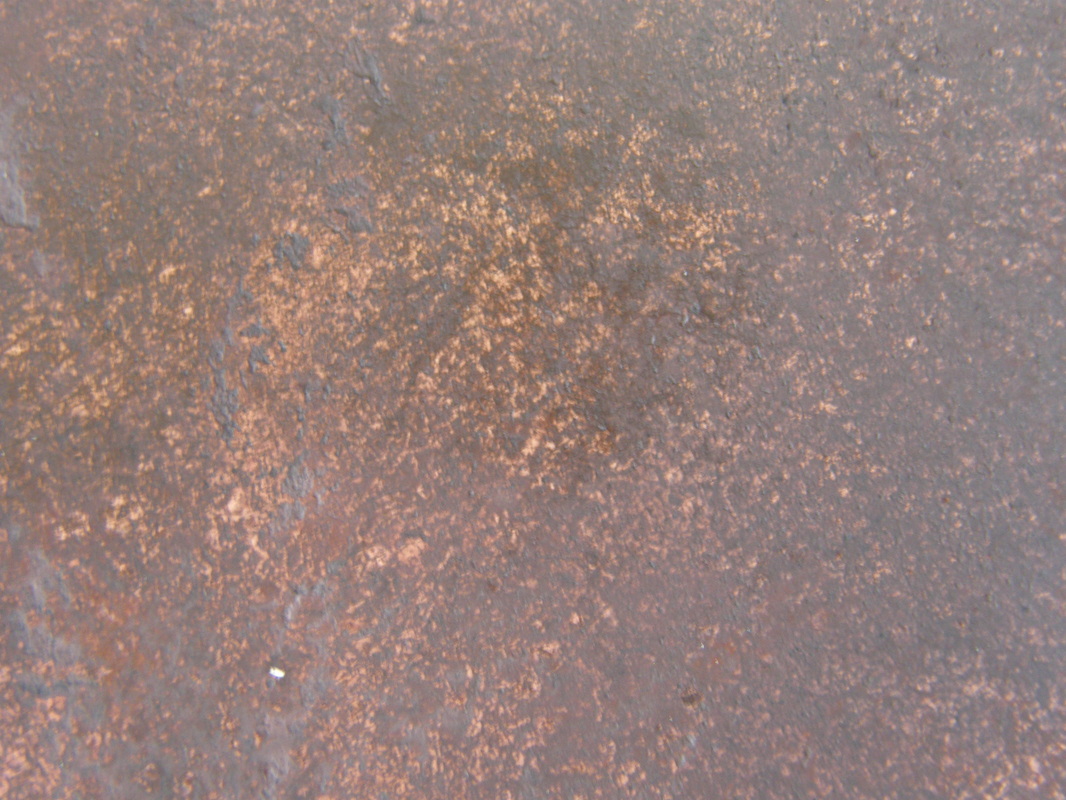
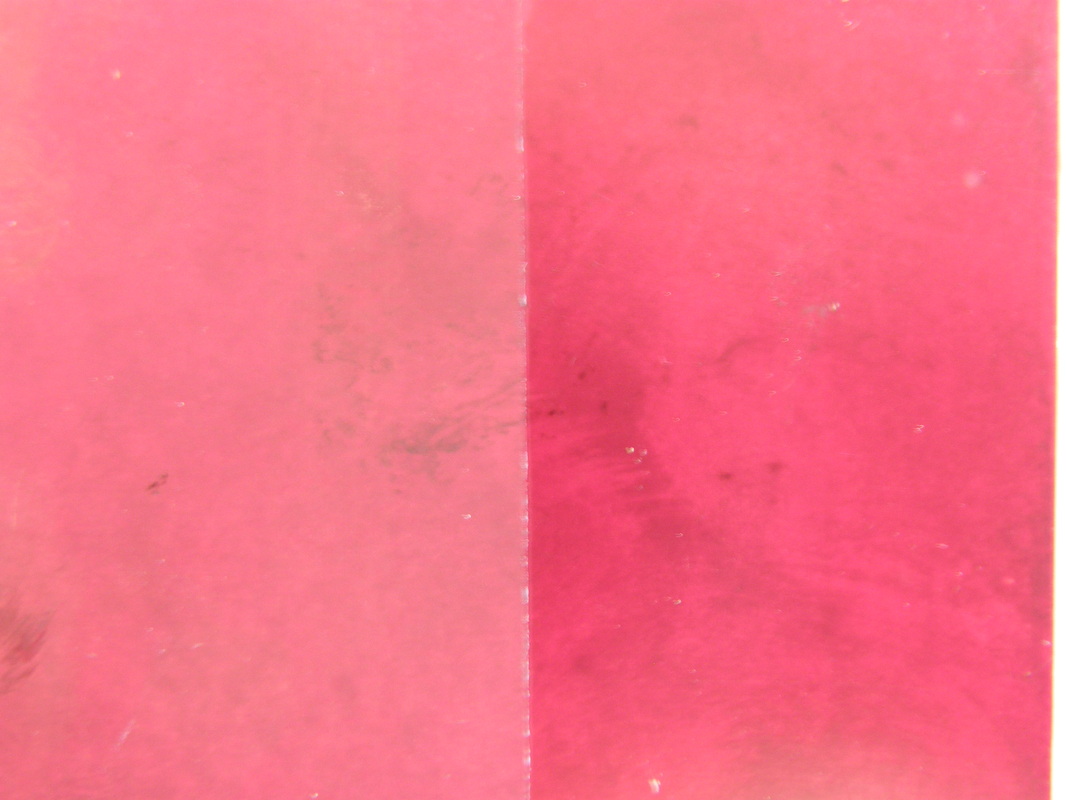
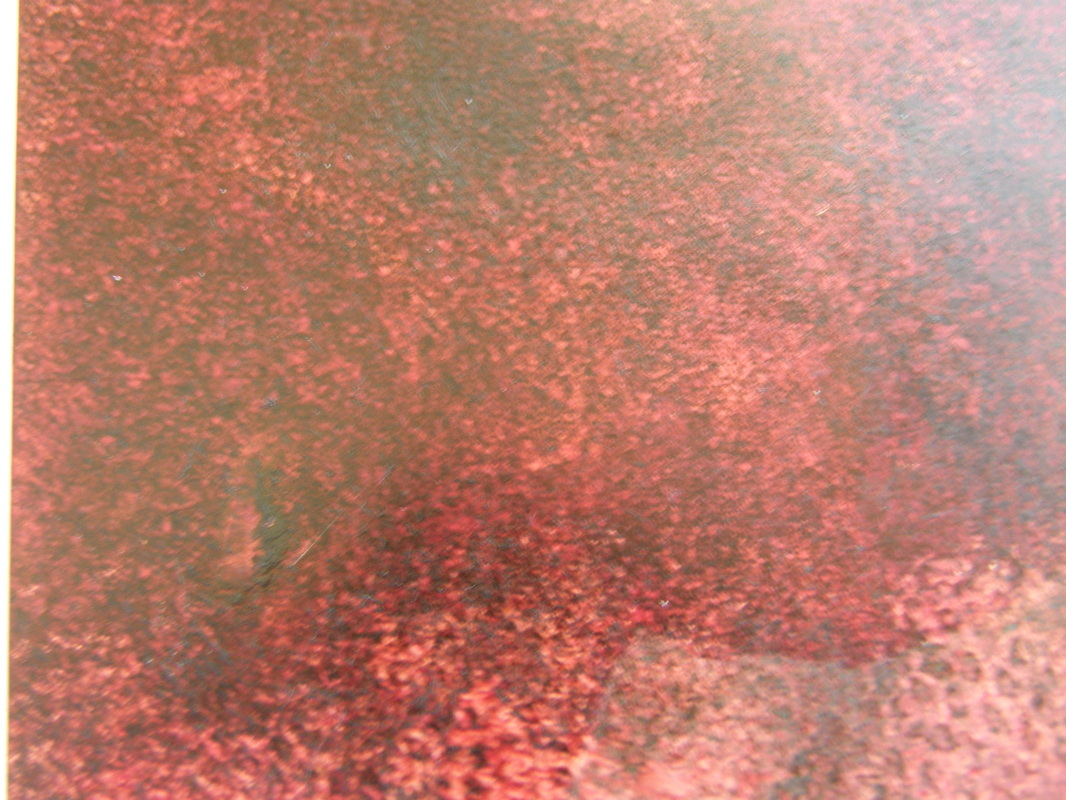
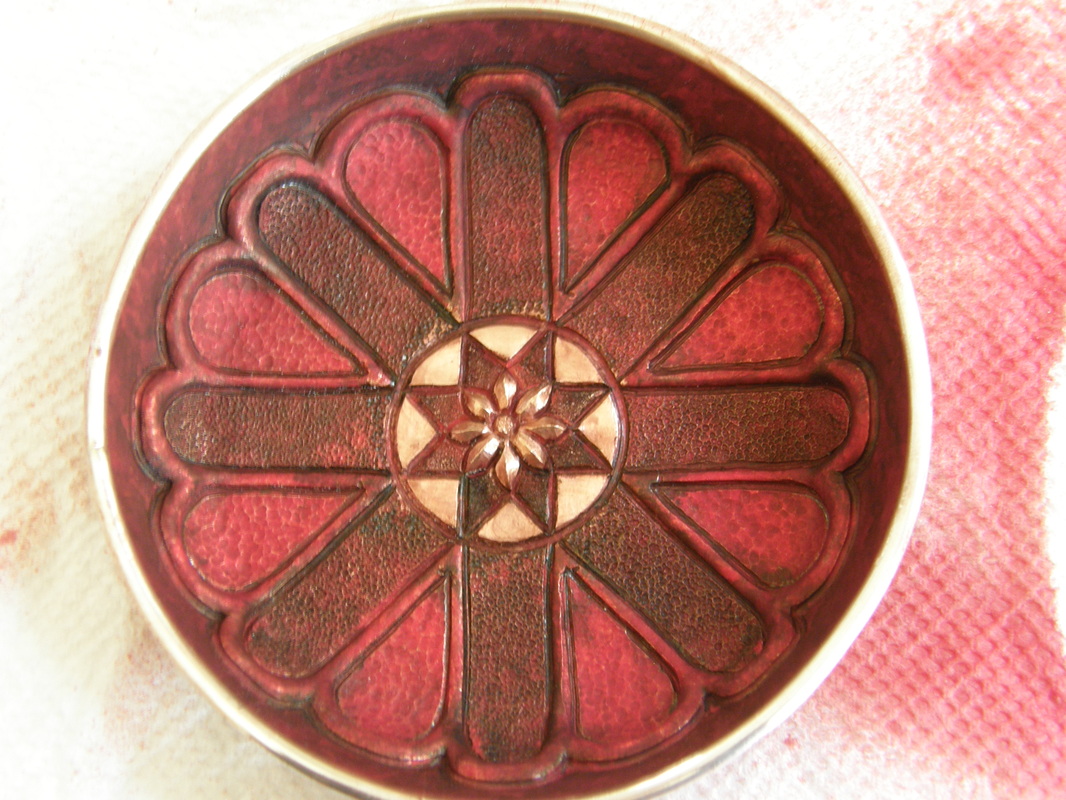
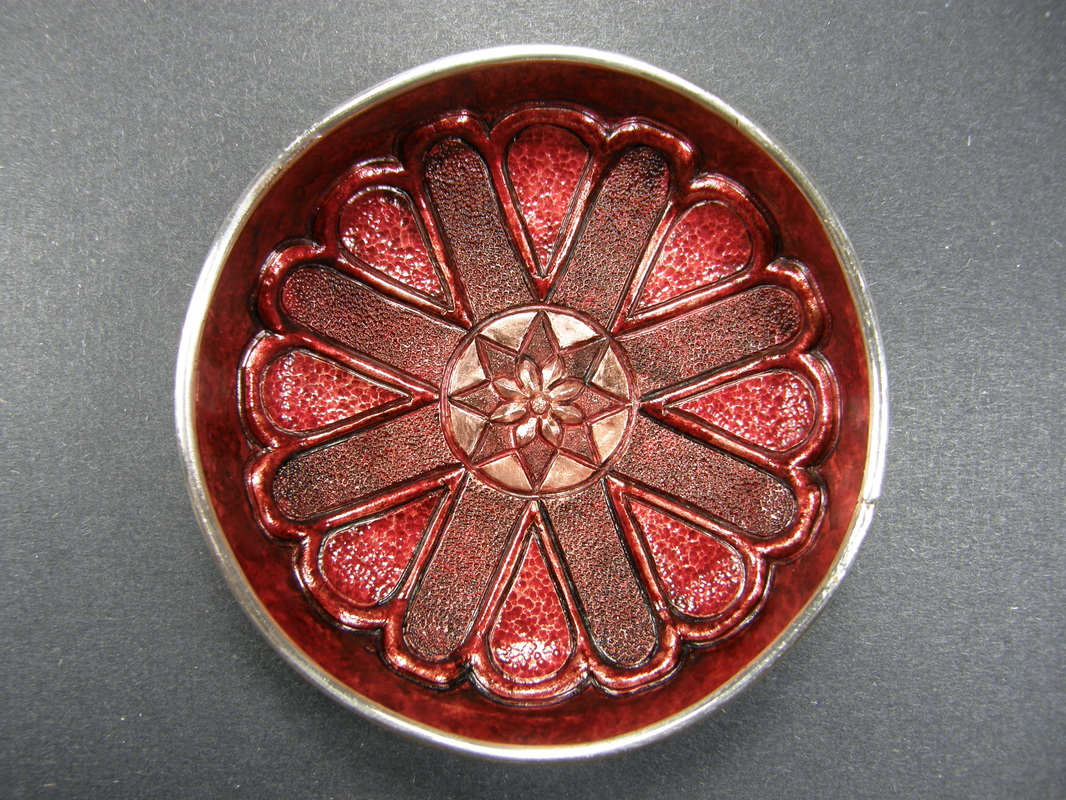
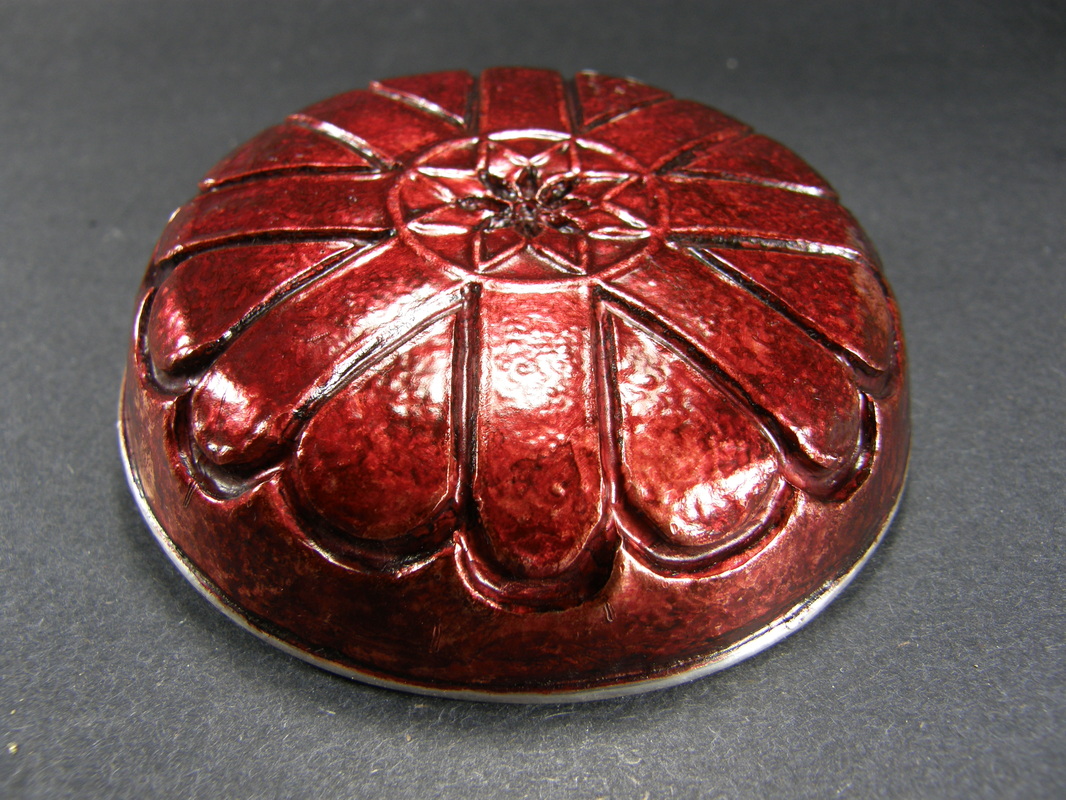
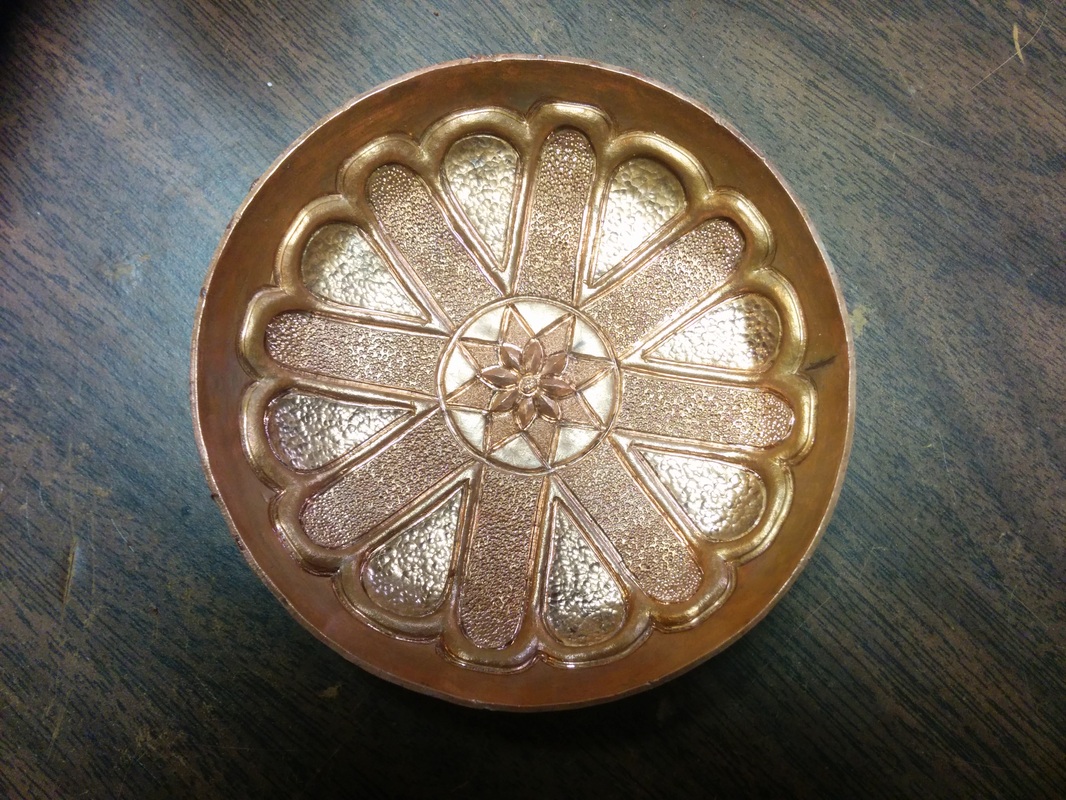
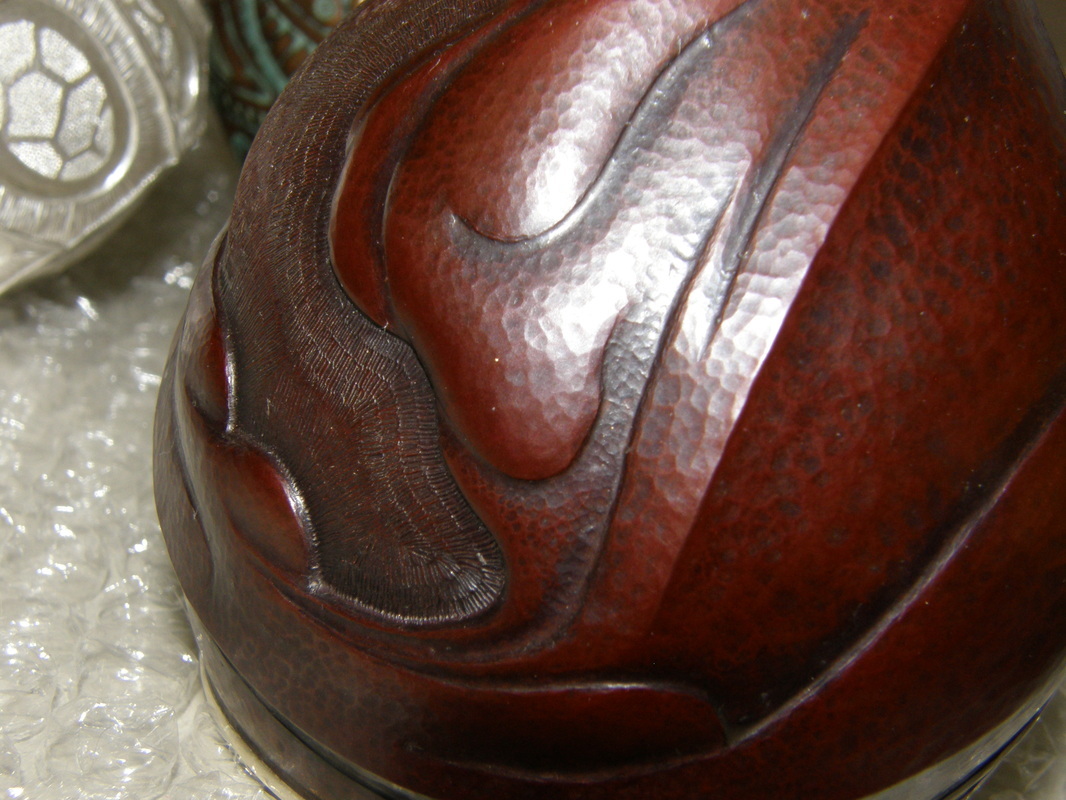
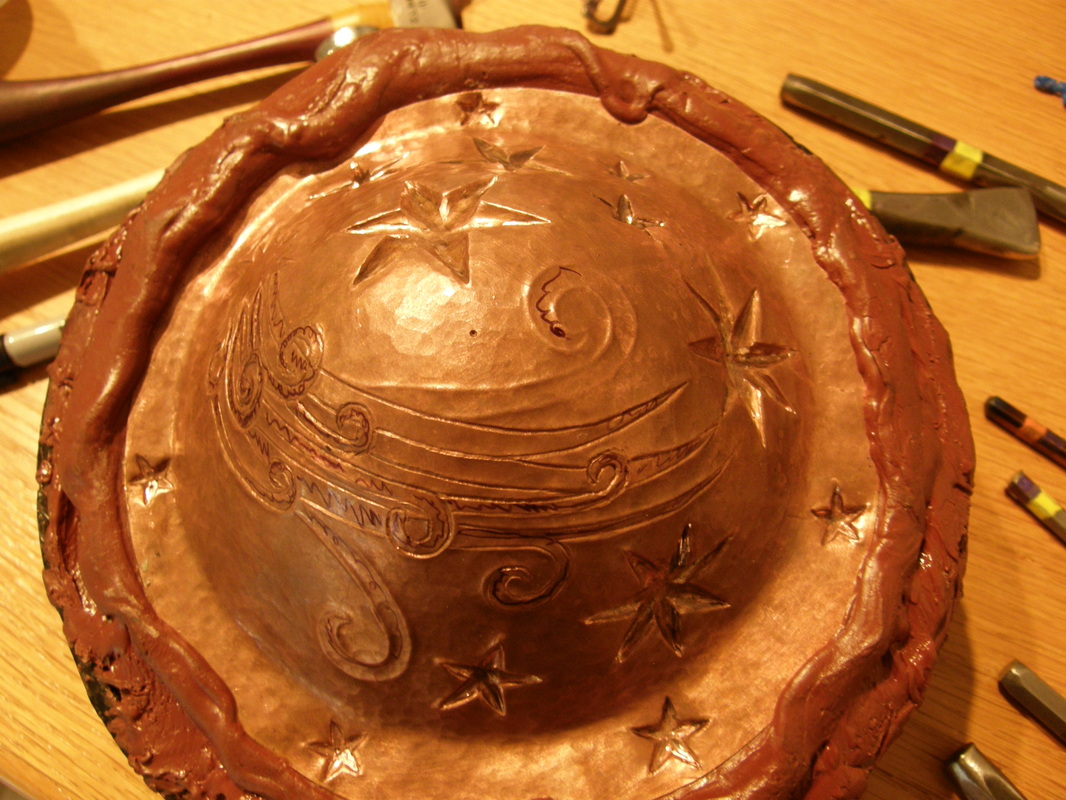
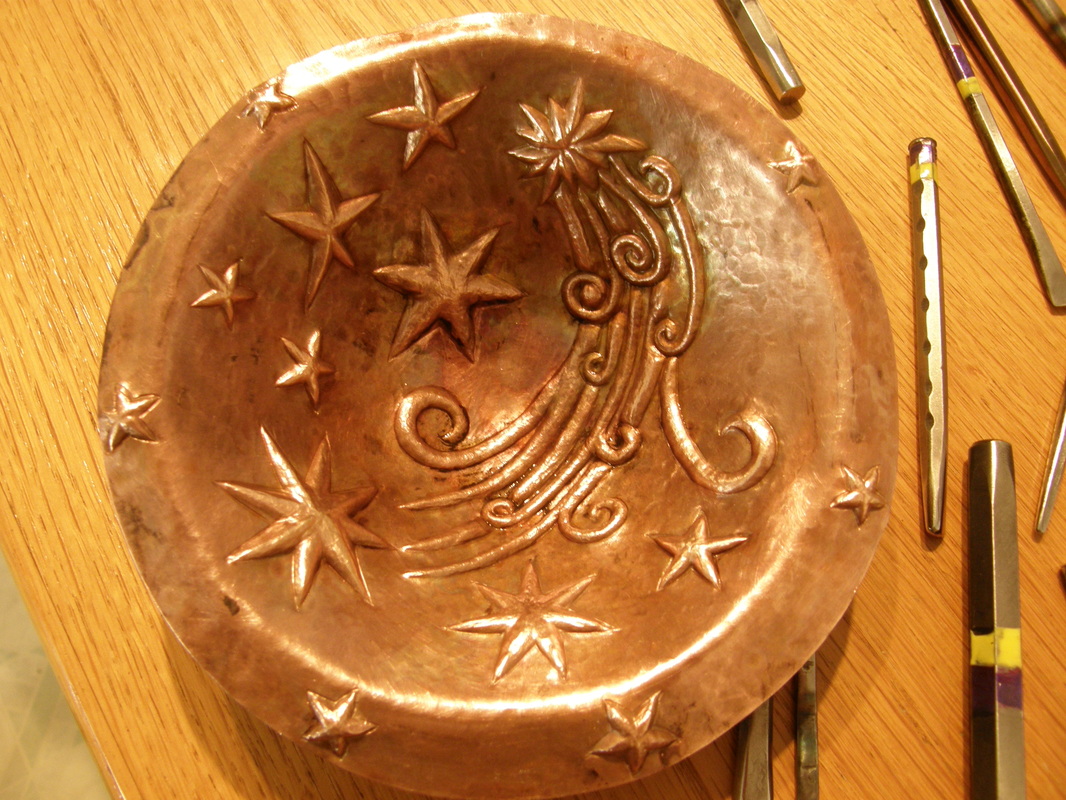
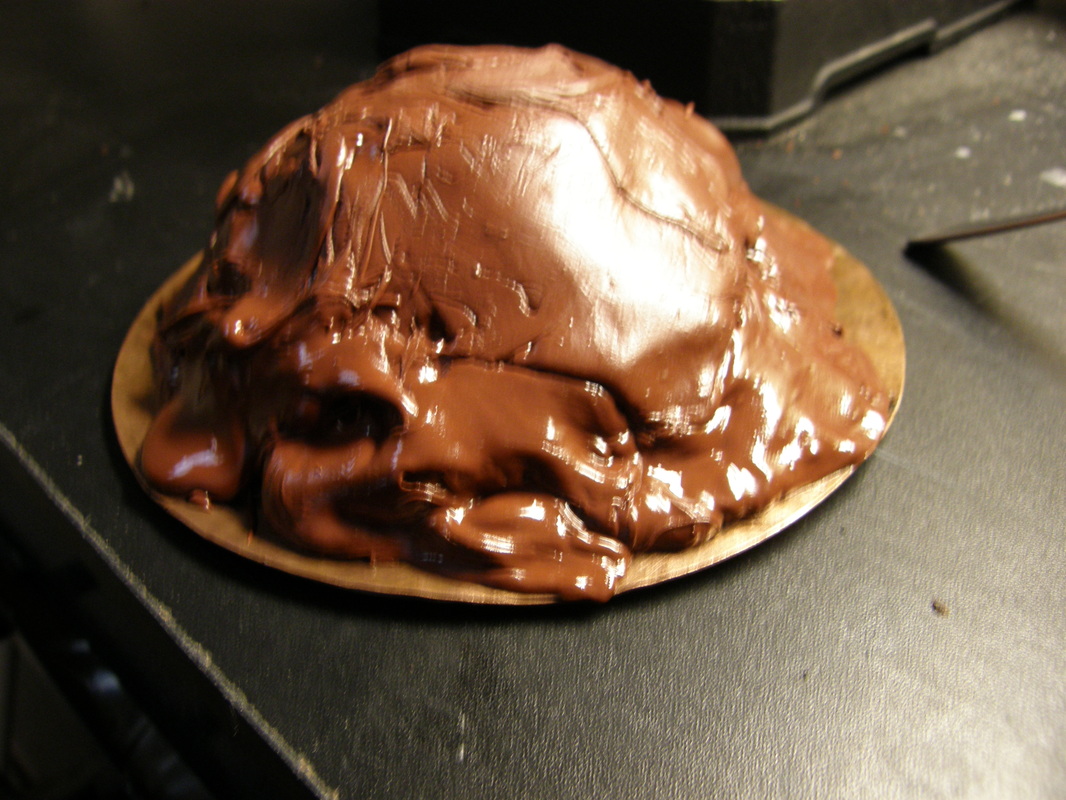
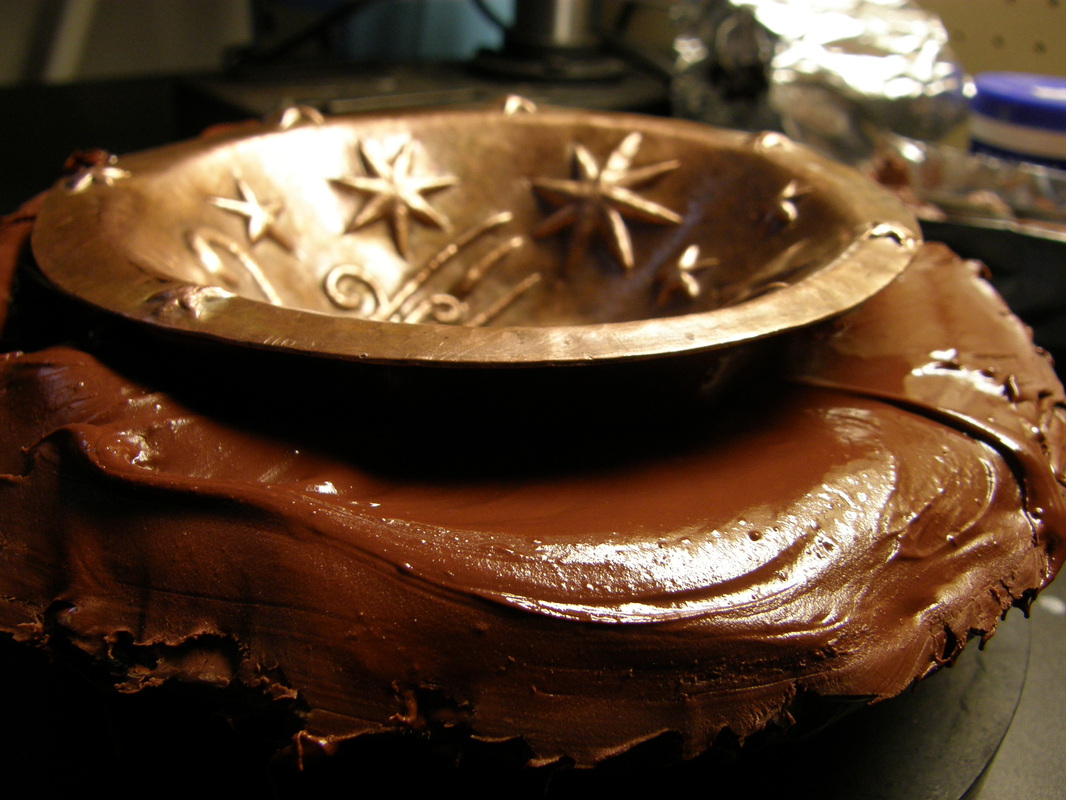
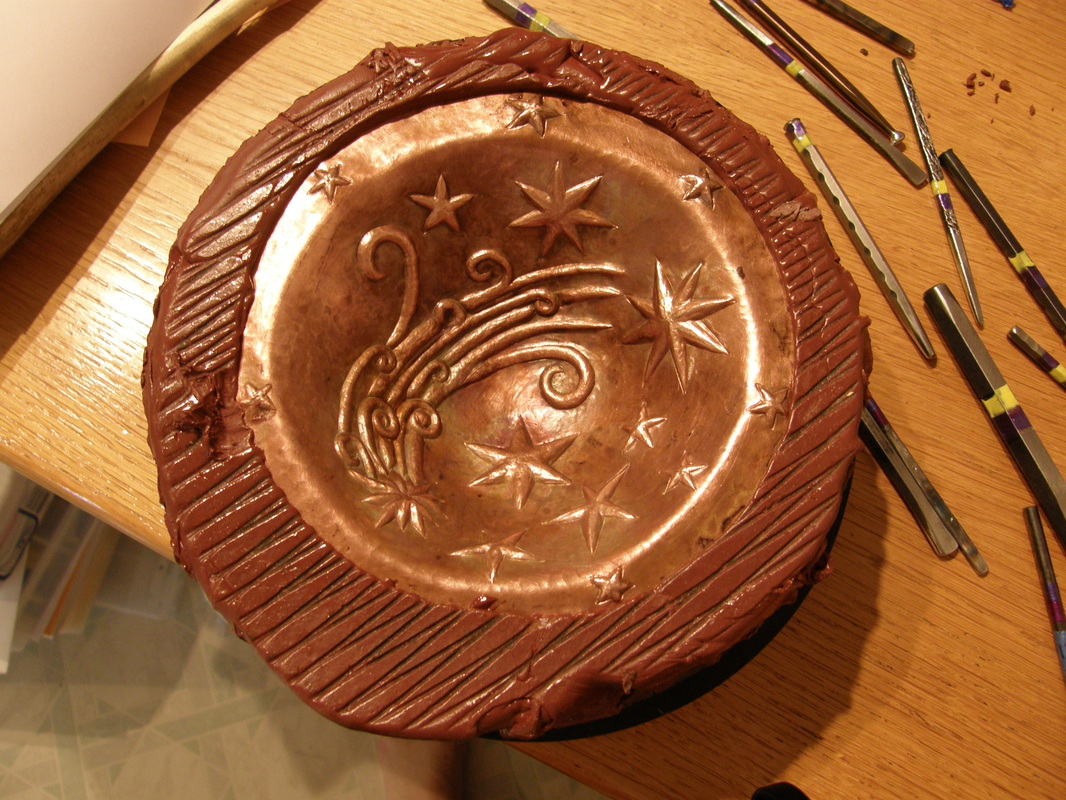
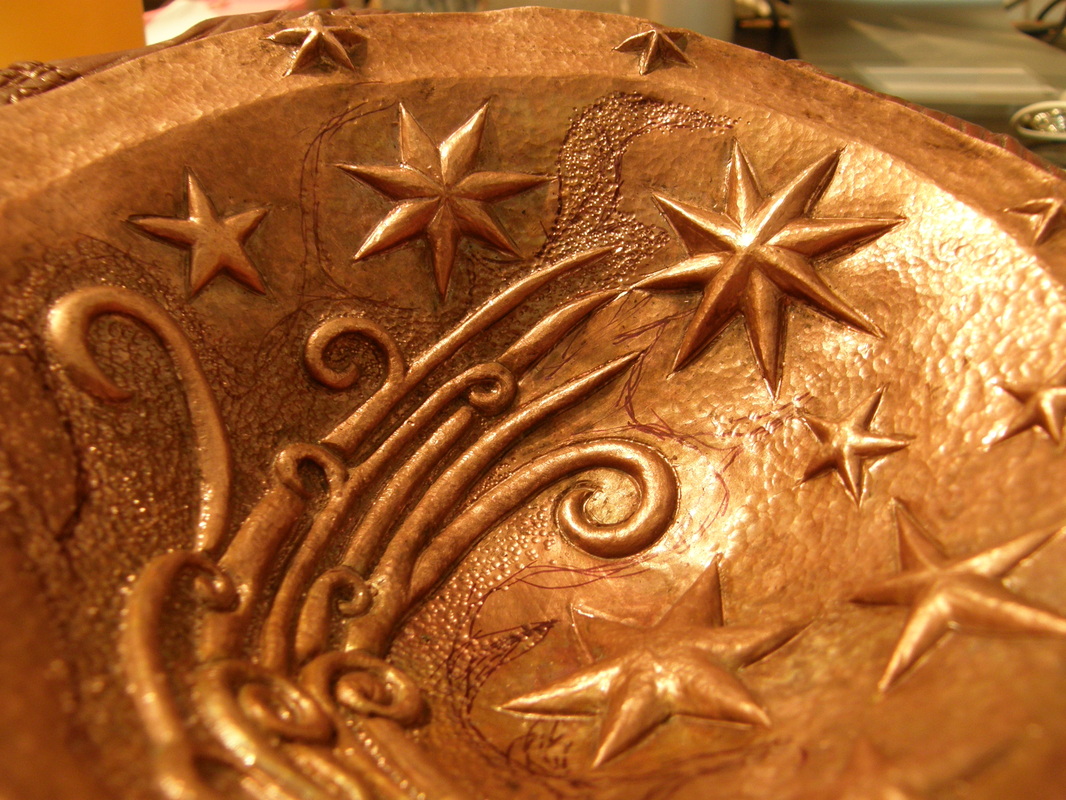
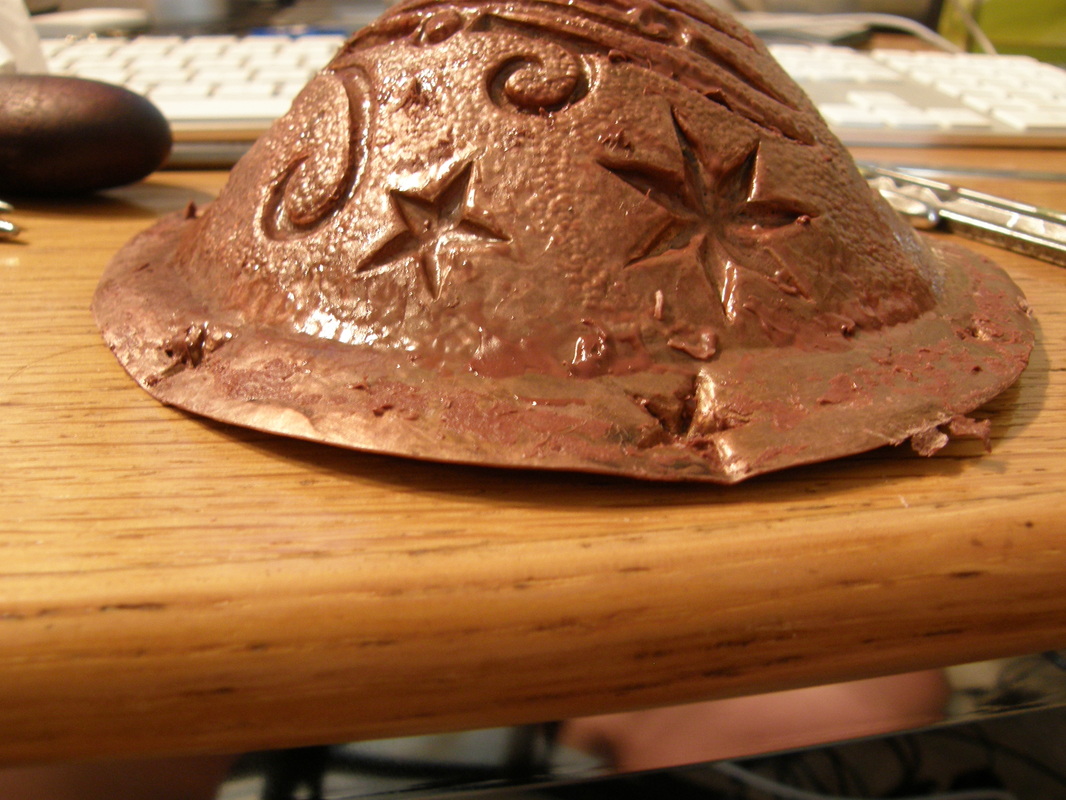
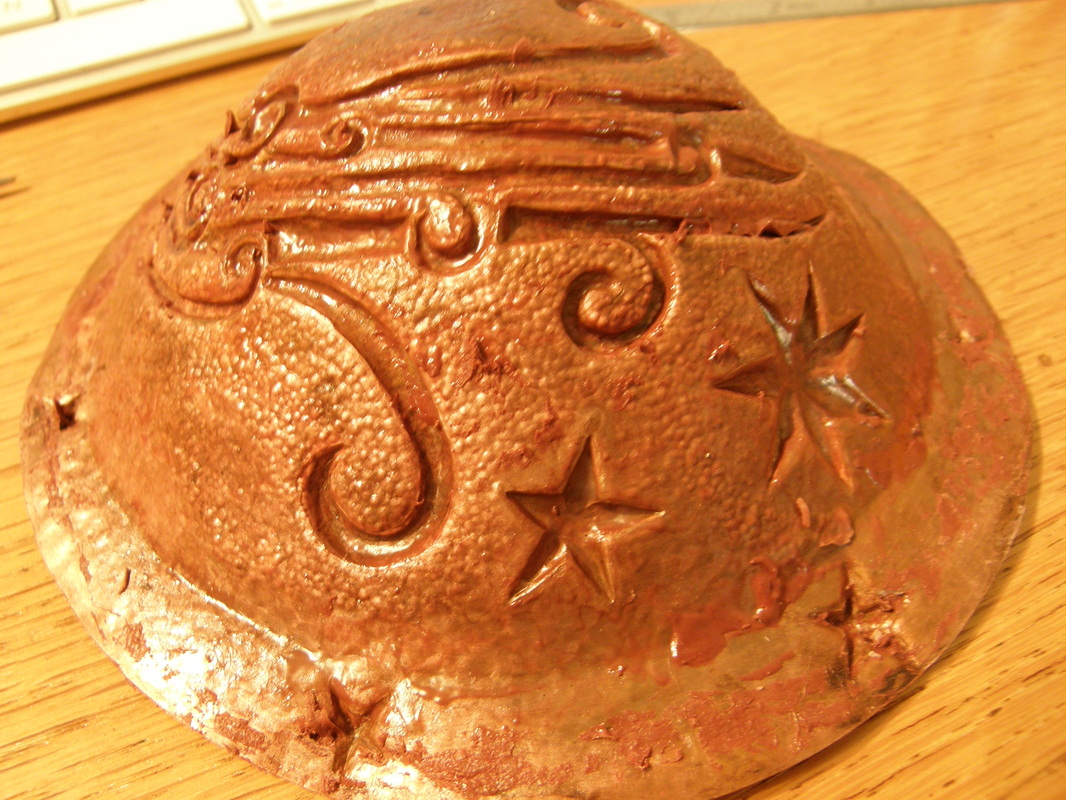
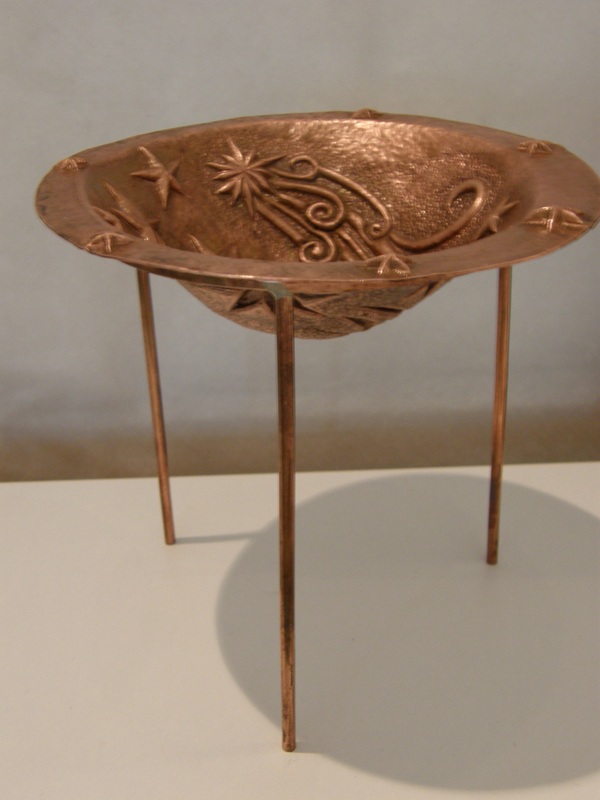
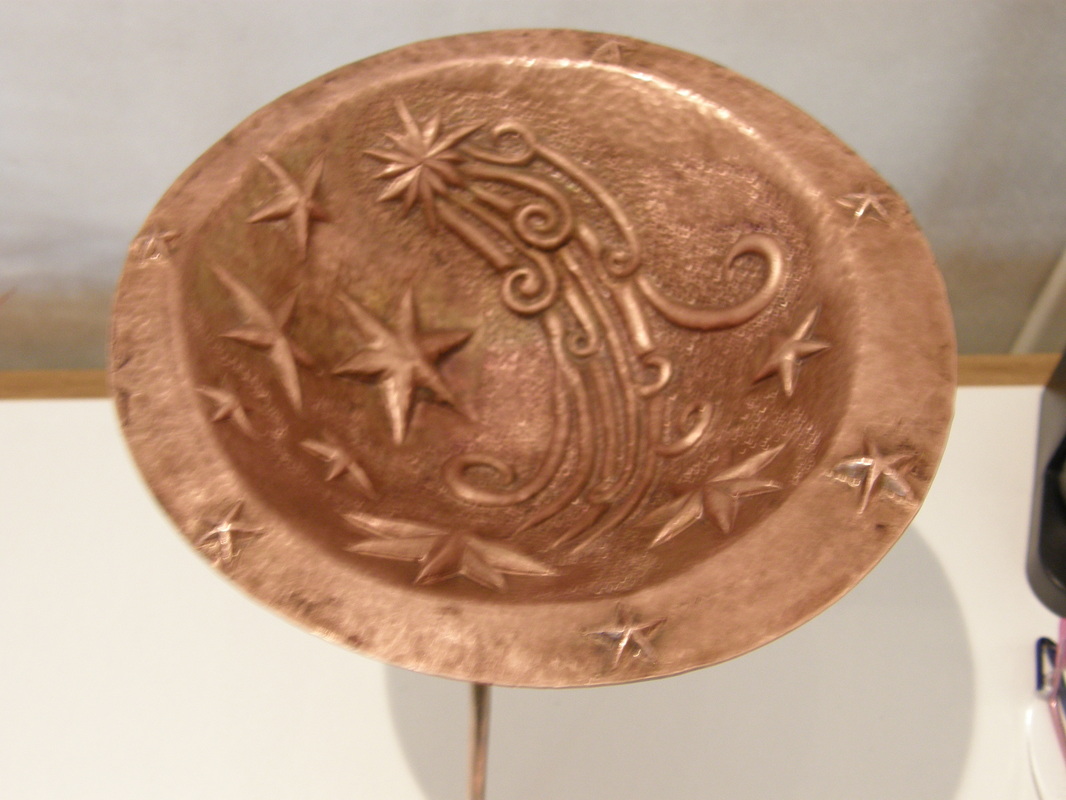
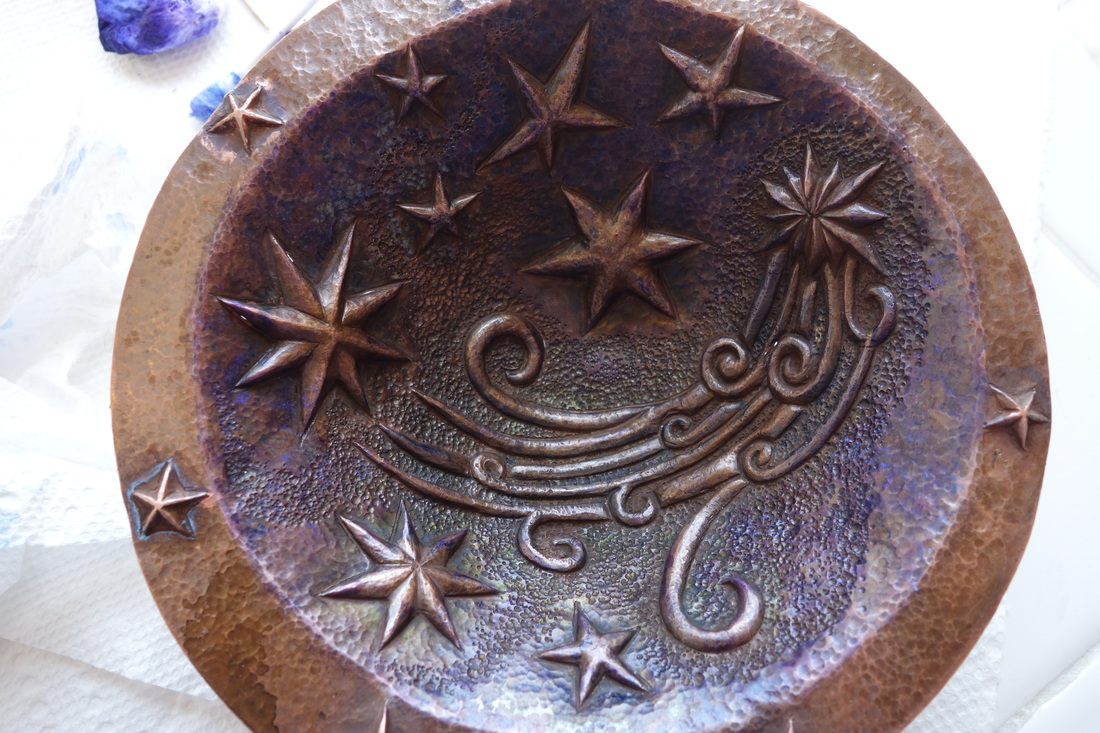
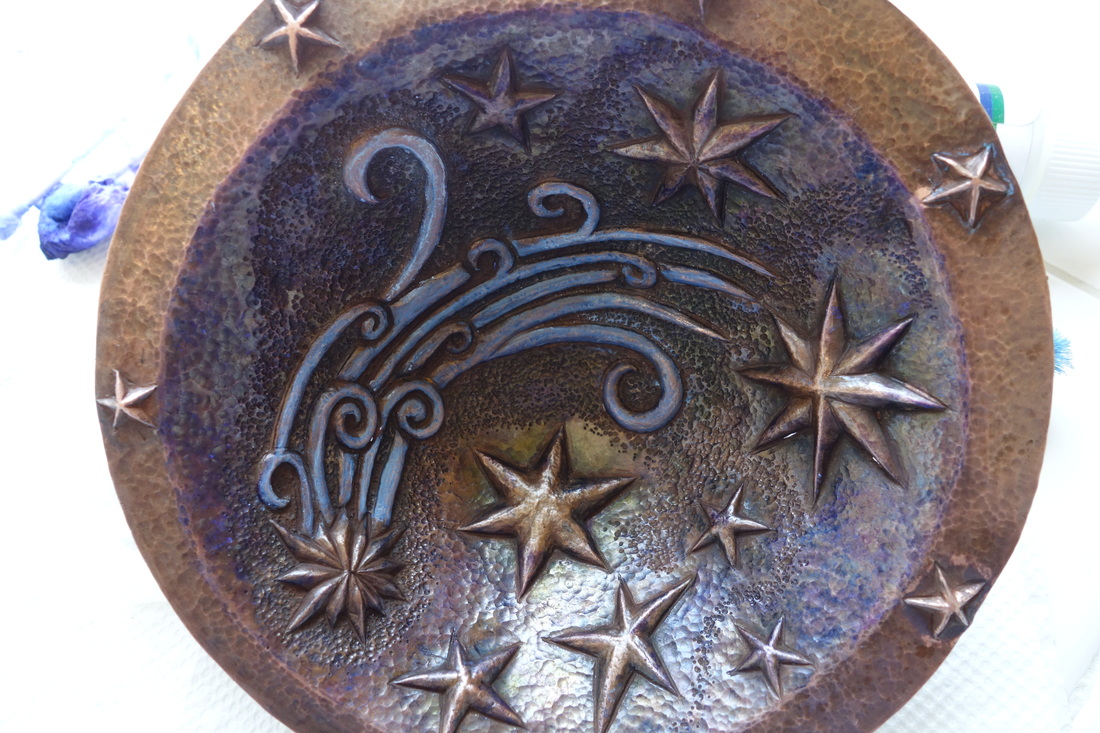
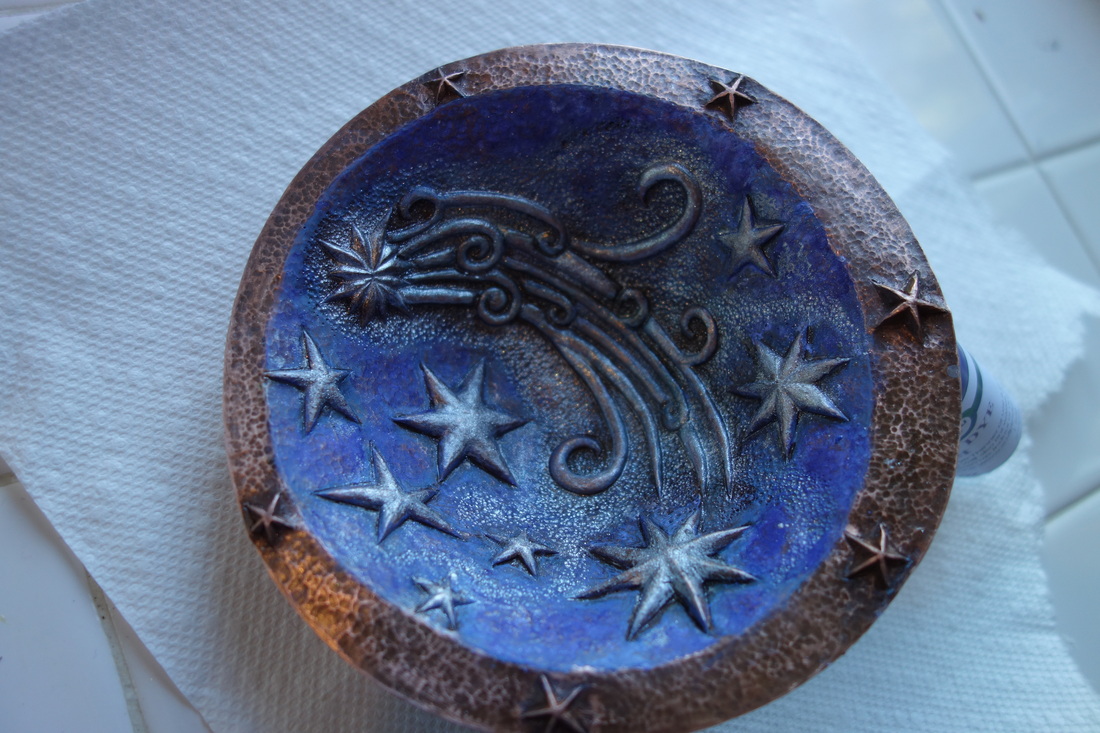
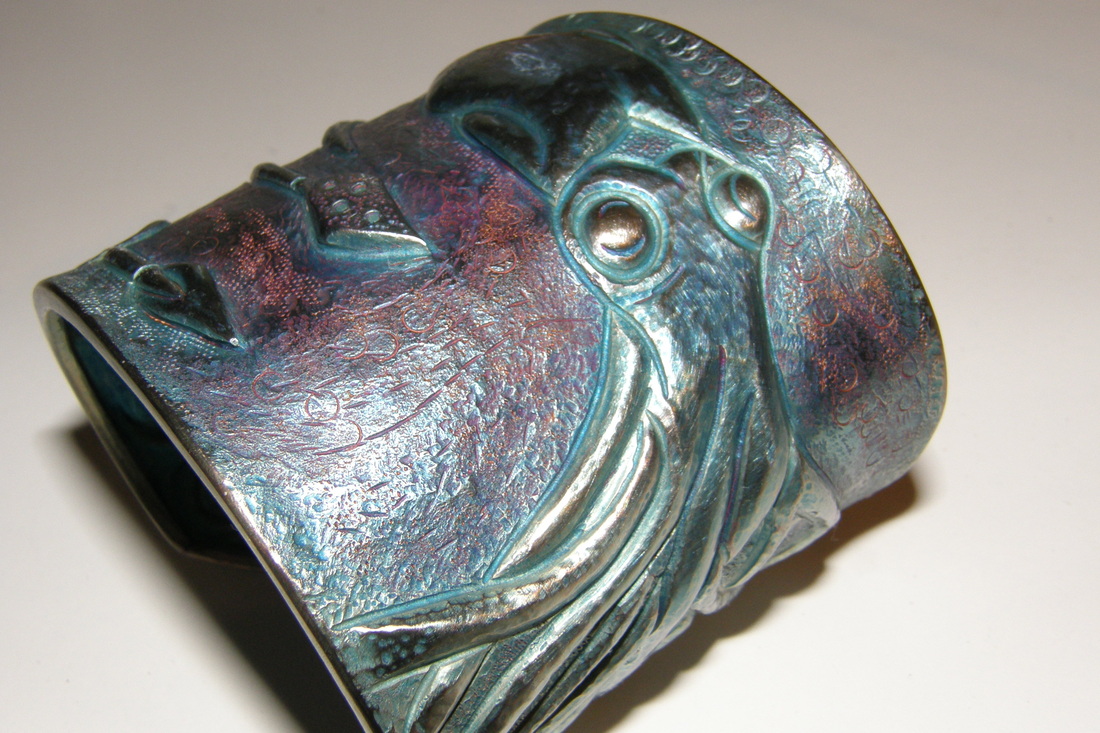
This project started with a different name which was The Deco Dish but after the patina was applied, the different chased sections with the red just yelled BLOOD ORANGE. 

This project also took several months complete and had many gaps in time due to other projects and workshop sneaking in. 

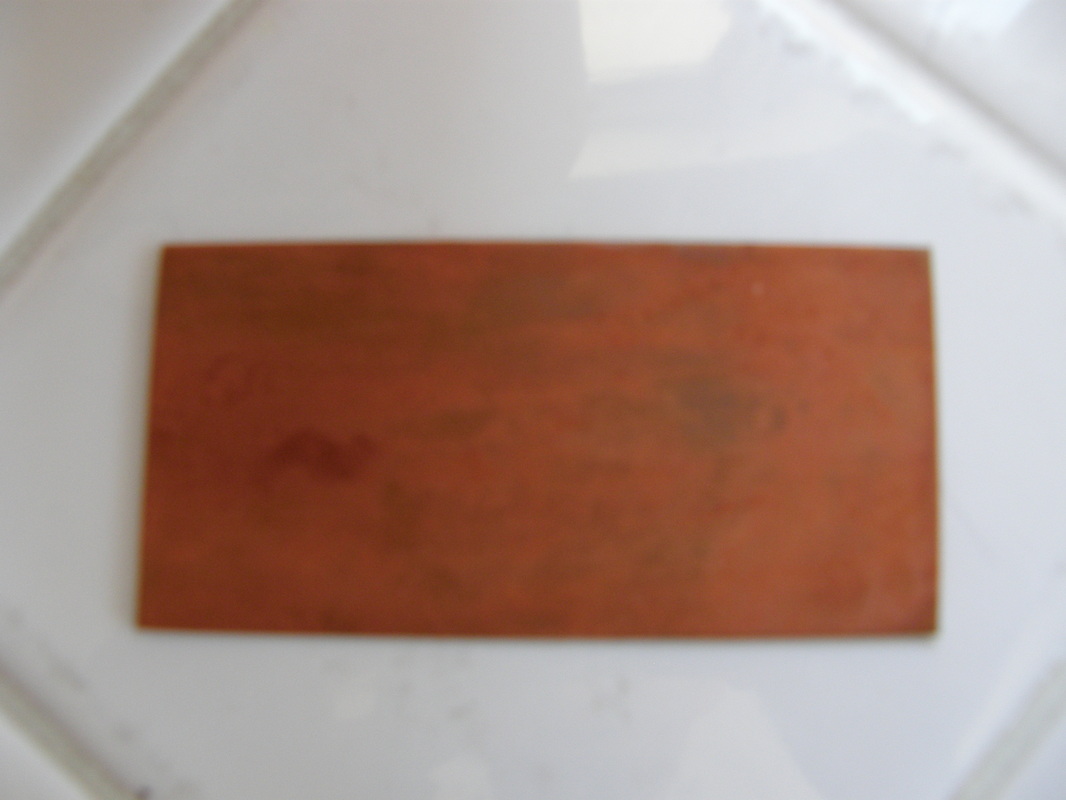
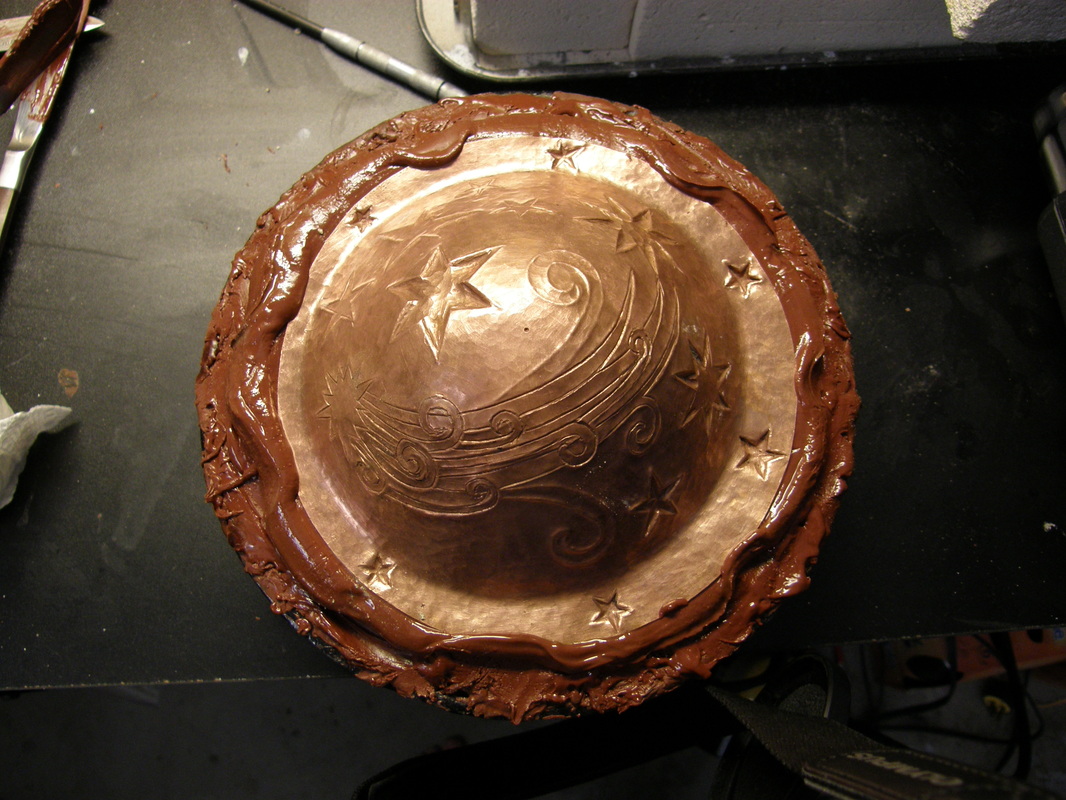
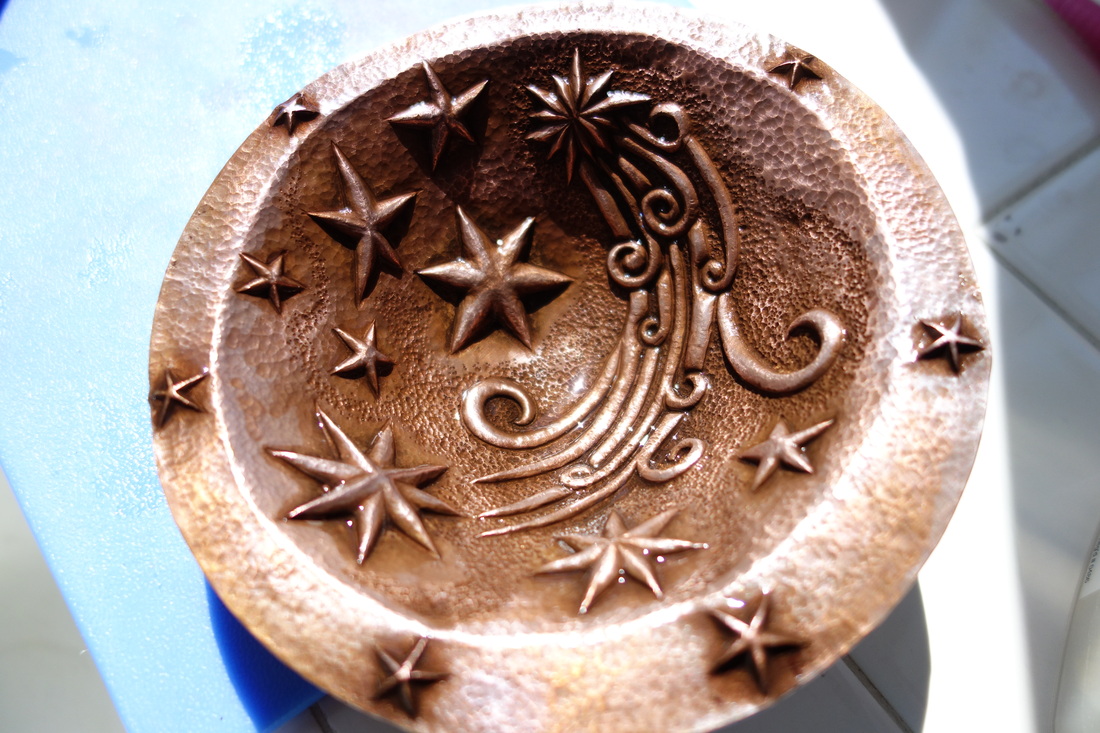
Project Name: The Blood Orange Dish.
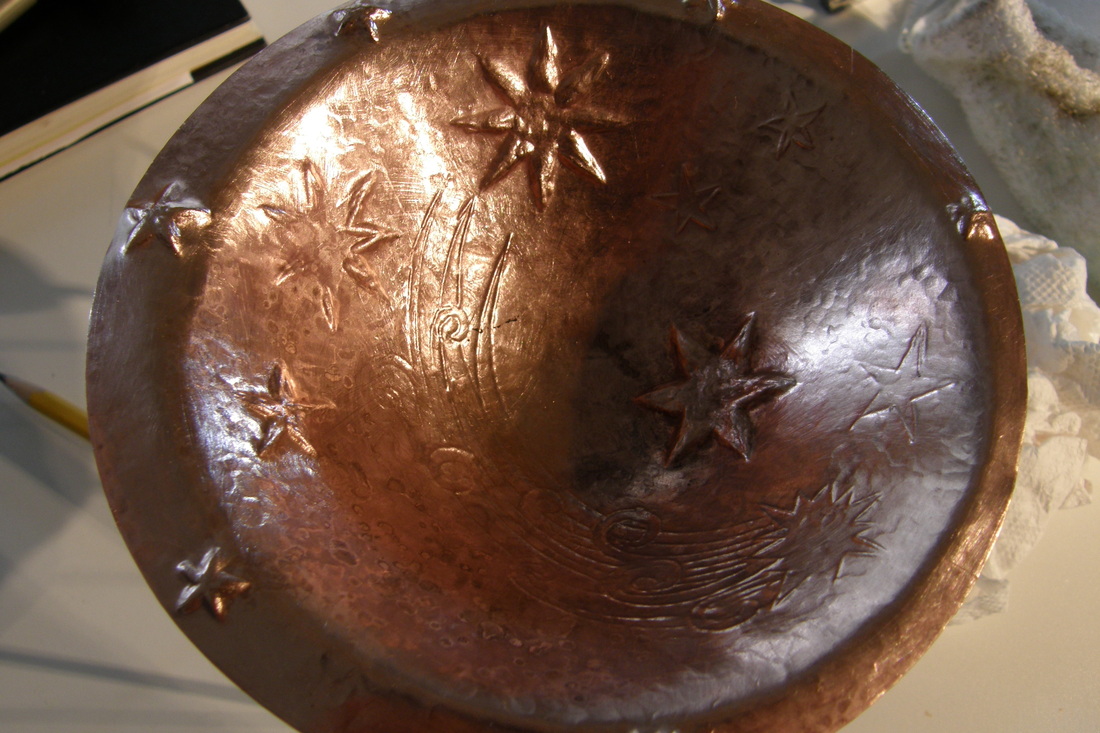
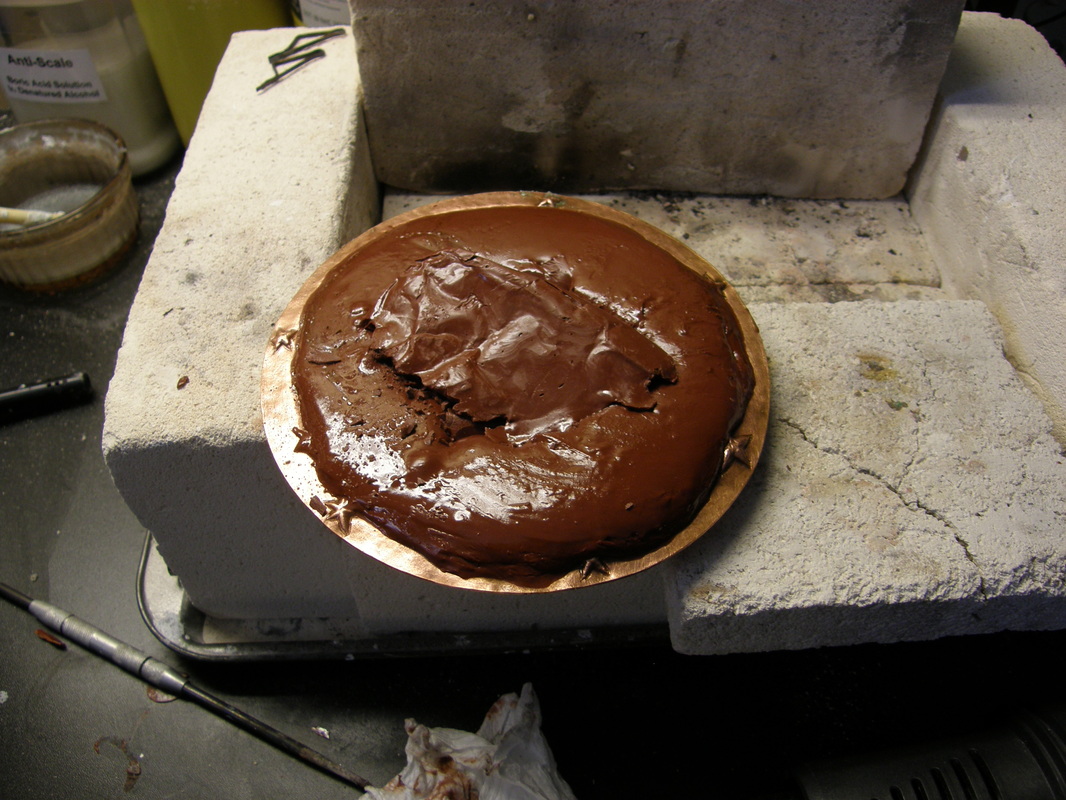
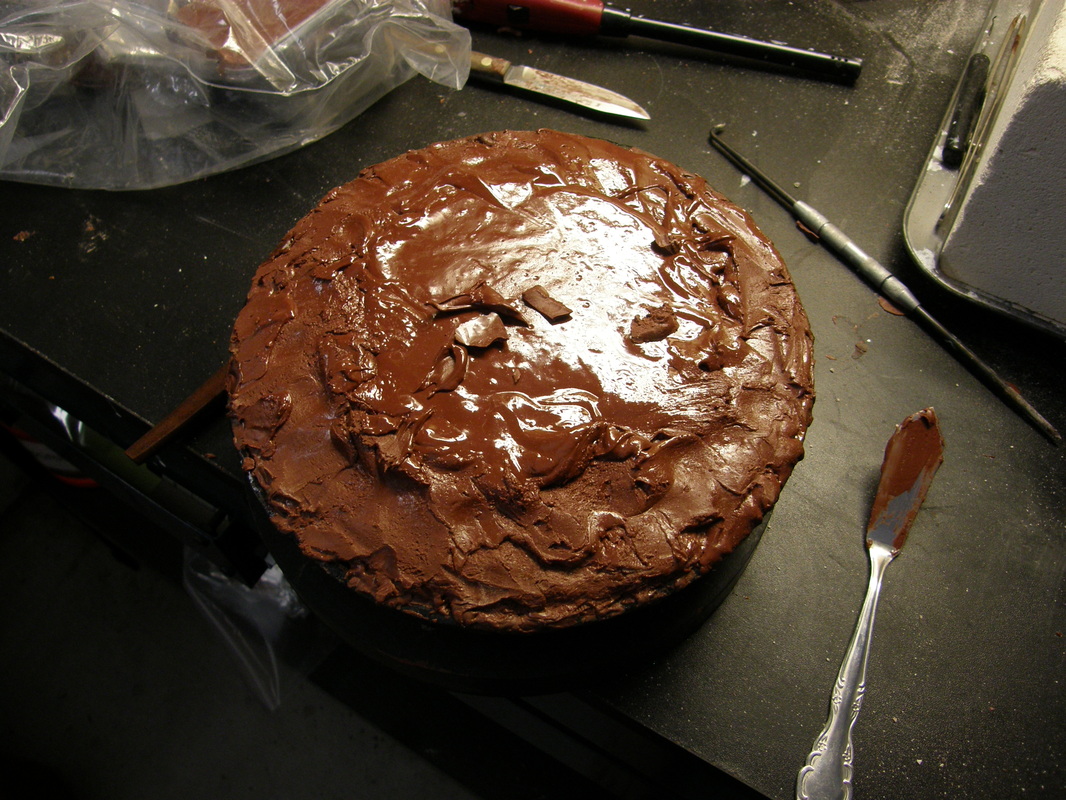
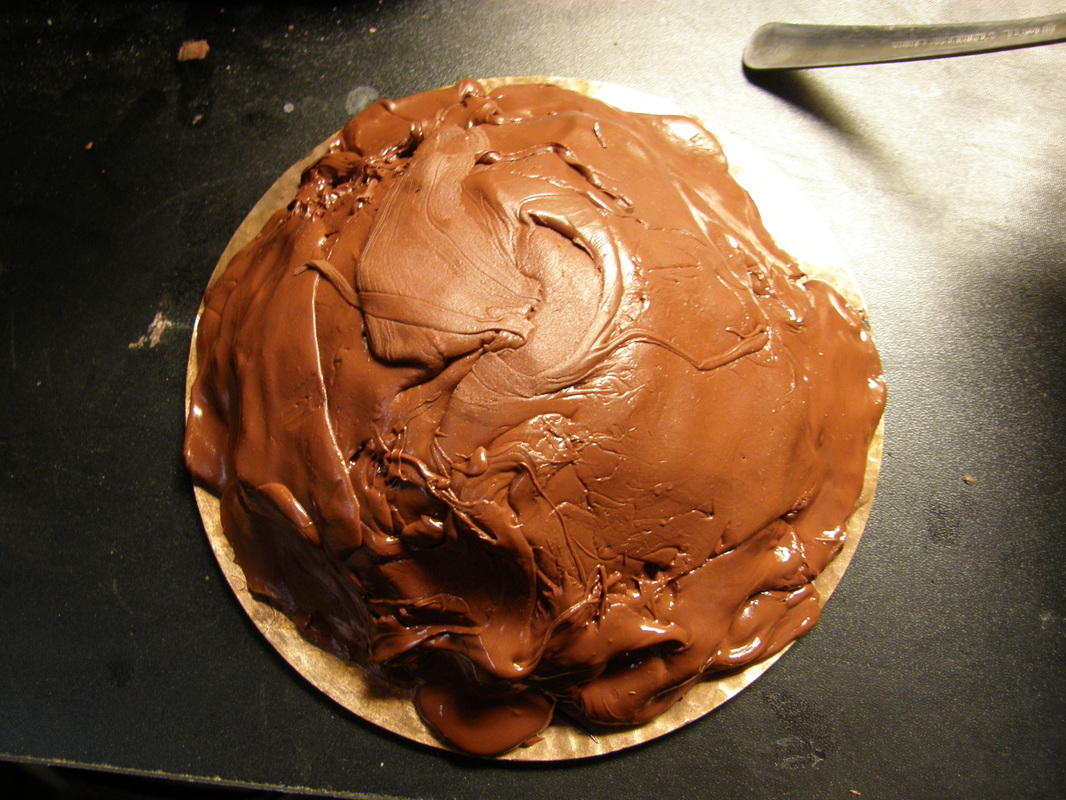
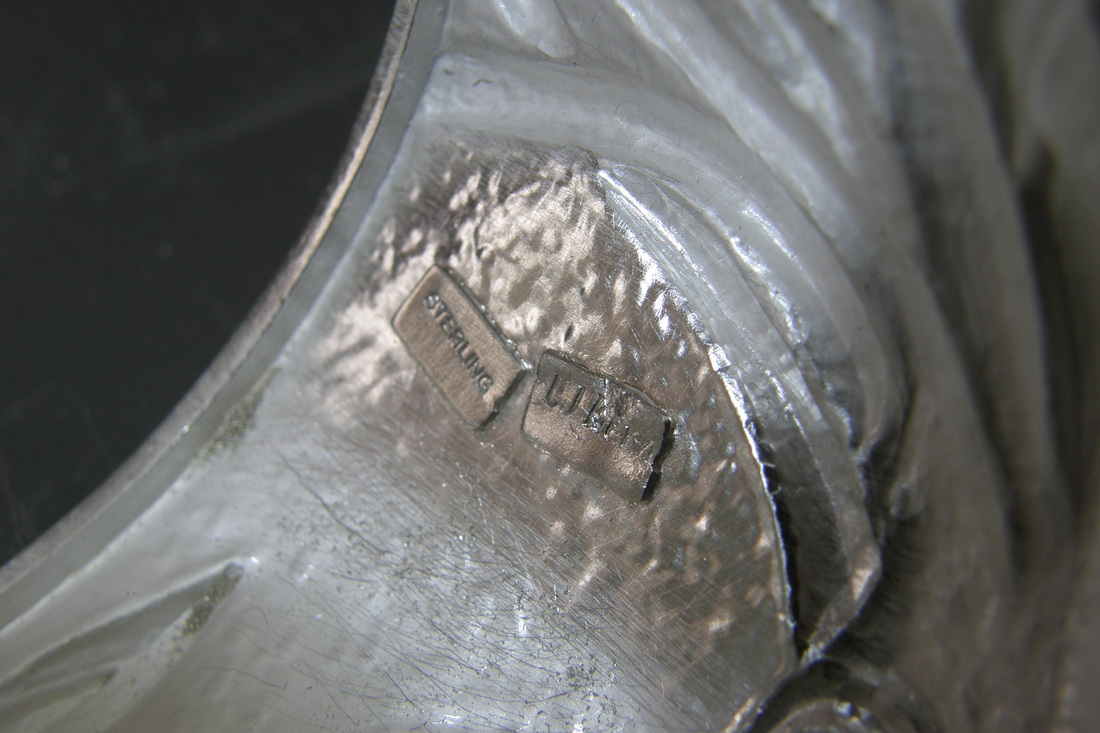
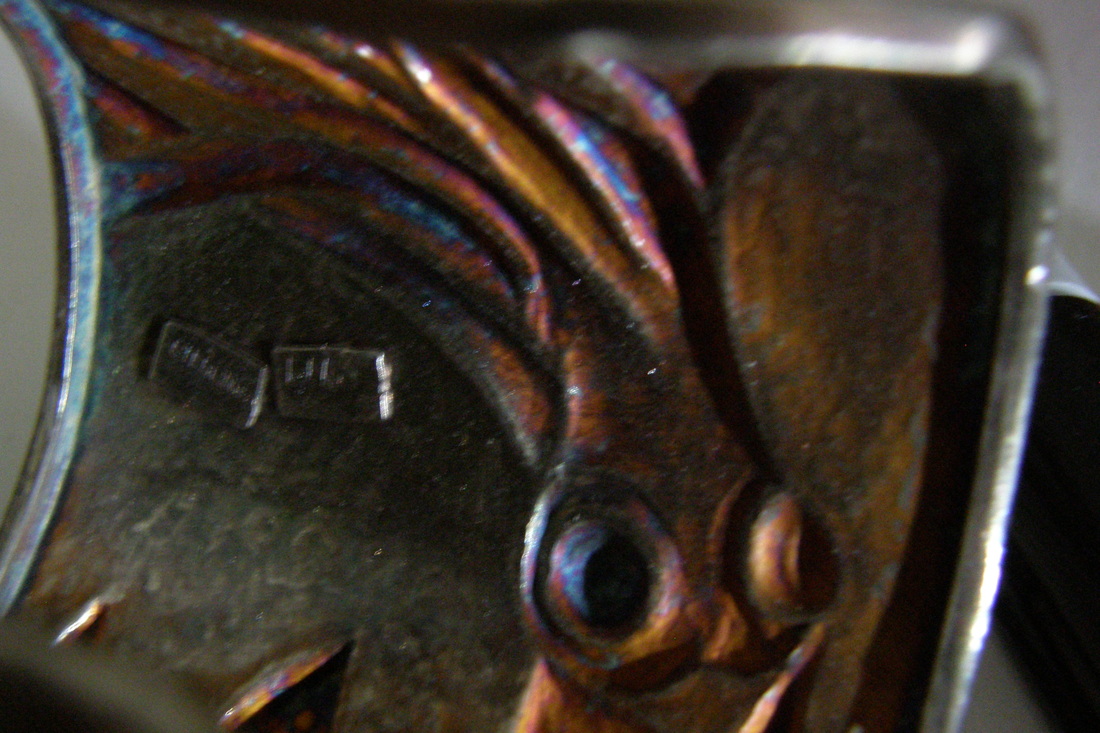
Material: Copper Sheet, Sterling Silver Rim with a Sculpt Nouveau Brown Solvent Dye under coat and the Red Dye-Oxide overcoat.

Major Points:
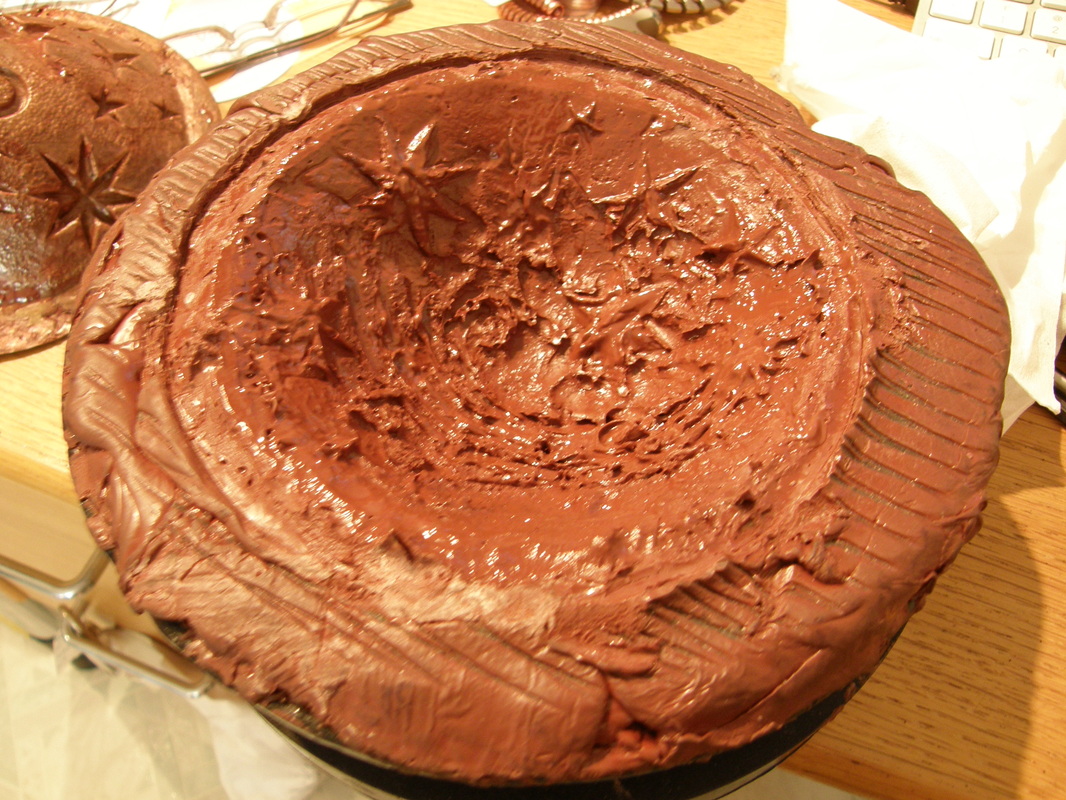
The dish was sunk by me back in December of 2013. The chasing & repousse was done in January and February of 2014, the rim and patina applied in May 2014. Yes a project can take months!

Related Posts: Tray Good, Counting and Planishing, New Vessel Planished, Deco Bowl, Deco Dish - Chasing Done, Rim, The Patina Predicament 

Lessons Learned: 
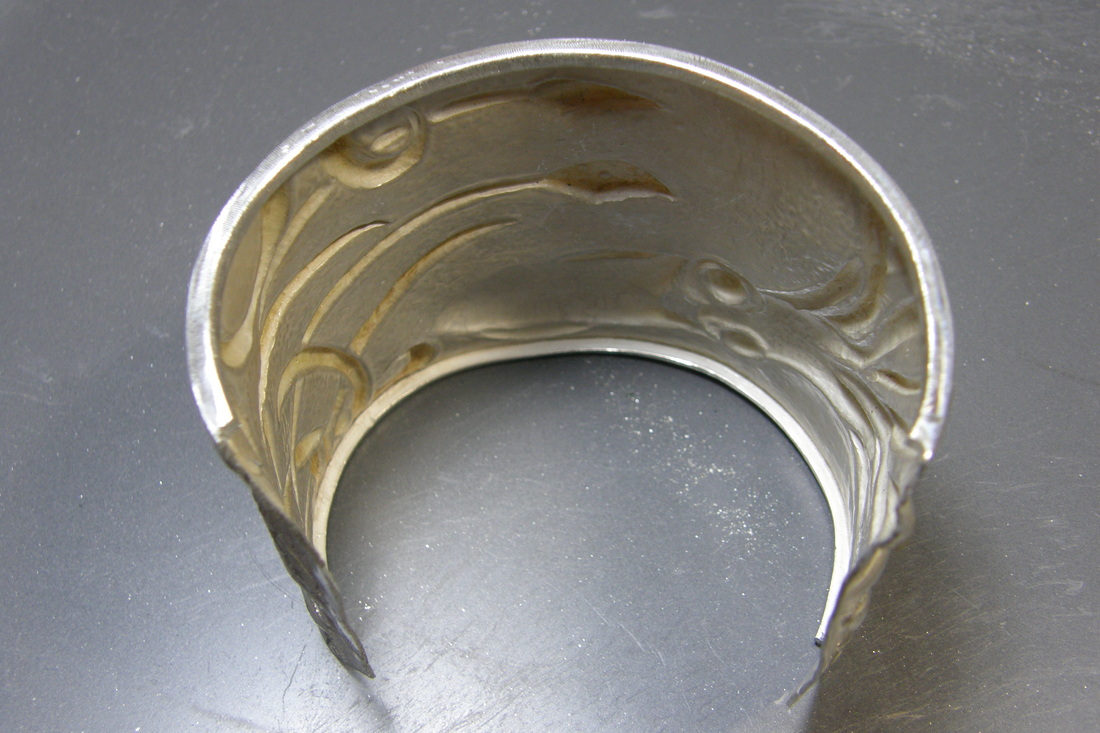
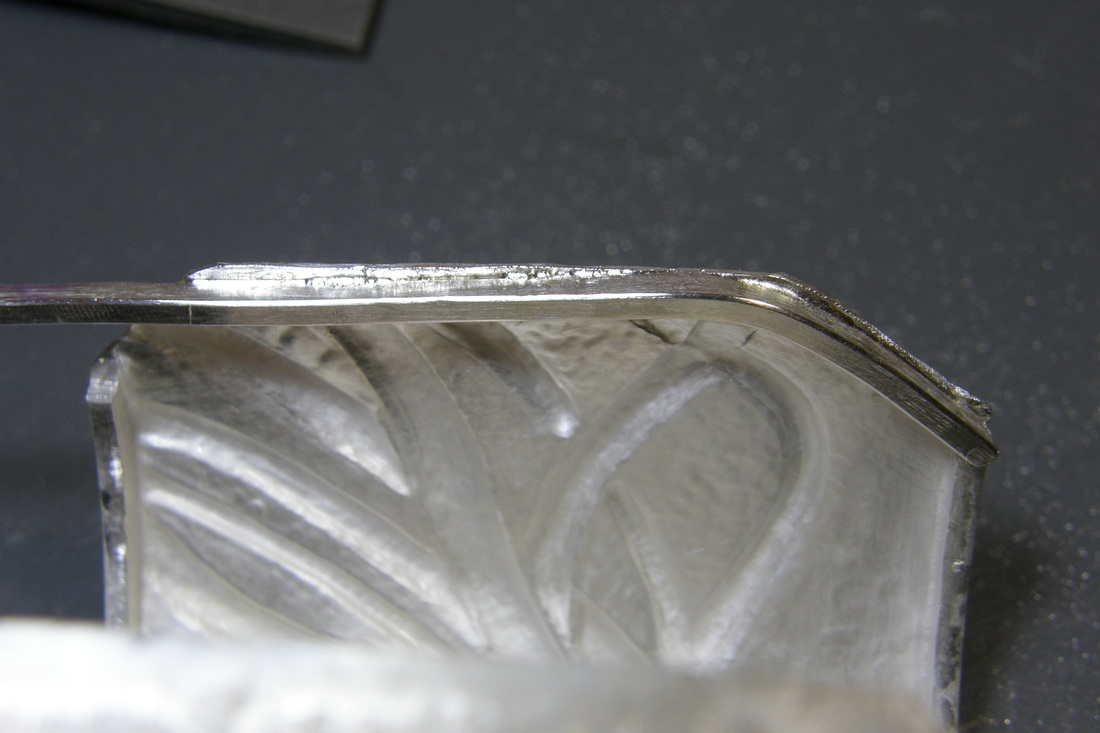
Soldering the rim - make sure the rim is large enough in diameter to be centered on the edge of the dish, you can make it smaller but not bigger.
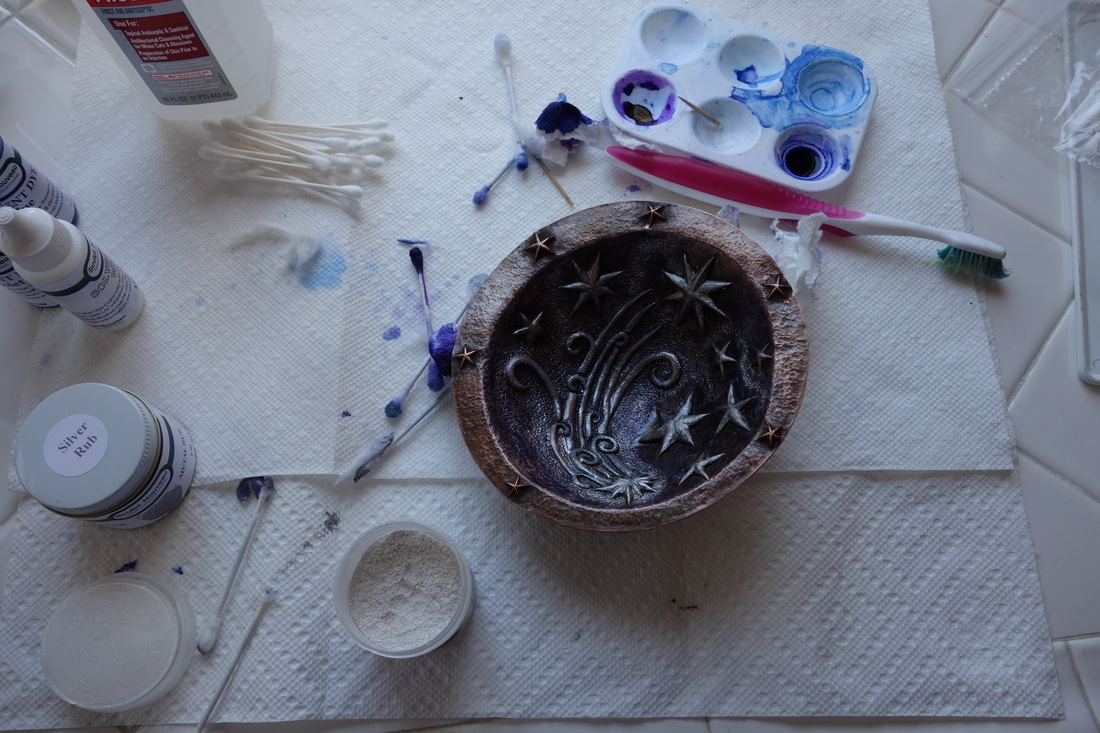
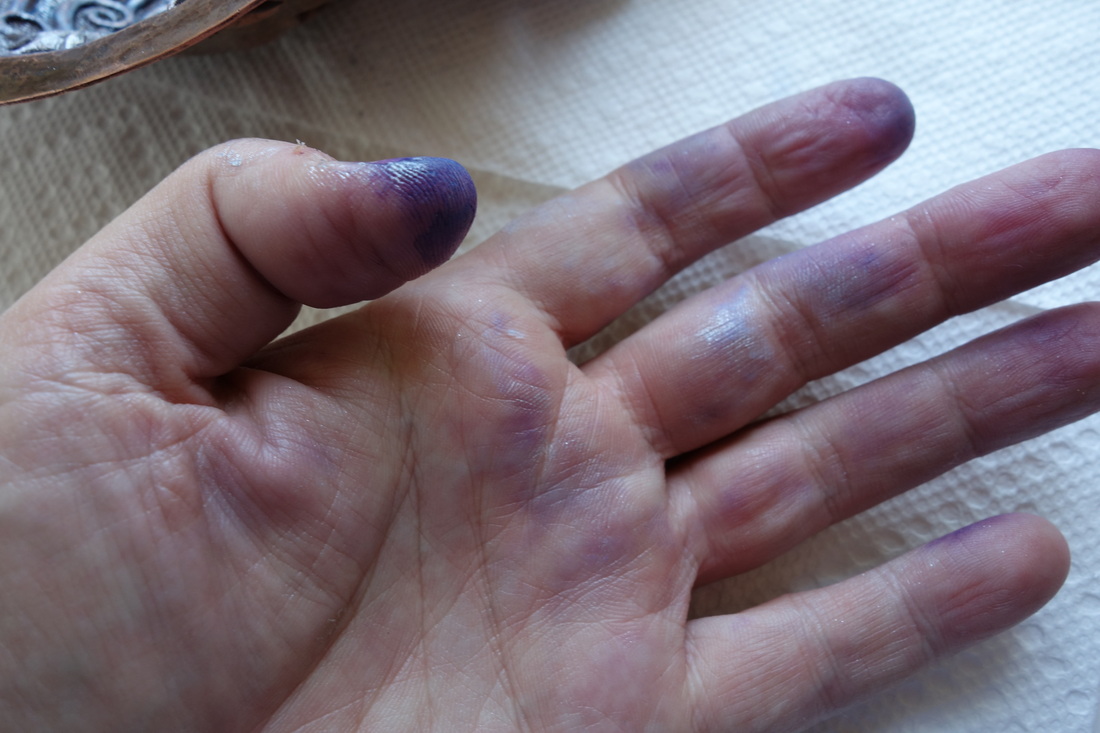
Patina - If working with a new patina, don't learn how to "make it" just before you want to apply it. Set aside several weekends to practice the technique. 

The Patina Predicament

5/26/2014

 
Having put the rim on the Deco Dish yesterday;  today I set myself the goal of applying a patina. 

I love David Huang's burgundy red/brown and he has explained how he does it and has said it can be hard to learn and quite finicky.
Picture
And after 3 hours of working with scrap copper, I got a SPOT of it on one test piece and decided that I would be spending all day just learning how to do it and still not get it correct on the dish (see image below). 
Picture
I really want to master this patina but I decided that this patina needs more practice time and today was not going to be that day so I moved on to some other patinas I was considering. 
I decided to try a few other red or red/browns.. and came to like the red oxide with a solvent dye brown under coat.  Open/Click the images to see a bigger version and sorry about the focus I realized afterwards my camera is acting up. 
sculpt nouveau - universal "rust"
sculpt nouveau - universal burgundy sprayed on. Half coated
sculpt nouveau - red oxide brushed on. Half coated
sculpt nouveau - brown solvent dye brushed on and red oxide brushed on top of that. Half coated
sculpt nouveau - brown solvent dye under a red oxide - spray on, no coating
Here is the dish with the patina after it is applied
And after applying the Clear Guard Spray.  
oh, the dish has spoken to me and it does not like the name Deco Dish so the name is being changed.

Deco Dish - Chasing Done

3/23/2014

2 Comments

 
I know I called this the Deco bowl but I have settled on the title of Deco Dish - I like alliteration. 

This week the chasing was finished and while I was putting the finishing touches on the dish I started to think about how I wanted to finish the dish.

Picture
Having taken a class with David Huang, I thought that putting a silver wire rim on the dish would take it to the next level. 

BUT before I do that I should determine what the patina should be. In this case I do not think LOS will be enough, I want something that POPs. I have pondered a verdigris patina  (i.e. Tiffany green as it is sometimes called)  but if you don't know what that is, just look at the patina on the Statue of Liberty - that's the color we are talking about.

I like the green but the more I thought about it, I did not think it would be dramatic enough.  Again from the workshop from David he discussed some of his patina's. And when I saw this picture, I knew it has to be THAT red.

 [David was kind enough to let me take many pictures of his vessels. If you use the link above, you will see all the pictures I took]

I am now working on sample pieces of copper to learn how to get the red. Soon the Deco dish will be done and then I will have a few more process pictures to show you. 
Picture
2 Comments

The Star & Comet Bowl

7/29/2012

 
It truly was patina day. It has taken all day to do this. It was slow and there was quite a bit of waiting in between the layering of the colors, pondering, letting it dry and such. And I have one step left - I have to seal it which will not only protect the applied patina but it will darken the colors just a bit. 

I will start you off with the process pictures and the patina pictures.

The Calamari Cuff is DONE

3/25/2012

 
I am done with the cuff, not *done* but DONE as in completed. 

Last Sunday, I trimmed the corners, so the cuff would be easier to put on, and then soldered on the end bars.  Then it was finishing the filing and sanding. Afterwards I polished it and applied a liver of sulfur patina.  I was not happy with the colors I was getting, it was too gray, so I took the cuff and put it into the pickle to remove some of the patina and reapplied it, I did get some blues but was still not happy so I waited until this weekend to remove it reapply again - that would be application number three. 

On Friday, since I was off from work (YEA, THREE DAY WEEKEND) I removed the patina, again, and then prepared my patina and very carefully applied it.  Friday night I left the cuff in very cold water to neutralize and to arrest the reaction. 

Saturday I had my second class in black smithing, we made a stake turner, and so I had to wait until I returned home to remove the patina from the squid body and tentacles.  I used a small polishing wheel in a hand tool and very carefully buffed off the patina. I had a couple of slips and thus removed some patina on the back ground - oops. 

There were too many of these dings for me so I went back down stairs, mixed up some more patina and did another application (number 4) but this time I did not remove what I already had.  As a result, yes the squid got covered again, but the background went even more blue! And I was happy again.  This time when I removed the patina from the squid I used the knife edged polishing disk and used my hand to protect the background from getting dinged.  

I now have to take some good pictures. I want to photo stitch them together so you can see all of it at once. But in the mean time, here are some for you to doooooolllllllll over. 

My view of LOS on Silver has changed.

11/21/2010

 
Yesterday, I made a "scrunched fabric" cuff bracelet out of silver. The body of the cuff is made from fine silver and the frame is sterling.

Using fine silver allow the folds to happen without the work hardening and potential cracking to occur. The sterling silver frame adds some rigidity - you could use fine silver too but to prevent the cuff from bending out of shape too easily, so using sterling and its work hardening propensity, keeps the cuff in shape.

I was going to allow the white tarnish from heating and pickling to stay in the folds to give these deeper spots a matt look; and then using a buffing cloth, I was going to polish the frame and hight spots on the fold.  


Part of the reason behind this matt/shiny look was that I don't like the 'normal' gray patina look which you get with LOS on silver. Having used LOS on copper, I love the various colors that can be obtained yet on silver you only see gray to black tones. 

There has to be something else that can be done! 

Doing some reading from my patina book; I came across a recipe that indicated that you can get golds, pink/purples, and blues on silver just like i do on copper.  Coooool but how hard was it going to be?

To get this effect, the first thing I had to do was scrub the cuff and remove all the oxides and finger oils.  Then set up the LOS bath with the dipping station, running water, steel wool, gloves and safety glasses. I also turned on all the lights so I could see the patina develop.  

I went at it very slowly and wow, what amazing results. My view of LOS on silver has just changed.  After using the LOS, I went back with my steel wool and rubbed the patina off the frame and the high spots on the folds since wearing the bracelet over the time would wear away the patina on these spots. Secondly doing this allows the white of the silver to shine through and add a great contrast to the colors from the patina 

 The first picture below is before LOS and the second is after the patina process is over.

And I love my bracelet, it is really, really, really amazing. I have to finish up one more as I promised it to Elisa of Scotland.  

Picture
Picture
Picture

Back to the Stake... and a prototype

11/14/2010

 
A few weeks ago I was demoing sinking on a scrap piece of copper that was square. I ended up with what I thought was a pretty nice little dish.  

Today I got back to that design and I made my prototype, I made the dish, planished it, and then added a ring base. I had to go back a planish again since the soldering annealed the piece again (note to self: invent way to solder a base onto a vessel and NOT have the piece get annealed). 

My solder job was only so-so, I was afraid of too much solder and ended up not using enough and now I have some gaps. I have to work on this more but for my sample I am ok with there being some gaps in the solder joint between the ring and the bowl. 

After a good cleaning I added a patina.  

Now I have to make a production piece out of silver and copper and in many sizes...I am calling it 'Dish-J'
Picture
Picture
Forward>>

    RSS Feed

    How to Aquire Your Own Shop Elf

    Archives

    June 2026
    May 2026
    April 2026
    March 2026
    February 2026
    January 2026
    December 2025
    October 2025
    September 2025
    August 2025
    July 2025
    June 2025
    May 2025
    April 2025
    March 2025
    February 2025
    January 2025
    December 2024
    November 2024
    October 2024
    September 2024
    August 2024
    July 2024
    June 2024
    January 2024
    November 2023
    October 2023
    September 2023
    October 2020
    August 2020
    March 2020
    December 2019
    November 2019
    October 2019
    September 2019
    August 2019
    July 2019
    June 2019
    May 2019
    March 2019
    February 2019
    January 2019
    December 2018
    November 2018
    October 2018
    September 2018
    August 2018
    July 2018
    May 2018
    April 2018
    February 2018
    January 2018
    November 2017
    October 2017
    September 2017
    July 2017
    June 2017
    May 2017
    April 2017
    March 2017
    February 2017
    January 2017
    December 2016
    November 2016
    October 2016
    September 2016
    August 2016
    July 2016
    June 2016
    May 2016
    April 2016
    March 2016
    February 2016
    January 2016
    December 2015
    November 2015
    October 2015
    September 2015
    August 2015
    July 2015
    June 2015
    May 2015
    April 2015
    March 2015
    February 2015
    January 2015
    December 2014
    November 2014
    October 2014
    September 2014
    August 2014
    July 2014
    June 2014
    May 2014
    April 2014
    March 2014
    February 2014
    January 2014
    December 2013
    November 2013
    October 2013
    September 2013
    August 2013
    July 2013
    June 2013
    May 2013
    April 2013
    March 2013
    February 2013
    January 2013
    December 2012
    November 2012
    October 2012
    September 2012
    August 2012
    July 2012
    June 2012
    May 2012
    April 2012
    March 2012
    February 2012
    January 2012
    November 2011
    August 2011
    July 2011
    June 2011
    May 2011
    April 2011
    March 2011
    February 2011
    January 2011
    December 2010
    November 2010

    Jan - Nov 2010 History
    File Size: 2272 kb
    File Type: pdf
    Download File

    Jan - Dec 2009 History
    File Size: 2332 kb
    File Type: pdf
    Download File

    Categories

    All
    3D Printing
    42
    Art
    A Year Of Repousse
    BFA
    Blacksmithing
    Blogoversary
    Box Project
    Business
    Chasing & Repousse
    Commission
    Education
    Embroidery
    Enamel
    Entries
    Entry
    Exhibition
    Facebook
    Filing
    Fold Forming
    Gold
    Holloware
    Hot Forging
    Hydraulic Press
    Jewelry
    Jooltool
    Keum-boo
    Knitting
    Learning
    Leather
    Lost Wax Casting
    Market
    Metal
    Patina
    Photography
    Polishing
    Publications
    Quilt
    Raising
    Sanding
    Santa Fe Symposium
    Shop Elf
    Sinking
    Social Media
    Soldering
    Store
    Studio Visits
    Superbowl Challenge
    Teaching
    Teapot Project
    Technique
    Temari
    Tin
    Tools
    Vessels
    Visiting Workshops
    Weaving
    Website
    Workshop
    Yubinuki

Powered by Create your own unique website with customizable templates.